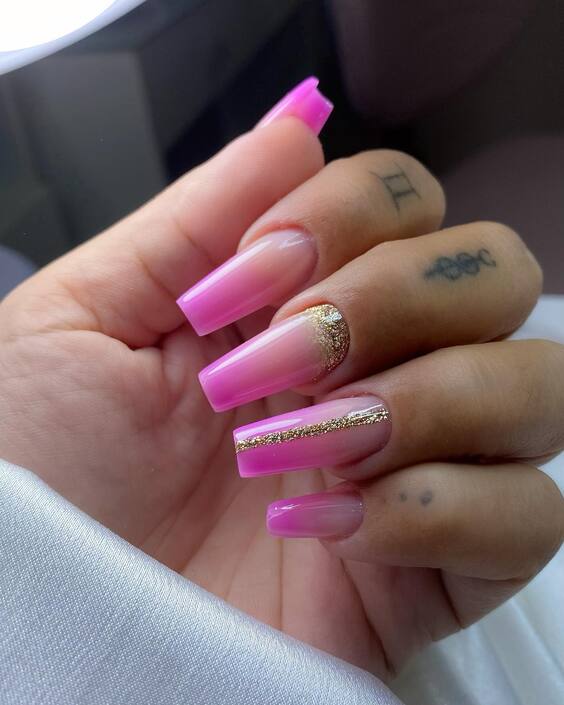
Subtle Elegance with Pink and White Ombre
The pink and white ombre manicure exudes a subtle elegance, perfect for any occasion, from a casual day out to a formal event. The soft transition from pale pink to pristine white mimics a serene sunset, blending naturally with a glossy finish that captures the light beautifully. This design not only enhances the natural beauty of your nails but also offers a versatile look that complements any outfit.
Materials Needed
- Base Coat: Clear Protective Polish
- Pink Polish: Essie’s “Ballet Slippers”
- White Polish: OPI’s “Alpine Snow”
- Top Coat: Seche Vite Dry Fast
- Sponge: For dabbing and blending the ombre effect
Professional Tip: Always start with a well-prepped nail, ensuring it’s clean and buffed for the best polish application.
DIY Instructions
- Apply a clear base coat to protect your nails and create a smooth canvas.
- Paint your entire nail with the lighter color (pink) as the base.
- On a sponge, apply both colors side by side, slightly overlapping.
- Dab the sponge gently onto the nail, repeating until you achieve the desired gradient effect.
- Finish with a top coat for a glossy, durable manicure.
Vibrant Summer Vibes with Blue and Purple Ombre
Embrace the vibrant colors of summer with this blue and purple ombre nail design. The dynamic contrast between the deep blue and lively purple creates an eye-catching effect that’s perfect for summer festivals or a beach day. This look not only pops but also signifies a bold, artistic expression.

Materials Needed
- Base Coat: Clear Protective Polish
- Blue Polish: Sally Hansen’s “Blue Me Away”
- Purple Polish: China Glaze’s “That’s Shore Bright”
- Top Coat: Seche Vite Dry Fast
- Sponge: For creating the smooth ombre transition
Professional Tip: Use a fine-tip brush to clean up the edges around the cuticle for a neat finish.
DIY Instructions
- Start with a clear base coat to protect your nails.
- Apply the lighter color (blue) as the base shade on your nails.
- On a sponge, layer the blue and purple polishes, blending slightly where they meet.
- Dab the sponge onto your nails, slowly building up the color intensity for the ombre effect.
- Seal with a top coat for longevity and shine.
Winter Elegance with Silver and Charcoal Ombre
The silver and charcoal ombre nail design brings a touch of winter elegance, perfect for the holiday season or a glamorous night out. The shimmering silver fades into a dark charcoal, creating a sophisticated and luxurious look that pairs well with winter fashion.
Materials Needed
- Base Coat: Clear Protective Polish
- Silver Polish: Revlon “Silver Dollar”
- Charcoal Polish: Essie’s “Smokin’ Hot”
- Top Coat: Seche Vite Dry Fast
- Glitter: Optional for an added sparkle
Professional Tip: For an even more glamorous look, add a thin layer of glitter over the ombre for a sparkling finish.
DIY Instructions
- Apply a base coat to protect your nails and enhance the polish adhesion.
- Paint the lighter color (silver) as the base.
- Use a sponge to blend the silver and charcoal polishes for the ombre effect.
- Dab onto the nails, building up the gradient to your liking.
- Finish with a top coat for a smooth, lasting manicure.
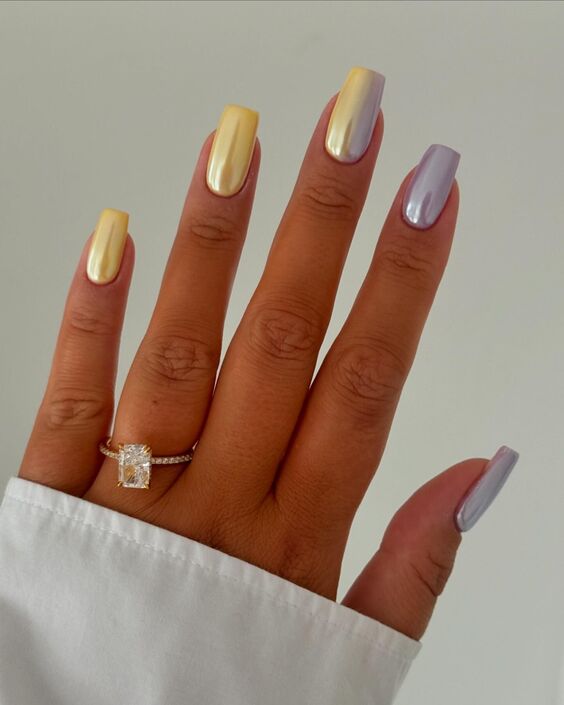
Chic Dual-tone Glamour
This chic dual-tone ombre featuring lavender and a soft yellow captures a modern and stylish aesthetic that’s both eye-catching and understated. The seamless gradient between the cool lavender and the warm yellow offers a unique twist on traditional dual-tone designs, making it a fantastic choice for those looking to experiment with color without overwhelming their look.
Materials Needed
- Base Coat: Essie’s “Grow Stronger”
- Lavender Polish: OPI’s “Do You Lilac It?”
- Yellow Polish: Sally Hansen’s “Mellow Yellow”
- Top Coat: Seche Vite Dry Fast Top Coat
- Sponge: For blending the colors smoothly
Professional Tip: Use a fine brush to add a clean line of metallic gold at the transition for an added touch of elegance.
DIY Instructions
- Apply a base coat to protect the nail and ensure a longer-lasting manicure.
- Paint the lighter color, yellow, as the base on all nails.
- On a makeup sponge, apply both colors and gently dab onto the nail, blending until desired ombre effect is achieved.
- Add a thin stripe of gold polish using a detail brush where the two colors meet if desired.
- Seal with a top coat for a glossy finish and to prevent chipping.
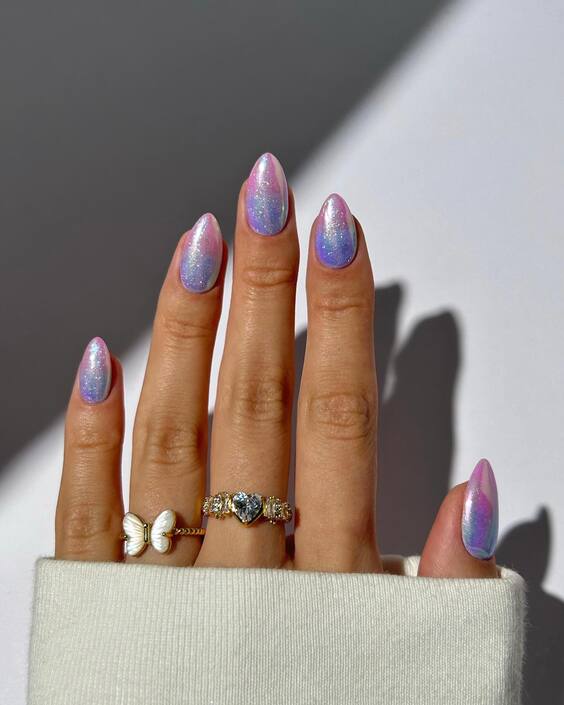
Iridescent Fairy Dust Ombre
Step into a magical aesthetic with these iridescent fairy dust ombre nails. The blend of pale blue, pink, and a touch of purple creates an ethereal look that seems to change colors under different lights. This nail design is perfect for adding a bit of fantasy to your everyday style or completing a special event ensemble.
Materials Needed
- Base Coat: CND Stickey Base Coat
- Polishes: A selection of iridescent polishes in light blue, pink, and lavender
- Top Coat: Sally Hansen Miracle Gel Top Coat
- Sponge: To apply the gradient effect
Professional Tip: Apply a very thin layer of iridescent glitter polish over the top for an extra sparkling effect.
DIY Instructions
- Begin with a base coat to protect your nails.
- Apply a light blue polish as the base color.
- On a sponge, gently blend the pink, lavender, and blue polishes, then dab onto the nails.
- Repeat the sponging process until you achieve a smooth, blended ombre effect.
- Finish with a top coat to enhance the iridescence and durability of your manicure.
Spring Blossom Inspired Ombre
These nails are inspired by the vibrant colors of spring blossoms, featuring a beautiful ombre transition from a rosy pink to a muted lavender. Decorated with delicate floral accents and tiny gold flecks, this design is perfect for welcoming the spring season or any festive occasion that calls for a touch of floral elegance.
Materials Needed
- Base Coat: ORLY Bonder Rubberized Basecoat
- Pink Polish: Essie’s “Muchi, Muchi”
- Lavender Polish: OPI’s “Lucky Lucky Lavender”
- Decorations: Gold flakes and miniature floral decals
- Top Coat: Seche Vite Dry Fast
Professional Tip: Place floral decals and gold flakes while the top coat is still tacky to ensure they adhere well and lay flat.
DIY Instructions
- Apply a base coat to all nails for longevity and protection.
- Start with the lighter color, pink, as the base.
- Using a sponge, apply both pink and lavender polishes for the ombre effect.
- Carefully place floral decals and sprinkle gold flakes before the polish dries.
- Seal everything with a top coat for a smooth, finished look that lasts.
Sleek and Sophisticated Ombre
This ombre manicure blends a neutral grey into a crisp white, offering a sleek and sophisticated look. Ideal for professionals or anyone wanting a manicure that speaks to understated elegance, this design is both modern and versatile, easily pairing with any wardrobe choice.
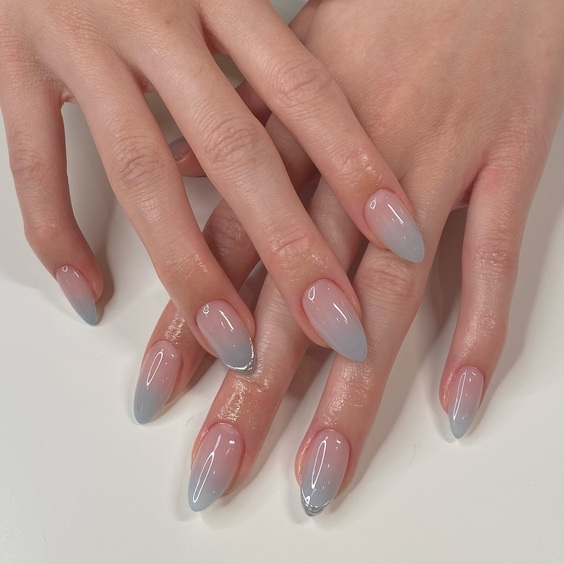
Materials Needed
- Base Coat: Butter London Nail Foundation
- Grey Polish: Essie’s “Chinchilly”
- White Polish: OPI’s “Alpine Snow”
- Top Coat: Sally Hansen Miracle Gel Top Coat
- Sponge: For a soft gradient effect
Professional Tip: Ensure each layer is slightly dry before sponging on the next to avoid colors bleeding into one another.
DIY Instructions
- Start with a base coat to protect the natural nail.
- Apply a full coat of the lighter color, white, as the base.
- On a sponge, apply the white and grey polish and softly dab onto the nail, focusing on the tip for the gradient.
- Repeat until you achieve the desired blend between the colors.
- Finish with a glossy top coat for a durable, shiny look.
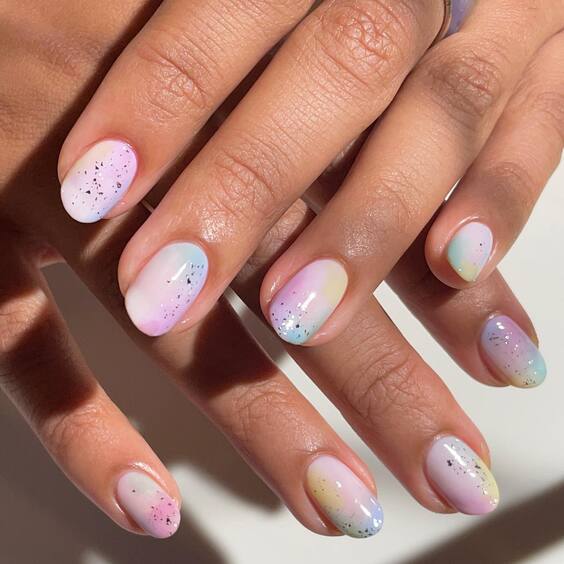
Pastel Rainbow Ombre
Embrace the joy of spring with this pastel rainbow ombre design. The gentle flow of yellow to pink to lavender adorned with subtle glitter and sequins captures the essence of a spring meadow in bloom. This playful yet elegant style is perfect for seasonal gatherings or adding a splash of color to your daily life.
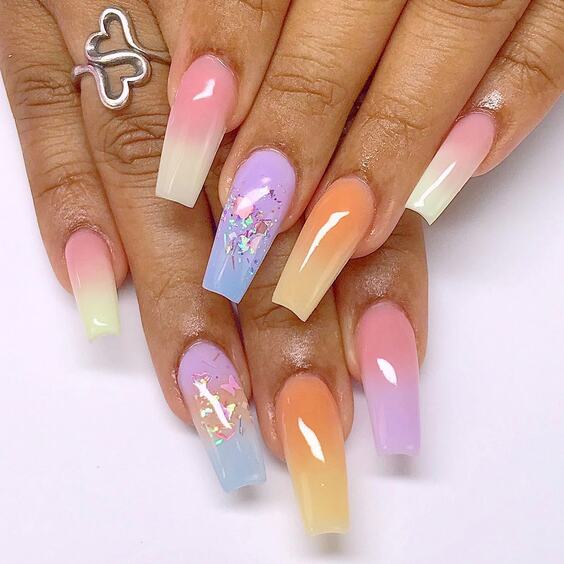
Materials Needed
- Base Coat: ORLY Bonder
- Polishes: Pastel shades of yellow, pink, and lavender
- Sequins and Glitter: For a touch of sparkle
- Top Coat: Seche Vite Dry Fast
Professional Tip: Apply sequins while the top coat is still tacky to ensure they stick well and lay flat.
DIY Instructions
- Apply a base coat to ensure the longevity of your ombre.
- Start with a pale yellow as the base.
- Using a sponge, blend the yellow into pink and then into lavender at the tips.
- While wet, gently place sequins and sprinkle glitter over the gradient.
- Seal with a top coat for a smooth and protective finish.
Elegant Lavender Fade
This elegant lavender fade ombre nails exude a sense of serene beauty. The soft lavender transitions smoothly into a muted pastel pink at the tips, perfect for those who prefer their manicures to be both subtle and stylish. This look is incredibly versatile, suitable for both everyday wear and special occasions.

Materials Needed
- Base Coat: CND Stickey Base Coat
- Lavender Polish: Essie’s “Lilacism”
- Pink Polish: Essie’s “Fiji”
- Top Coat: Seche Vite Dry Fast Top Coat
- Sponge: To achieve the flawless fade effect
Professional Tip: Keep the sponge slightly damp to help the colors meld more seamlessly.
DIY Instructions
- Apply a base coat to protect your nails.
- Paint the entire nail with the lavender polish as the base color.
- Dab on the pink polish with a sponge, starting midway through the nail and blending toward the tip.
- Repeat the sponging process until the desired gradient is achieved.
- Finish with a top coat to enhance the colors and ensure durability.
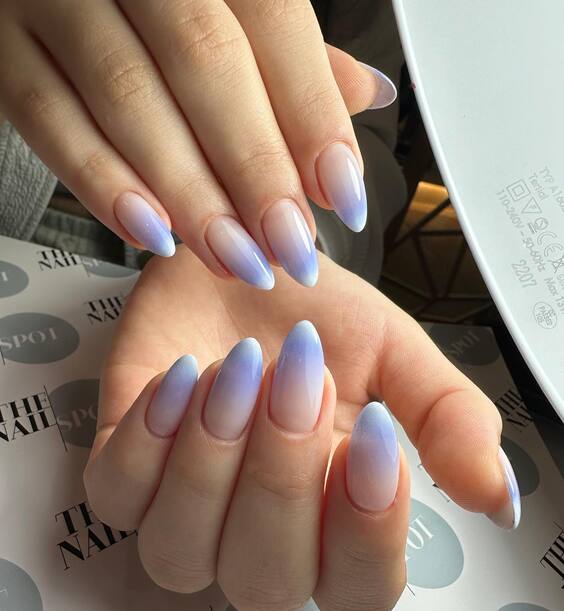
Celestial Skies Ombre
This nail design captures the ethereal beauty of a twilight sky, blending shades of periwinkle and lilac for a truly celestial look. The smooth transition of colors mimics the serene gradient seen in the sky at dusk, making this manicure perfect for those who prefer a dreamy, romantic aesthetic.
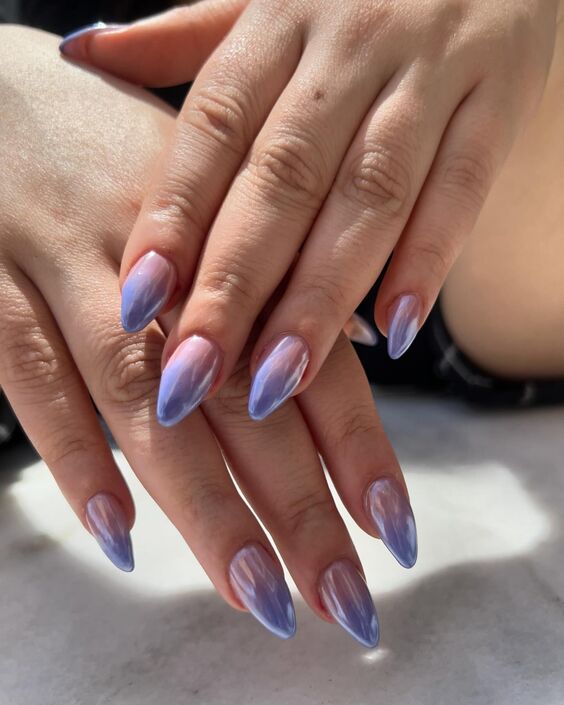
Materials Needed
- Base Coat: Deborah Lippmann Gel Lab Pro
- Periwinkle Polish: China Glaze “Secret Peri-wink-le”
- Lilac Polish: Essie “Go Ginza”
- Top Coat: Seche Vite Dry Fast
- Sponge: To create the ombre effect
Professional Tip: Apply a thin layer of shimmer topcoat to mimic the starlit sky for an added magical touch.
DIY Instructions
- Start with a base coat to protect your nails and ensure a smooth application.
- Paint the nails with a periwinkle base.
- Using a sponge, gently blend the lilac polish from the middle to the tips of the nails.
- If desired, add a shimmer topcoat for a celestial finish.
- Seal with a top coat for a glossy, durable manicure.
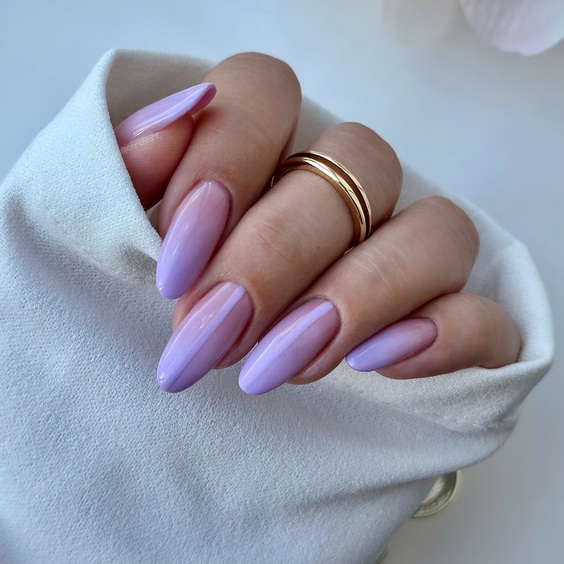
Soft Lavender Ombre
Soft lavender ombre nails offer a gentle and soothing appearance, ideal for both daily wear and special occasions. The subtle transition from a pale lavender to a deeper shade creates a tender yet elegant look, enhancing the beauty of well-manicured hands.
Materials Needed
- Base Coat: ORLY Rubberized Base
- Lavender Polishes: Two shades of lavender, light and medium
- Top Coat: Sally Hansen Miracle Gel
- Sponge: For blending
Professional Tip: Keep the transitions subtle by using a dry brush technique to feather out the darker shade into the lighter base.
DIY Instructions
- Apply a base coat to prevent staining and improve polish adherence.
- Paint the entire nail with the lighter lavender shade.
- Lightly dab the darker lavender at the tips with a sponge, blending upwards.
- Use a dry brush to soften the transition line.
- Finish with a top coat to enhance the colors and longevity of your manicure.
Pastel Rainbow Speckle Ombre
This delightful design features a pastel rainbow ombre sprinkled with tiny speckles of glitter, reminiscent of a candy-coated fantasy. The soft, playful transition of colors makes this style particularly appealing for spring or for anyone who loves adding a touch of whimsy to their look.
Materials Needed
- Base Coat: CND Stickey Base Coat
- Pastel Polishes: A selection of soft pink, yellow, and blue
- Glitter: Micro glitter in various colors
- Top Coat: Seche Vite Dry Fast
Professional Tip: Sprinkle the glitter while the last coat of ombre is still tacky to ensure it adheres well without clumping.
DIY Instructions
- Begin with a base coat to protect your nails and create a sticky surface.
- Apply the lightest pastel color as the base.
- Gradually sponge on the other pastel colors, creating a soft blend from one to the next.
- While the polish is still wet, lightly sprinkle with micro glitter for a speckled effect.
- Seal everything with a top coat for a smooth finish and to lock in the glitter.
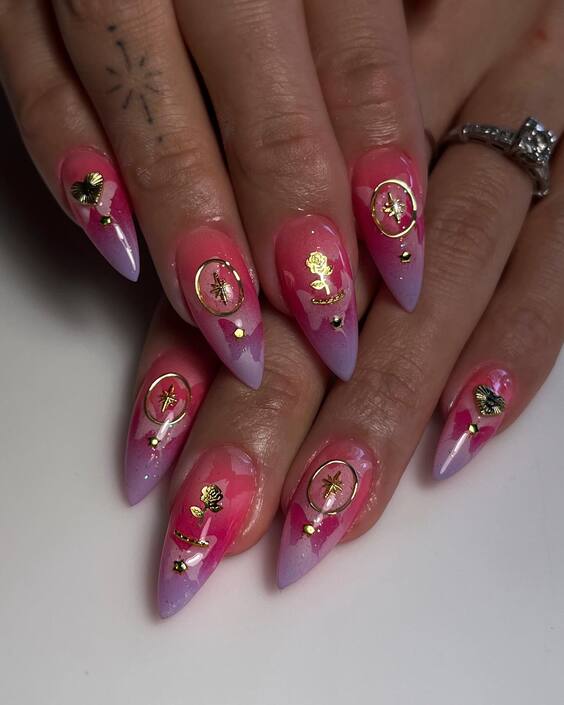
Playful Character Ombre
This design combines the fun of vivid colors with adorable character art, creating a playful yet intricate look. Each nail features a different character, blending into a radiant ombre background that makes each figure seem to pop. It’s perfect for those who love to express their playful side through their manicure.

Materials Needed
- Base Coat: ORLY Bonder Rubberized Basecoat
- Polishes: Red, green, purple, and orange
- Character Decals: Assorted designs
- Top Coat: Seche Vite Dry Fast
Professional Tip: Apply decals carefully with tweezers and seal with a top coat to prevent edges from lifting.
DIY Instructions
- Apply a base coat to protect your nails.
- Paint each nail with a different base color corresponding to the character’s theme.
- Gradually blend into the next color using a sponge for the ombre effect.
- Apply character decals once the base is slightly tacky.
- Seal everything with a top coat for a glossy, protective finish.
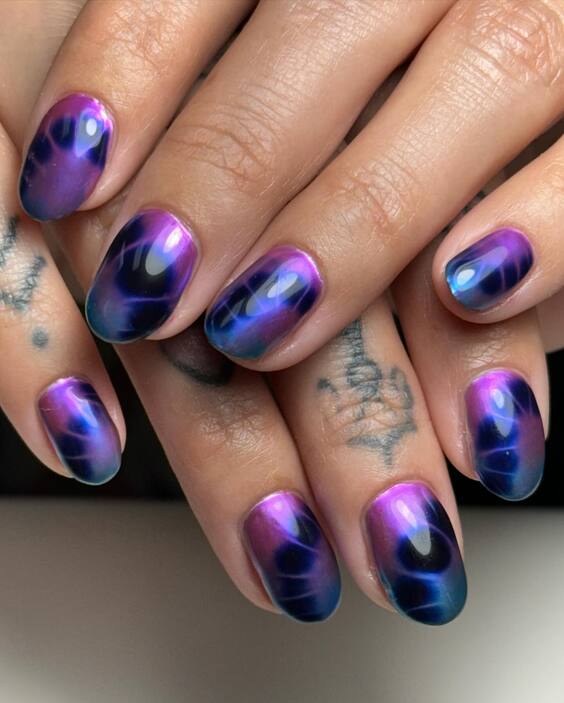
Galactic Swirl Ombre
The galactic swirl ombre nails are a spectacle of color and shine, mimicking the mesmerizing colors of the galaxy. This design uses a swirling technique with magnetic polishes to create a stunning visual effect that’s both futuristic and captivating.
Materials Needed
- Base Coat: CND Stickey Base Coat
- Magnetic Polishes: Pink and blue with metallic finish
- Magnet Tool: To create the swirling effect
- Top Coat: Sally Hansen Miracle Gel
Professional Tip: Move the magnet slowly and steadily to control the pattern and ensure a clear, defined swirl.
DIY Instructions
- Start with a base coat to enhance the adhesion of your manicure.
- Apply the first color as a base.
- While still wet, drop the second polish on top and immediately use the magnet tool to draw the swirls.
- Allow each nail to set before applying a top coat for a smooth, glossy finish.
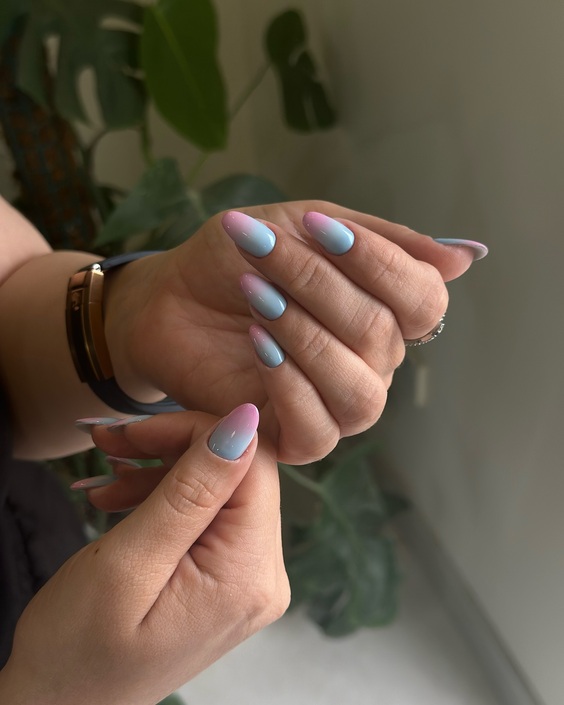
Pastel Sky Ombre
These nails feature a soft ombre transition from pastel blue to light pink, reminiscent of a serene morning sky. This soothing design is ideal for anyone seeking a subtle yet beautiful nail art that enhances the natural elegance of their hands.
Materials Needed
- Base Coat: Essie’s “Grow Stronger”
- Polishes: Pastel blue and pink
- Top Coat: Seche Vite Dry Fast
Professional Tip: For a flawless ombre, use a dense sponge to dab and blend the colors softly.
DIY Instructions
- Apply a base coat to protect the nails and ensure a long-lasting finish.
- Paint the whole nail with the lighter color, pastel blue, as the base.
- Sponge on the pastel pink, starting from the tip and blending upwards.
- Repeat sponging for a seamless transition.
- Finish with a top coat to maintain the manicure’s beauty and integrity.
Neon Glow Ombre
These nails are a true celebration of color and light, featuring a bold neon ombre that transitions through nearly every hue of the rainbow. The vivid colors are perfect for those looking to make a statement, particularly in settings where UV light can make them glow, such as parties or nightclubs.
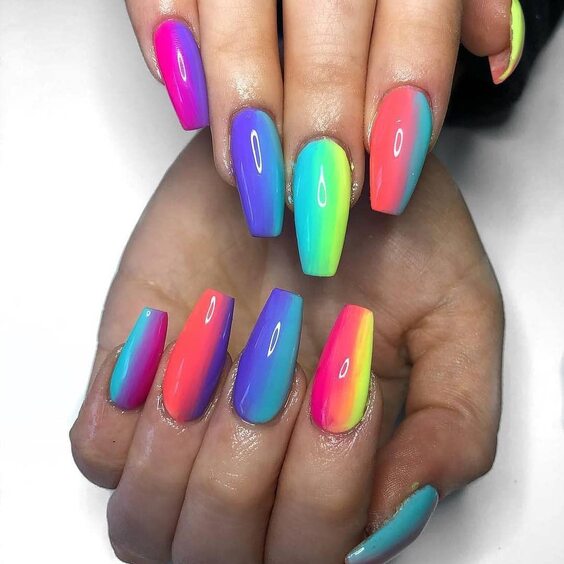
Materials Needed
- Base Coat: ORLY Bonder Rubberized Basecoat
- Neon Polishes: Array of neon colors
- Top Coat: Seche Vite Dry Fast
- UV Light: To enhance the glow effect
Professional Tip: Use thin layers to keep the colors bright and ensure they dry quickly under UV light.
DIY Instructions
- Apply a base coat to protect your nails.
- Paint each nail with a different neon color as the base.
- Using a sponge, blend adjacent colors to create the ombre effect.
- Cure under UV light to enhance the neon effect.
- Finish with a top coat for a glossy, protective finish.
Spring Floral Ombre
This nail design features a delicate ombre base with hand-painted floral patterns, creating a soft and romantic look perfect for spring. The gentle transition of pastel colors provides an ideal backdrop for the intricate flowers, making this style suited for weddings, garden parties, or simply celebrating the season.
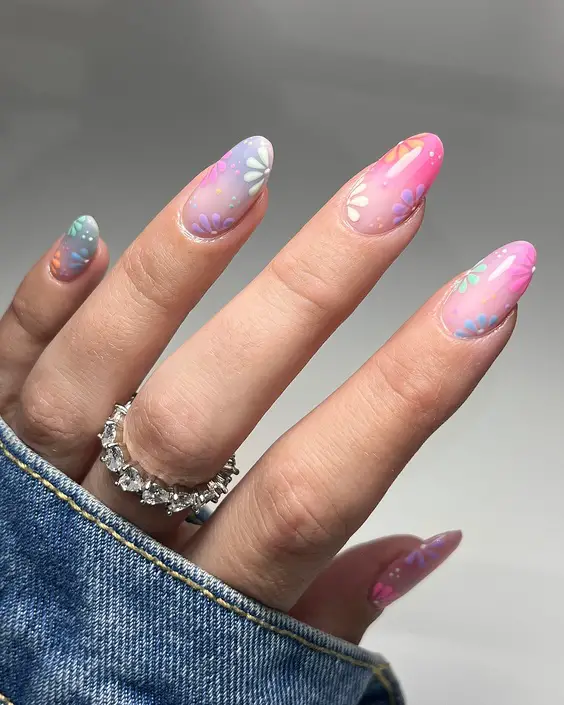
Materials Needed
- Base Coat: Essie’s “Grow Stronger”
- Pastel Polishes: Soft pink and blue
- Detail Brush: For floral designs
- Top Coat: Sally Hansen Miracle Gel
Professional Tip: Practice the flower designs on paper before applying them to your nails to ensure precision and confidence.
DIY Instructions
- Start with a base coat to protect the nails.
- Apply a pastel pink base, then gently sponge on blue at the tips for the ombre effect.
- Use a detail brush to hand-paint small floral designs over the gradient.
- Seal the design with a top coat for durability and shine.
Mystic Galaxy Ombre
Inspired by the depths of the cosmos, these nails feature a deep blue and purple ombre with a swirling pattern that resembles a distant galaxy. This design is for those who appreciate a touch of the mysterious and the majestic in their manicure.
Materials Needed
- Base Coat: CND Stickey Base Coat
- Blue and Purple Polishes: Deep shades for a galactic look
- Glitter Polish: For a starry effect
- Top Coat: Seche Vite Dry Fast
Professional Tip: Sprinkle fine glitter while the top coat is wet to simulate stars and add depth to the galactic effect.
DIY Instructions
- Apply a base coat for nail protection.
- Paint a dark blue base, then sponge on purple from the mid-nail upwards.
- While wet, lightly sprinkle with fine glitter for a starry look.
- Swirl a thin brush through the colors to create a galaxy effect.
- Finish with a top coat to seal in the design and enhance the depth.
Subtle Summer Breeze Ombre
This delightful nail design features a refreshing summer breeze ombre that transitions from a soft baby pink to a subtle seafoam green. The gentle blend of these pastel shades evokes the soothing colors of a tranquil beach, making it a perfect choice for warm summer days or for anyone looking to add a touch of calm to their style.
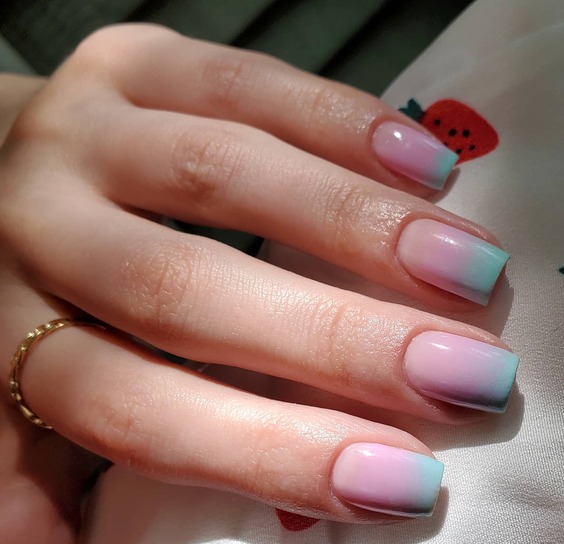
Materials Needed
- Base Coat: OPI Natural Nail Base Coat
- Pink Polish: Essie’s “Muchi, Muchi”
- Green Polish: China Glaze’s “For Audrey”
- Top Coat: Sally Hansen Miracle Gel Top Coat
- Sponge: For a smooth gradient effect
Professional Tip: For an even more seamless ombre, apply the polish to the sponge in overlapping layers before dabbing onto the nail.
DIY Instructions
- Begin with a base coat to protect your nails and improve the longevity of the ombre.
- Apply the lighter color, baby pink, as the base coat on all nails.
- Dab some green polish onto a sponge and gently press onto the tips, blending back towards the middle to create a soft ombre effect.
- Repeat the sponging if necessary to enhance the color transition.
- Finish with a top coat for a glossy, durable finish.
Conclusion
Exploring the art of ombre nail colors reveals just how versatile and captivating this manicure style can be. Whether you opt for a subtle gradient for everyday elegance or a bold, vibrant ombre for special occasions, these designs offer something for everyone. Remember, the key to perfect ombre nails lies in practice and creativity. Don’t be afraid to experiment with different color combinations and techniques to find what works best for you. As we’ve seen, the possibilities are truly limitless, so let your nails be your canvas and paint your way to stunning, eye-catching nail art.