19 Stunning Mauve Nail Color Ideas for 2024: Explore the Latest Trends and Designs
Have you ever wondered why mauve nail color has become a staple in every manicure enthusiast’s palette? Whether it’s the versatility of the shade or its year-round appeal, mauve has a way of making a statement without overpowering. From subtle hues for everyday wear to bold variations for special occasions, mauve nails adapt to any style. What makes this color so universally loved, and how can you incorporate it into your nail art repertoire? Let’s explore some stunning mauve nail color ideas and designs, and I’ll guide you on how to achieve these looks at home.
Captivating Simplicity in Mauve
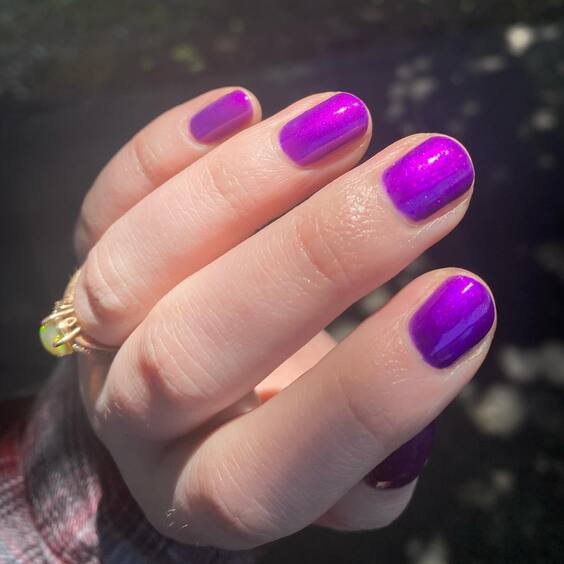
The first photo showcases a classic, glossy mauve nail color that exudes elegance and simplicity. The vibrant yet understated shade makes it perfect for both casual outings and formal events. The nails are meticulously cared for, shaped into a soft, rounded tip which enhances the feminine appeal. This shade of mauve, likely achieved using mauve nail color gel, offers a smooth and flawless finish that catches the light beautifully.
Consumables Needed
- Base Coat: Start with a high-quality base to protect your nails.
- Mauve Nail Gel: For this look, a gel like Opi or Dnd in a mauve shade provides a durable, shiny finish.
- Top Coat: A glossy top coat to enhance the shine and longevity.
- Optional: A cuticle oil for a perfect finish.
DIY Instructions
- Begin by applying a base coat to clean, dry nails.
- Once the base coat is dry, apply two thin layers of the mauve nail gel, curing under a UV lamp between coats.
- Finish with a glossy top coat and cure it under the UV lamp.
- Apply cuticle oil to hydrate and enhance the overall look.
Modern Artistic Flair
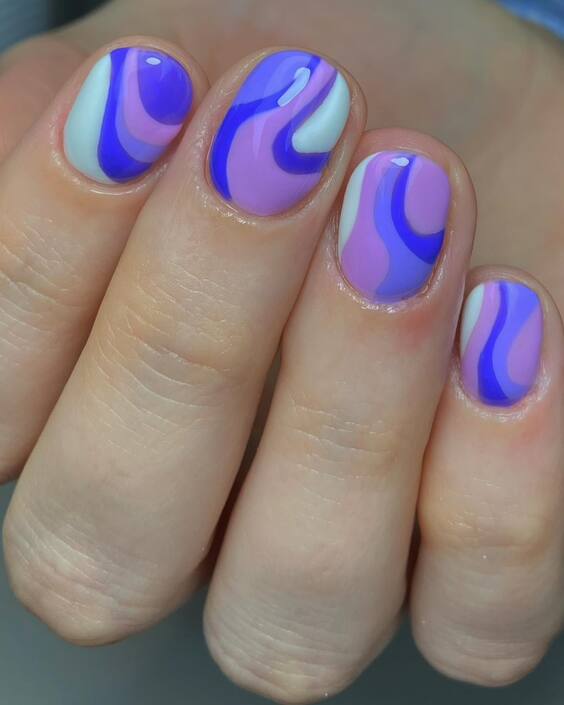
The second image dives into a more creative realm with a mauve color play featuring mauve nail color design in a swirling pattern of white and deeper mauve shades. This design reflects a modern artistic flair, perfect for those who wish to stand out. The use of light and dark mauve shades creates a mesmerizing effect, reminiscent of marble or natural stone.
Consumables Needed
- Base Coat: Essential for nail protection.
- Light Mauve Gel: A softer hue for the base.
- Dark Mauve Gel: For contrast in the design.
- White Gel: To create the swirls.
- Detailing Brush: For intricate designs.
- Top Coat: To seal in the artwork.
DIY Instructions
- Apply the base coat and cure it.
- Paint the entire nail with a light mauve gel as the background.
- Using a detailing brush, swirl together dark mauve and white gels directly on the nail.
- Swiftly, while the gel is still wet, use a clean brush to gently blur the lines between colors for a natural effect.
- Cure the design under a UV lamp and finish with a top coat.
Elegantly Embellished Mauve
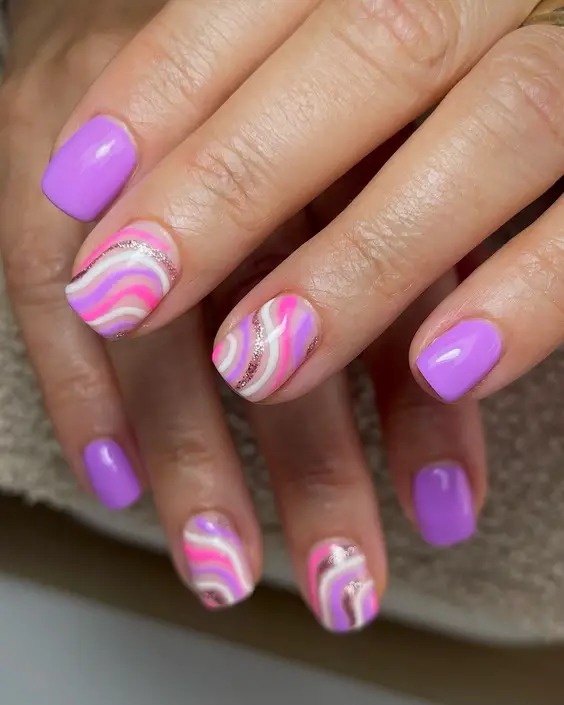
The third photo highlights an innovative approach to mauve nail color ideas. This design incorporates delicate pink and white swirls over a matte mauve base, embellished with tiny gems that add a touch of glamour. It’s an ideal choice for festive occasions or weddings, where you want your nails to have a little extra sparkle.
Consumables Needed
- Matte Mauve Polish: As the base color.
- Pink and White Polishes: For the swirls.
- Tiny Gems: To add sparkle.
- Nail Glue: For securing the gems.
- Matte Top Coat: To maintain the matte finish.
DIY Instructions
- Start with a matte mauve polish as the base.
- Once dry, use a thin brush to add swirls with pink and white polish.
- While the design is tacky, carefully place tiny gems where desired using a dotting tool and a dab of nail glue.
- Seal everything with a matte top coat for a durable, chic finish.
Bold and Bright Mauve Matte
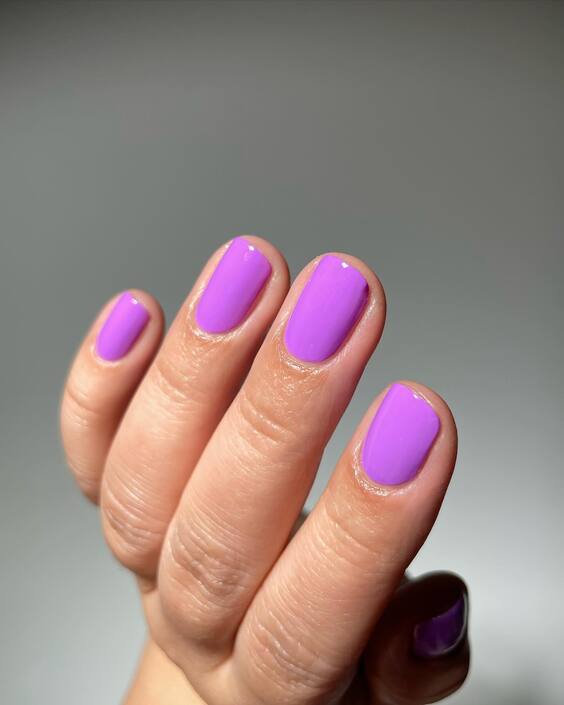
This photo features a bold and bright matte mauve nail color, a perfect example of how a vibrant hue can transform a simple manicure into something extraordinary. The matte finish gives a contemporary touch, making it a fantastic choice for those who prefer a non-glossy look. This dark mauve color is especially suitable for fall, providing a pop of color that complements seasonal outfits beautifully.
Consumables Needed
- Matte Base Coat: To ensure a smooth matte finish.
- Dark Mauve Matte Polish: Such as mauve nail color Dnd or Opi.
- Matte Top Coat: To lock in the color and prevent chipping.
- Nail Cleaner: To prep the nails for application.
DIY Instructions
- Prep your nails with a nail cleaner and apply a matte base coat.
- Paint two coats of the dark mauve matte polish, allowing it to dry between applications.
- Finish with a matte top coat for durability and to enhance the matte effect.
Floral Fantasy in Mauve
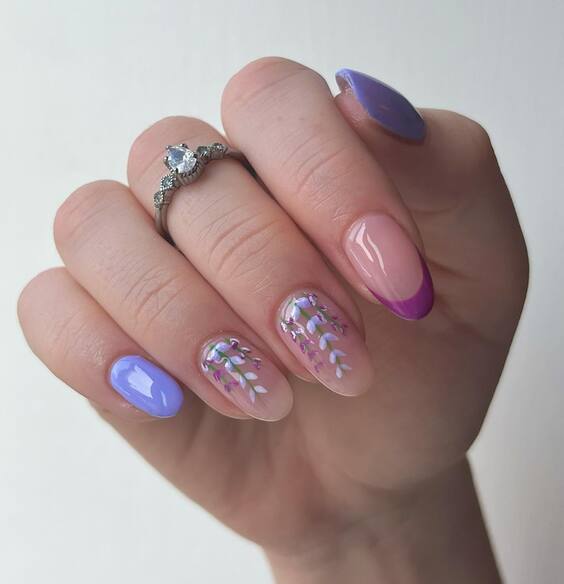
This intricate design blends light mauve and lilac shades with delicate floral artwork, creating a dreamy and romantic look. The flowers, painted with precision and grace, suggest a soft, springtime theme but can be adapted for any season by adjusting the color depth. This design is ideal for weddings or special events where a touch of elegance is desired.
Consumables Needed
- Light Mauve Polish: As a base color.
- Lilac Polish: For detailed floral designs.
- Fine Detail Brush: For intricate artwork.
- Clear Top Coat: To protect the design.
- Gems or Pearls (optional): For added embellishment.
DIY Instructions
- Apply a light mauve polish as the base.
- Use a fine detail brush to hand-paint lilac flowers on each nail.
- If desired, add tiny gems or pearls to the center of each flower for extra glamour.
- Seal with a clear top coat to protect your artwork.
Subtle Elegance in Dusty Mauve
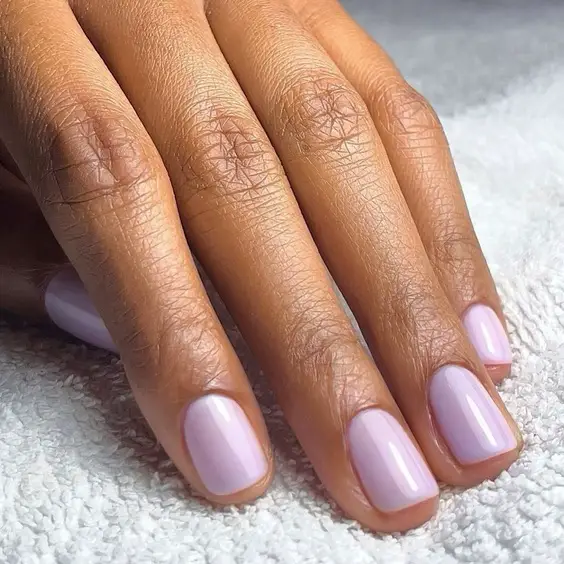
The photo captures the essence of subtle elegance with a dusty mauve nail color. This shade is perfect for those seeking a sophisticated, understated look that still offers a hint of color. The creamy, opaque finish provides a smooth application, ideal for professional settings or everyday wear.
Consumables Needed
- Dusty Mauve Polish: For a soft, elegant look.
- Base Coat: To protect the natural nail.
- Top Coat: For a glossy finish and extended wear.
- Nail File: For shaping the nails to a uniform size and shape.
DIY Instructions
- Shape your nails with a nail file and apply a base coat.
- Apply two coats of dusty mauve polish, waiting for each coat to dry.
- Finish with a glossy top coat for a sleek and polished appearance.
Glittering Accents in Mauve Majesty
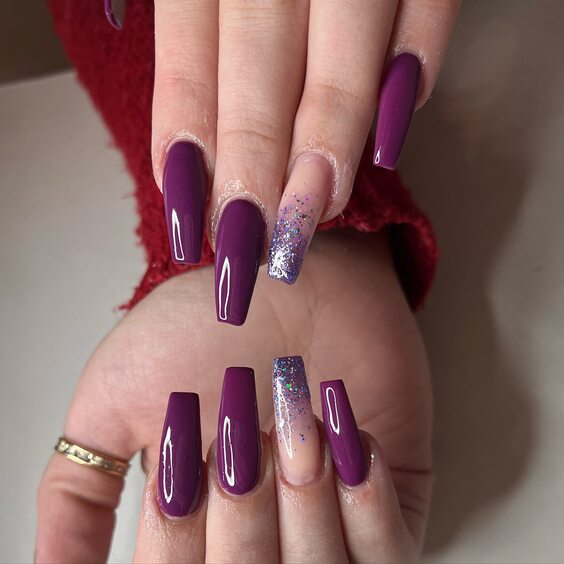
This design combines a deep mauve nail color with glittering accents, creating a look that’s both bold and festive. The mauve base provides a rich canvas for the sparkling particles, catching the light with every movement. This style is perfect for those looking to add a bit of glamour to their look without overwhelming it, showcasing a great example of mauve nail color combos.
Consumables Needed
- Deep Mauve Polish: As the primary color.
- Glitter Top Coat: To add sparkle and texture.
- Base Coat: For nail protection.
- High-Gloss Top Coat: To seal in the design and enhance durability.
DIY Instructions
- Start by applying a base coat to protect your nails.
- Apply two coats of deep mauve polish as the base color.
- Once dry, add a layer of glitter top coat for a sparkling finish.
- Seal the design with a high-gloss top coat to ensure longevity and shine.
Subtle Sheen with Light Mauve Veil
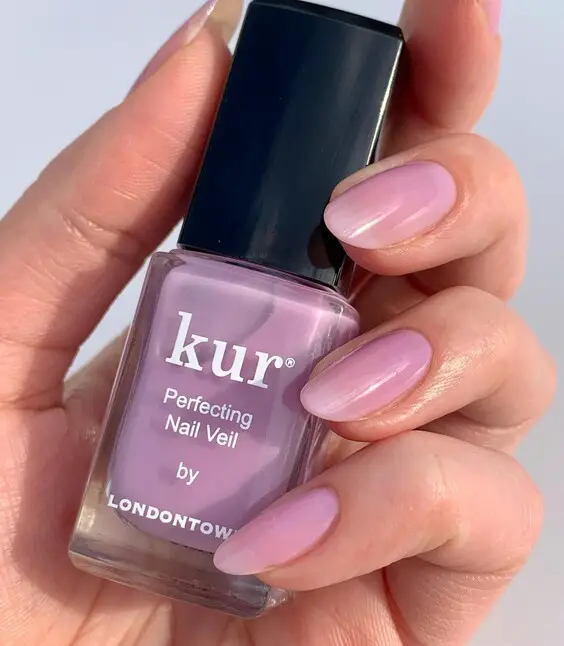
Features a light mauve polish named “Perfection Nail Veil” by Londontown, offering a subtle sheen that’s perfect for everyday elegance. The light mauve nail color is ideal for those who prefer a minimalist yet chic appearance. Its understated beauty makes it suitable for professional settings or casual outings, reflecting a best nail color for mauve dress choice that complements rather than competes.
Consumables Needed
- Light Mauve Nail Veil by Londontown: For a sheer finish.
- Base Coat: To protect the nail.
- Soft Top Coat: For a gentle sheen.
DIY Instructions
- Apply a base coat to clean, prepped nails.
- Use two coats of Londontown’s Light Mauve Nail Veil for a perfect blend of color and transparency.
- Finish with a soft top coat to enhance the natural sheen and extend wear.
Vibrant Mauve with Metallic Flair
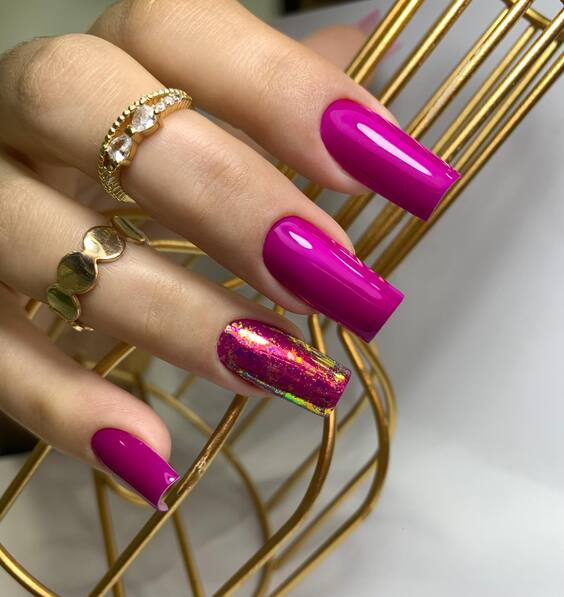
In the vivid mauve nail color is beautifully contrasted with a metallic pinky finger, offering a modern twist to the classic manicure. This look exemplifies how to play with mauve nail color design by incorporating metallic elements to elevate the aesthetic. It’s an ideal choice for those seeking a dynamic and eye-catching manicure.
Consumables Needed
- Vibrant Mauve Polish: For the main color.
- Metallic Pink Polish: For the accent nail.
- Base Coat and Top Coat: To ensure durability and shine.
DIY Instructions
- Prep your nails with a base coat.
- Apply two coats of vibrant mauve polish on all fingers except for the pinky.
- Paint the pinky with a metallic pink polish for a striking contrast.
- Seal all nails with a top coat to protect the manicure and enhance the metallic sheen.
Sparkling Radiance in Mauve
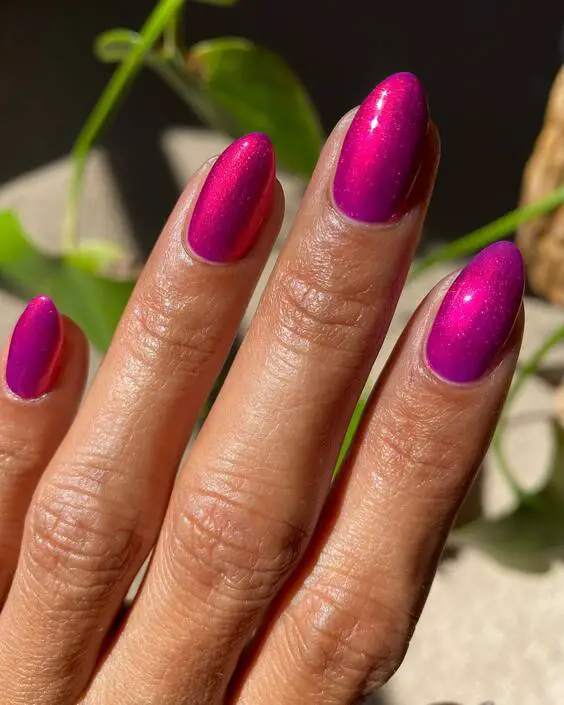
Showcases a vibrant, sparkling mauve nail color enriched with a shimmering finish that captures the sunlight beautifully. This look is ideal for those who desire a touch of glamour but still want to maintain an air of sophistication. The slight shimmer within the polish adds depth and complexity to the nails, making it a standout choice for evening events.
Consumables Needed
- Sparkling Mauve Polish: To achieve the shimmer effect.
- Base Coat: To protect the nail.
- Glossy Top Coat: To enhance the sparkle and ensure longevity.
DIY Instructions
- Begin with a base coat to protect your nails.
- Apply two coats of sparkling mauve polish, allowing each coat to dry completely.
- Finish with a glossy top coat to maximize shine and durability.
Subtle Elegance with Satin Mauve
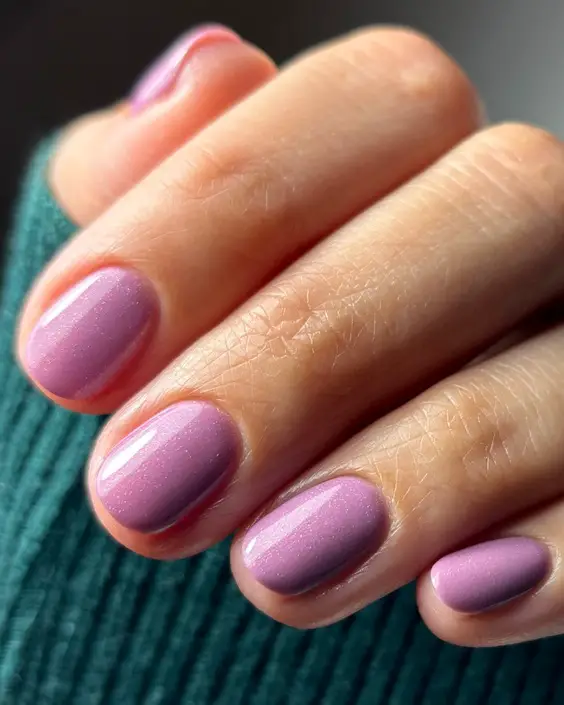
Captures a more understated elegance with a satin light mauve nail color. This polish offers a soft, subtle sheen that’s perfect for everyday wear or professional environments. The muted mauve tone provides a clean, polished look that pairs well with any outfit, reflecting a versatile choice for those who prefer a more refined aesthetic.
Consumables Needed
- Satin Mauve Polish: For a gentle, elegant finish.
- Base Coat: To protect the nail.
- Satin Top Coat: To maintain the subtle sheen.
DIY Instructions
- Apply a base coat to clean, prepped nails.
- Use two coats of satin mauve polish for a smooth, even coverage.
- Finish with a satin top coat to preserve the color’s subtle elegance.
Modern Mauve with Geometric Art
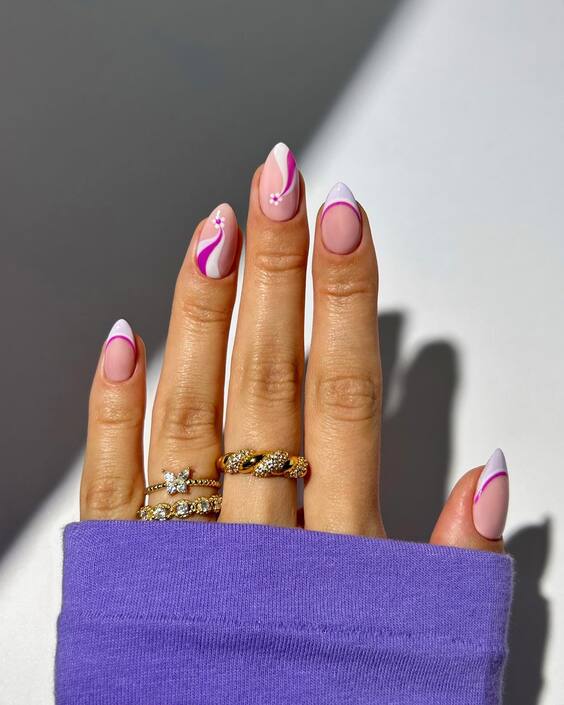
Showcases an innovative approach to mauve nail color design with geometric art. This nail design features sharp, clean lines contrasting against a light mauve base, offering a contemporary look that’s both artistic and eye-catching. Perfect for those who love to experiment with their style, this manicure combines traditional colors with modern art for a truly unique appearance.
Consumables Needed
- Light Mauve Polish: As the base color.
- White Polish: For the geometric lines.
- Detailing Brush: For precise lines.
- Glossy Top Coat: To seal the design and add shine.
DIY Instructions
- Start with a base coat to protect your nails.
- Apply two coats of light mauve polish as the base.
- Use a detailing brush and white polish to create geometric designs.
- Seal the design with a glossy top coat for a smooth, durable finish.
Deep Mauve Elegance
Features a striking deep mauve nail polish with a glossy finish that highlights the nails’ smooth, rounded contours. This rich, captivating shade is perfect for those looking to make a bold statement while maintaining an air of classic sophistication. It is particularly suitable for evening wear or formal events, where its deep tone can truly shine.
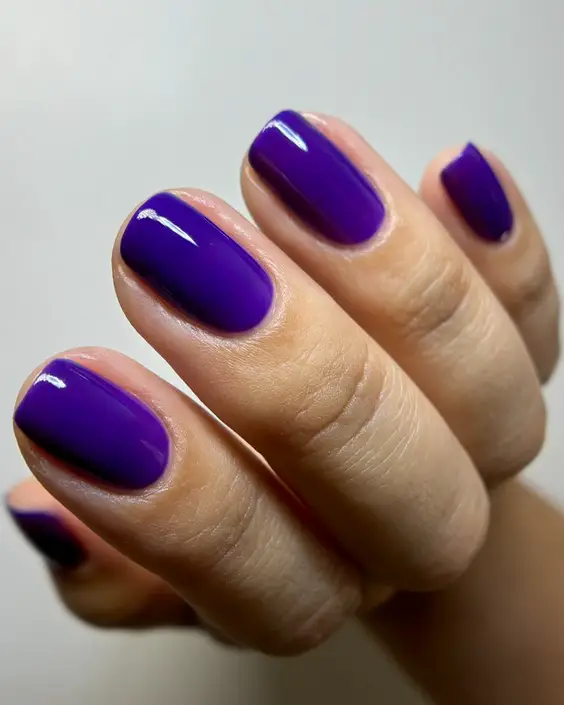
Consumables Needed
- Deep Mauve Nail Polish: For a bold and sophisticated look.
- Base Coat: To protect the natural nails.
- Glossy Top Coat: To enhance the finish and durability.
DIY Instructions
- Begin with a base coat to protect your nails and enhance polish adherence.
- Apply two coats of deep mauve nail polish, allowing each coat to dry thoroughly.
- Finish with a glossy top coat for extra shine and protection.
Mauve Manicure Variety
Displays a playful variety of nail colors including a bold pink, a soft mauve, and a shimmering silver, paired with mauve to create a vibrant and diverse manicure. This multi-colored approach is perfect for those who love to express their creativity through their nail art, showcasing how mauve can be elegantly paired with other shades to enhance its appeal.
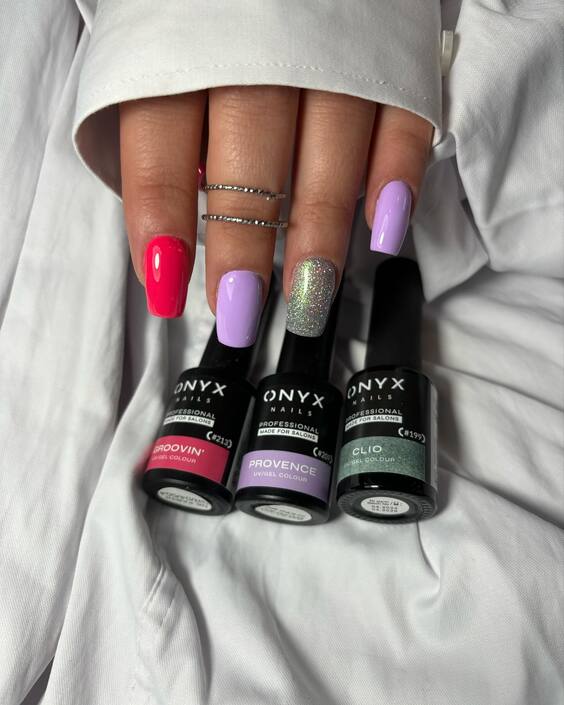
Consumables Needed
- Pink, Mauve, and Silver Nail Polishes: For a varied palette.
- Base Coat: To protect the nails.
- Glossy Top Coat: For a seamless finish.
DIY Instructions
- Apply a base coat to each nail.
- Paint each nail a different color—pink, mauve, or silver—depending on the desired pattern.
- Apply a glossy top coat to unify the look and add durability.
Artistic Mauve Accents
Showcases a sophisticated mauve manicure with detailed nail art including a floral accent and a glittery silver nail. This manicure combines subtle elegance with artistic flair, making it ideal for those who desire a bit of drama without overwhelming their overall look. The floral design adds a delicate touch, perfect for special occasions or seasonal events.
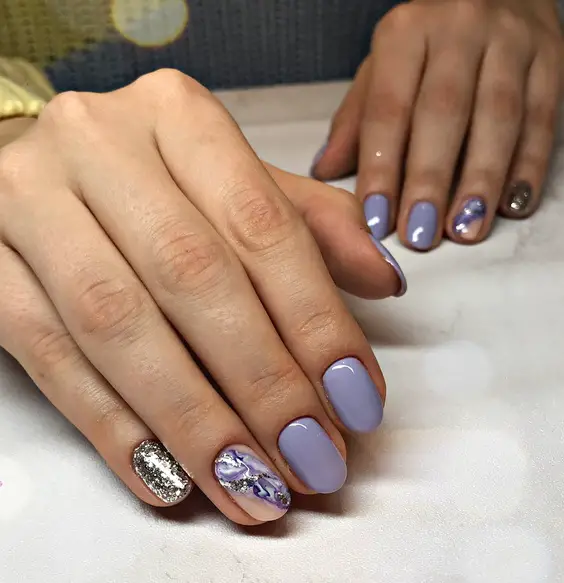
Consumables Needed
- Light Mauve and Silver Glitter Nail Polishes: For the base and accents.
- Nail Art Tools: For detailed designs.
- Top Coat: To seal in the art and enhance longevity.
DIY Instructions
- Paint your nails with light mauve polish as the base.
- Use nail art tools to create a delicate floral design on one accent nail.
- Apply silver glitter polish to another nail for a touch of sparkle.
- Seal the design with a top coat for durability and gloss.
Floral Fantasy
Is a stunning example of intricate nail art, combining bright floral designs with soft mauve tones. The nails feature a variety of decorations including painted flowers and jewel embellishments, creating a vibrant and textured look that is sure to draw attention. This style is ideal for special occasions or seasonal events where a playful and artistic nail design is desired.
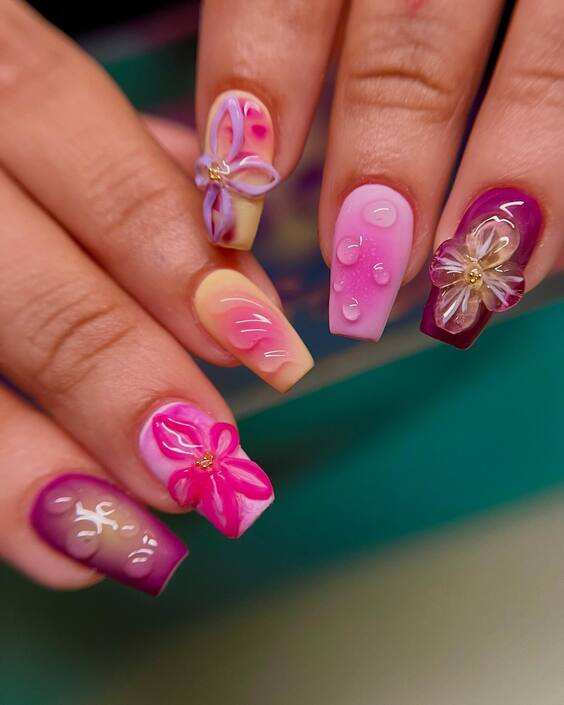
Consumables Needed
- Vibrant Pink and Mauve Nail Polishes: For the floral designs.
- Clear Nail Jewels: For embellishments.
- Glossy Top Coat: To seal the design and enhance durability.
DIY Instructions
- Paint the base of the nails in a soft mauve shade.
- Hand-paint floral designs using vibrant pink polish.
- Apply clear nail jewels to the center of the flowers for extra sparkle.
- Finish with a glossy top coat to protect and showcase the nail art.
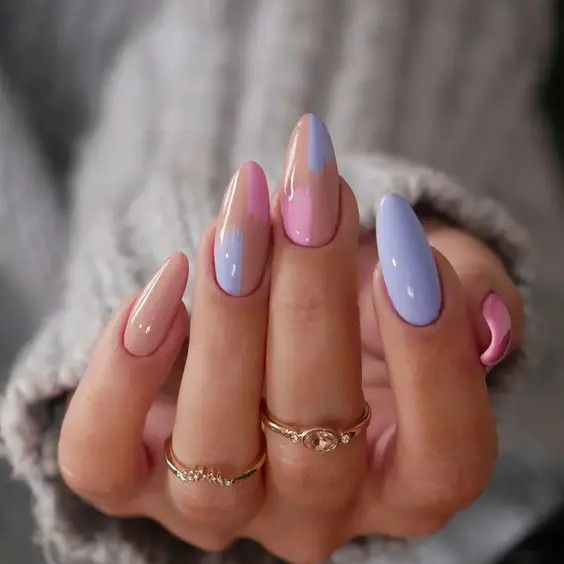
Soft Pastel Ombre
Displays a beautiful pastel ombre effect transitioning from mauve to lavender to light pink. The smooth gradient gives a calming, soft appearance, making it suitable for everyday wear or for more understated events. The look is completed with a high-gloss finish, which enhances the seamless transition between shades.
Consumables Needed
- Mauve, Lavender, and Light Pink Nail Polishes: For the ombre effect.
- Sponge: To blend the colors.
- Top Coat: For a smooth, glossy finish.
DIY Instructions
- Apply a base coat and let it dry.
- Paint a stripe of each color on a sponge and dab onto the nail to create the ombre effect.
- Repeat until the desired intensity is achieved.
- Apply a top coat for a smooth and shiny finish.
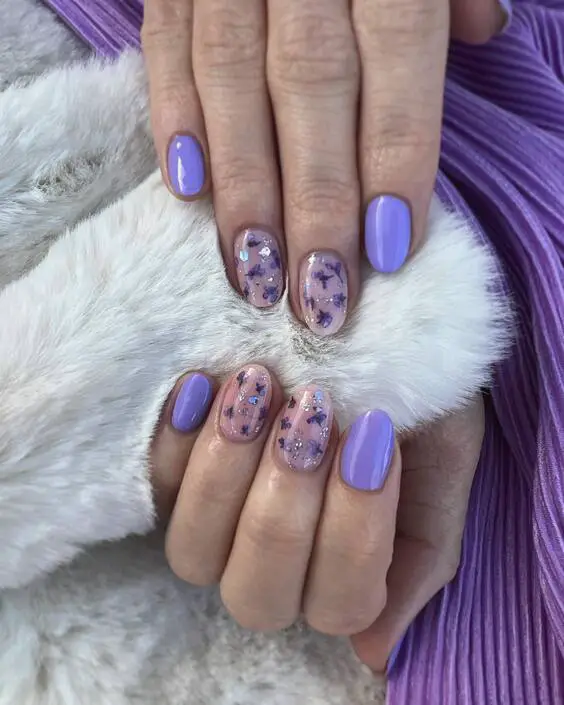
Elegant Mauve and Lavender Mix
Features a sophisticated mix of mauve and lavender shades, accented with delicate floral patterns and subtle glitter. This manicure combines simplicity with artistic flair, making it perfect for those who appreciate a detailed yet not overly bold nail design. The inclusion of floral patterns adds a touch of femininity and elegance, suitable for both formal and casual settings.
Consumables Needed
- Mauve and Lavender Nail Polishes: For the base colors.
- White Nail Polish: For the floral details.
- Glitter Nail Polish: For a hint of sparkle.
- Fine Detail Brush: For precise designs.
- Top Coat: To seal and protect the nail art.
DIY Instructions
- Apply mauve and lavender nail polishes as the base colors on different nails.
- Use a fine detail brush and white polish to add floral designs.
- Accent one or two nails with a touch of glitter polish for subtle sparkle.
- Seal with a top coat to enhance durability and shine.
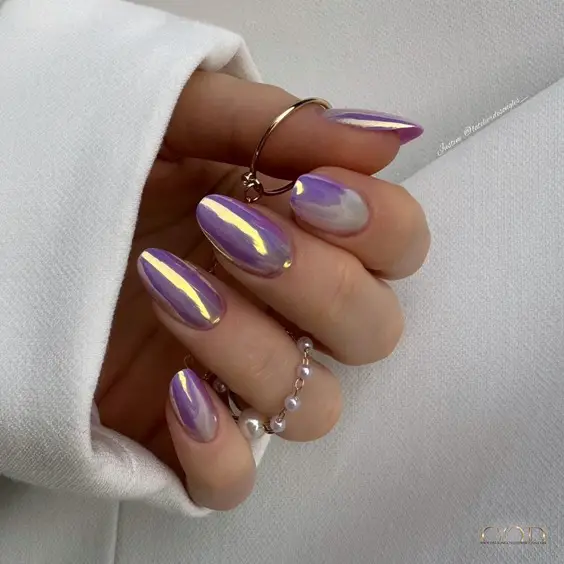
Iridescent Mauve Elegance
Illustrates a mesmerizing iridescent effect over a mauve base, lending an ethereal and modern twist to traditional mauve nails. The interplay of light and color creates dynamic shifts in hue, making these nails a captivating focal point for any outfit. This style is perfect for those who want to blend subtlety with a touch of the extraordinary, ideal for both day-to-night transitions and special occasions.
Consumables Needed
- Mauve Nail Polish: As the base color.
- Iridescent Top Coat: To achieve the shimmering effect.
- Base Coat: For nail protection.
- High-Gloss Top Coat: To enhance the iridescence and ensure durability.
DIY Instructions
- Start by applying a base coat to protect your nails.
- Apply two coats of mauve nail polish, allowing it to dry completely.
- Top with an iridescent coat that shifts in color depending on the light and angle.
- Finish with a high-gloss top coat to maximize the iridescent effect and protect your manicure.
Mauve nail color offers a versatile palette that can effortlessly adapt to any style or occasion, proving itself as a timeless choice in the world of nail art. From the subtle elegance of dusty mauves to the vibrant charm of floral and iridescent designs, this color can be transformed to suit casual day wear or elevate evening attire. The diversity of the mauve shade spectrum encourages personal expression through a variety of designs, making it a perennial favorite for those who value both classic beauty and contemporary trends in their manicure choices.

