19 Stunning Nude Nail Colors for Every Skin Tone: Tips & Styles 2024
Have you ever stood in front of a dazzling array of nail polishes, feeling overwhelmed by choices yet drawn to the timeless elegance of nude shades? Nude nail colors are not just a trend; they are a staple in the manicure world. But what makes a nude shade perfect? Is it the match with your skin tone, the occasion, or the season? In this article, we’ll explore the versatile world of nude nail colors through detailed reviews of specific shades tailored for every skin tone, from the fairest pale to the deepest dark. Discover how to select the best nude for your skin tone, and learn to create salon-worthy designs at home.
Elegant Simplicity
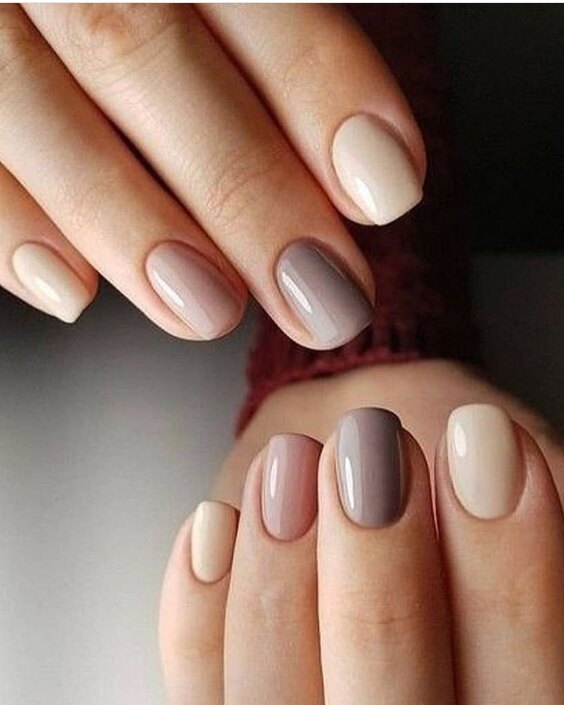
The first image showcases a subtle yet sophisticated manicure that embodies the beauty of minimalist nail art. The nails are adorned with a range of nude shades that blend seamlessly with the skin tones they’re paired with. From milky whites to soft pinks, each nail presents a slight variation in hue, creating a gentle ombre effect. This choice not only enhances the natural beauty of the hands but also offers a versatile look suitable for both casual and formal settings.
Consumables List:
- Base Coat: OPI Natural Nail Base Coat
- Nude Polishes: OPI ‘Bubble Bath’ (milky pink), ‘Samoan Sand’ (pale nude), and ‘Dulce de Leche’ (warm beige)
- Top Coat: Seche Vite Dry Fast Top Coat Recommendation: For a flawless finish, apply two coats of each polish, allowing sufficient drying time between coats.
DIY Instructions: Start by applying a base coat to protect your nails and ensure a smooth polish application. Next, select your nude polish and apply the first coat thinly. Once dry, apply a second coat to achieve a more opaque finish. If experimenting with an ombre effect, use a makeup sponge to dab the darker shade at the nail’s tip, blending towards the middle. Finish with a top coat for a glossy look and enhanced durability.
Depth and Dimension
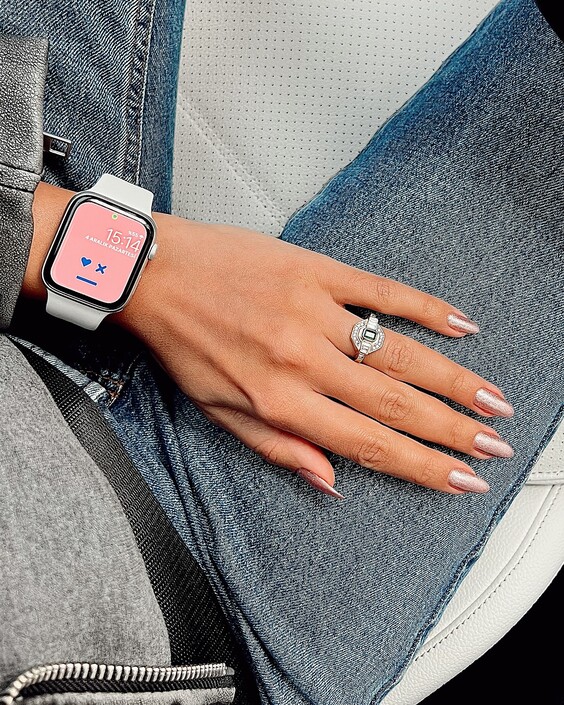
The second image offers a deeper dive into the versatility of nude nail colors for dark skin tones. The nails are expertly painted in a rich, deep taupe that complements the natural undertones of darker skin beautifully. The high gloss finish reflects light, adding dimension and a touch of luxury to the overall look.
Consumables List:
- Base Coat: Essie Here to Stay Base Coat
- Nude Polish: Essie ‘Mink Muffs’
- Top Coat: Sally Hansen Miracle Gel Top Coat Recommendation: This shade stands out beautifully on its own; however, for an added touch of elegance, consider a matte top coat for a contemporary finish.
DIY Instructions: Ensure your nails are clean and shaped before applying a base coat. Apply two thin layers of ‘Mink Muffs’, allowing each coat to dry thoroughly. For a glossy finish, apply a gel top coat; for a matte effect, opt for a matte top coat. Both styles provide a professional look that lasts.
Playful Pinks
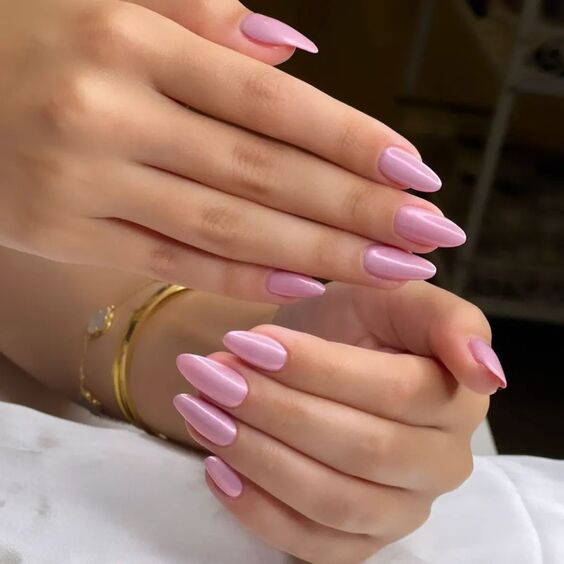
In the third image, playful pink hues steal the show, demonstrating that nude can also be vibrant. These nails feature a gradient of pink shades, from a soft blush at the cuticle to a vibrant rose at the tips, creating a youthful and dynamic look.
Consumables List:
- Base Coat: CND Stickey Base Coat
- Pink Polishes: CND Vinylux in ‘Cake Pop’ and ‘Tutu Be or Not to Be’
- Top Coat: CND Vinylux Weekly Top Coat Recommendation: For a lasting gradient effect, use a sponge to blend the colors on each nail.
DIY Instructions: Apply the base coat to clean nails. For the gradient effect, apply the lighter color as a base, and while it’s still tacky, dab the darker shade onto the sponge and press it gently starting from the tip, moving downward. Seal with a top coat for a durable, glossy finish.
Fresh and Funky
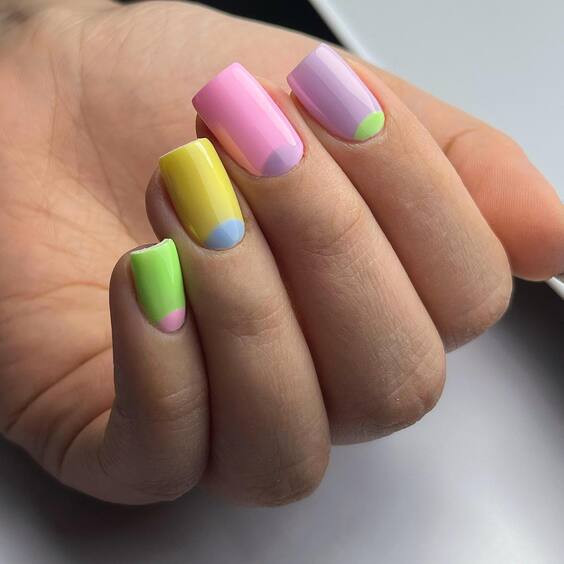
This image captures a playful and vibrant nail design that breaks the conventional boundaries of nude nail colors by incorporating vivid pastels. Each nail is a canvas showcasing a different pastel shade, from lemon yellow to sky blue, with a distinctive dot of a contrasting color at the base, adding a whimsical touch. This design is perfect for those looking to add a pop of color while keeping the overall aesthetic light and fun.
Consumables List:
- Base Coat: Orly Bonder Rubberized Basecoat
- Pastel Polishes: China Glaze ‘Lemon Fizz’, ‘For Audrey’, ‘Re-Fresh Mint’, and ‘Something Sweet’
- Dotting Tool
- Top Coat: OPI Top Coat Recommendation: Use a dotting tool for precise dot application, and seal the design with a top coat to enhance durability and shine.
DIY Instructions: Begin with a clean, prepped nail and apply the base coat. Once dry, apply two coats of each pastel polish on different nails. Using a dotting tool, dip into a contrasting polish and gently place a dot at the base of each nail. Finish with a top coat for a smooth, protective layer.
Understated Elegance
The second photo features a monochromatic palette that redefines elegance with a deep taupe shade, providing a sophisticated, muted alternative to traditional nudes. This color is particularly flattering for olive and tan skin tones, giving a clean, polished look ideal for both professional environments and casual outings.
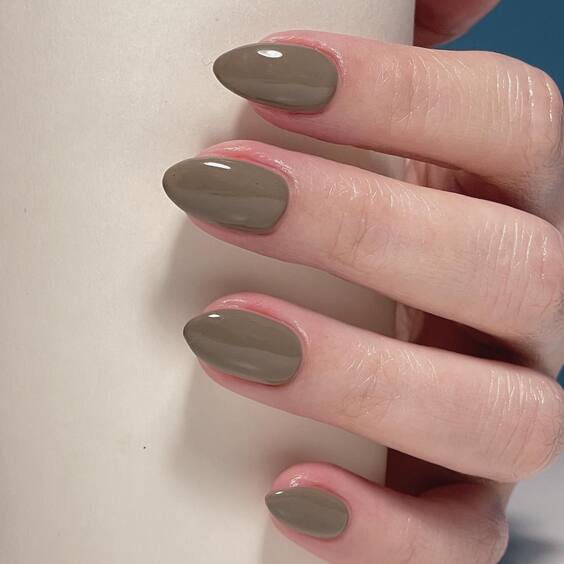
Consumables List:
- Base Coat: Sally Hansen Double Duty
- Nude Polish: Essie ‘Mochacino’
- Top Coat: Essie Good to Go Top Coat Recommendation: Opt for a single color to maintain a minimalist vibe. This shade is versatile enough to stand alone or act as a base for nail art if desired.
DIY Instructions: Apply the base coat to protect your natural nails. Follow with two coats of ‘Mochacino’ to achieve full opacity. Allow each coat to dry completely before applying the next to prevent smudging. Finish with a fast-drying top coat to seal in color and add a glossy finish.
Vibrant Spectrum
In our third image, we explore the transition from soft milky tones to bold, eye-catching corals and reds, arranged in a stunning ombre effect across multiple hands. This spectrum showcases the adaptability of nude shades, ranging from the lightest pink to the deepest coral, making it a perfect demonstration of how nudes can cater to every skin tone and preference.
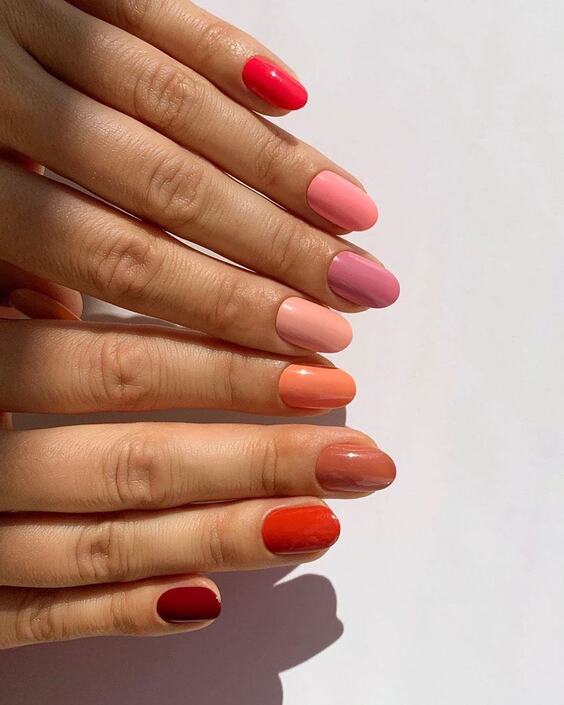
Consumables List:
- Base Coat: CND Stickey Base Coat
- Polishes: DND ‘Peachy’, ‘Cherry Blossom’, and ‘Sunset Coral’
- Sponge (for ombre effect)
- Top Coat: OPI Glossy Top Coat Recommendation: For a seamless ombre transition, use a sponge to dab the colors onto the nail, blending as you go.
DIY Instructions: Start with a base coat to protect your nails. Apply a light pink as the base color. Then, using a sponge, apply the medium and dark shades to the tips and mid-sections of the nails, blending each color upward to create a smooth gradient. Finish with a glossy top coat to enhance the colors and ensure longevity.
Coral Charm
This photo features a captivating coral hue that stands out beautifully against any skin tone, embodying the warmth of the summer. The glossy finish enhances the depth of the color, making it a striking choice for those seeking a vibrant, yet not overwhelming, nail color. This particular shade is a great example of how a bright nude can enhance the natural beauty of the hands.
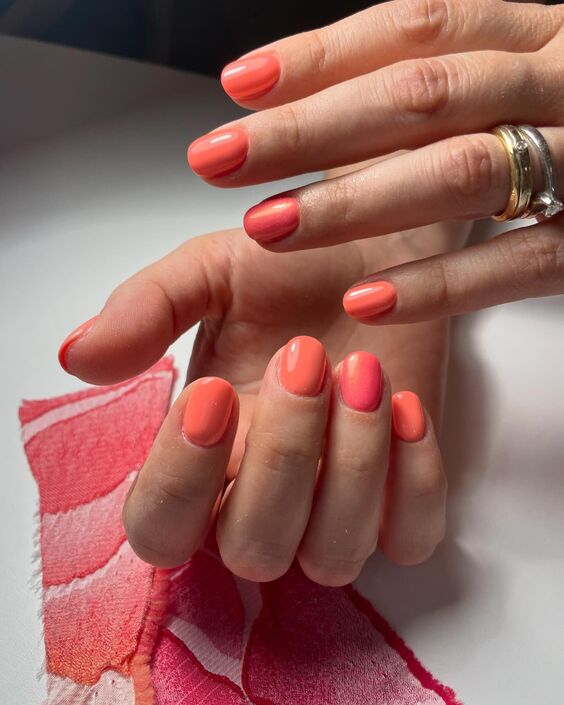
Consumables List:
- Base Coat: OPI Natural Nail Base Coat
- Coral Polish: Essie ‘Tart Deco’
- Top Coat: Essie Gel Setter Top Coat Recommendation: This polish is highly pigmented, so one or two coats are sufficient for full coverage.
DIY Instructions: Apply the base coat to clean, filed nails. Once dry, apply one coat of ‘Tart Deco’. If necessary, follow with a second coat to deepen the color. Finish with a glossy top coat for a lasting shine and to prevent chips.
Playful Polka Dots
The eighth image offers a delightful take on nude nails with soft pink as the base and playful polka dots and floral accents on alternating nails. This design is whimsical and perfect for spring or summer, providing a fun twist on the traditional nude manicure. The use of soft pink creates a gentle, feminine vibe, while the polka dots add a touch of playfulness.
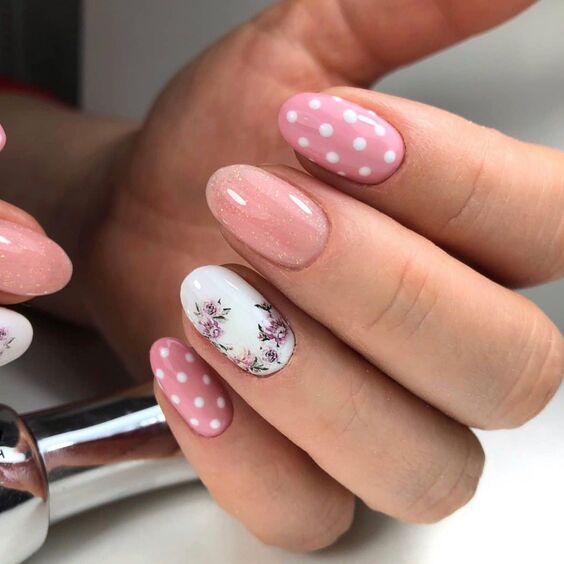
Consumables List:
- Base Coat: CND Stickey Base Coat
- Polishes: OPI ‘Mod About You’ (pink), ‘Alpine Snow’ (white for dots)
- Detail Brush (for floral designs)
- Top Coat: Sally Hansen Insta-Dri Anti-Chip Top Coat Recommendation: Use a fine detail brush for the flowers and a dotting tool or the head of a pin for perfect dots.
DIY Instructions: Start with a base coat. Apply two coats of ‘Mod About You’ for a solid pink background. Once dry, use ‘Alpine Snow’ to add polka dots on some nails and delicate floral patterns on others. Seal your design with a fast-drying top coat to enhance durability and shine.
Elegant Swirls
The final image in our series shows a sophisticated design featuring nude base nails with elegant white and gold swirls. This manicure is a testament to the versatility of nude colors, providing a perfect backdrop for intricate art. The subtle gradient from milky base to clear tips adds a modern twist to the classic French manicure.
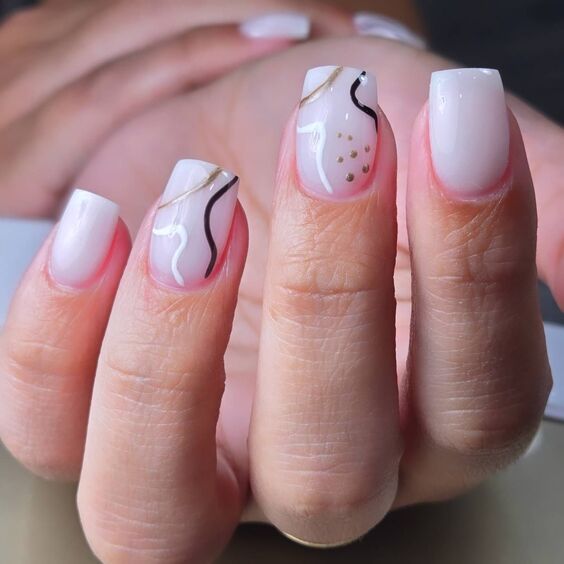
Consumables List:
- Base Coat: Essie Here to Stay Base Coat
- Nude Polish: ‘Ballet Slippers’ by Essie
- Gold Polish: OPI ‘Love.Angel.Music.Baby’
- White Polish: ‘Alpine Snow’ by OPI
- Detail Brush (for swirls)
- Top Coat: Seche Vite Dry Fast Top Coat Recommendation: Practice the swirls on paper before attempting on nails to ensure smooth lines.
DIY Instructions: Apply a base coat to protect your nails. Paint a nude base and let it dry. Using a detail brush, draw swirls with white and gold polish, starting from the nail bed and swirling towards the tip. Finish with a clear top coat to seal the design and add a glossy look.
Sheer Perfection
The tenth image epitomizes the classic beauty of nude nails with a glossy, sheer finish that enhances the natural look of the nails. This style is particularly flattering for light skin tones, offering a polished, barely-there look that’s perfect for any occasion, from business meetings to weddings.
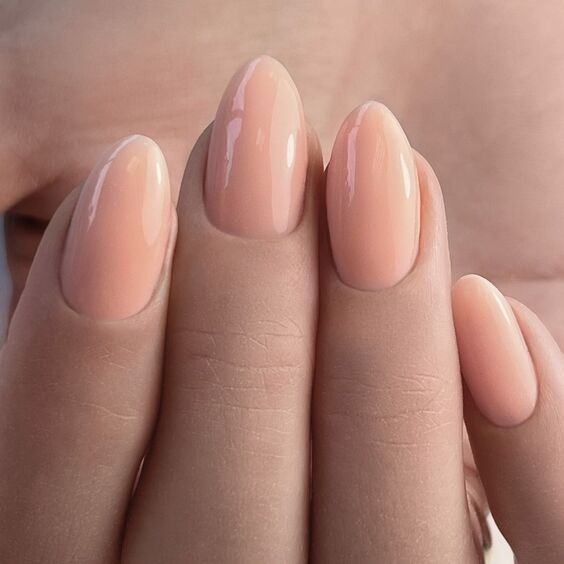
Consumables List:
- Base Coat: Butter London Nail Foundation Priming Basecoat
- Nude Polish: Essie ‘Ballet Slippers’
- Top Coat: Butter London Hardwear Shine UV Topcoat Recommendation: For an extra glossy finish, apply an additional layer of topcoat the day after your manicure.
DIY Instructions: Start with a base coat to protect your nails and provide a smooth surface. Apply two thin coats of ‘Ballet Slippers’ for a sheer yet buildable color that enhances the natural beauty of your nails. Finish with a layer of UV topcoat for a durable, high-shine effect.
Holographic Glow
In this striking image, the nails are transformed into a mesmerizing display of holographic brilliance. The multi-dimensional polish reflects a spectrum of colors, making it a bold choice for those looking to make a statement. This look is ideal for evening events or parties where you want your hands to be a conversation starter.
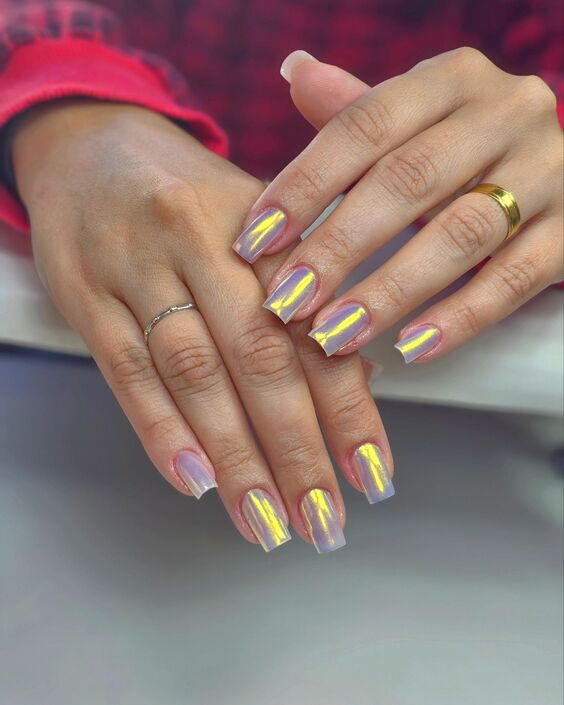
Consumables List:
- Base Coat: ILNP Ready for Takeoff (Peel-off)
- Holographic Polish: ILNP ‘Mega’
- Top Coat: Glisten & Glow Top Coat Recommendation: The peel-off base coat makes removal as effortless as the application, perfect for temporary yet stunning looks.
DIY Instructions: Apply the peel-off base coat to clean, dry nails. Once dry, apply two coats of ‘Mega’ to achieve the full holographic effect. Seal the design with a high-shine top coat to maximize reflectivity and wear.
Pastel Elegance
The final image showcases a soft, pastel palette with each nail painted in a different shade—from lilac to muted mint—creating a delicate, spring-ready look. The inclusion of a minimalist nail art on one finger adds a modern twist, making this manicure both playful and sophisticated.
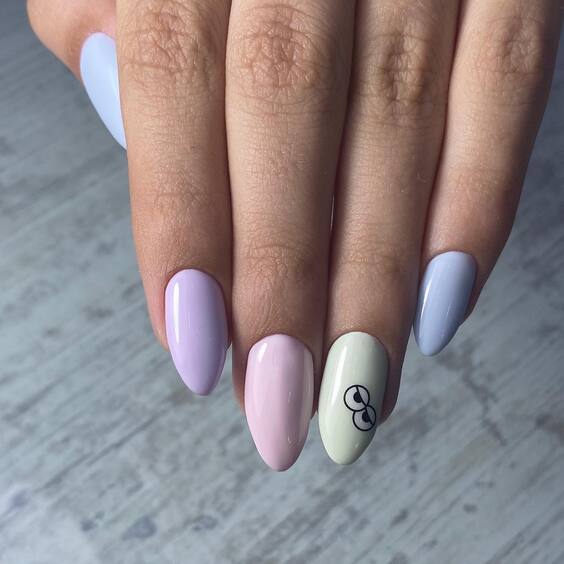
Consumables List:
- Base Coat: Zoya Anchor Base Coat
- Pastel Polishes: Zoya ‘Caitlin’ (lilac), ‘Tiana’ (mint), ‘Dot’ (pink), and ‘Blu’ (light blue)
- Detail Brush (for minimal art)
- Top Coat: Zoya Armor Top Coat Recommendation: Apply each color to a different nail for a harmonious, multi-colored effect, and use a detail brush for precise art work.
DIY Instructions: Begin by applying a base coat to protect the nails. Paint each nail a different pastel shade. For the nail art, use a fine brush to create a simple design such as a small heart or abstract line. Finish with a top coat to seal in the color and art.
Mystical Gradients
The thirteenth image features a stunning gradient from a soft milky base to a translucent tip, adorned with intricate silver jewelry rings that complement the mystical aesthetic. This manicure offers a modern twist on the French tip, blending seamlessly into the natural nail for a sophisticated, ethereal look.
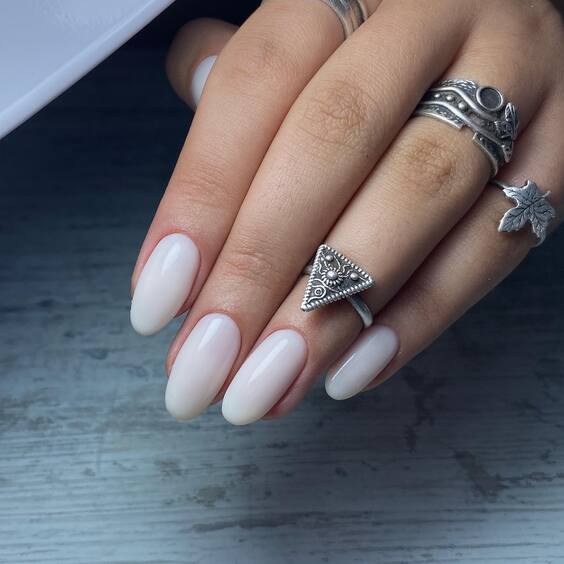
Consumables List:
- Base Coat: Orly Bonder Base Coat
- Sheer Polish: OPI ‘Kyoto Pearl’
- Detail Brush (for precise gradient application)
- Top Coat: Essie Gel Setter Recommendation: For a flawless gradient, use a makeup sponge to lightly dab and blend the polish from the tip towards the base.
DIY Instructions: Start with a protective base coat. Apply a sheer polish as the base color. Then, use a sponge with ‘Kyoto Pearl’ to create a soft gradient effect at the tips. Use a detail brush for any necessary touch-ups. Seal everything with a top coat for a glossy finish and added durability.
Elegant Gold Accents
This look captures the essence of understated luxury with clean, glossy nails highlighted by elegant gold accents. The nails are painted with a sheer nude base and adorned with gold foil and fine line art, creating a design that’s both sophisticated and perfect for special occasions or everyday elegance.
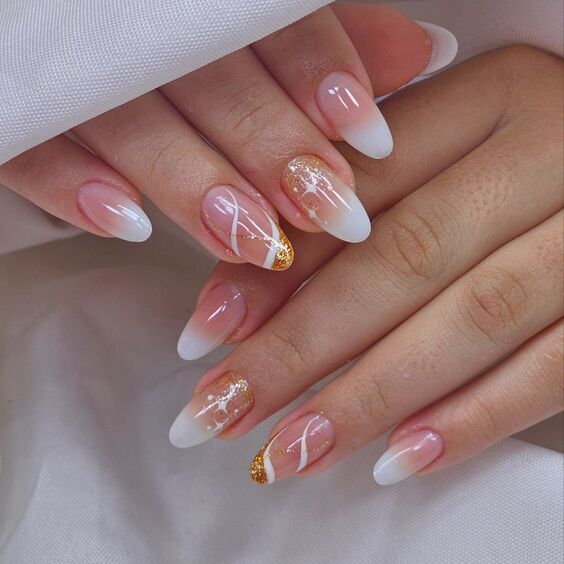
Consumables List:
- Base Coat: Deborah Lippmann Gel Lab Pro Base Coat
- Nude Polish: Essie ‘Tuck it in my Tux’
- Gold Leaf: Nail Art Gold Foil
- Fine Liner Brush
- Top Coat: Chanel Le Gel Coat Longwear Top Coat Recommendation: Apply the gold leaf sparingly for a delicate, luxurious touch.
DIY Instructions: After applying your base coat, paint your nails with two coats of a sheer nude for a clean look. Carefully place pieces of gold leaf on the nails while still tacky. Use a fine liner brush to add subtle lines or designs with gold polish. Finish with a longwear top coat for a glossy, protective layer.
Playful Pink and Glitter
The final image in our series showcases a playful yet elegant nail design featuring a soft pink base paired with bold glitter accents. This manicure is perfect for those who enjoy a bit of sparkle while maintaining an overall sophisticated and understated look. The alternating glitter nails add a dynamic contrast, making this design ideal for both day and evening wear.
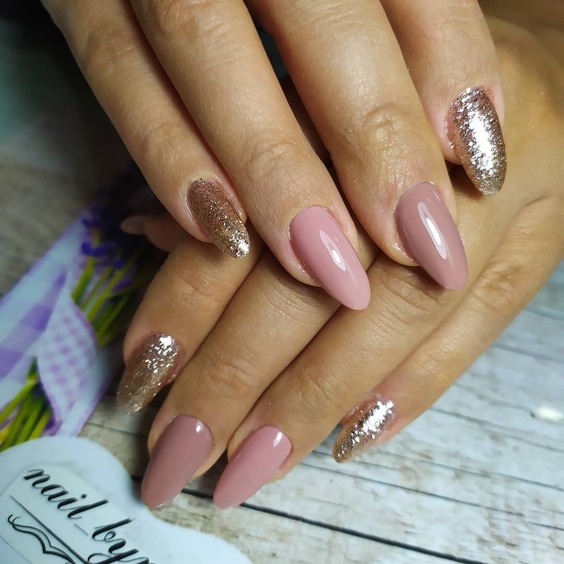
Consumables List:
- Base Coat: Smith & Cult Base Coat
- Pink Polish: Zoya ‘Madison’
- Glitter Polish: Essie ‘A Cut Above’
- Top Coat: Smith & Cult Above it All Top Coat Recommendation: For the glitter nails, consider using a sponge to apply the glitter more densely.
DIY Instructions: Apply a base coat to protect your nails and ensure smooth polish application. Paint all nails with two coats of ‘Madison’. For the glitter nails, apply ‘A Cut Above’ using a sponge to pack the glitter on for full coverage. Finish with a top coat for lasting shine and protection.
Sparkling Sophistication
This design from the sixteenth image radiates elegance with a base of subtle shimmer and bold, golden accents that create a luxurious appeal. The nails are painted with a glitter-infused polish that catches the light beautifully, ideal for evenings or special occasions where a touch of glamor is essential.
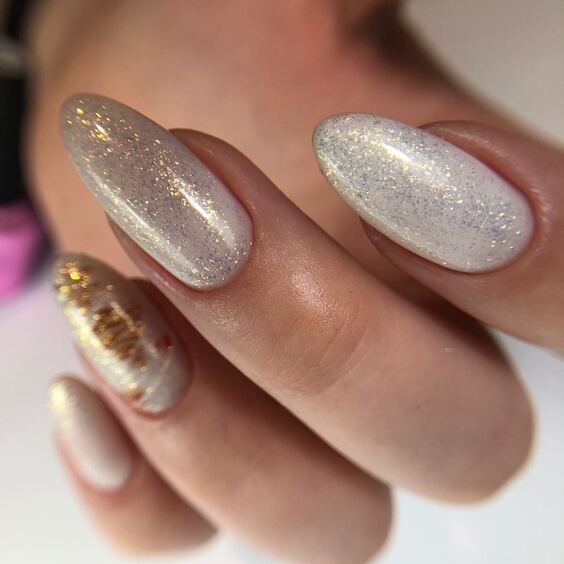
Consumables List:
- Base Coat: Essie Strong Start
- Glitter Polish: OPI ‘Champagne for Breakfast’
- Gold Polish: Sally Hansen ‘Golden-I’
- Top Coat: INM Out the Door Top Coat Recommendation: Layer the glitter polish to achieve the desired sparkle and use tape to create clean lines for the gold accents.
DIY Instructions: Begin with a base coat to protect your nails. Apply two coats of ‘Champagne for Breakfast’ for a shimmering base. Use tape to section off areas for the gold polish, apply ‘Golden-I’, and carefully remove the tape while the polish is still tacky. Finish with a fast-drying top coat to seal and add gloss.
Playful Pastel Confetti
The seventeenth image brings a playful twist to the nude nail trend with a clear polish base sprinkled with colorful pastel confetti. This design is cheerful and fun, perfect for casual outings or seasonal events like spring festivals or summer picnics.
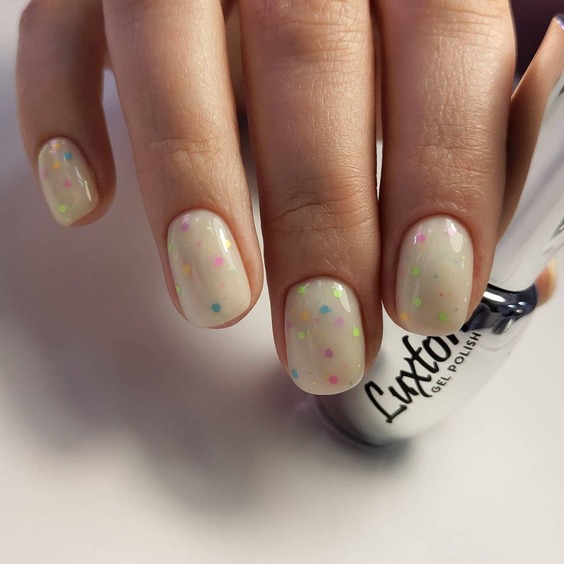
Consumables List:
- Base Coat: OPI Natural Nail Base Coat
- Clear Polish: Seche Clear
- Confetti Polish: Ciate ‘Confetti’
- Top Coat: Seche Vite Dry Fast Top Coat Recommendation: Apply the confetti polish sparingly to avoid clumping and maintain a playful, scattered effect.
DIY Instructions: Start with a protective base coat. Apply one coat of Seche Clear for a natural nail look. Then, layer ‘Confetti’ to add colorful dots, ensuring even distribution. Complete your look with a top coat to smooth out the texture and enhance durability.
Vibrant Contrast
The final image in our series features a bold and bright contrast using vibrant pink and orange swirls over a solid pink base. This dynamic and modern design is an excellent choice for someone looking to make a statement with their nails, combining fun with chic in a striking way.
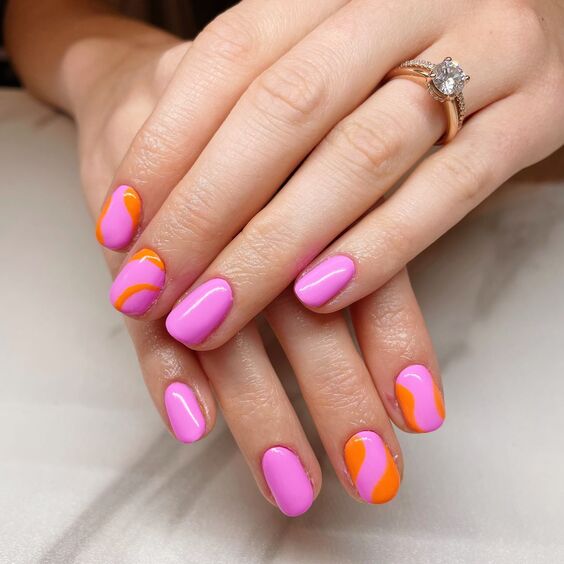
Consumables List:
- Base Coat: Zoya Anchor Base Coat
- Pink Polish: Essie ‘Mod Square’
- Orange Polish: OPI ‘Cajun Shrimp’
- Detail Brush
- Top Coat: Zoya Armor Top Coat Recommendation: Use a detail brush for precise swirls and opt for vibrant colors that complement each other well.
DIY Instructions: Apply a base coat to prepare your nails. Paint all nails with ‘Mod Square’ as the base color. Once dry, use ‘Cajun Shrimp’ with a detail brush to create bold swirls over the pink base. Ensure the lines are smooth and flowing. Seal with a top coat for a glossy finish and to protect your design.
Mint Gold Elegance
The final image showcases a sophisticated mint green manicure accentuated with delicate gold leaf on the ring finger. This elegant design combines the fresh, calming hue of mint with the luxurious touch of gold, creating a look that’s both modern and timeless. The pointed nail shape further enhances the chic appeal of this manicure.
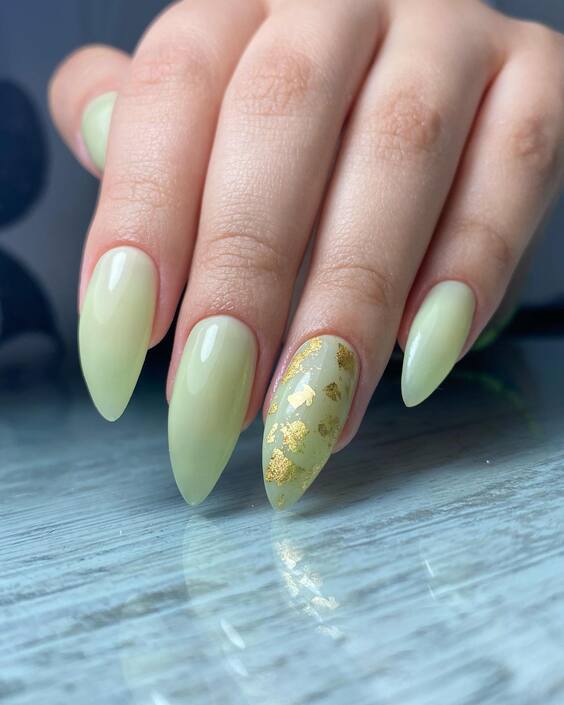
Consumables List:
- Base Coat: Orly Bonder Base Coat
- Mint Polish: Essie ‘Mint Candy Apple’
- Gold Leaf: Nail Art Gold Foil
- Top Coat: Sally Hansen Miracle Gel Top Coat Recommendation: Ensure the gold leaf is applied while the polish is still tacky for better adherence and smooth out any rough edges with a top coat.
DIY Instructions: Start by applying a base coat to your clean, filed nails. Apply two coats of ‘Mint Candy Apple’ for an opaque mint base. On the ring finger, carefully place pieces of gold leaf while the polish is still tacky, using tweezers for precision. Seal the design with a top coat, ensuring a glossy and durable finish.

