20 Stunning Funny Bunny Nail Color Designs for Every Occasion!
Exquisite Elegance in Simplicity
The funny bunny nail color exudes a pristine charm, ideal for those who adore minimalism with a touch of sophistication. In this design, the nails are coated in a uniform funny bunny nail color, providing a perfect backdrop for a subtle, yet striking, chrome accent on the ring finger. This choice not only highlights the clean beauty of funny bunny but also adds a contemporary twist to a classic look.
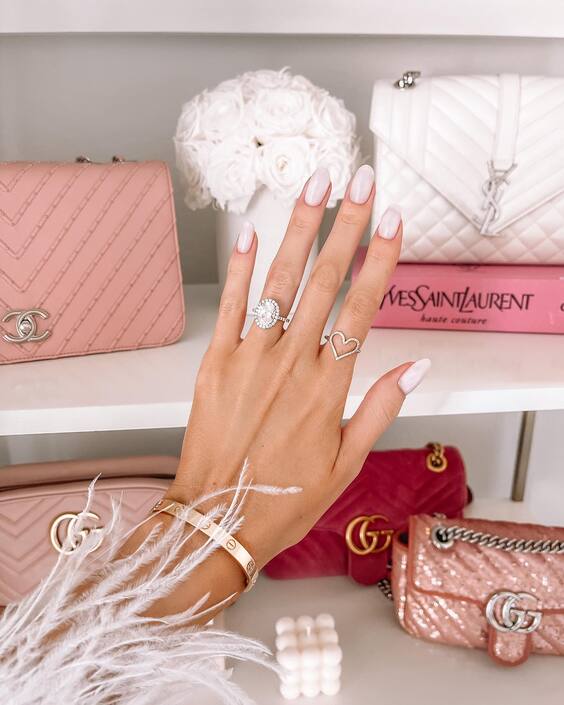
- Consumables:
- OPI Funny Bunny nail color
- Chrome powder for accent
- Top coat for a glossy finish
DIY Tips: To achieve this chic look, start with a clean, buffed nail surface. Apply two coats of OPI Funny Bunny gel for a smooth, opaque appearance. For the chrome accent, gently dab chrome powder onto the tacky layer of the ring finger nail before sealing it with a top coat. This will ensure durability and a mirror-like finish.
Dynamic Duo: Funny Bunny and Bubble Bath
This manicure showcases a delightful pairing of funny bunny and bubble bath nail color. The design cleverly uses both shades to create a subtle contrast, perfect for any season. The funny bunny serves as the base, while bubble bath accents are used to add depth and interest through delicate striping.
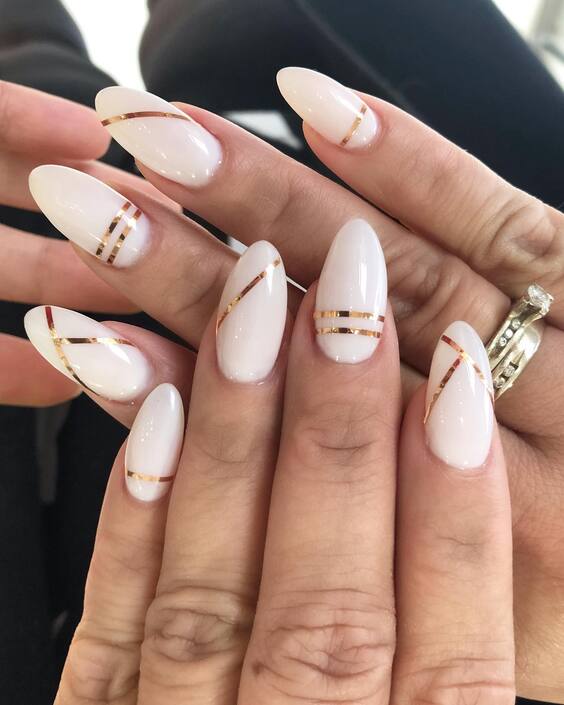
- Consumables:
- OPI Funny Bunny nail color
- OPI Bubble Bath nail color
- Thin striping tape
- Top coat for sealing
DIY Tips: Begin with a base of funny bunny. Once dry, use striping tape to outline where you want the bubble bath accents. Paint the accents carefully, remove the tape while the polish is still wet, and finish with a clear top coat to protect your design.
Sophisticated Sparkle with Funny Bunny
Here, funny bunny nail color dip takes center stage, enhanced by a sprinkle of glitter along the cuticle line, creating a luxurious yet understated look. The dip powder technique ensures a flawless, long-lasting finish, perfect for those looking for durability alongside elegance.
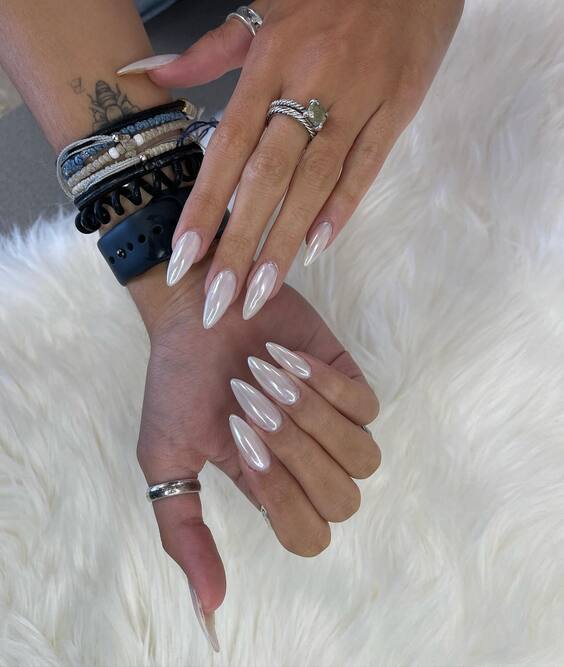
- Consumables:
- Funny Bunny dip powder
- Silver glitter
- Dip base and top coat
DIY Tips: Prepare your nails with a base coat specific for dip powders. Apply a layer of funny bunny dip powder, followed by a second coat. Before the second coat dries, sprinkle silver glitter towards the cuticle for a gradient effect. Seal with a dip top coat for a smooth, enduring finish.
Artistic Flair with Funny Bunny
The playful and artistic charm of funny bunny nail color is showcased spectacularly in this manicure. Each nail features a unique face design, blending abstract art with manicure in a captivating way. The use of funny bunny as a base allows the vivid colors of the faces to stand out, making each nail a canvas of expression.
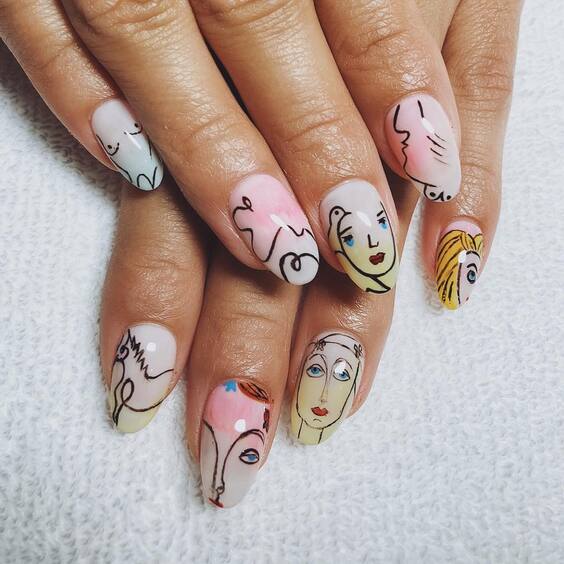
- Consumables:
- OPI Funny Bunny nail color as the base
- Acrylic paints for the face designs
- Fine detail brushes
- Top coat for a lasting finish
DIY Tips: Start with two layers of funny bunny for a solid base. Use fine brushes and acrylic paint to add each face detail. Be patient as you work on the smaller elements. Finish with a clear top coat to seal and protect your artwork.
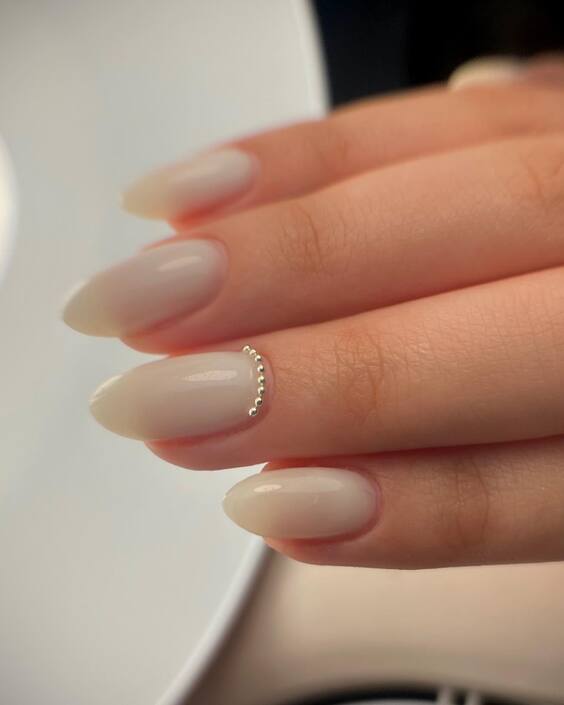
Subtle Elegance: Funny Bunny with Gem Accents
This design elevates the funny bunny nail color with the subtle addition of a gem accent on the cuticle of one nail, adding a touch of glamour without overwhelming the simplicity of the color. This look is perfect for those who prefer a hint of luxury while maintaining an air of understated chic.
- Consumables:
- OPI Funny Bunny gel color
- Small nail gems
- Gem glue
- Glossy top coat
DIY Tips: Apply a base of funny bunny gel color. Once dry, use a tiny dab of glue to place a gem at the cuticle of your chosen nail. It’s crucial to apply a final top coat over the gem to secure it in place, ensuring it doesn’t catch on fabrics.
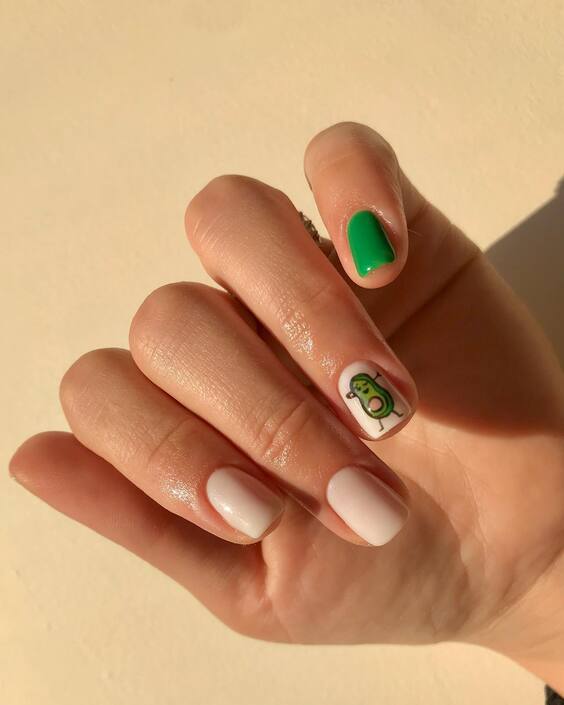
Funny Bunny in Seasonal Contrast
Here, funny bunny nail color is used in a delightful seasonal contrast, paired with a vibrant green to celebrate perhaps spring or summer vibes. The addition of a cute turtle decal on one nail is a whimsical touch that brings a smile, perfectly balancing the simplicity of funny bunny with a pop of color.
- Consumables:
- OPI Funny Bunny nail color
- Bright green polish for contrast
- Turtle nail decal
- Top coat for protection
DIY Tips: Paint most nails with funny bunny. Select a nail for a green accent and apply two coats for opacity. Once dry, apply the turtle decal on the green nail, ensuring it’s flat against the polish. Seal all nails with a clear top coat to enhance durability and shine.
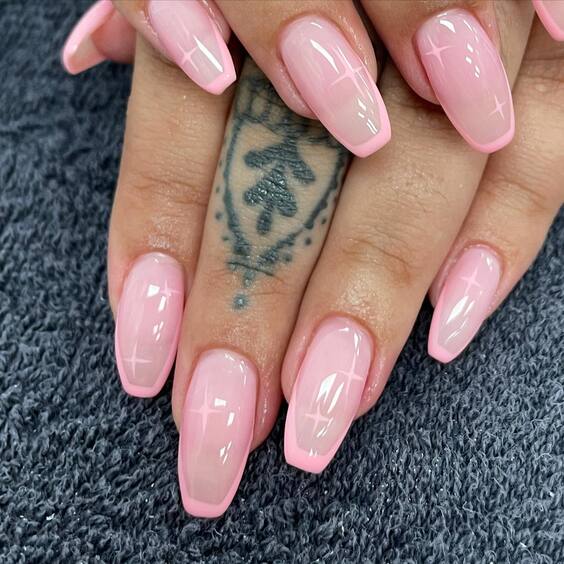
Polished Pink Perfection
This manicure showcases a flawless application of a pink hue that closely mirrors the funny bunny nail color, enhanced by a high gloss finish that gives it a fresh and lively look. The seamless blend of natural pink tones with the precision of a professional gel application demonstrates the adaptability of funny bunny for everyday elegance.
- Consumables:
- Funny Bunny gel color or similar soft pink gel
- High gloss top coat
DIY Tips: For a flawless finish, start by applying a base coat to protect your natural nails. Follow with two coats of your chosen soft pink gel. Each coat should be cured under a UV light for durability. Finish with a high gloss top coat to achieve that enviable shine.
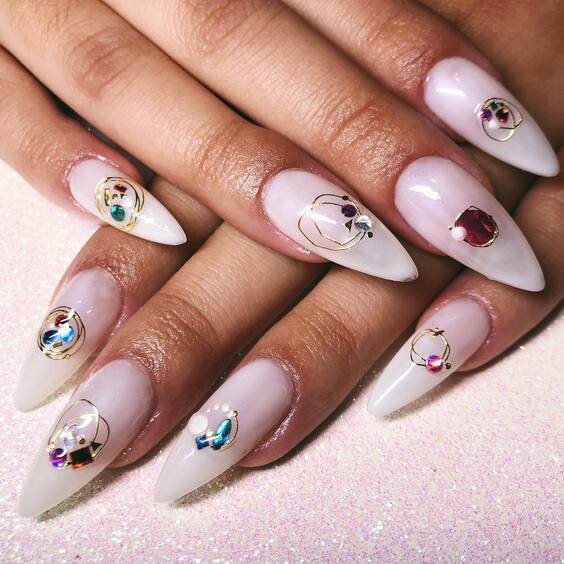
Elegant Embellishments on Funny Bunny
Here, the funny bunny nail color is elevated with delicate embellishments, including jewels and artistic decals. This design transforms the nails into a statement of luxury and creativity, perfectly blending subtle funny bunny tones with bold accents.
- Consumables:
- Funny Bunny base color
- Assorted nail jewels and decals
- Fine-tip tweezers for application
- Gel top coat to seal the design
DIY Tips: Apply a base of funny bunny. Once it’s cured, use tweezers to carefully place jewels and decals on the nails. Consider using a dot of gel polish as glue for the jewels before curing again. Finish with a gel top coat to ensure everything stays in place and retains its luster.
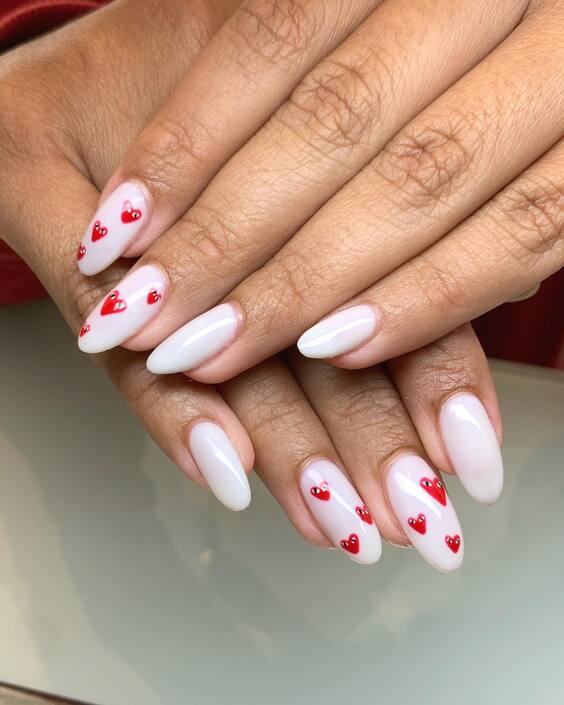
Romantic Red Hearts on Funny Bunny
This playful design features funny bunny nail color as a soft background for vibrant red hearts, making it a perfect choice for romantic occasions or just to brighten a casual day. The simplicity of the hearts adds a charming contrast to the understated base, providing a pop of passion against the serene funny bunny.
- Consumables:
- Funny Bunny nail color as the base
- Red nail polish for hearts
- Small brush or toothpick for heart design
- Clear top coat
DIY Tips: Begin with a smooth, even base of funny bunny. Once dry, use a small brush or the tip of a toothpick to paint tiny hearts in red polish. Apply the hearts randomly or in a pattern, depending on your preference. Seal the design with a top coat for durability and gloss.
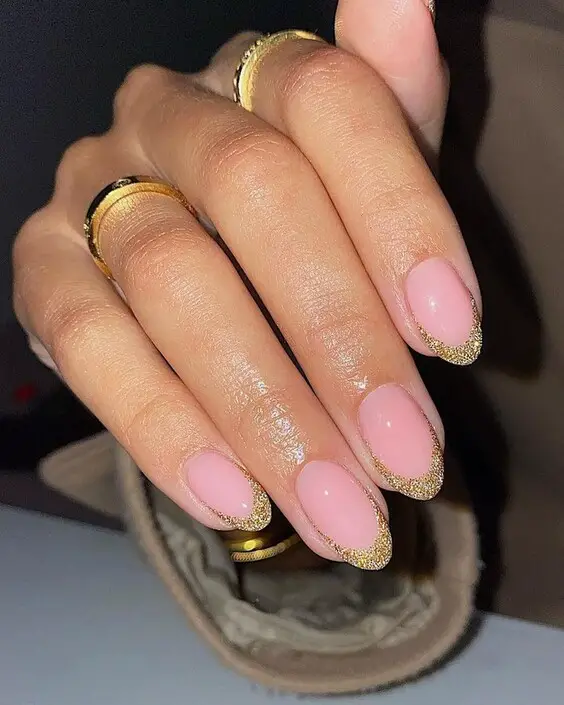
Golden Glamour on Funny Bunny
This design perfectly marries the softness of the funny bunny nail color with the luxurious flair of golden tips. The gradient effect where the gold softly merges into the pink base is not only trendy but also adds a regal touch to the manicure, making it ideal for festive seasons or glamorous events.
- Consumables:
- Funny Bunny nail color
- Gold glitter polish
- Sponge for gradient application
- High gloss top coat
DIY Tips: Paint your nails with funny bunny. Once dry, lightly sponge on the gold glitter polish at the tips, blending towards the middle for a smooth gradient. Finish with a high gloss top coat to enhance the sparkle and ensure longevity.
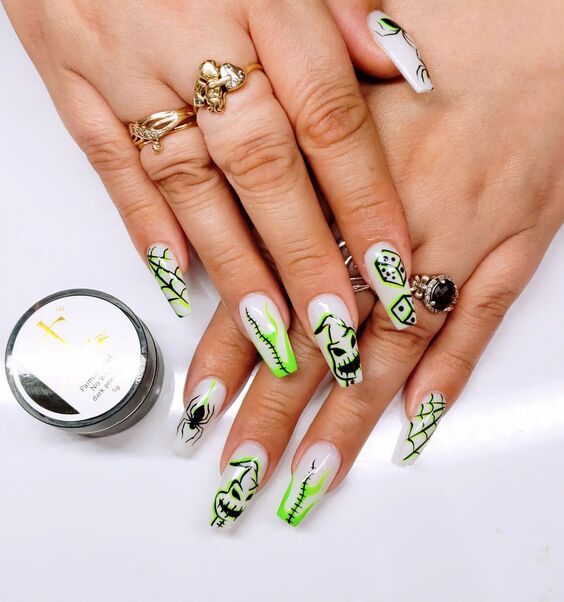
Vivid and Vibrant: Funny Bunny Gets Edgy
Breaking away from its usual subtle charm, this manicure uses funny bunny as a base for dynamic green patterns and funky designs that scream personality and style. This is a great example of how versatile funny bunny can be, perfectly capable of holding its own in a more edgy, graphic nail art design.
- Consumables:
- Funny Bunny as the base color
- Black and green nail art pens
- Top coat for sealing
DIY Tips: Begin with a base coat of funny bunny. Use nail art pens to draw the green and black designs. Allow each layer to dry completely to avoid smudging. Finish with a clear top coat to protect your design and add a professional sheen.
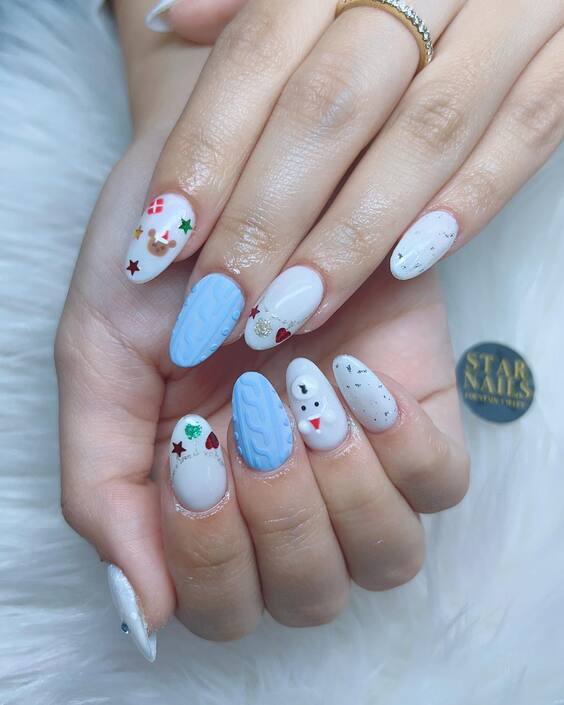
Seasonal Delights with Funny Bunny
This playful design showcases funny bunny in a holiday-themed manicure, perfect for celebrating special occasions. Each nail features a different design, from festive trees to charming snowmen, all laid over a funny bunny base, proving its versatility for themed manicures.
- Consumables:
- Funny Bunny nail color for the base
- Various colors for detailed designs (red, green, blue, black)
- Tiny brushes or dotting tools for precision
- Top coat for a durable finish
DIY Tips: Apply funny bunny as the base color. With a small brush, create each holiday design on different nails. This could involve delicate painting skills for precision and detail. Seal with a top coat to ensure your festive nails remain chip-free throughout the season.
Modern Art Meets Manicure
This nail design introduces a bold, contemporary art style using shades of blue on a funny bunny nail color base. The abstract pattern, reminiscent of modern art paintings, showcases how funny bunny can serve as an excellent canvas for more avant-garde and graphic designs.
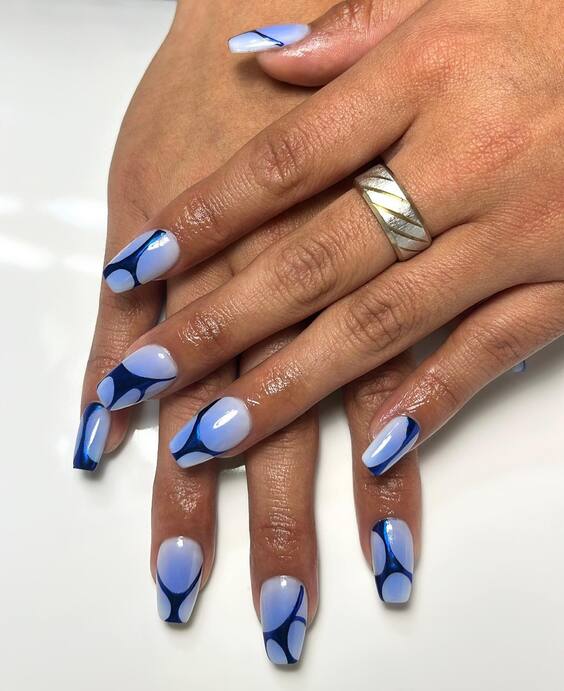
- Consumables:
- Funny Bunny as the base color
- Different shades of blue nail polish
- Thin brushes for detailed art
- Glossy top coat
DIY Tips: Start with a base of funny bunny. Use thin brushes to create abstract patterns with different shades of blue. This design requires a steady hand and a bit of creativity to mimic the flow and blend of colors. Finish with a glossy top coat to enhance the details and ensure durability.
Celestial Dreams on Funny Bunny
This design takes inspiration from the night sky with celestial elements like moons, stars, and clouds, layered over a funny bunny backdrop. The addition of gold accents brings a touch of luxury and mystique, making the nails look like a piece of the starry night.
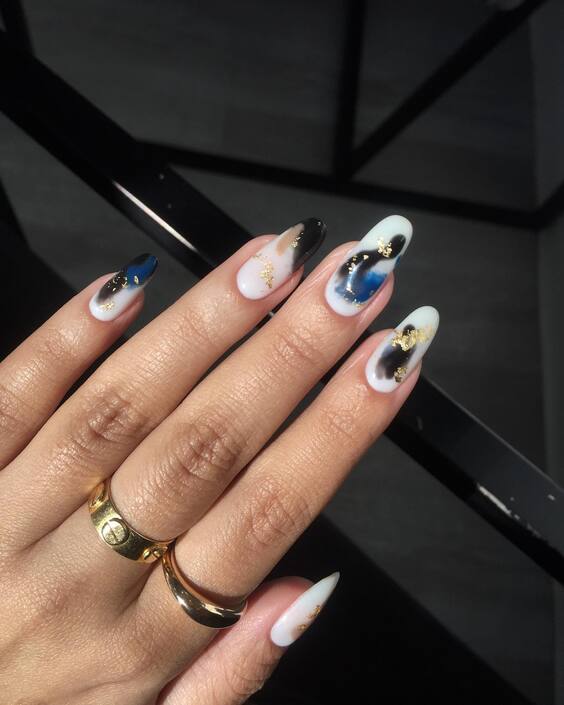
- Consumables:
- Funny Bunny nail color for the base
- White, black, and gold nail polishes for details
- Fine-tip brushes or dotting tools
- Matte or glossy top coat, depending on preference
DIY Tips: Apply funny bunny as the base. With fine brushes, create small celestial designs using white for clouds and moons, black for night sky accents, and gold for stars. Decide whether to finish with a matte or glossy top coat based on the desired effect (matte for a more ethereal look, glossy for vibrance).
Playful Pink and Patterns
This nail design cleverly mixes vibrant pink with playful black and white dalmatian spots over a funny bunny base. It’s a fun, youthful style that combines simplicity with a pop of color, demonstrating the playful versatility of funny bunny.
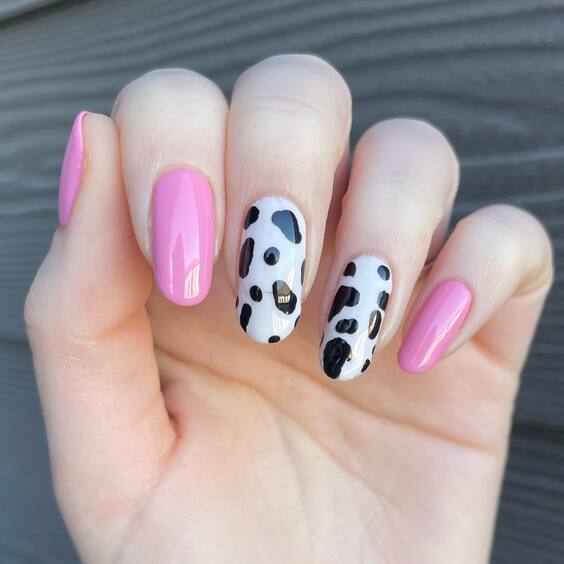
- Consumables:
- Funny Bunny nail color as the base
- Pink nail polish for alternate nails
- Black nail polish for dalmatian spots
- Top coat for sealing and shine
DIY Tips: Paint alternate nails with funny bunny and vibrant pink. On the funny bunny nails, use a small brush or dotting tool to add black dalmatian spots. Be playful with the placement and size of the spots for a more authentic look. Seal with a top coat to protect the design and add a shiny finish.
Sweet Sorbet Swirls
This playful and sweet manicure alternates between vibrant pink and a marbled funny bunny nail color, creating a candy-like appearance. The combination of bold pink with the softer swirls provides a fresh, youthful look, perfect for spring or summer outings.
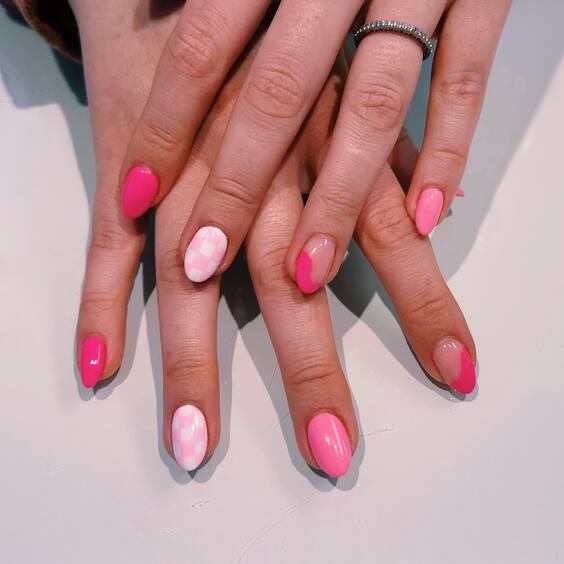
- Consumables:
- Funny Bunny nail color for the base on some nails
- Vibrant pink polish for alternate nails
- Marbling tools
- Top coat for a glossy finish
DIY Tips: Apply funny bunny on some nails and vibrant pink on others. For the marbled effect, drop spots of pink and funny bunny onto a nail and swirl gently with a marbling tool or toothpick. Work quickly to ensure the polishes don’t dry before the design is complete. Seal with a top coat for durability and gloss.
Glimmering Fairy Dust
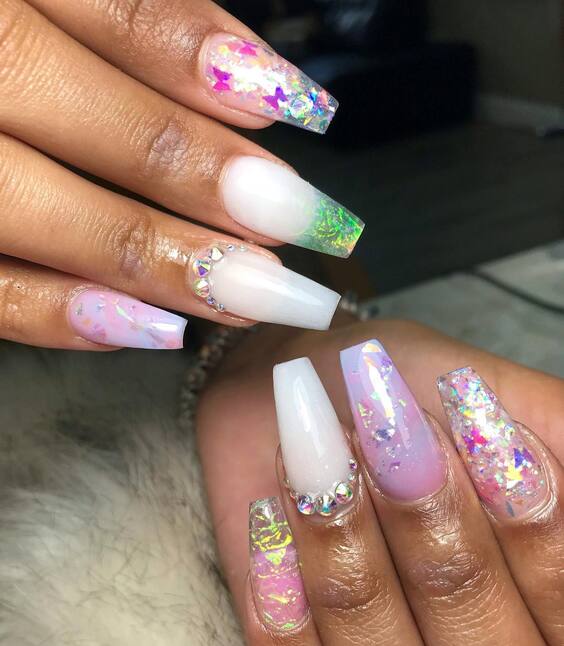
Featuring a magical blend of iridescent flakes and jewels on a funny bunny base, this design captures the essence of a fairy tale. The nails sparkle with a variety of textures and colors, making this look ideal for those who love to stand out with a touch of fantasy and elegance.
- Consumables:
- Funny Bunny as the base color
- Iridescent flakes and various small jewels
- Nail glue for the jewels
- Top coat for sealing and extra shine
DIY Tips: Start with a funny bunny base. While the base is tacky, sprinkle iridescent flakes over the nails. Use nail glue to apply jewels as desired. Complete the look with a thick layer of top coat to ensure the elements stay secure and the nails remain smooth.
Sleek Skyline Strokes
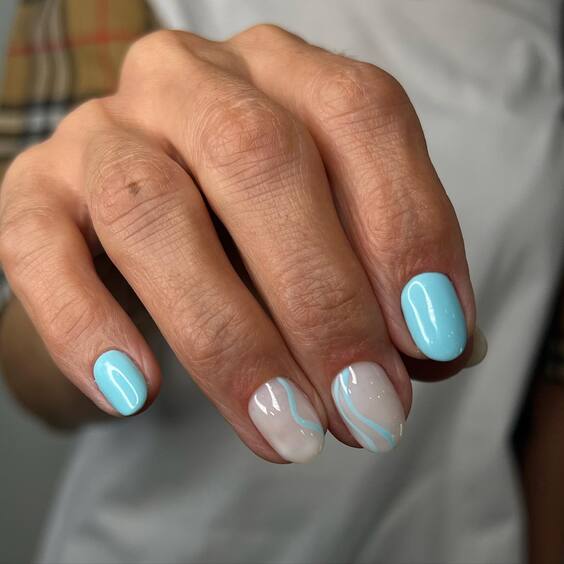
This design incorporates funny bunny nail color with bold strokes of sky blue, creating a minimalist yet striking look. The clean lines mimic a serene skyline, offering a modern twist on traditional nail art.
- Consumables:
- Funny Bunny for the base
- Sky blue nail polish for the strokes
- Thin brush for precision
- Matte or glossy top coat, depending on the desired finish
DIY Tips: Apply a base coat of funny bunny. Using a thin brush, paint sleek, straight lines with sky blue polish. Keep the lines crisp and uniform for a sophisticated appearance. Choose a matte top coat for a contemporary finish or a glossy one for a more traditional shine.
Artistic Elixir Designs
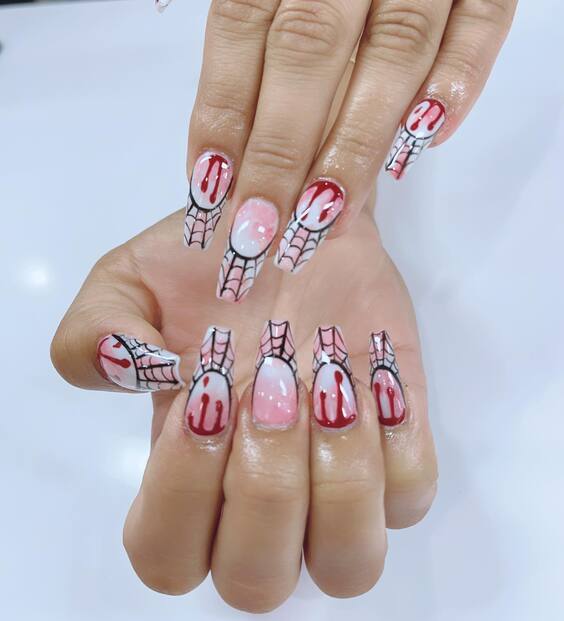
This design showcases a creative mix of nail art that looks almost pharmaceutical, with designs resembling bottles and elixirs on a funny bunny background. The detailed artistry highlights the ability of funny bunny to serve as a subtle base that enhances intricate designs, perfect for thematic events or just to showcase a unique style.
- Consumables:
- Funny Bunny as the base color
- Red and black nail art pens for the details
- Thin brushes for precision
- Glossy top coat for protection and shine
DIY Tips: Begin with a base of funny bunny. Use nail art pens or brushes to draw the elixir bottles and their contents with high precision. This design demands steady hands and patience to capture all the fine details accurately. Finish with a glossy top coat to make the artwork pop and to protect your nails.
Flowing Rivers of Color
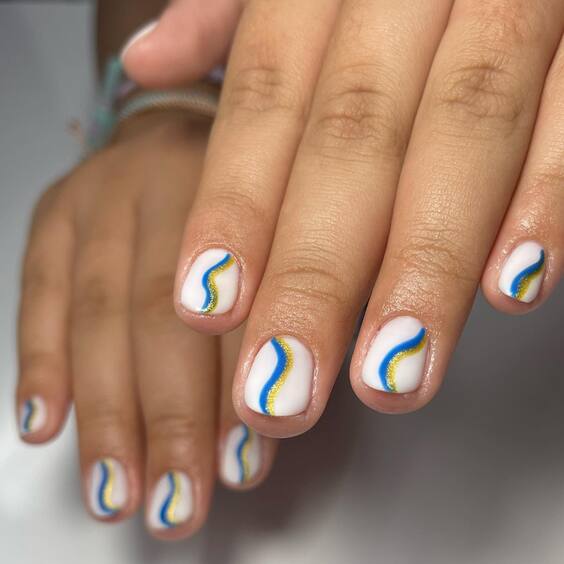
This minimalist yet colorful design features smooth, flowing lines in blue, yellow, and gold on a funny bunny base. The simplicity of the curves contrasted against the vibrant colors offers a modern look that’s both refreshing and stylish, ideal for those who prefer a subtle yet colorful manicure.
- Consumables:
- Funny Bunny nail color as the base
- Blue, yellow, and gold nail polish for the lines
- Fine brush or striping tape for clean lines
- Matte or glossy top coat, based on preference
DIY Tips: Apply funny bunny as the base color. Using a fine brush or striping tape, create smooth, flowing lines with your chosen colors. The key to this design is the smoothness and fluidity of the lines, so take your time to ensure they are perfect. Decide on a matte finish for a modern look or a glossy finish for a more traditional shine.
Conclusion
Throughout this exploration of funny bunny nail color, we’ve seen its incredible adaptability and how it serves as a perfect foundation for both understated elegance and elaborate artwork. Each design discussed provides not only visual delight but also practical guidance on recreating these styles. Embrace the versatility of funny bunny to express your personal style and creativity. Whether you’re at a professional salon or experimenting at home, funny bunny is sure to enhance your manicure repertoire with its timeless charm and boundless potential.

