20 Stunning Yellow Fall Nail Designs for a Vibrant Autumn Look
Elegant Ombre Yellow Fall Nails
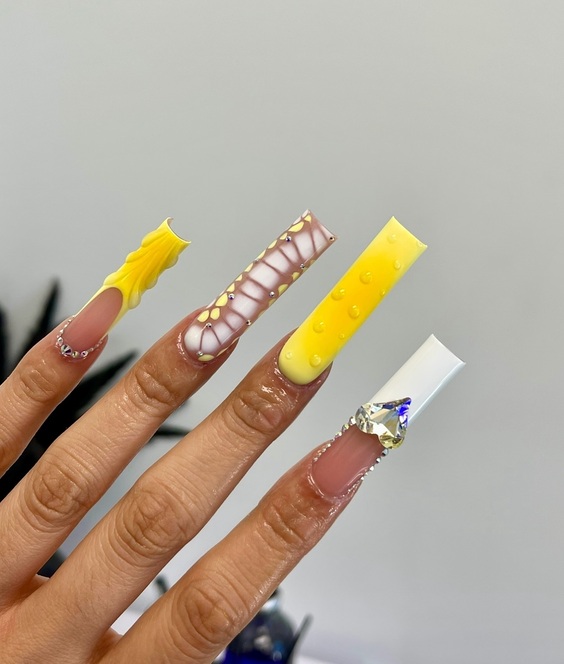
The first design captures the essence of fall with a gorgeous ombre yellow fall nails transition. Starting with a rich, creamy yellow at the tips and fading into a soft, almost translucent hue near the cuticles, this design is both sophisticated and playful. The smooth gradient effect is meticulously applied, showcasing a high level of craftsmanship. The overall look is refreshing and perfectly suited for both everyday wear and special autumn events.
Consumables List
- Base coat: Essie Here to Stay
- Yellow polish: OPI ‘Don’t Tell a Sol’
- Top coat: Seche Vite Dry Fast Top Coat
- Sponge (for the ombre effect)
Professional Tip: For the best ombre effect, use a makeup sponge to dab the darker shade at the tip, blending it downwards to achieve a flawless gradient.
DIY Instructions
Begin with a clean, dry nail and apply a base coat to protect your nails. Apply a light yellow polish as the base color. Then, take your sponge and apply a small amount of the darker yellow polish to the edge. Dab the sponge lightly starting from the tip, moving downward to create the ombre effect. Seal your design with a top coat for a glossy finish and added durability.
Yellow Fall Nail Designs with Star Accents
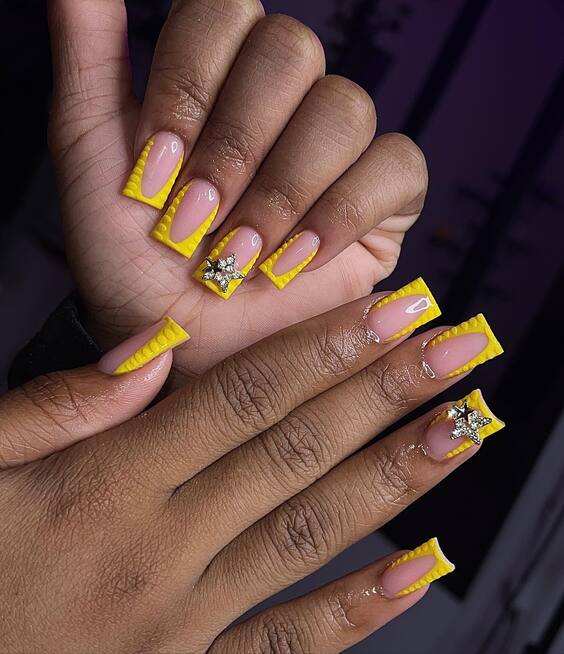
This vibrant yellow fall nail design features bold yellow as a backdrop with striking white stars as accents. The stars are placed strategically to catch the eye, making this design a standout choice for those who love to make a statement. The glossy finish enhances the vibrancy of the yellow, making it a perfect match for fall accessories.
Consumables List
- Base coat: OPI Natural Nail Base Coat
- Yellow polish: Sally Hansen ‘Mellow Yellow’
- White polish for stars: China Glaze ‘White on White’
- Detailing brush
- Top coat: Sally Hansen Miracle Gel Top Coat
Professional Tip: Use a fine detailing brush to paint the stars. Practice on a paper before applying to the nails to ensure precision.
DIY Instructions
Apply a base coat to protect your nails and ensure a smooth surface. Once dry, apply two coats of your chosen yellow polish. Using a detailing brush dipped in white polish, draw small stars on each nail. Try to vary the size and placement for a dynamic look. Finish with a top coat to protect your design and add a shine that lasts.
Classic Yellow with Minimalist Art
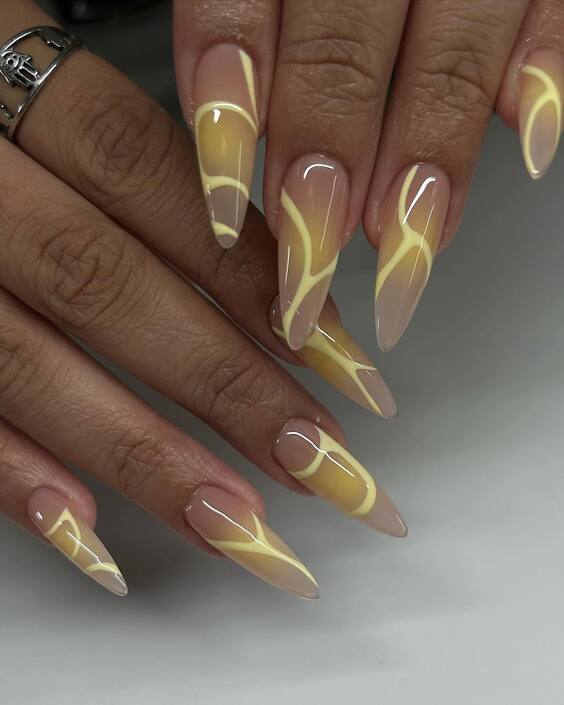
For those who adore simplicity with a twist, this nail design uses a classic fall yellow nail color adorned with subtle minimalist art. The artwork in white adds a modern touch to the traditional yellow, creating an elegant yet understated look. This style is perfect for professionals who prefer a clean, polished appearance with a hint of creativity.
Consumables List
- Base coat: CND Stickey Base Coat
- Yellow polish: Essie ‘Aim to Misbehave’
- White art polish: Nails Inc. Nailkale in ‘Montpelier Walk’
- Thin art brush
- Top coat: CND Vinylux Weekly Top Coat
Professional Tip: Keep your brush strokes light and fluid for the minimalist designs to ensure they don’t overpower the base yellow.
DIY Instructions
Start with a base coat to protect your nails. Apply two coats of yellow polish for a vibrant base. Dip your thin art brush in white polish and gently draw geometric shapes or thin lines according to your preference. Allow the art to dry completely before applying a top coat to seal in the design and enhance durability.
Playful Yellow and White Patterned Nails
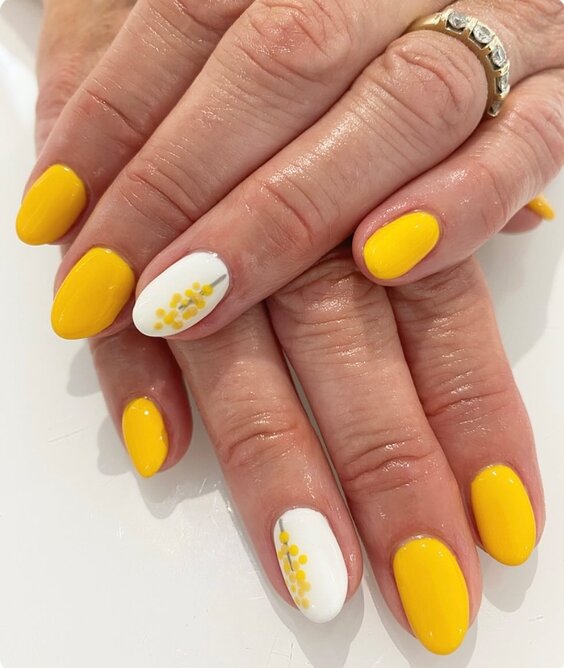
This delightful nail design combines solid yellow fall nail color with a creative white pattern on a single accent nail. The yellow is bold and eye-catching, perfect for capturing the essence of autumn’s energy, while the white pattern adds a unique touch, resembling small autumn flowers or abstract dots, enhancing the playfulness of the manicure.
Consumables List
- Base coat: Deborah Lippmann Hard Rock
- Yellow polish: China Glaze ‘Sun Worshiper’
- White polish for designs: OPI ‘Alpine Snow’
- Detailing tool or dotting tool
- Top coat: Butter London Hardwear P.D. Quick Topcoat
Professional Tip: When creating patterns, use a dotting tool for precision. This tool helps in making perfect dots or small patterns without much effort.
DIY Instructions
Apply a base coat to ensure your nails are protected and the polish adheres well. Paint all nails except for one on each hand with the bright yellow polish. On the accent nails, use a dotting tool to apply the white polish in your desired pattern. Finish with a top coat to seal in the design and add a brilliant shine.
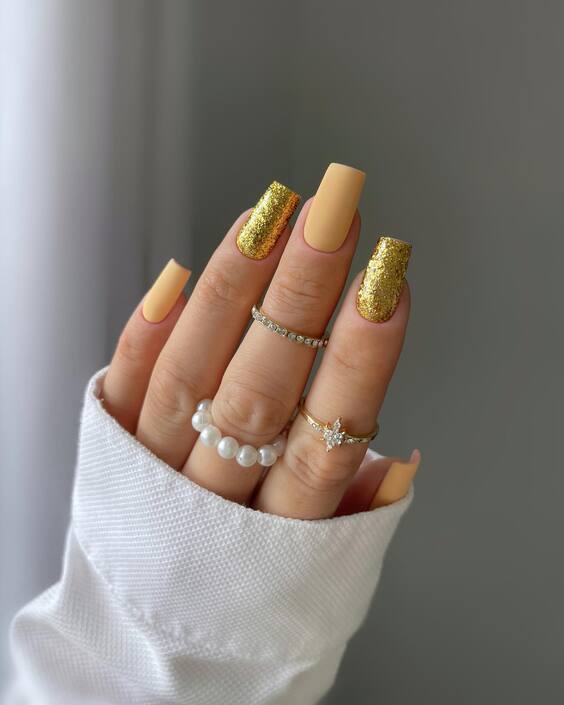
Sophisticated Matte and Glitter Combination
This design brilliantly uses matte yellow fall nail designs as a base while incorporating gold glitter nails that add a luxurious feel. The contrast between the matte and glitter creates a sophisticated look, ideal for those who want to blend boldness with class. The gold glitter not only complements the matte yellow but also adds a festive touch, making it suitable for both day and night events during the fall.
Consumables List
- Base coat: Zoya Anchor Base Coat
- Yellow matte polish: Sally Hansen ‘Mellow Yellow’ Matte
- Gold glitter polish: Essie ‘Rock at the Top’
- Matte top coat: Essie Matte About You
- Glossy top coat for glitter nails: Revlon Extra Life No Chip Top Coat
Professional Tip: Apply two coats of matte yellow polish for a more opaque finish. For the glitter nails, use a sponge to dab on the glitter polish; this technique helps to pack the glitter densely, achieving a more pronounced effect.
DIY Instructions
Start with a base coat to protect your nails. Apply two coats of the yellow matte polish on all nails except for the chosen accent nails. On these, apply a base of the same yellow matte and then dab gold glitter polish using a sponge for dense coverage. Apply a matte top coat on the yellow nails and a glossy top coat on the glitter nails to enhance their sparkle.
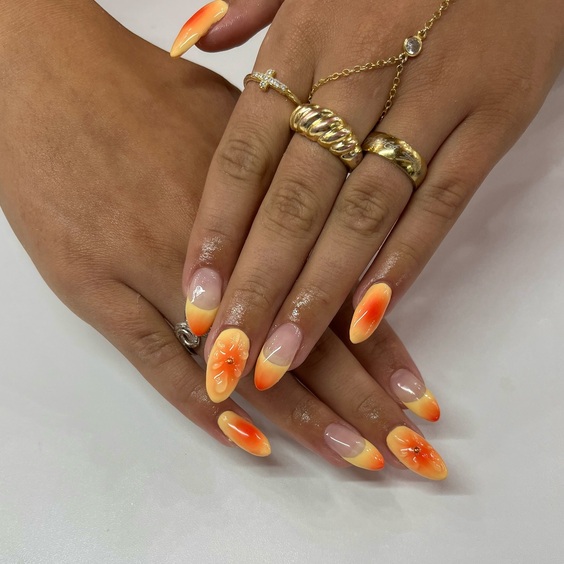
Gradient Orange and Yellow Fall Nails
This stunning ombre yellow fall nails design seamlessly blends orange and yellow, capturing the warm tones of a fall sunset. The gradient creates a soft transition from a deep, fiery orange at the tips to a bright, sunny yellow at the base, mimicking the natural colors of the season.
Consumables List
- Base coat: ORLY Bonder Rubberized Basecoat
- Orange polish: OPI ‘Yank My Doodle’
- Yellow polish: Orly ‘Glowstick’
- Sponge for gradient
- Top coat: CND Vinylux Long Wear Top Coat
Professional Tip: For a smooth gradient, the key is blending while both shades are still wet on the sponge, so work quickly to apply the polish to the nail before it dries.
DIY Instructions
Apply a base coat to protect your nails from staining. Paint a base layer with the lighter yellow polish. Then, on a makeup sponge, apply lines of orange and yellow polish next to each other, and dab onto the nail, gently pressing to blend the colors at the meeting point. Repeat until you achieve the desired intensity of color. Finish with a top coat to smooth out the gradient and add shine.
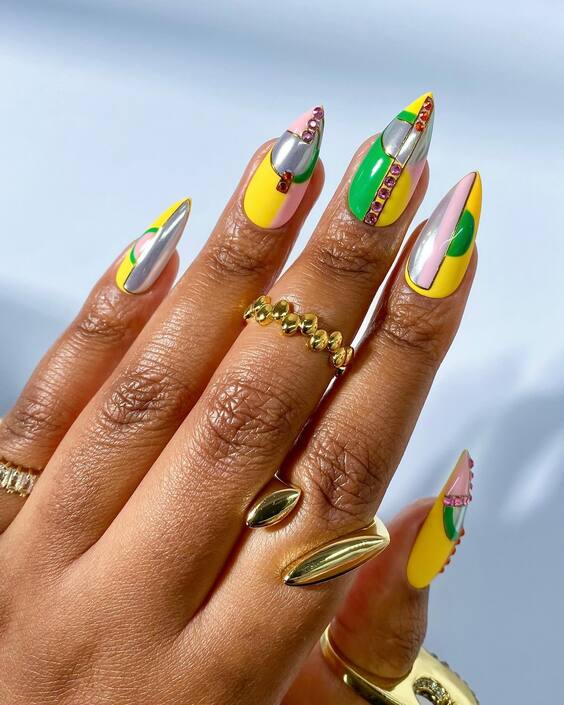
Artistic Multi-Design Yellow Fall Nails
These nails are a masterpiece of creativity, showcasing a complex mix of designs that incorporate yellow fall nail ideas along with green, pink, and silver hues. The arrangement includes patterns and embellishments, such as jewels and metallic accents, which provide a vivid and dynamic appearance. This look is perfect for those who love to express their unique style and aren’t afraid to stand out.
Consumables List
- Base coat: ORLY Bonder Rubberized Basecoat
- Yellow polish: OPI ‘Sunrise to Sunset’
- Green polish: Essie ‘Mojito Madness’
- Pink polish: Zoya ‘Dana’
- Silver metallic polish: Revlon ‘Silver Dollar’
- Nail jewels and metallic studs
- Top coat: INM Out the Door Fast Drying Top Coat
Professional Tip: Placement of the jewels and metallic studs should be done with tweezers for precision, and a dot of clear polish should be used as glue for better adherence.
DIY Instructions
Start with a base coat to protect your nails. Apply the base colors as desired, then carefully paint the designs using a fine brush or striping tape. Place jewels or metallic studs where you want them, using a tiny dab of clear polish to adhere each piece. Finish with a clear top coat to seal in your design and add extra shine.
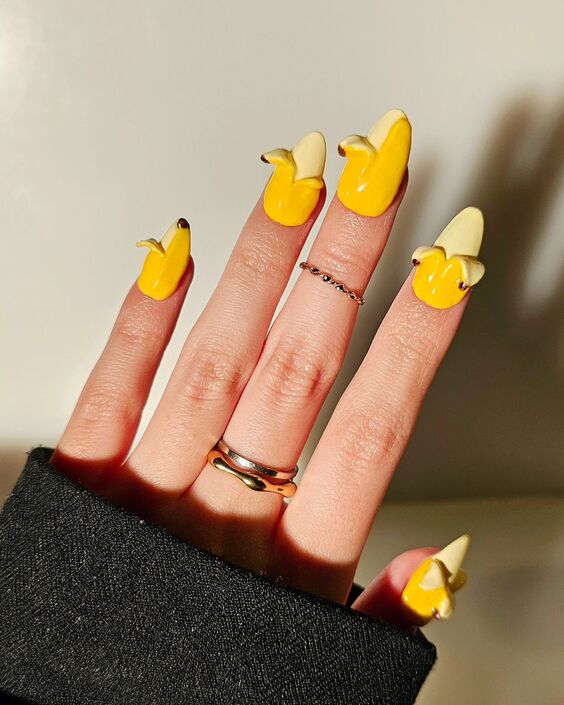
Fun Yellow Banana Tip Nails
This playful design features bold yellow tips shaped like bananas, adding a whimsical touch to your nail art. It’s a fun take on fall yellow nail designs, ideal for those who enjoy playful and imaginative styles. The banana tips are eye-catching and unique, sure to spark conversations and bring a smile.
Consumables List
- Base coat: CND Stickey Base Coat
- Yellow polish: Sinful Colors ‘Let’s Meet’
- Detailing brush for shaping bananas
- Top coat: Essie Gel Setter Top Coat
Professional Tip: For shaping the banana tips, use a detailing brush to outline the shape before filling it in. This ensures a more precise and clean design.
DIY Instructions
Apply a base coat to protect your nails and provide a sticky surface for longer polish life. Paint the entire nail with a clear or nude polish as the base. Using yellow polish and a detailing brush, carefully draw and fill in the banana shape on each tip. Seal the design with a top coat to ensure durability and gloss.
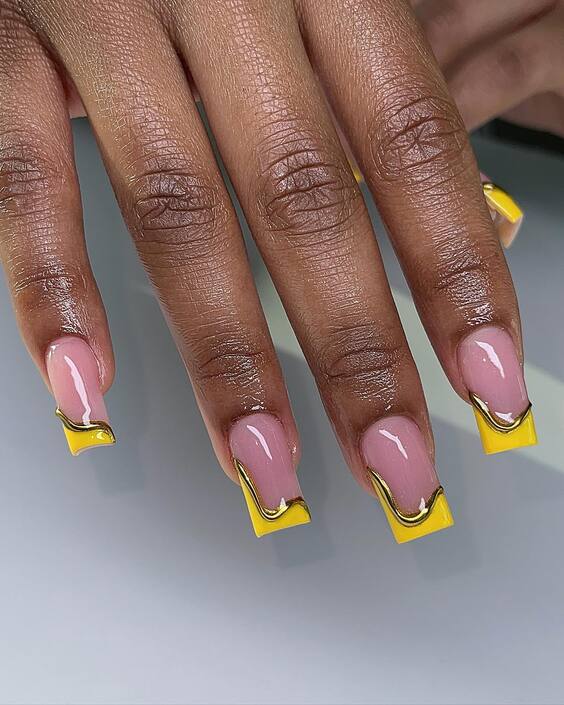
Minimalist Yellow French Tips
The minimalist yellow French tips are a subtle yet stylish way to wear fall yellow nail color. This design modernizes the classic French manicure by using a vibrant yellow on the tips, which adds a pop of color while keeping the overall look sophisticated and clean. It’s perfect for those who prefer understated elegance.
Consumables List
- Base coat: OPI Natural Nail Base Coat
- Yellow polish for tips: Chanel ‘Giallo Napoli’
- Sheer pink or nude polish for the base
- Top coat: Dior Gel Top Coat
Professional Tip: For a crisp line, use French tip guides or a steady hand with a striping brush to apply the yellow polish precisely.
DIY Instructions
Begin with a base coat to protect your nails. Apply a sheer pink or nude polish as the base color. Once dry, carefully apply the yellow polish on the tips, using French tip guides or freehand with a steady hand. Finish with a top coat to enhance shine and prolong wear.
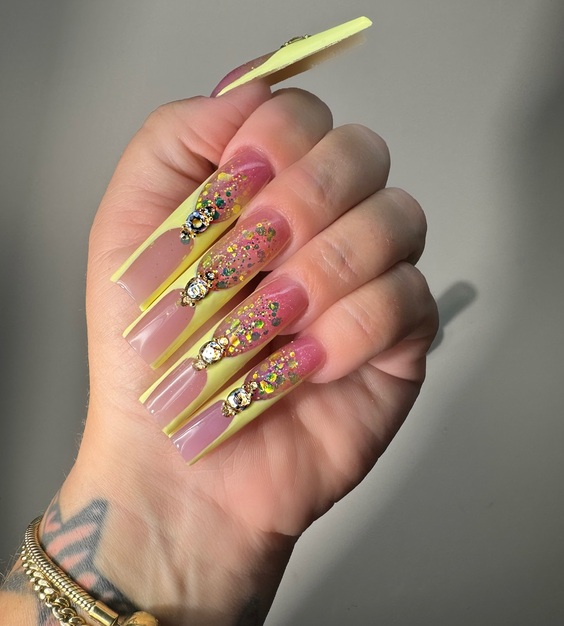
Glitter and Glam Yellow Fall Nails
This nail design is a true celebration of sparkle and flair, combining yellow fall nail ideas with pink undertones and lavish glitter accents. The long, tapered nails are coated with a soft yellow and pink gradient, embellished with sparkling stones and sequins that catch the light beautifully. It’s a festive choice for those special autumn gatherings where you want to shine.
Consumables List
- Base coat: Sally Hansen Miracle Cure
- Yellow polish: Essie ‘Chillato’
- Pink polish: Essie ‘Muchi, Muchi’
- Glitter and sequins mix
- Gem glue
- Top coat: OPI Top Coat
Professional Tip: Apply gem glue sparingly to secure the stones and sequins without the adhesive being too visible.
DIY Instructions
After applying a base coat, blend the yellow and pink polishes to create a smooth gradient. While the polish is still tacky, strategically place glitter and sequins using a picking tool for precision. Apply gem glue where necessary to attach larger stones. Finish with a high-gloss top coat to seal and protect your design.
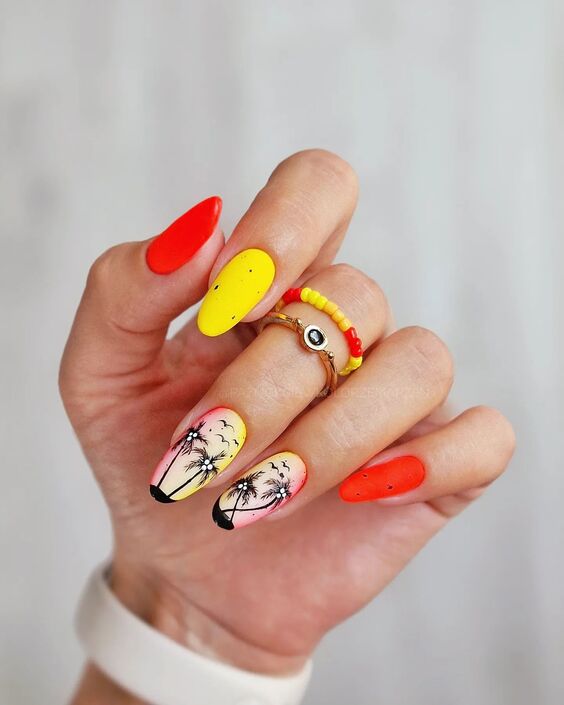
Tropical Beach-Themed Nails
These nails are perfect for the end of summer transitioning into fall, featuring a vibrant display of yellow fall nail designs with beach-themed art. The nails alternate between solid yellow and beach-inspired designs with palm trees silhouetted against a sunset. The playful theme is a great way to hold onto summer memories while welcoming the fall season.
Consumables List
- Base coat: CND Vinylux Long Wear Base Coat
- Yellow polish: China Glaze ‘Sun Upon My Skin’
- Black polish for silhouettes: OPI ‘Black Onyx’
- Sunset colors: various shades of red and orange
- Detailing brush
- Top coat: Seche Vite Dry Fast Top Coat
Professional Tip: Use a thin detailing brush for the palm tree silhouettes to ensure clean and precise lines.
DIY Instructions
Apply a base coat to protect your nails. Paint some nails solid yellow and others with a gradient of red and orange to mimic a sunset. Use black polish to paint palm tree silhouettes on the sunset nails. Allow each layer to dry thoroughly before applying the next to avoid smudging. Finish with a top coat for a durable, glossy finish.
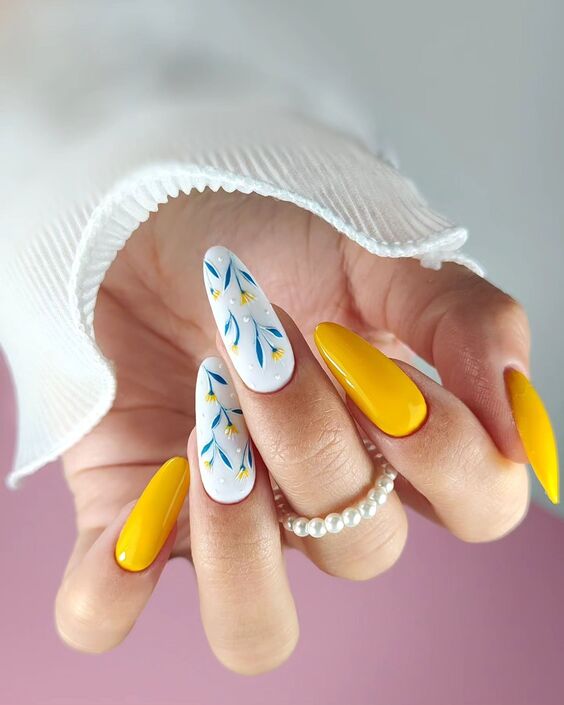
Elegant Floral and Yellow Duo-Tone Nails
This design elegantly combines a stark white base with vibrant yellow tips, accented with delicate blue floral patterns. The result is a chic and sophisticated look that marries the simplicity of duo-tone with the intricate detail of floral art, making it ideal for both everyday elegance and special occasions.
Consumables List
- Base coat: Essie All in One Base
- White polish: Sally Hansen ‘White On’
- Yellow polish: Orly ‘Glowstick’
- Blue acrylic paint for floral details
- Fine art brush
- Top coat: OPI Glossy Top Coat
Professional Tip: When painting the floral details, keep the brush very light to avoid overwhelming the delicate design.
DIY Instructions
Start with a protective base coat. Apply white polish as the base on all nails, followed by yellow tips. Once dry, use blue acrylic paint and a fine brush to add floral patterns to the white area. Finish with a glossy top coat to enhance the vibrancy of the colors and protect your artwork.
Vibrant Bee-Themed Yellow Fall Nails
Embrace the buzz of the fall with these bee-themed yellow nails. This design features a vivid yellow base with intricate black striping and honeycomb patterns, accented with adorable bee illustrations. It’s an artistic choice that showcases exceptional detail and creativity, perfect for those who enjoy thematic nail art with a playful twist.
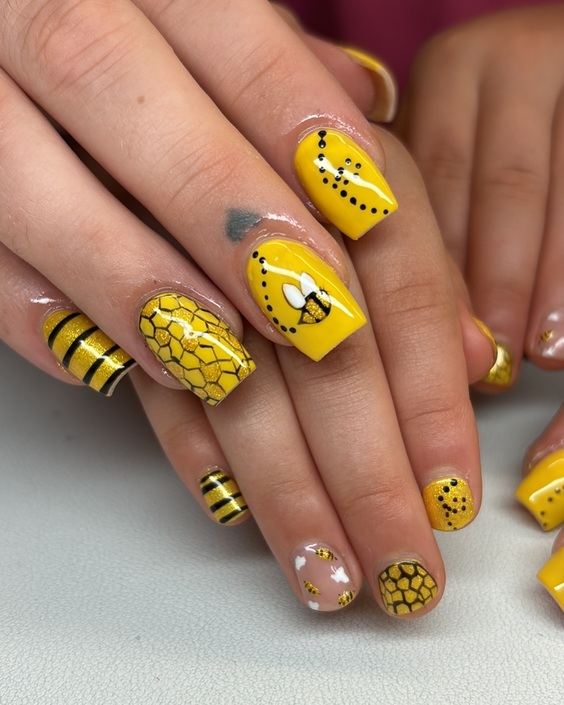
Consumables List
- Base coat: Base Coat Nail Polish by Orly
- Yellow polish: ‘Bee’s Knees’ by Color Club
- Black polish: ‘Black Magic’ by Morgan Taylor
- Honeycomb stencil or decal
- Small detailing brush
- Top coat: Glossy Top Coat by CND Vinylux
Professional Tip: Use a stencil for the honeycomb patterns to achieve sharp, consistent shapes, which can be tricky to freehand.
DIY Instructions
Apply a base coat to protect your nails and enhance the adhesion of your polish. Paint a bright yellow base on all nails. Once dry, use a black polish and a small detailing brush to add stripes and bee illustrations. For the honeycomb pattern, apply decals or use a stencil with black polish. Finish with a glossy top coat to protect your design and make it shine.
Sculptural Yellow Swirl Nails with Golden Accents
This set takes nail art to a new level with its sculptural swirls that flow elegantly over the nails. The soft yellow swirls are complemented by golden accents and embedded rhinestones, creating a luxurious and tactile experience. This design is perfect for special events where you want to make a dramatic statement.
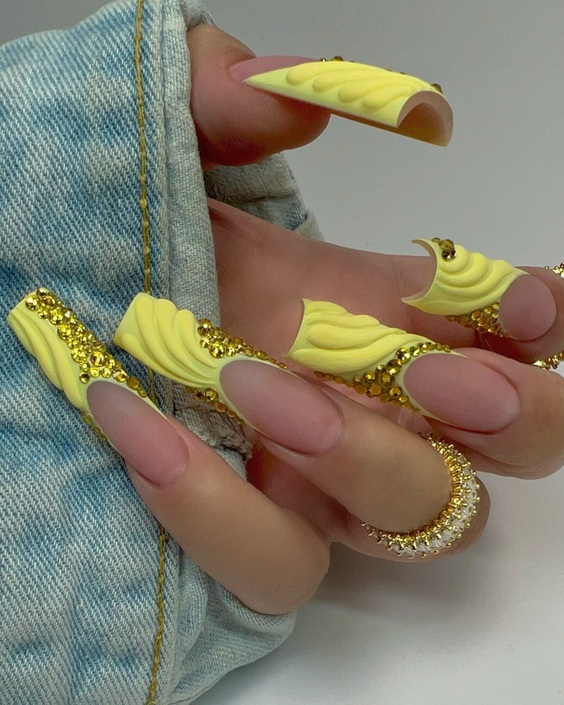
Consumables List
- Base coat: Orly Rubberized Base
- Yellow acrylic powder
- Gold leaf flakes
- Rhinestones
- Nail glue
- Top coat: Sally Hansen Miracle Gel Top Coat
Professional Tip: Carefully place the gold leaf and rhinestones while the acrylic is still pliable to ensure they adhere well and become part of the sculpture.
DIY Instructions
Prepare your nails with a base coat. Sculpt the swirls directly on your nails using yellow acrylic powder. Before the acrylic sets, press in the gold leaf flakes and rhinestones into the desired positions. Seal everything with a strong top coat to ensure longevity and shine.
Elegant Gradient Yellow Fall Nails with Jewel Accents
Featuring a gorgeous gradient that transitions from translucent to rich yellow, these nails are the epitome of fall elegance. The design is elevated with jewel accents and a delicate golden crackle effect, adding a touch of luxury and sophistication suitable for any high-end event this season.
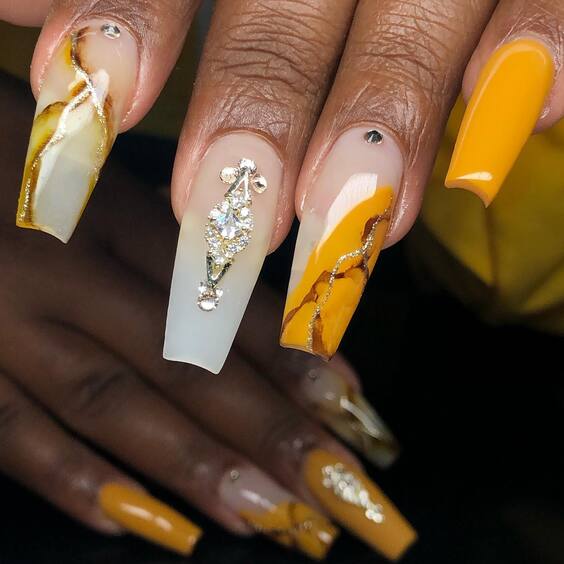
Consumables List
- Base coat: Essie Here To Stay Base Coat
- Gradient polishes: Light yellow (OPI ‘Don’t Tell a Sol’) and white (OPI ‘Alpine Snow’)
- Gold crackle polish
- Jewel accents
- Top coat: Seche Vite Dry Fast Top Coat
Professional Tip: Apply the gradient with a sponge for a smoother blend and place the jewels while the top coat is still wet to ensure they stick properly.
DIY Instructions
Start with a base coat to protect your nails. For the gradient effect, apply white polish at the nail base and yellow at the tips, then blend using a sponge. Once dry, add a thin layer of gold crackle polish. Carefully place the jewels where you want them. Finish with a fast-drying top coat to seal your design and add a glossy finish.
Classic Yellow Stiletto Nails
These classic stiletto nails in a striking yellow capture the essence of the bold and vibrant fall season. The smooth, monochromatic look is both daring and chic, making a statement with its sharp silhouette and saturated hue. Ideal for those who appreciate simplicity with an edge.
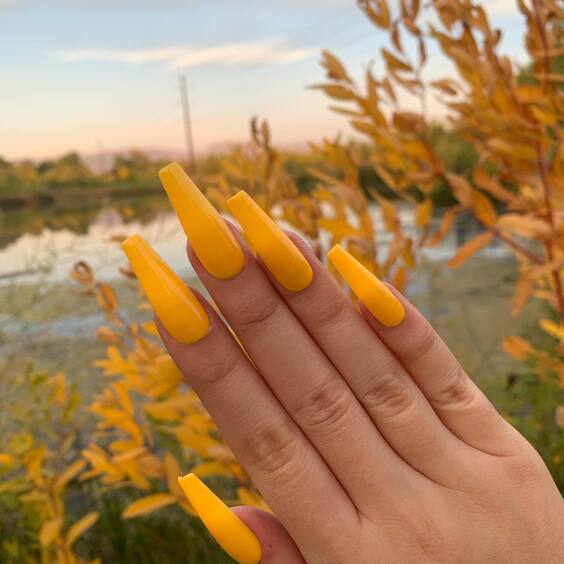
Consumables List
- Base coat: ORLY Bonder Rubberized Basecoat
- Yellow polish: Essie ‘Aim to Misbehave’
- Top coat: Seche Vite Dry Fast Top Coat
Professional Tip: To achieve the perfect stiletto shape, file your nails evenly from both sides towards the center tip, ensuring symmetry and precision.
DIY Instructions
Start with a clean, filed nail in the stiletto shape. Apply a base coat to protect your nails. Then, apply two coats of the vibrant yellow polish, allowing each coat to dry thoroughly. Finish with a fast-drying top coat to enhance the gloss and longevity of your manicure.
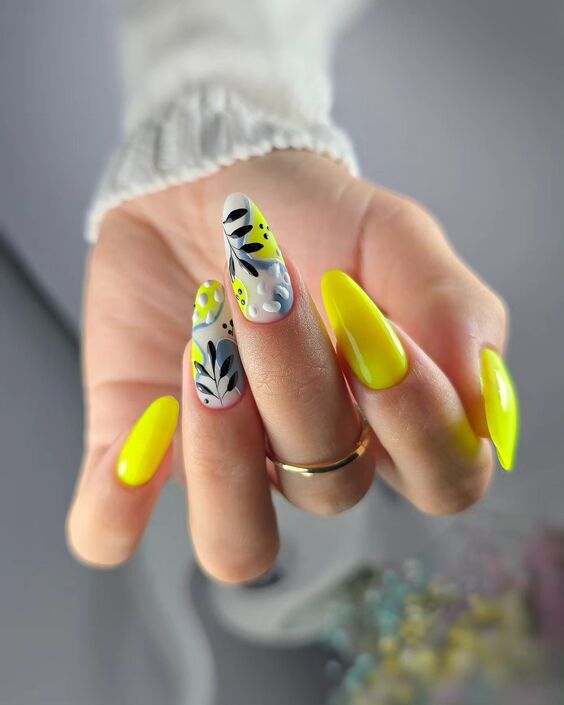
Dynamic Floral and Neon Yellow Nails
This design is a lively mix of bright neon yellow and intricate floral patterns over a translucent base. It’s perfect for transitioning from the bright summer into the more subdued fall, offering a burst of energy and creativity. The hand-painted floral details provide a personal touch that’s both artistic and sophisticated.
Consumables List
- Base coat: CND Stickey Base Coat
- Neon yellow polish: China Glaze ‘Yellow Polka Dot Bikini’
- White polish for detailing: OPI ‘Alpine Snow’
- Fine detailing brush
- Top coat: INM Out the Door Top Coat
Professional Tip: When creating detailed art like the floral patterns, keep your brush lightly loaded with paint and work slowly to ensure precise and clean lines.
DIY Instructions
Prepare the nails with a base coat for longevity. Apply a sheer base color. Then, using the neon yellow, create bold accents on selected nails. With a fine detailing brush and white polish, carefully add the floral details. Finish with a high-gloss top coat to protect the design and add vibrancy.
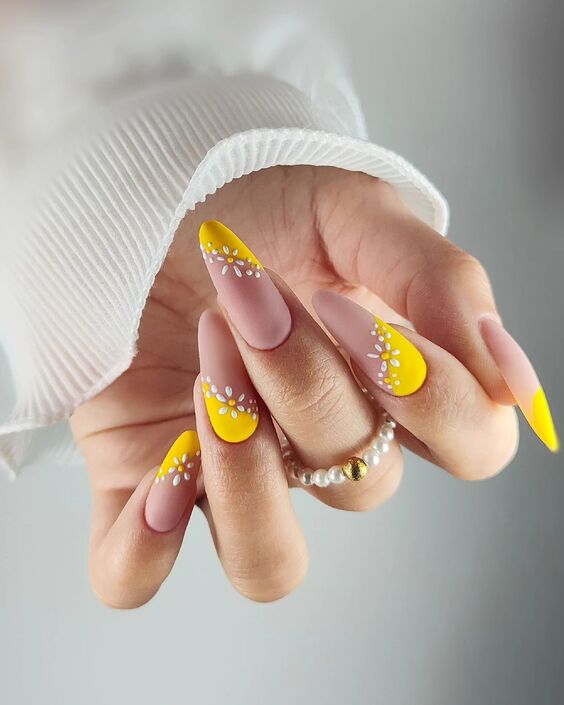
Elegant Yellow and Lavender Art Nails
Combining soft lavender and bright yellow, these nails offer a unique and refreshing look with delicate floral accents. The combination of colors is unexpected yet harmonious, providing a soft background for the vibrant yellow details, perfect for those who love a touch of whimsy in their style.
Consumables List
- Base coat: Essie Grow Stronger Base Coat
- Lavender polish: Essie ‘Go Ginza’
- Yellow polish: Sally Hansen ‘Mellow Yellow’
- White polish for detailing: Sally Hansen ‘White On’
- Top coat: OPI Top Coat
Professional Tip: Use a dotting tool to create precise floral accents, allowing each color to dry before applying the next to avoid smearing.
DIY Instructions
Apply a base coat to all nails for protection. Paint the nails with a soft lavender as the base. On selected nails, apply a bold yellow tip or feature design. Using a fine brush, add white floral details over the yellow for contrast. Finish with a clear top coat to seal in the design and enhance durability.
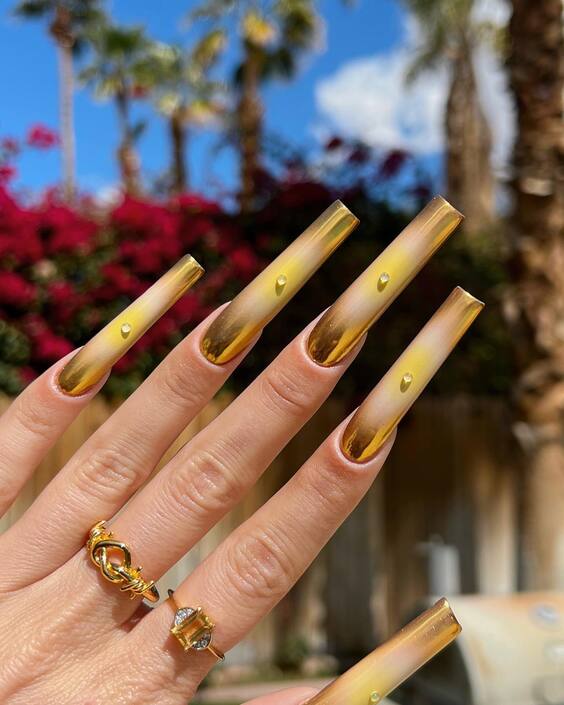
Golden Luxe Long Coffin Nails
These long coffin nails are a masterpiece in luxury, featuring a minimalist yet striking design. The glossy yellow transitions into a golden hue at the tips, embellished with a single gemstone on each nail. This sophisticated look is perfect for those who seek to combine elegance with a touch of glamour.
Consumables List
- Base coat: OPI Natural Nail Base Coat
- Yellow polish: Sally Hansen ‘Mellow Yellow’
- Gold metallic polish: Essie ‘Good As Gold’
- Gemstones
- Nail glue
- Top coat: Essie Gel Setter Top Coat
Professional Tip: For a seamless gradient between the yellow and gold, use a sponge to lightly dab and blend the gold polish towards the tip.
DIY Instructions
Apply a base coat to protect your nails and ensure polish adherence. Paint the nails with the yellow polish as the base color. Once dry, apply the gold polish to the tips using a sponge for a gradient effect. Place a gemstone on each nail using a small dab of nail glue. Finish with a glossy top coat to enhance the shine and secure the gemstones.
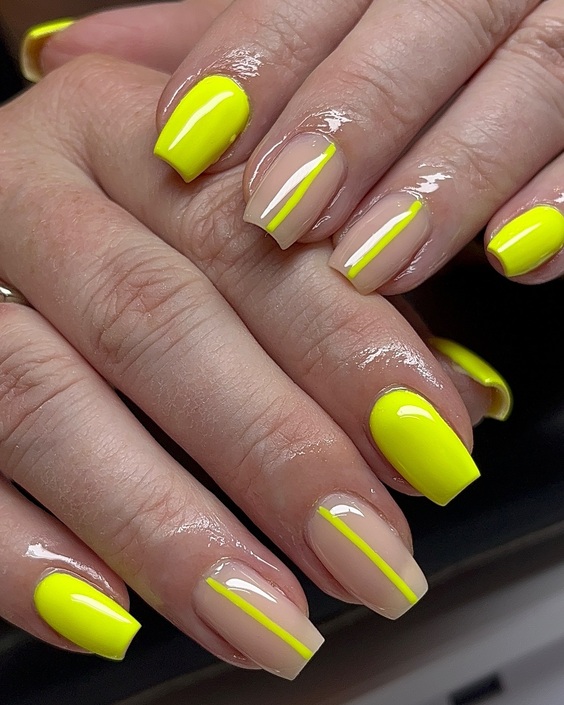
Neon Yellow Stripe French Manicure
This modern take on the French manicure introduces neon yellow stripes over a clear base, creating a bold and eye-catching look. It’s an excellent choice for those who love classic styles but want to add a vibrant, contemporary twist.
Consumables List
- Base coat: Seche Clear Crystal Clear Base Coat
- Neon yellow polish: China Glaze ‘Celtic Sun’
- Striping tape or a fine brush
- Top coat: OPI Top Coat
Professional Tip: Use striping tape for precise, clean lines when applying the neon yellow polish. This ensures a sharp and professional finish.
DIY Instructions
Start by applying a clear base coat to clean, prepped nails. Once dry, use striping tape to section off where you want the neon yellow stripes to be. Apply the neon yellow polish along these lines. Carefully remove the tape while the polish is still slightly wet to prevent smudging. Finish with a top coat to seal the design and add a glossy finish.
This concludes our journey through various yellow fall nail designs, from playful and whimsical to elegant and subtle. Each style offers something unique, ensuring everyone can find something to match their fall mood. Whether you choose to experiment with these styles at home or bring these ideas to your favorite salon, you’re sure to elevate your autumn look with these fabulous yellow fall nail ideas.

