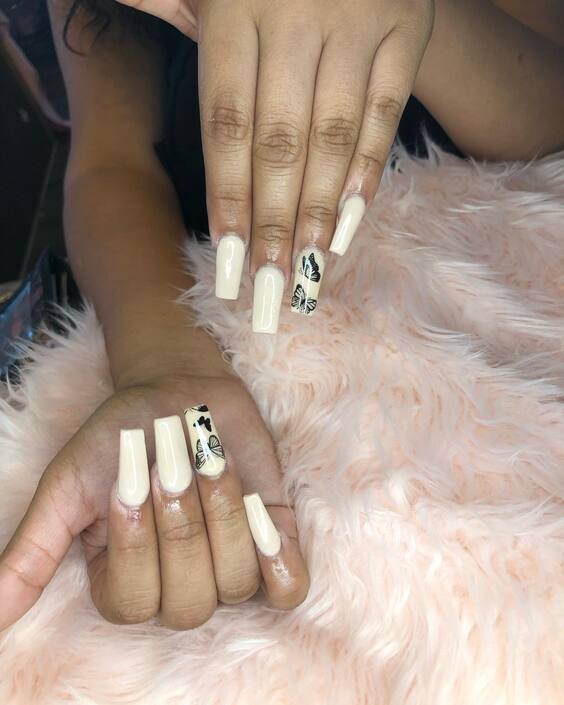
Welcome to the enchanting world of butterfly acrylic nails, where art meets the tips of your fingers in an explosion of colors, patterns, and textures. This guide is designed for nail art enthusiasts who are seeking inspiration to bring a touch of nature’s elegance to their manicure. Whether you’re a fan of bold, eye-catching designs or prefer a more subtle, sophisticated look, butterfly acrylic nails offer something for everyone. From the simplicity of monochrome motifs to the sparkle of holographic shards, each design promises to transform your nails into miniature canvases of personal expression. Dive into our collection of butterfly-themed designs, and discover how to add a whimsical or chic twist to your nail art repertoire.
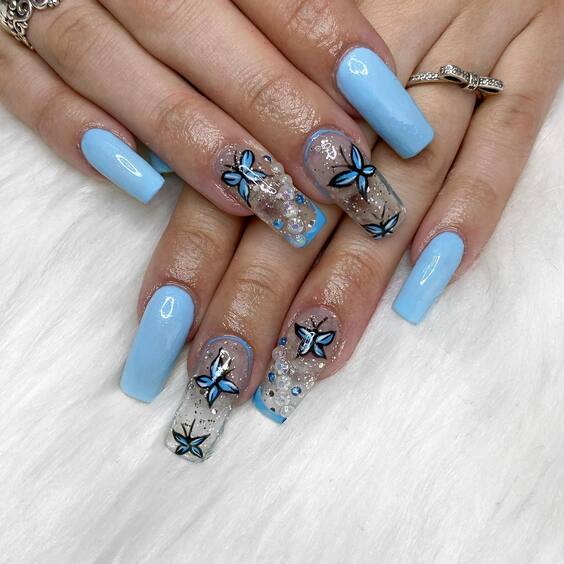
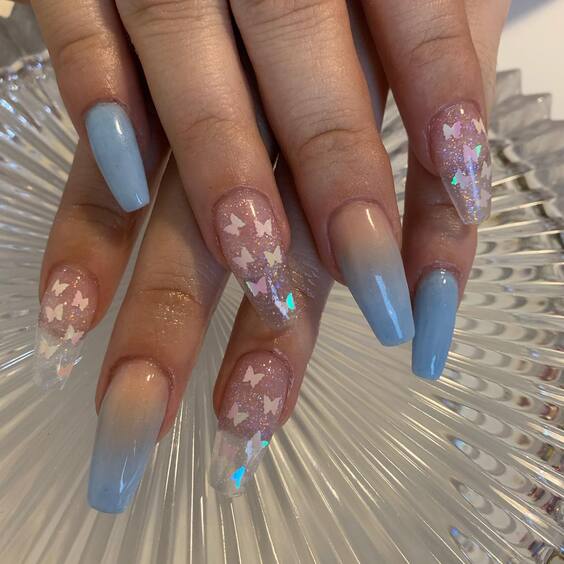
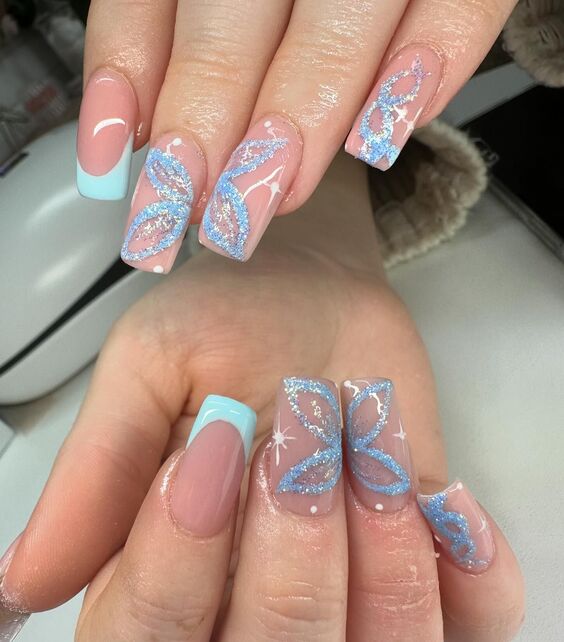
Ethereal Elegance with Butterfly Acrylic Nails in Pastel Hues
The nails featured in exemplify a dreamy combination of pastel blue and soft pink shades, adorned with silver butterfly decals that seem to hover with an almost magical allure. This design leverages the softness of the pastels to provide a perfect backdrop for the shimmering butterflies, creating a look that’s both romantic and sophisticated.
Consumables and Recommendations
- Base Polish: Sky Blue and Baby Pink Acrylic Paint
- Butterfly Decals: Silver Glitter Butterfly Stickers
- Top Coat: High-Gloss Finish
- Accent Tools: Fine-tip Brushes for Detailing
These products work harmoniously to achieve a delicate and long-lasting finish. I recommend using high-quality acrylic paints for their pigmentation and durability.
DIY Instructions
- Prepare the Nails: Clean and shape your nails to a desired length.
- Base Coat: Apply a thin layer of baby pink polish on half of the nails and sky blue on the other half.
- Decal Application: Once the base coat dries, carefully place the butterfly decals on the nails.
- Finishing Touches: Apply a top coat to seal in the design and add a glossy finish.
Bold and Beautiful: Black Matte Butterfly Acrylics
Showcases a bold approach to butterfly acrylic nails, featuring a stark black matte finish that makes the colorful butterfly designs pop. The use of contrasting colors emphasizes the intricate details of each butterfly, making it a statement piece perfect for those looking to make an impression.
Consumables and Recommendations
- Base Polish: Matte Black Acrylic Paint
- Butterfly Stickers: Multi-colored Butterfly Decals
- Top Coat: Matte Finish
- Accent Tools: Dotting Tool for Precision
For those aiming for this bold look, opt for a matte top coat to contrast beautifully with the vibrant butterflies.
DIY Instructions
- Base Preparation: Apply a base coat to protect your nails.
- Matte Black Application: Paint your nails with two coats of matte black polish.
- Butterfly Placement: Affix the multi-colored decals strategically on each nail.
- Finish: Seal with a matte top coat to ensure longevity and prevent chipping.
Playful Pastels with 3D Butterfly Accents
In the playful spirit of spring is captured through the use of pastel shades enhanced by 3D butterfly accents. This design is perfect for those who prefer a tactile element in their manicure, adding not just color but also texture and depth.
Consumables and Recommendations
- Base Polish: Soft Lavender and Mint Green Acrylic Paint
- 3D Butterfly Accents: Small 3D Butterfly Appliqués
- Top Coat: Gel Finish for Enhanced Thickness
- Accent Tools: Tweezers and Adhesive for 3D Elements
Choosing gel polish as a top coat can add the necessary volume to accommodate the 3D elements without losing elegance.
DIY Instructions
- Nail Prep: Ensure your nails are clean and smooth.
- Pastel Base: Alternate between lavender and mint green on each nail.
- Applying 3D Accents: Use tweezers to place 3D butterflies on the nails while the polish is still tacky.
- Sealing the Design: Apply a thick layer of gel top coat to secure the butterflies and add a glossy finish.
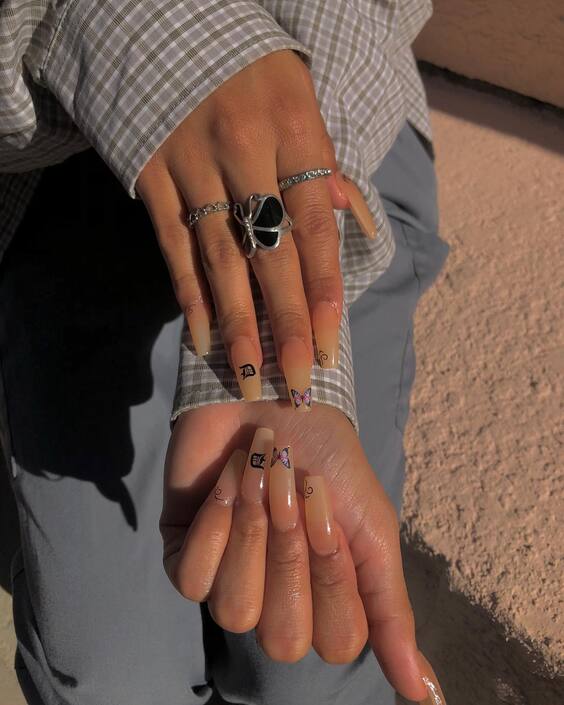
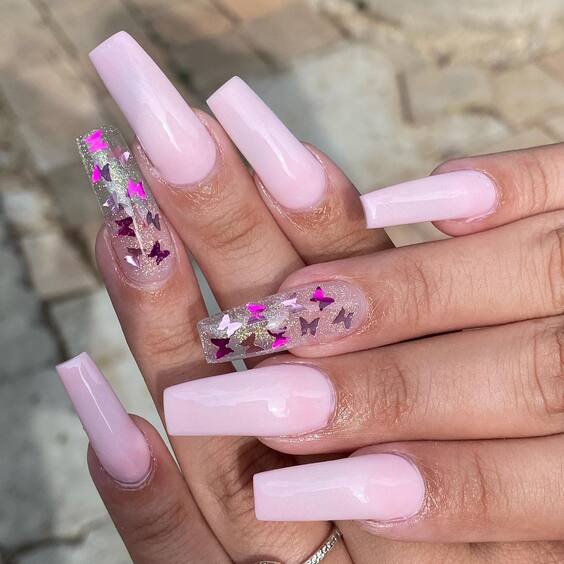
Subtle Charm with Pink Butterflies on Clear Acrylic
Presents a serene yet stylish approach to butterfly acrylic nails, featuring a soft pink base complemented by transparent segments adorned with pink and purple butterfly stickers. This design is perfect for those who prefer a subtle yet playful look.
Consumables and Recommendations
- Base Polish: Soft Pink Acrylic Paint
- Butterfly Stickers: Pink and Purple Butterfly Decals
- Clear Acrylic Segments: High-Quality Clear Acrylic
- Top Coat: UV Gel Top Coat for a Durable Shine
- Accent Tools: Precision Tweezers for Decal Placement
Opt for transparent acrylic to give the illusion of floating butterflies, enhancing the ethereal quality of the design.
DIY Instructions
- Prep the Nails: Shape your nails and apply a primer.
- Base Color: Paint a coat of soft pink as the base.
- Apply Clear Acrylic: Add clear acrylic segments to the tips or middle sections.
- Place Butterflies: Attach the butterfly decals on the clear segments.
- Seal the Design: Apply a UV gel top coat to protect and add gloss.
Glittering Night Sky: Black and Silver Butterfly Long Coffin Nails
In the nails take a dramatic turn with long coffin-shaped tips painted in a deep black, speckled with silver glitter, and decorated with silver butterfly decals. This design is tailor-made for evening events, where the sparkle can truly shine.
Consumables and Recommendations
- Base Polish: Jet Black Acrylic Paint
- Glitter: Fine Silver Glitter Dust
- Butterfly Decals: Silver Metallic Butterfly Stickers
- Top Coat: High-Gloss Gel Finish
- Accent Tools: Glitter Application Brush
The choice of a coffin shape not only enhances the drama but also provides a larger canvas for the detailed butterfly decals.
DIY Instructions
- Nail Preparation: Start with a clean and buffed nail surface.
- Apply Black Base: Use two coats of black acrylic paint for a solid background.
- Add Glitter: While the second coat is wet, sprinkle silver glitter dust.
- Butterfly Placement: Carefully place silver butterfly decals.
- Finish with a Top Coat: Seal everything with a high-gloss gel top coat for durability and shine.
Vibrant Diversity: Multi-Color Butterfly Tips on Nude Acrylic
Explores the vibrant side of butterfly acrylic nails with a nude base that allows the multi-colored butterfly decals to stand out. This design celebrates diversity with each nail featuring a different color palette, making it ideal for showcasing personal style and creativity.
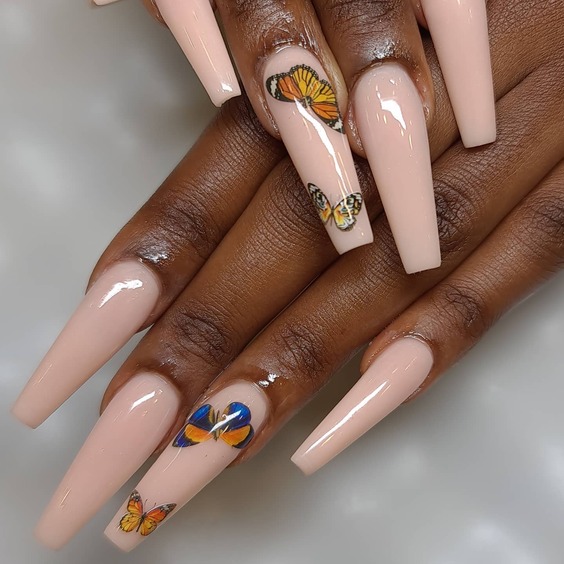
Consumables and Recommendations
- Base Polish: Nude Acrylic Paint
- Butterfly Decals: Assorted Colors Butterfly Stickers
- Top Coat: Matte Finish for a Modern Look
- Accent Tools: Mini Dotting Tool for Fine Detail Work
Emphasizing the nude base enhances the vivid colors of the butterfly decals, providing a striking contrast.
DIY Instructions
- Prepare the Nails: Ensure nails are clean and shaped.
- Apply Nude Base: Start with a nude acrylic base coat.
- Decal Application: Apply different colored butterfly decals to each nail.
- Finalize with a Top Coat: Use a matte finish top coat to unify the look and prevent shine from overpowering the design.
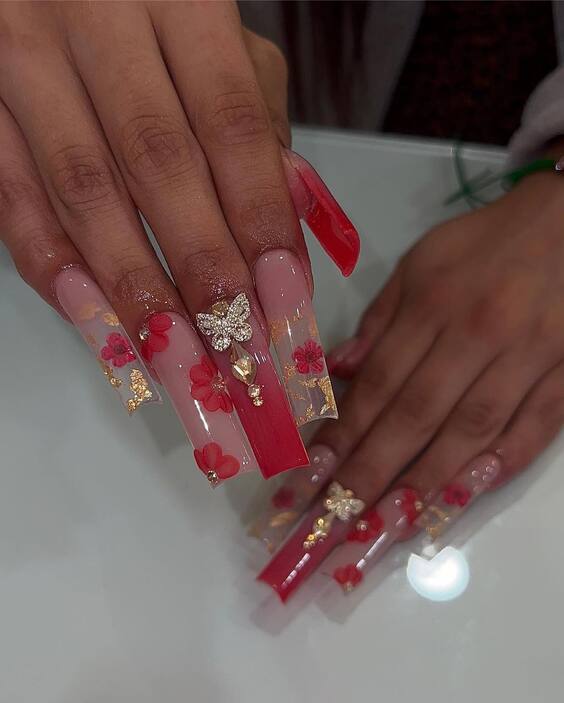
Regal Elegance with Jeweled Butterfly Accents
Displays a stunning array of long almond-shaped nails painted in a delicate pink and white ombre, enhanced with jeweled butterfly and floral accents. This design is an epitome of regal elegance, perfect for special occasions or anyone wishing to add a touch of luxury to their everyday style.
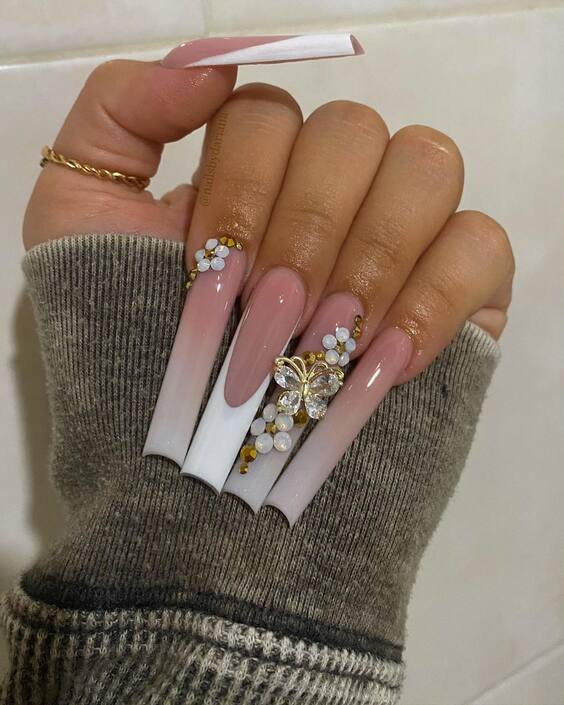
Consumables and Recommendations
- Base Polish: Pink and White Ombre Acrylic Paint
- Butterfly Jewels: Gold Butterfly Charms
- Floral Accents: White Pearl Flowers
- Top Coat: Clear Gel for a Glass-like Finish
- Accent Tools: Jeweling Tweezers
This combination of ombre painting and jewel accents requires precision and patience, ensuring each charm is perfectly placed for maximum effect.
DIY Instructions
- Prepare the Nails: Clean and buff the nails to a smooth surface.
- Apply Ombre Effect: Gradually blend pink and white polishes from the cuticle to the tip.
- Decorate with Charms: Strategically place butterfly and floral jewels along the nail.
- Finish with a Top Coat: Apply a layer of clear gel top coat for durability and a high-gloss shine.
Lavender Dreams with Butterfly Wing Details
Offers a fresh take on butterfly acrylic nails, showcasing long, slender coffin nails in a soothing lavender hue, adorned with detailed butterfly wing art and tiny floral embellishments. This design is ideal for those who love detailed artistry combined with a soft, dreamy color palette.

Consumables and Recommendations
- Base Polish: Lavender Acrylic Paint
- Butterfly Wing Art: Hand-painted Butterfly Wing Designs
- Floral Embellishments: Tiny White Beads
- Top Coat: Matte Finish for a Contemporary Look
- Accent Tools: Fine Detail Brush
The hand-painted butterfly wings demand a steady hand and an eye for detail, making this design as challenging as it is beautiful.
DIY Instructions
- Nail Prep: Start with a clean, primed base.
- Apply Base Color: Coat the nails with a lavender acrylic paint.
- Paint Butterfly Wings: Carefully draw butterfly wings using a fine brush.
- Add Floral Touches: Place tiny white beads for a floral effect.
- Seal with Matte Top Coat: A matte finish will enhance the softness of the design.
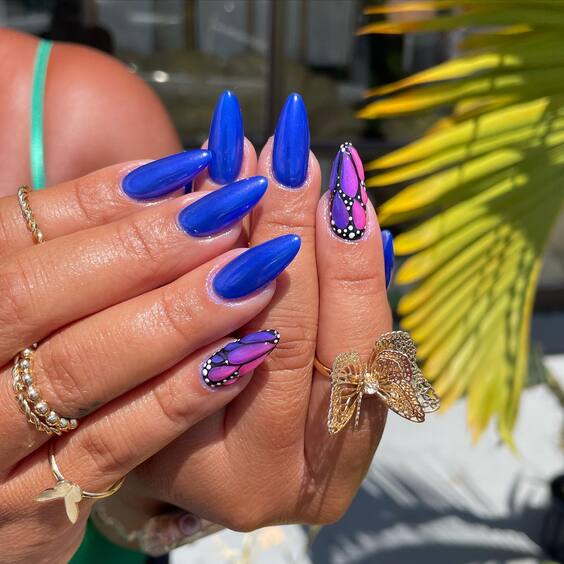
Bold Blue Butterfly Fantasy
The nails are transformed into a canvas showcasing vibrant blue butterfly designs set against a nude backdrop. This bold statement look combines the natural simplicity of the nude polish with the vivid blue of the butterfly, making it perfect for both day and evening wear.
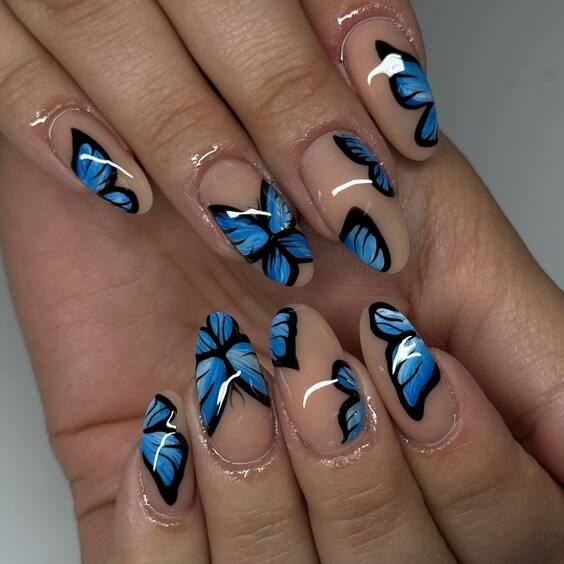
Consumables and Recommendations
- Base Polish: Nude Acrylic Paint
- Butterfly Designs: Blue Acrylic Paint
- Top Coat: High-Gloss Gel Finish
- Accent Tools: Detailing Brush for intricate designs
This striking contrast between the nude and blue hues brings the butterfly motifs to life, ideal for those who desire a standout manicure.
DIY Instructions
- Prepare the Nails: Ensure a clean, smooth base.
- Apply Nude Base: Paint a solid nude background to highlight the designs.
- Design Butterflies: Use a detailing brush to paint blue butterflies.
- Finalize with Glossy Top Coat: Apply a glossy gel top coat for a durable and shiny finish.
Monochrome Magic with Butterfly Silhouettes
Features an innovative approach to butterfly nail art, displaying a monochrome theme with subtle butterfly silhouettes against a sleek grey background. The design is modern and understated, making it suitable for those who appreciate minimalistic beauty with a hint of intrigue.
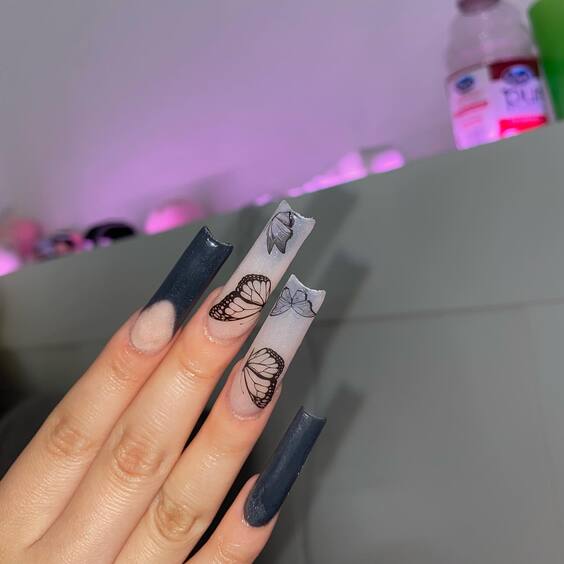
Consumables and Recommendations
- Base Polish: Charcoal Grey Acrylic Paint
- Butterfly Silhouettes: White Butterfly Decals
- Top Coat: Satin Finish for a Soft Look
- Accent Tools: Fine Precision Brush for Detailing
This nail design requires a steady hand for applying the delicate decals and achieving a seamless finish with the monochrome palette.
DIY Instructions
- Prepare the Nails: Start with a clean and even base.
- Apply Base Color: Paint the nails with a charcoal grey polish.
- Place Butterfly Decals: Arrange the white butterfly silhouettes delicately on the nail.
- Seal with Top Coat: Apply a satin finish top coat to blend the design smoothly into the base color.
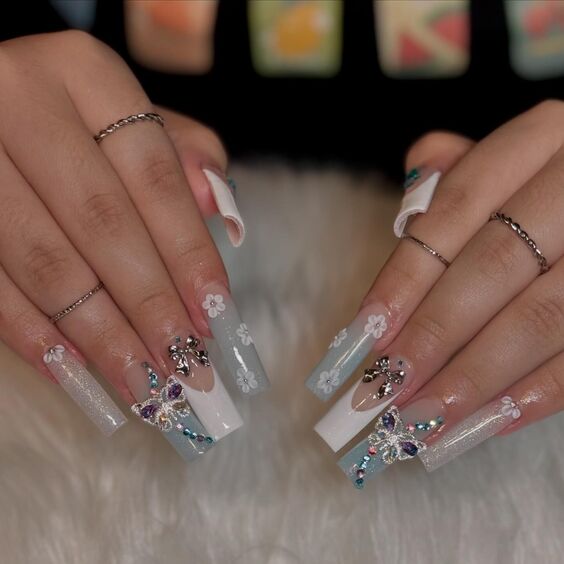
Vibrant Purple and Glitter Butterfly Wonderland
Dazzles with its vibrant purple color and sparkling glitter details. This design incorporates both clear and opaque sections, adorned with intricate butterfly and floral patterns, offering a dynamic and eye-catching look perfect for any festive occasion or as a bold everyday statement.
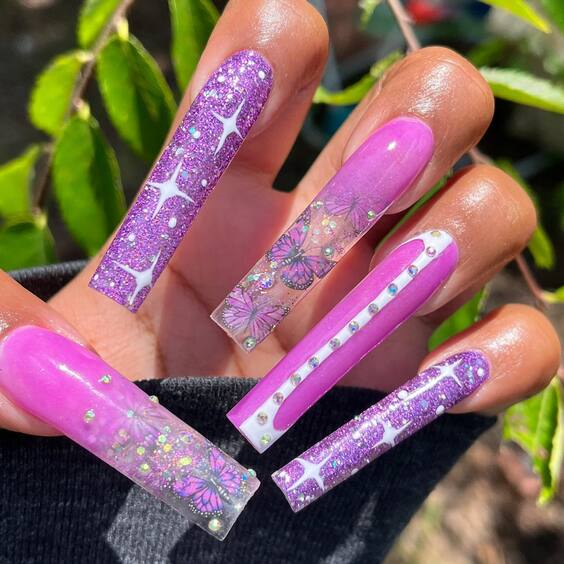
Consumables and Recommendations
- Base Polish: Bright Purple Acrylic Paint
- Glitter: Silver and Purple Fine Glitter
- Butterfly and Floral Patterns: Custom Butterfly Stickers
- Top Coat: High-Gloss Gel Finish
- Accent Tools: Glitter Applicator Brush
The use of bright colors and reflective glitter makes this design stand out, while the detailed stickers add a layer of sophistication.
DIY Instructions
- Nail Preparation: Ensure nails are clean and filed.
- Apply Purple Base: Coat the nails with a bright purple acrylic.
- Glitter Application: Add glitter over the base while still tacky.
- Decorate with Stickers: Place butterfly and floral stickers as desired.
- Finish with a Glossy Top Coat: Secure the design with a high-gloss gel top coat for durability and shine.
Elegant Minimalism with a Single Butterfly Accent
Captures the essence of elegance in minimalism with a single blue butterfly delicately placed on a nude almond-shaped nail. This design is ideal for those who seek a subtle yet striking expression of style, perfect for both professional settings and casual outings.

Consumables and Recommendations
- Base Polish: Nude Acrylic Paint
- Butterfly Accent: Blue Butterfly Decal
- Top Coat: Matte Finish for a Contemporary Feel
- Accent Tools: Tweezers for Precise Placement
The simplicity of the design focuses on the exquisite detail of the single butterfly, making it a conversation starter.
DIY Instructions
- Prepare the Nails: Clean and shape the nails to an almond form.
- Apply Nude Base: Use a nude polish for a clean, subtle background.
- Place the Butterfly Decal: Carefully set the blue butterfly decal using tweezers.
- Apply Top Coat: Finish with a matte top coat to enhance the modern aesthetic.
Frosty Flutters with Glitter Accents
Captures the enchanting beauty of icy tones, featuring a soft pastel blue and white color scheme, intricately detailed with silver glitter butterflies. The design employs a mix of matte and glossy finishes to create a textured, layered look that mimics the delicate wings of a butterfly.
Consumables and Recommendations
- Base Polish: Pastel Blue and White Acrylic Paint
- Glitter: Silver Glitter for Accents
- Top Coat: Matte and Glossy Top Coats
- Accent Tools: Detailing Brush for Fine Glitter Lines
This combination of soft pastels and sparkling accents is perfect for a winter wonderland theme or a festive occasion.
DIY Instructions
- Prepare the Nails: Clean and file to an even surface.
- Apply Base Colors: Alternate pastel blue and white on different nails.
- Add Glitter Details: Use a detailing brush to apply silver glitter along the butterfly designs.
- Finish with Top Coats: Apply matte on some nails and glossy on others for a varied texture.
Swirled Sophistication in Soft Pink
Features a soft pink base with white swirled designs that flow like the gentle breeze of spring. The nail design is elevated with small rhinestone accents, providing a subtle sparkle that enhances the swirl patterns without overpowering the delicate aesthetic.
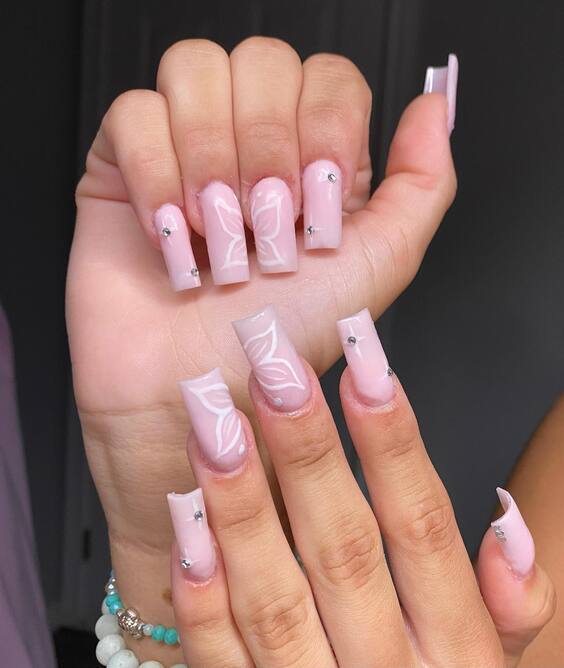
Consumables and Recommendations
- Base Polish: Soft Pink Gel Polish
- Swirl Designs: White Acrylic Paint
- Rhinestones: Small Clear Rhinestones
- Top Coat: High-Gloss Gel Top Coat
- Accent Tools: Fine Liner Brush for Swirls
This look is ideal for weddings, proms, or any occasion where elegance and subtlety are prized.
DIY Instructions
- Nail Prep: Begin with a clean, buffed base.
- Apply Pink Base: Coat the nails with soft pink gel polish.
- Paint Swirls: Delicately draw swirls with white paint using a liner brush.
- Add Rhinestones: Place a few rhinestones along the swirls for a touch of glamour.
- Seal with Top Coat: Finish with a high-gloss gel top coat for shine and protection.
Sunshine and Butterflies
Rdiates joy with its bright yellow and pink gradient base, adorned with sparkling gold butterfly appliqués and tiny flower embellishments. This cheerful design is perfect for the sunny days of summer or to brighten up any gloomy day.
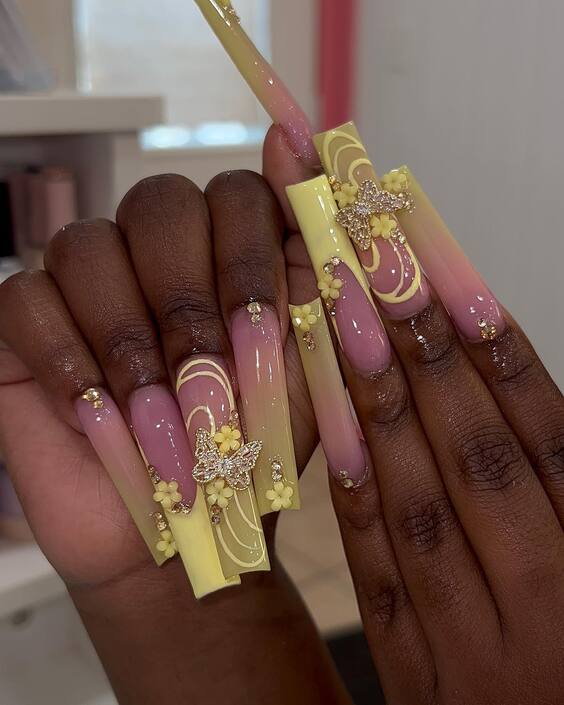
Consumables and Recommendations
- Base Polish: Yellow and Pink Gradient Acrylic Paint
- Butterfly Appliqués: Gold Butterfly Charms
- Floral Embellishments: Small Yellow Beads
- Top Coat: High-Gloss Gel Finish
- Accent Tools: Sponge for Gradient Application, Tweezers for Appliqués
This vibrant design encourages a playful and optimistic mood, suitable for those who love to express their personality through their manicure.
DIY Instructions
- Prepare the Nails: Ensure nails are clean and free of old polish.
- Apply Gradient Base: Use a sponge to blend yellow and pink polishes on the nail.
- Decorate with Charms and Beads: Affix gold butterfly charms and yellow beads to the nails.
- Finish with a Top Coat: Apply a layer of high-gloss gel top coat to enhance the colors and secure the decorations.