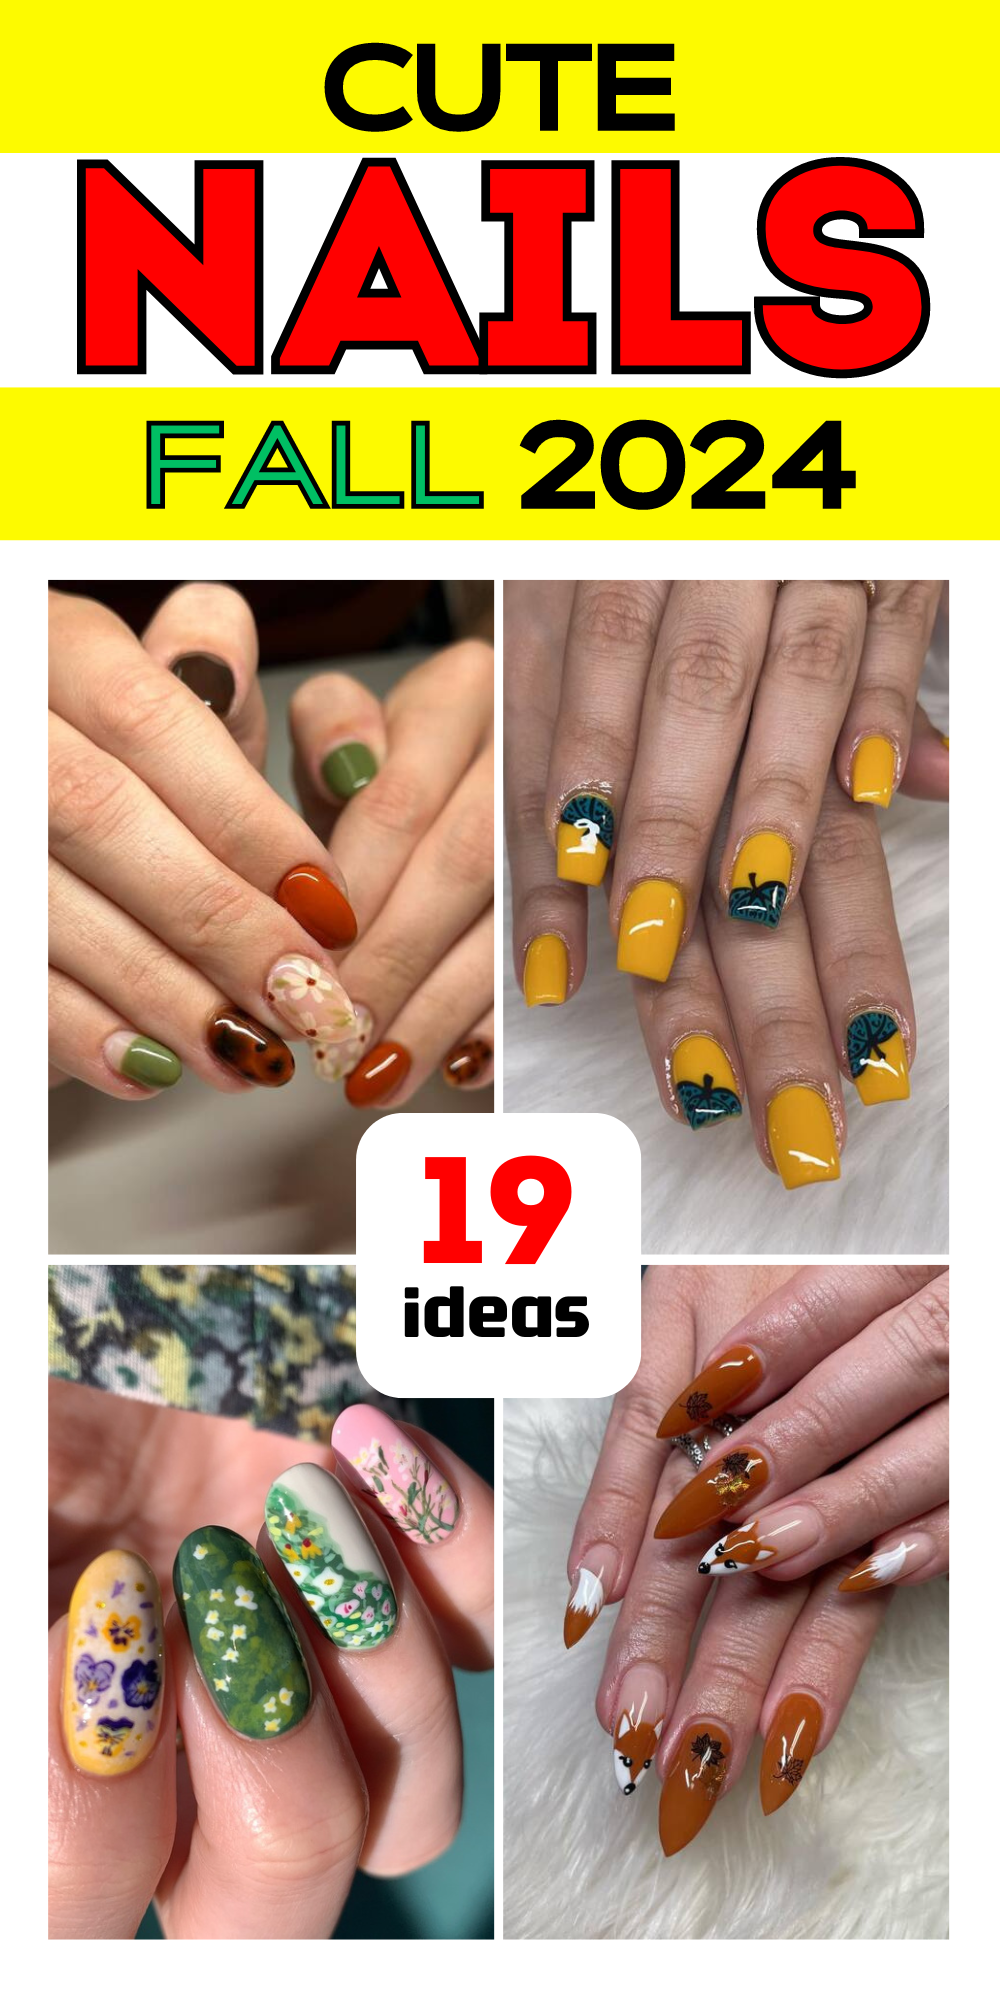
19 Explore Top Cute Fall Nail Designs: Get Trendy with Artistic Manicures!
Tina Pratsyuk15 June 2024Last Updated: 16 August 2024
0 13 minutes read
Welcome to the enchanting world of nail art, where creativity meets sophistication! As the seasons shift, so do our style preferences, especially when it comes to manicures. This article dives into a variety of nail designs that not only capture the essence of artistic expression but also cater to everyone from the minimalist to the glamour enthusiast. From subtle lavender swirls to bold starry gradients, each design offers a unique way to adorn your nails. Perfect for any occasion, these nail art ideas are crafted to inspire your next trip to the salon or even your next DIY nail session at home. Get ready to explore these stunning, detailed nail art designs that promise to uplift your style quotient and add a sparkle to your everyday look!
Earthy Tones and Geometric Elegance
The first design captures the essence of fall with its rich, earthy tones and geometric flair. This manicure utilizes a warm palette of orange and brown, accented with precise white lines that add a sophisticated touch. The matte finish on some nails contrasts beautifully with the glossy appearance on others, providing a tactile variety that is both pleasing to the eye and delightful to touch.
Polishes: Essie’s “Playing Koi” (orange), “Little Brown Dress” (brown), Sally Hansen’s “White On” for the lines
Top Coat: Seche Vite Dry Fast Top Coat
Tools: Thin brush for detailing, tape for clean lines
Each polish chosen here offers excellent opacity, which is ideal for creating bold colors with fewer coats. The use of tape ensures that even beginners can achieve clean, straight lines for a professional-looking finish.
DIY Instructions
Preparation: Start with a clean, buffed nail bed. Apply the base coat to protect your nails.
Color Application: Paint all nails with two coats of “Playing Koi.” Allow it to dry, then apply “Little Brown Dress” on alternating nails.
Detailing: Once dry, use tape to mark off geometric patterns on each nail. With a thin brush, apply “White On” along these lines.
Finishing Touches: Remove the tape while the white polish is still wet to ensure crisp lines. Finish with a top coat for durability and shine.
Floral Accents on Nude Nails
This design offers a delicate balance between understated elegance and festive flair, featuring a soft, nude background adorned with subtle floral accents in fall colors. The clever placement of tiny rhinestones adds a sparkle that catches the light, symbolizing the dewy mornings of autumn.
Polishes: Zoya’s “Chantal” (nude), Hand-mixed acrylic paints for flowers
Rhinestones: Small clear and colored stones
Top Coat: Seche Vite Dry Fast Top Coat
Tools: Detailing brush, dotting tool for rhinestone application
Opting for Zoya’s “Chantal” provides a perfect opaque nude that serves as a great canvas for any artwork. The acrylic paints should be thinned slightly to ease the painting process.
DIY Instructions
Preparation: Apply the base coat to clean, prepped nails.
Color Application: Apply two coats of “Chantal” and wait for it to dry completely.
Painting Details: Use a fine brush to hand-paint the floral designs. Be patient and keep a steady hand for the best results.
Adding Embellishments: Place rhinestones at the center of each flower using a dotting tool dipped in a little top coat to pick them up.
Sealing the Design: Apply a top coat to seal in the design and add a glossy finish that makes the details pop.
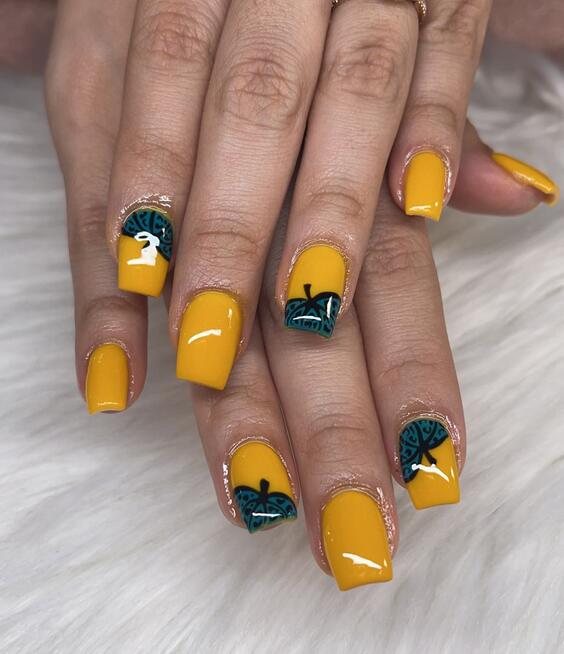
Vibrant Playfulness with Polka Dots
Fun and vibrant, this look combines bold fall shades with playful polka dots, making it perfect for casual outings and cozy gatherings. The alternating colors and sizes of the dots add a dynamic element to the nails, reflecting the lively spirit of fall.
Polishes: Deborah Lippmann’s “Autumn in New York” (gold), “It’s Raining Men” (deep red)
Top Coat: Sally Hansen Miracle Gel Top Coat
Tools: Dotting tool
The choice of a gel top coat is intentional to give the polka dots a slightly raised, 3D effect that adds to the playful feel.
DIY Instructions
Preparation: Apply a base coat to protect and smooth out your nails.
Base Color: Apply two coats of “Autumn in New York” for a luxurious gold background.
Creating Dots: Dip your dotting tool into “It’s Raining Men” and dot randomly across each nail, varying the size for a whimsical look.
Finishing Up: Once the dots are dry, seal them with a gel top coat for a long-lasting, durable finish.
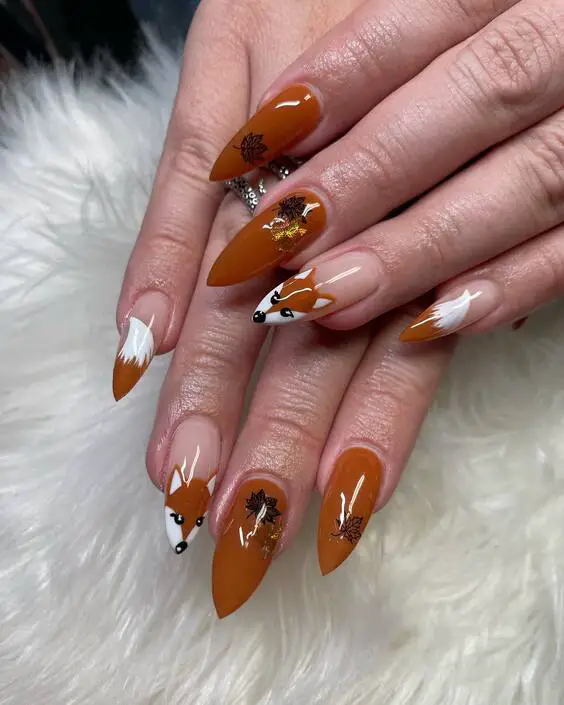
Woodland Whimsy with Foxy Flair
Embrace the playful side of fall with this charming woodland-themed manicure. Featuring a foxy design, this look uses a striking orange base that mimics autumn leaves. Delicate white accents create the illusion of fox tails, while small leaf and acorn stickers add a rustic touch. This design is perfect for anyone who wants to carry a bit of the forest with them.
Polishes: China Glaze’s “Sunset Sail” (base orange), “White on White” for accents
Stickers: Leaf and acorn nail stickers
Top Coat: China Glaze Fast Forward Top Coat
Tools: Fine brush for detail work
The China Glaze polish is selected for its rich pigment and durability, essential for a vibrant and long-lasting manicure.
DIY Instructions
Preparation: Start with clean, shaped nails. Apply a base coat to protect your nails.
Base Color: Apply two coats of “Sunset Sail” for a rich, orange base.
Detail Work: Use a fine brush to add white accents to mimic fox tails.
Stickers: Carefully place leaf and acorn stickers on selected nails.
Finish: Seal everything with a fast-drying top coat for a glossy finish and added longevity.
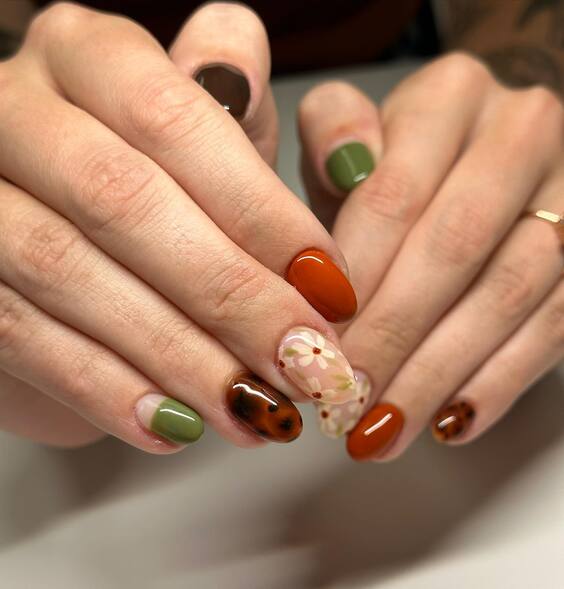
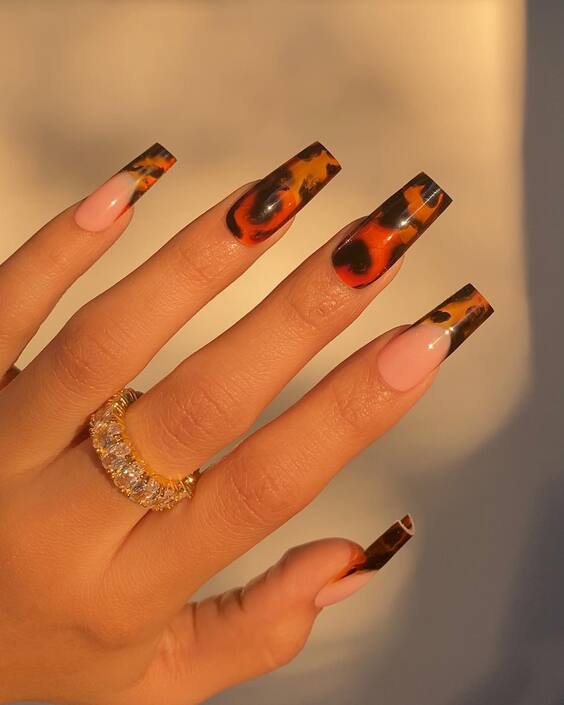
Modern Tortoiseshell Elegance
This sophisticated nail design combines a modern tortoiseshell pattern with bold, glossy black tips. The look is achieved through a meticulous layering process that creates depth and complexity, akin to real tortoiseshell. It’s a stunning choice for anyone looking to make a statement this fall.
Polishes: Sally Hansen “Slicks and Stones,” “Black Out” for the tips
Top Coat: Essie Gel Setter Top Coat
Tools: Sponge for the tortoiseshell effect, detail brush for tips
The gel setter top coat is crucial for achieving that glass-like finish that really makes the tortoiseshell pattern pop.
DIY Instructions
Preparation: Apply a base coat to clean nails.
Base Color: Begin with a base layer of “Slicks and Stones.”
Sponge Technique: Sponge on additional colors in layers to create the tortoiseshell effect.
Detailing Tips: Use a detail brush and “Black Out” to carefully paint the tips.
Finishing: Apply a thick layer of gel setter top coat for a smooth, shiny finish.
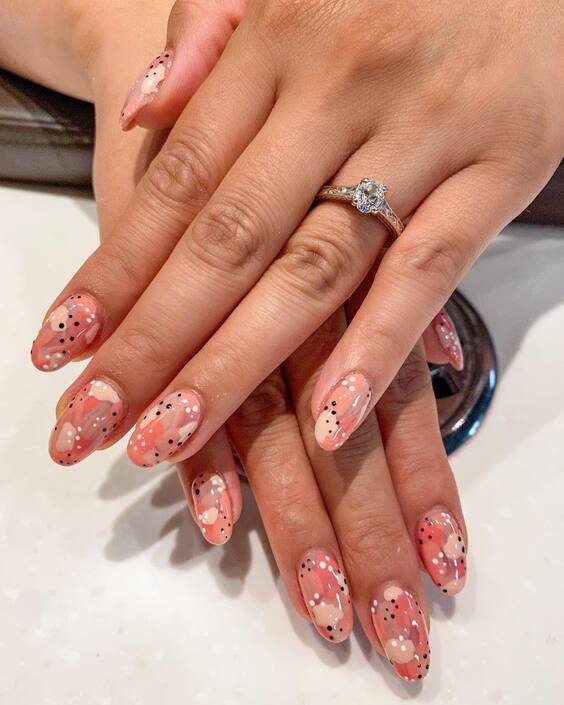
Dainty Polka Dots and Peach Tones
This adorable look combines soft peach tones with playful black and white polka dots, creating a light-hearted yet chic design perfect for everyday wear. The scattered dot pattern adds an element of fun, while the peach base keeps it sweet and subdued.
Polishes: OPI “Freedom of Peach,” “Alpine Snow” for white dots, “Black Onyx” for black dots
Top Coat: Sally Hansen Insta-Dri Top Coat
Tools: Dotting tool
Using a dotting tool ensures perfectly round dots, essential for the clean, playful look of this design.
DIY Instructions
Preparation: Apply a base coat to protect your nails from staining.
Base Color: Paint all nails with “Freedom of Peach.”
Creating Dots: Alternately dot “Alpine Snow” and “Black Onyx” on the nails.
Finishing Touches: Once the dots have dried, apply a fast-drying top coat to seal the design and enhance its durability.
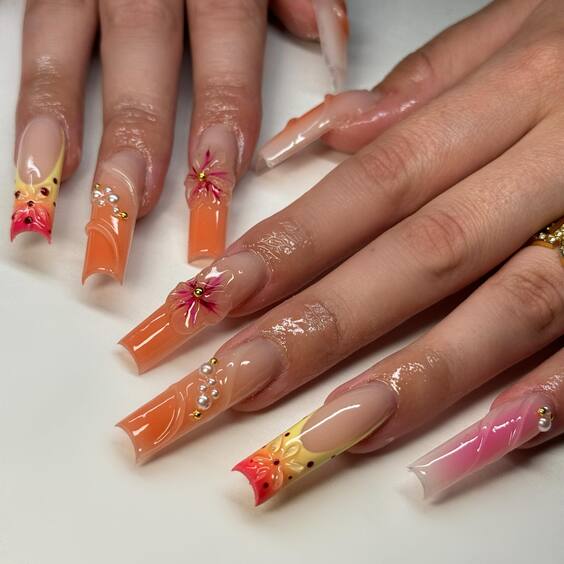
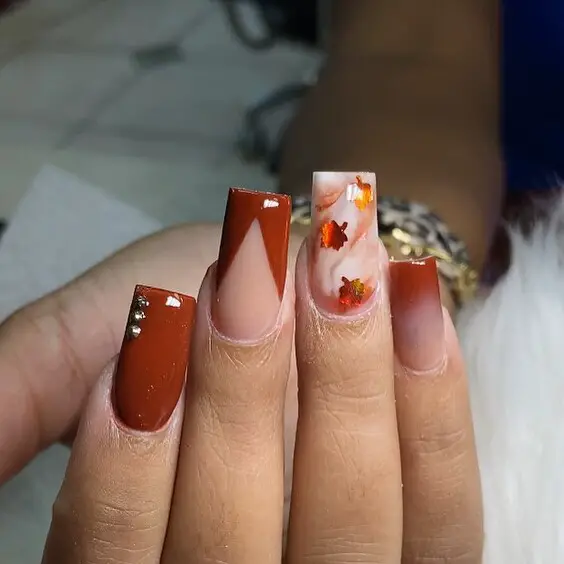
Fall Foliage French Tips
This elegant twist on classic French tips captures the spirit of fall with its leaf-themed designs set against a clear base. The tips are adorned with miniature red and orange leaves, resembling the changing fall foliage, offering a subtle yet stunning nod to the season.
Polishes: Transparent polish, hand-mixed red and orange for leaves
Top Coat: Seche Vite Dry Fast Top Coat
Tools: Fine brush for detailed leaf painting
The use of a transparent base emphasizes the clean, minimalist look, allowing the colorful tips to stand out strikingly.
DIY Instructions
Preparation: Start with a well-prepped nail, applying a base coat for adhesion.
Base Color: Apply a layer of transparent polish to all nails.
Painting Leaves: Use a fine brush to paint leaf designs on the tips of each nail.
Finishing: Complete the look with a top coat for shine and protection.
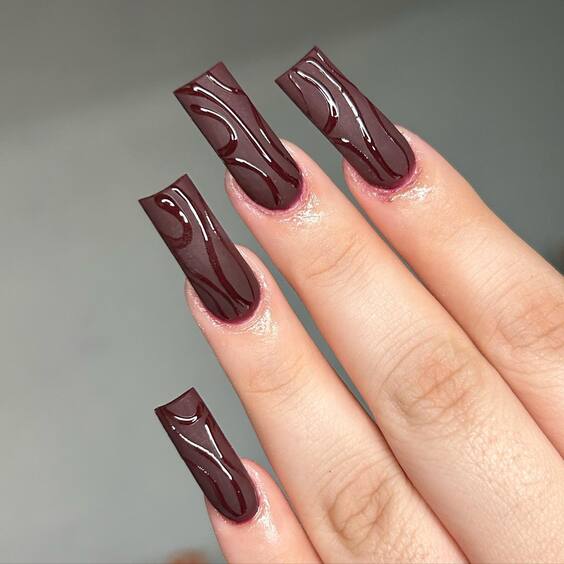
Glossy Chocolate Waves
This mesmerizing design features long, glossy nails painted in a deep chocolate hue, adorned with wave-like patterns in a slightly lighter shade. The seamless flow of the waves evokes a sense of smooth motion, perfect for those who prefer a sophisticated yet understated look.
Polishes: Essie “Little Brown Dress” for the base, “Mink Muffs” for waves
Top Coat: Revlon Extra Life No Chip Top Coat
Tools: Detailing brush
Choosing a high-gloss top coat brings out the depth of the chocolate tones and ensures that the intricate wave designs remain pristine.
DIY Instructions
Preparation: Apply a base coat to clean, shaped nails to ensure a smooth application.
Base Color: Paint all nails with two coats of “Little Brown Dress.”
Creating Waves: Use “Mink Muffs” and a fine brush to draw wavy lines across each nail.
Finishing Touches: After the design dries, apply a high-gloss top coat to enhance the shine and protect the artwork.
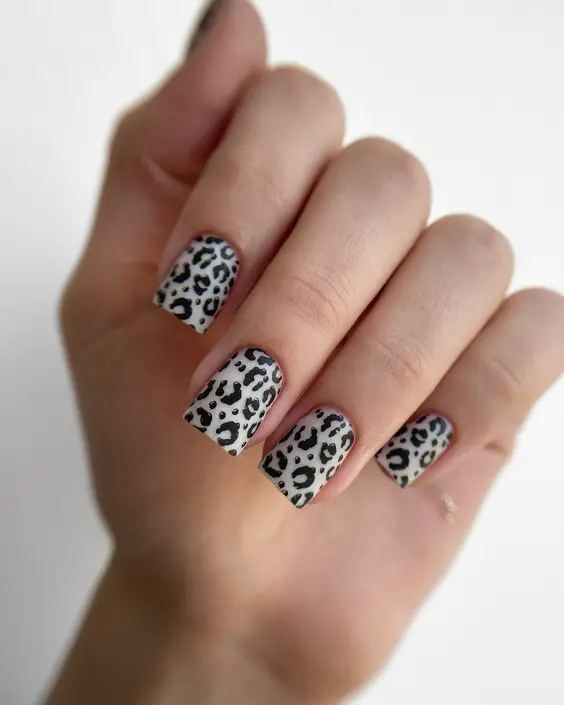
Trendy Leopard Print
Leopard print nails are a timeless trend that exudes a bold, adventurous spirit. This particular set features a clean, white base with black and gray spots, offering a modern twist on the classic leopard pattern.
Polishes: China Glaze “White on White” for the base, “Black Diamond” and “Recycle” for the spots
Top Coat: Essie Gel Setter
Tools: Dotting tool
The gel setter top coat is recommended for its long-lasting finish that maintains the crispness of the design.
DIY Instructions
Preparation: Start by applying a strengthening base coat to protect your nails.
Base Color: Apply two coats of “White on White” for a clean, opaque background.
Leopard Spots: Using a dotting tool, add irregular spots with “Black Diamond” and “Recycle.”
Finishing Touches: Seal your design with a gel setter top coat for a durable, glossy finish.
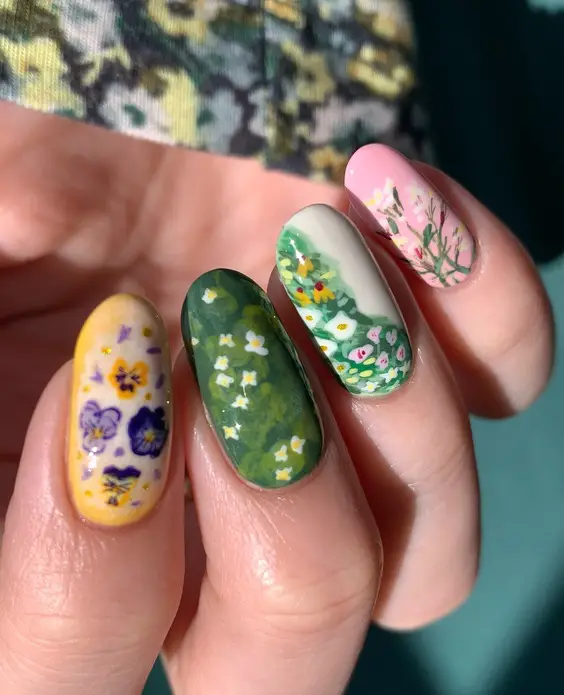
Floral Artistry
These nails celebrate the beauty of nature with their intricate floral designs spread across a vibrant color palette. This artful composition features soft pink and white base colors, overlaid with detailed depictions of various flowers and leaves.
Polishes: Various acrylic paints for the flowers, OPI “Alpine Snow” for the white base
Top Coat: Seche Vite Dry Fast Top Coat
Tools: Fine brush for detailed art
Acrylic paints are used for their vibrant colors and ease of mixing, allowing for detailed and colorful floral designs.
DIY Instructions
Preparation: Apply a sticky base coat to clean nails for better polish adhesion.
Base Color: Paint the nails with “Alpine Snow.”
Floral Details: Hand-paint each flower and leaf with fine brushes and acrylic paints.
Finishing: Add a layer of fast-drying top coat for a long-lasting and glossy finish.
Sleek Black Marble
This nail design offers a luxurious take on the classic marble effect, featuring swirling black patterns over a translucent pink base. The design is both elegant and dramatic, perfect for evening events or as a bold everyday look.
Polishes: Essie “Ballet Slippers” for the base, “Licorice” for the marble effect
Top Coat: Deborah Lippmann Gel Lab Pro Top Coat
Tools: Detailing brush, saran wrap
The gel lab pro top coat ensures a smooth, glass-like finish that enhances the marble effect.
DIY Instructions
Preparation: Apply a base coat to ensure that the nail surface is smooth.
Base Color: Paint all nails with “Ballet Slippers.”
Marble Effect: Dip a detailing brush in “Licorice” and create marble patterns. Use saran wrap to dab and blur the design for a more natural marble look.
Finishing Touches: Once dry, apply a gel lab pro top coat for ultimate shine and protection.
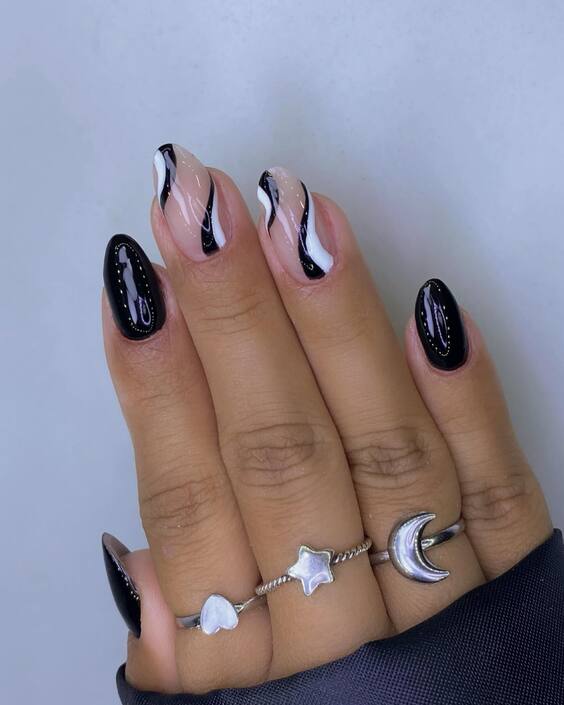
Chic Noir with Playful Accents
This design marries sophistication with whimsy through its use of stark black and soft nude tones, accented by intricate line art and a charming cat motif. It’s perfect for those who want to express their playful side while maintaining an air of elegance.
Polishes: Essie “Licorice” for the black, “Ballet Slippers” for the nude
Top Coat: Sally Hansen Miracle Gel Top Coat
Tools: Detailing brush for the line art
The combination of gel polish and a precise detailing brush ensures the artwork is both durable and finely detailed.
DIY Instructions
Preparation: Apply a gel base coat for a smooth foundation.
Base Color: Alternate between “Licorice” and “Ballet Slippers” on different nails.
Detailing: Use a fine brush to draw the playful motifs and delicate lines.
Finishing Touches: Seal with a gel top coat for a long-lasting, glossy finish.
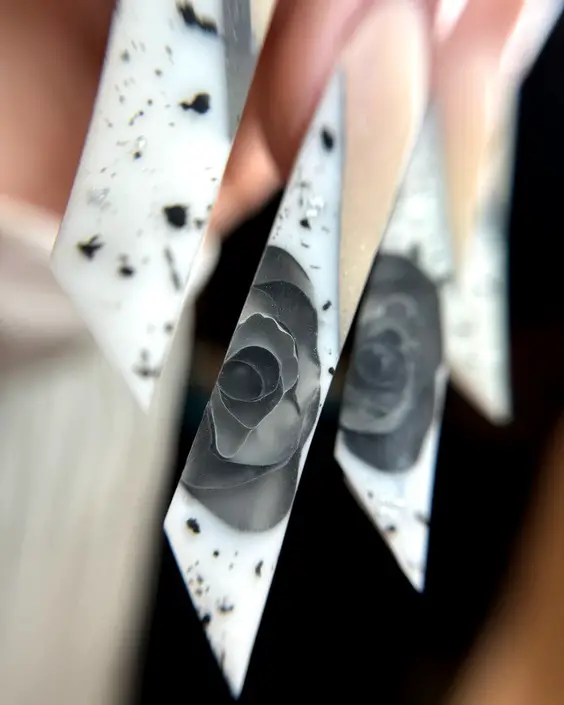
Elegance in Monochrome
This design features a stunning monochrome gradient with a delicate rose detail carved within the nail. The look combines modern artistry with classic elegance, making it a sophisticated choice for any formal occasion.
Polishes: White and black gel polish for gradient, clear gel for sculpting
Top Coat: Essie Gel Setter Top Coat
Tools: Sponge for gradient, fine brush for detail work
The sculpted rose adds a three-dimensional element that truly makes the nails stand out as miniature pieces of art.
DIY Instructions
Preparation: Apply a base coat to protect the nail.
Base Gradient: Use a sponge to blend white and black gel polish for a smooth gradient effect.
Rose Detailing: Sculpt the rose detail using clear gel polish and a fine brush.
Finishing: Apply a gel setter top coat for a durable, high-gloss finish.
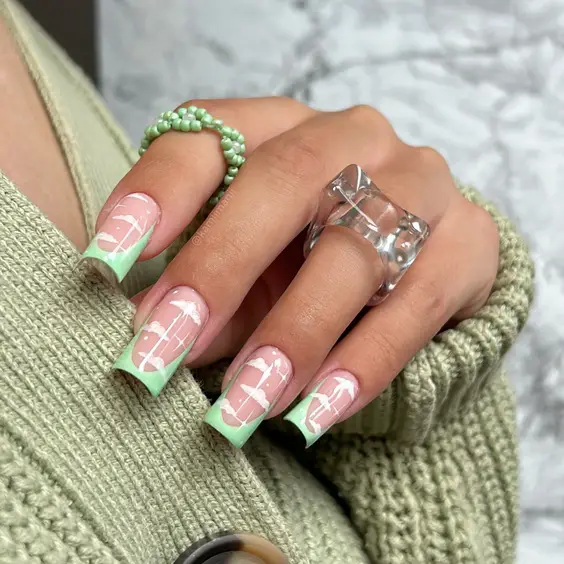
Pastel Geometry
This fresh, geometric design uses pastel shades to create a crisp and modern look that’s perfect for spring or summer. The interplay of pink and soft green is accented by white lines that give the nails a sharp, clean finish.
Tools: Tape for clean lines, fine brush for detailing
Using tape helps achieve those perfectly straight lines that are crucial for a geometric look.
DIY Instructions
Preparation: Apply a base coat to ensure adhesion and longevity.
Base Colors: Paint alternate nails in pastel pink and green.
Detailing: Use tape to section off areas for white lines, then paint with a fine brush.
Finishing Touches: Apply a fast-drying top coat to seal the design and add a protective glossy finish.
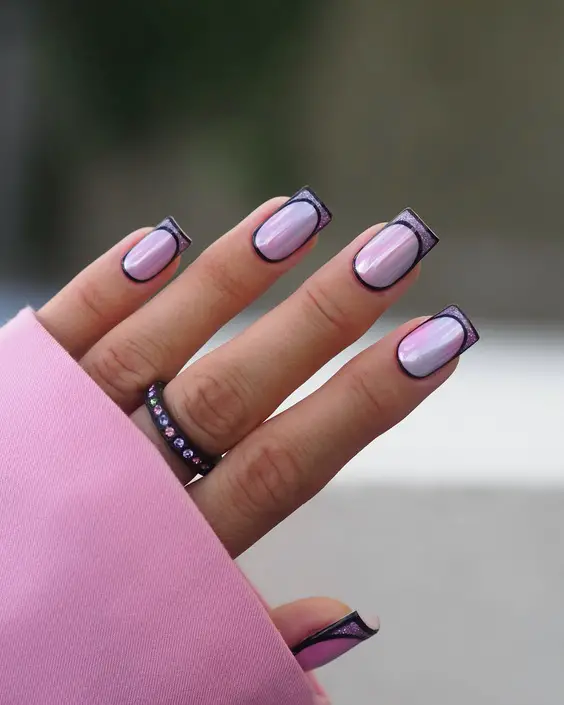
Lavender Dreams
This design showcases a dreamy lavender hue paired with dark, contrasting outlines for a striking effect. The minimalist approach focuses on clean lines that define the nail edges, creating a sophisticated yet simple aesthetic.
Polishes: Light lavender, deep purple for outlines
Top Coat: OPI Top Coat
Tools: Fine brush for precision outlining
The use of contrasting purples gives this design a modern twist that’s both eye-catching and elegant.
DIY Instructions
Preparation: Begin with a base coat to protect your nails.
Base Color: Paint all nails with a soft lavender.
Outlining: Carefully outline the edges of each nail with a deeper purple using a fine brush.
Finishing: Complete the look with a top coat for shine and durability.
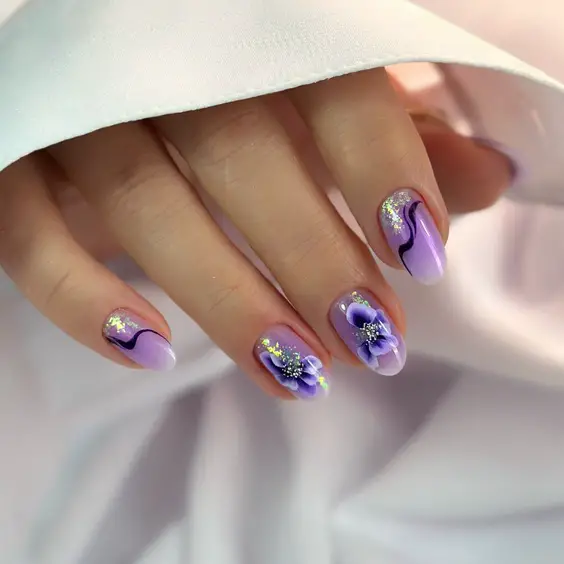
Lavender Artistry
This delicate design features a soft lavender base with swirling, darker purple accents and embellished with tiny crystals. It strikes a balance between simplicity and ornate detail, ideal for those who appreciate subtle elegance.
Tools: Fine brush for swirls, tweezers for crystals
Using a fine brush allows for precise control over the intricate swirls, while tweezers help place crystals accurately without smudging the underlying polish.
DIY Instructions
Preparation: Apply the base coat to clean nails.
Base Color: Cover the nails with a smooth layer of lavender polish.
Detailing: Draw swirls with dark purple polish using a fine brush.
Embellishments: Add crystals on focal points for extra sparkle.
Finish: Seal with a top coat for lasting wear and enhanced shine.
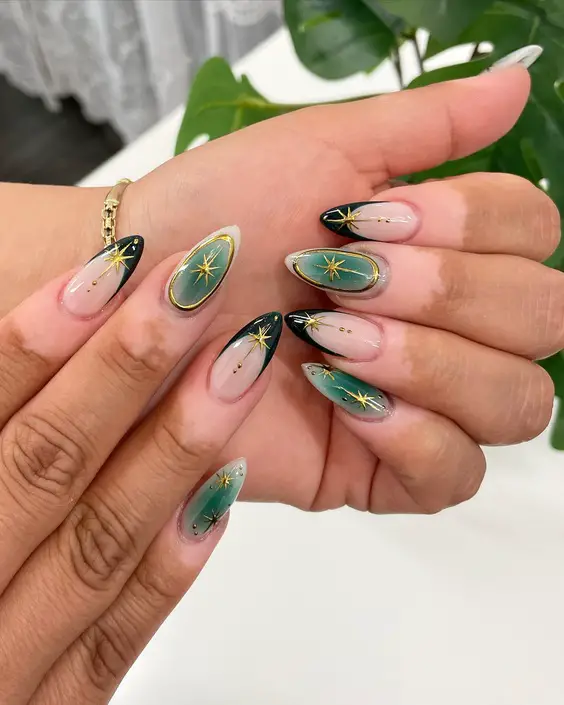
Starry Sky Gradient
This nail design features a gradient base that transitions from pink to teal, overlaid with hand-painted stars and golden linings that evoke a starry night sky. It’s a magical look for those who dream big.
Polishes: Pink and teal for gradient, gold for stars
Top Coat: Sally Hansen Miracle Gel Top Coat
Tools: Sponge for gradient, fine brush for stars
The gradient technique is made easier with a sponge, blending pink and teal into a seamless transition, while the fine brush ensures precise star shapes.
DIY Instructions
Preparation: Start with a base coat to protect the nails.
Gradient Base: Apply pink polish at the nail base and teal at the tip. Blend using a sponge.
Stars and Accents: Paint small stars and golden lines with a fine brush.
Finishing Touches: Apply a gel top coat for a smooth, glossy finish.
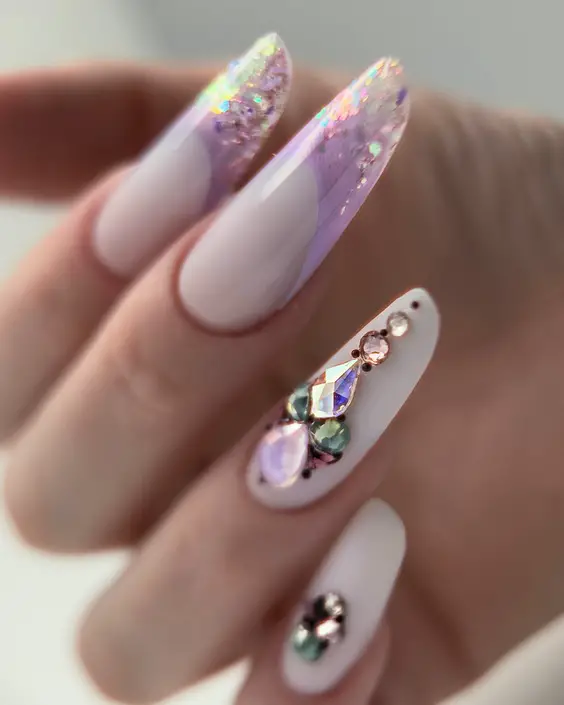
Ethereal Sparkles
Featuring an ethereal mix of white and pastel lavender, this nail design is accented with glitter and sophisticated jewel embellishments. The overall effect is both dreamy and luxurious, perfect for special occasions.
Polishes: White and pastel lavender, glitter polish
Decorations: Jewel embellishments
Top Coat: Seche Vite Dry Fast Top Coat
Tools: Tweezers for jewel placement
Jewel embellishments are carefully placed to catch the light, enhancing the shimmering effect of the glitter polish.
DIY Instructions
Preparation: Apply the base coat for longevity.
Base Colors: Paint nails with white and pastel lavender, adding touches of glitter.
Jewels: Use tweezers to place jewels strategically on the nails.
Finish: A top coat is applied to secure the decorations and add a protective glossy finish.
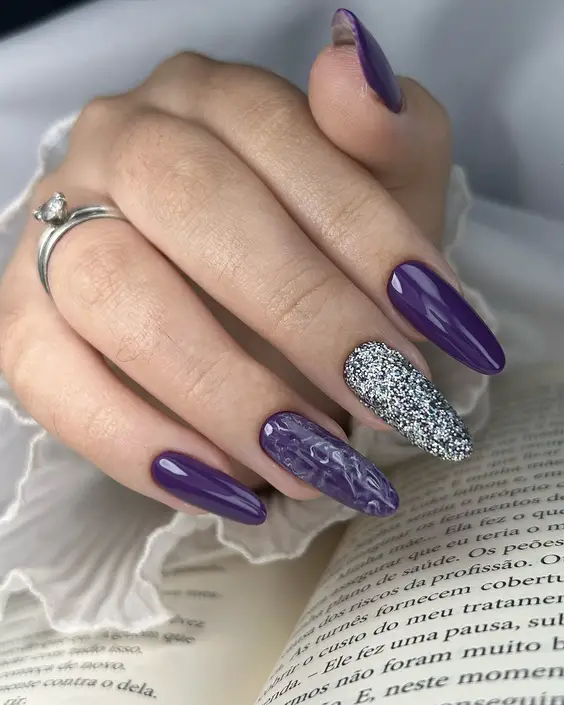
Majestic Purple Elegance
This design showcases a bold, deep purple base complemented by a glittery silver nail and subtle purple marbling. It’s a regal choice that pairs well with both day and evening wear.
Polishes: Deep purple, silver glitter, and marbling medium
Top Coat: OPI Top Coat
Tools: Marbling tool, sponge for glitter application
The use of a marbling tool allows for unique, intricate designs, while a sponge helps to apply glitter evenly for a consistent sparkle.
DIY Instructions
Preparation: Start with a protective base coat.
Base Color: Apply deep purple on all nails except one.
Glitter Nail: Apply silver glitter using a sponge for full coverage.
Marbling: Create a marbling effect on one nail using lighter purple polish.
Finishing Touches: Seal with a top coat for durability and a high gloss finish.
Conclusion
As we’ve explored these diverse and beautiful nail designs, it’s clear that the possibilities are endless when it comes to expressing yourself through your manicure. Whether you prefer the subtle elegance of pastel tones or the dramatic flair of bold patterns, there’s a design here to resonate with every personality and taste. Remember, each nail design not only enhances your appearance but also boosts your confidence by reflecting your unique style and creativity. So, embrace these ideas, experiment with your favorite looks, and let your nails be your canvas for self-expression and artistic creativity. Step into any room as your hands make a statement all their own, perfectly polished to perfection!
Tina Pratsyuk15 June 2024Last Updated: 16 August 2024
Tina Pratsyuk is a talented author, practicing colorist, and passionate enthusiast in the world of beauty, hairstyles, and style. Her journey toward creating a successful website began with a childhood love for experimenting with hair. Today, she combines her professional expertise as a colorist with her creative flair, sharing modern trends, styling tips, and hair care advice to inspire others to embrace their unique beauty.