19 Stunning Fall Leaf Nail Designs to Elevate Your Autumn Style
Vivid Autumn Spectrum
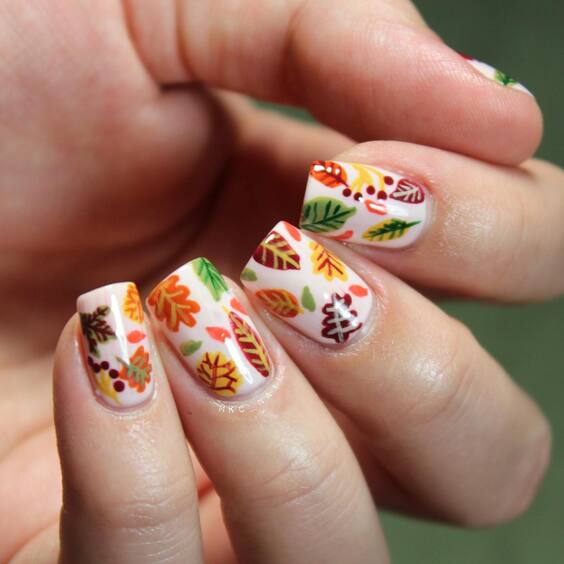
This nail design captures the essence of autumn with its vivid depiction of fall leaves on a clear base. The nails are adorned with a variety of leaf patterns in warm tones of orange, yellow, and red, interspersed with touches of green. This look not only celebrates the seasonal color shift but also showcases a playful yet sophisticated artistry.
Consumables Needed
- Base Coat: A clear base to ensure the colors pop.
- Polish Colors: Orange, yellow, red, and green nail polishes.
- Top Coat: For a glossy finish that protects the design.
- Fine Brush: For detailed leaf painting.
- Dotting Tool: To add small details and accents.
DIY Instructions
Begin by applying a clear base coat. Once dry, use a fine brush to draw various leaf shapes across each nail, using different colors for diversity. With a dotting tool, add intricate details to each leaf, enhancing its realism. Finish with a top coat to seal in your artwork.
Autumn Whisper
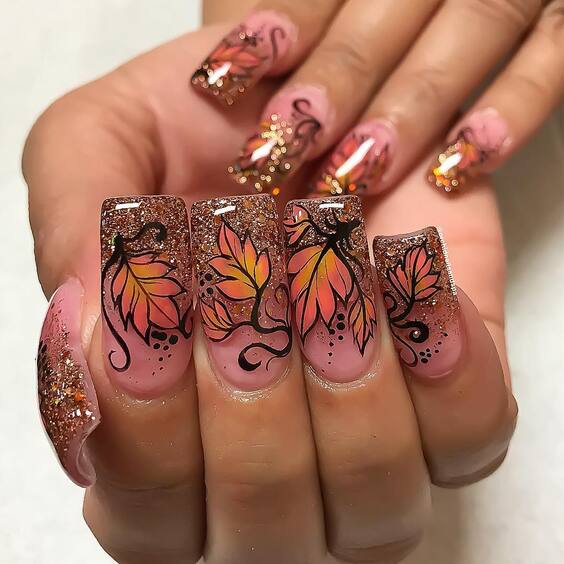
This design features an elegant gradient background transitioning from soft pink to sparkling orange, overlaid with black silhouetted leaves. The combination of the shimmering background and the bold leaf outlines offers a modern twist on traditional fall themes, perfect for both casual and formal settings.
Consumables Needed
- Gradient Polishes: Pink and orange glitter nail polishes.
- Black Polish: For the leaf outlines.
- Sponge: For the gradient effect.
- Fine Brush: To outline leaves.
- Top Coat: To enhance and protect the design.
DIY Instructions
Start with a pink base. Once that’s set, use a sponge to apply the orange glitter polish, creating a gradient effect. With a fine brush, draw silhouetted leaves in black over the gradient. Apply a top coat for durability and shine.
Harvest Festival
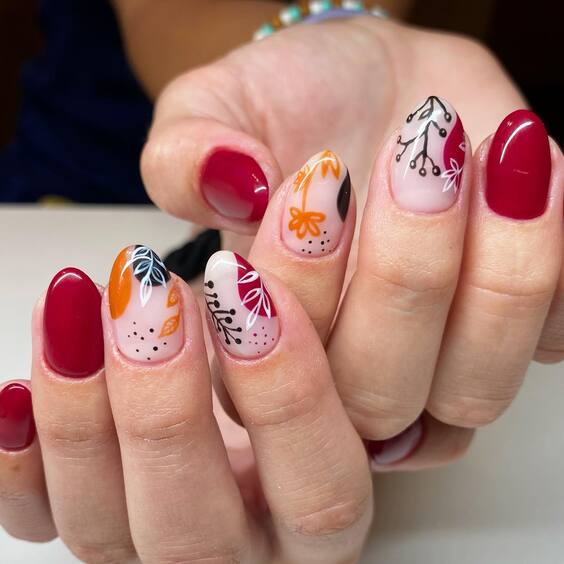
Rich maroon nails serve as a backdrop for golden swirls mimicking autumn winds, a design that’s both dramatic and enchanting. The deep base color evokes the richness of fall, while the swirling golden accents add a touch of whimsy.
Consumables Needed
- Maroon Polish: As the base color.
- Gold Polish: For the swirls.
- Fine Brush: For detailed swirl designs.
- Top Coat: For a glossy finish.
DIY Instructions
Paint your nails with the maroon polish as a base. Use a fine brush dipped in gold polish to create swirling patterns that mimic the autumn breeze. Seal the design with a top coat to ensure it lasts through all your fall adventures.
Twilight Reflections
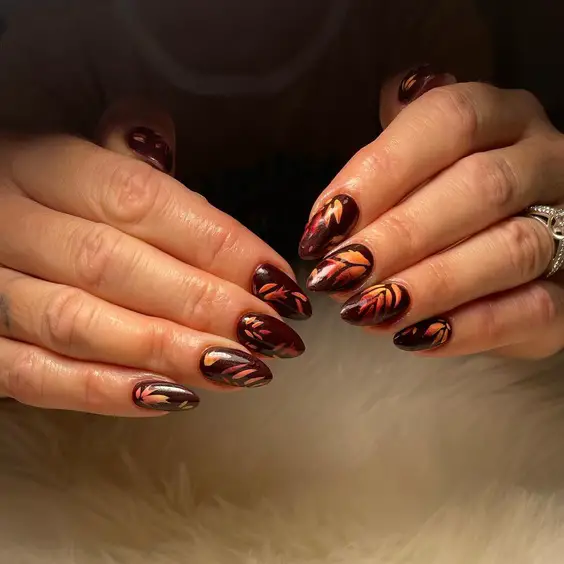
This luxurious nail art exudes an air of mystery and depth, perfect for the twilight hours of autumn. The design features a rich maroon base intertwined with golden and black swirls that mimic the organic, meandering patterns of falling leaves and evening breezes. The interplay of reflective gold and deep maroon creates a captivating visual effect that’s both elegant and daring.
Consumables Needed
- Maroon Polish: For a deep, rich base.
- Gold Metallic Polish: To add a touch of glamour and reflection.
- Black Polish: For contrast and depth.
- Fine Brush: For creating detailed swirls.
- Top Coat: To ensure a glossy, enduring finish.
DIY Instructions
Begin by applying a base of maroon polish for a lush, autumnal background. Once dry, use a fine brush to delicately add swirls of gold metallic polish, ensuring each stroke complements the curves and contours of your nails. Introduce black polish to accentuate and define the swirls, enhancing the design’s complexity. Finish with a top coat to seal in the colors and provide a lasting, shiny appearance.
Elegant Minimalism
This design epitomizes minimalist elegance with its soft pink base and stark black leaf outlines. The leaves, artistically rendered in a graphic style, are strategically placed to create a sense of movement and contrast. This understated yet striking design is perfect for those who appreciate a clean, modern aesthetic in their nail art.
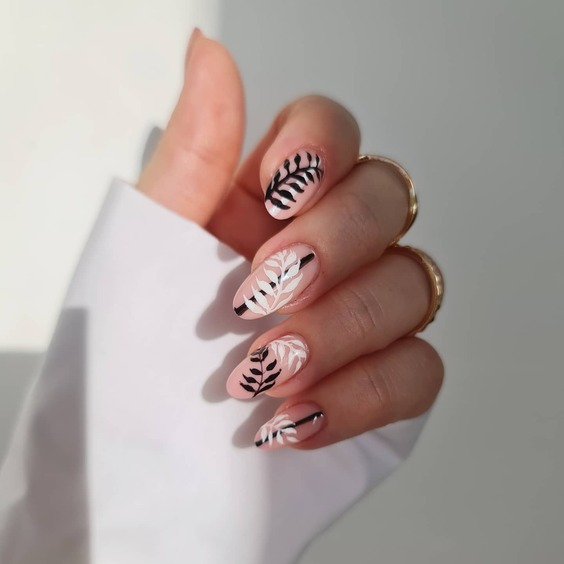
Consumables Needed
- Soft Pink Polish: As the base color.
- Black Polish: For crisp leaf outlines.
- Fine Brush: For precise line work.
- Top Coat: To ensure longevity and gloss.
DIY Instructions
Start with two coats of soft pink polish for a smooth, opaque base. Once dry, use a fine brush to paint black leaf outlines, varying the size and orientation for visual interest. Seal the design with a high-gloss top coat for a durable finish.
Autumn Transparency
Capturing the translucency of autumn, this design features delicate, painted leaves in shades of yellow, orange, and red on a clear base. The leaves appear as if they are gently floating across the nails, offering a beautiful display of autumn’s fleeting beauty.
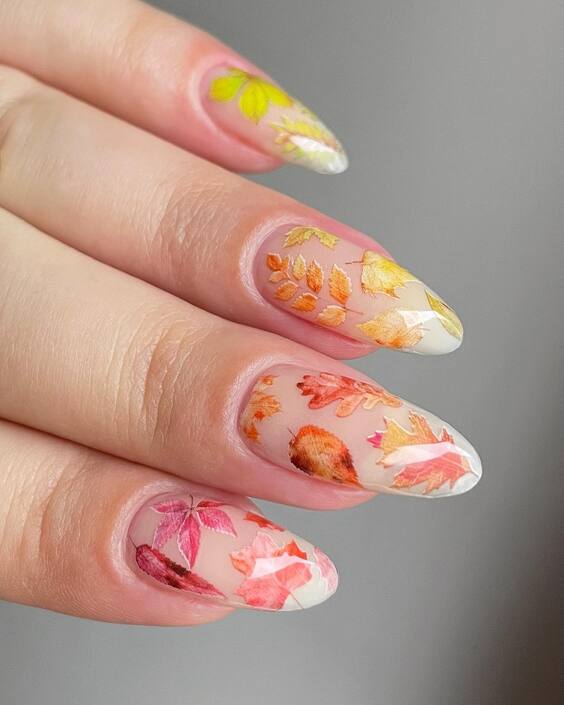
Consumables Needed
- Clear Base Coat: To showcase the natural nail.
- Watercolor Polishes: Yellow, orange, and red for the leaves.
- Fine Brush: For detailed leaf painting.
- Top Coat: For protection and shine.
DIY Instructions
Apply a clear base coat to clean, filed nails. Once dry, use watercolor polishes with a fine brush to paint thin, delicate leaves, allowing colors to blend slightly at the edges. Finish with a top coat to enhance and protect the design.
Glittering Autumn
This nail design is a celebration of autumn’s sparkle, featuring a glittering golden base with white leaves outlined in black. The contrasting colors make the leaf patterns pop, and the glitter adds a festive touch, perfect for seasonal celebrations.
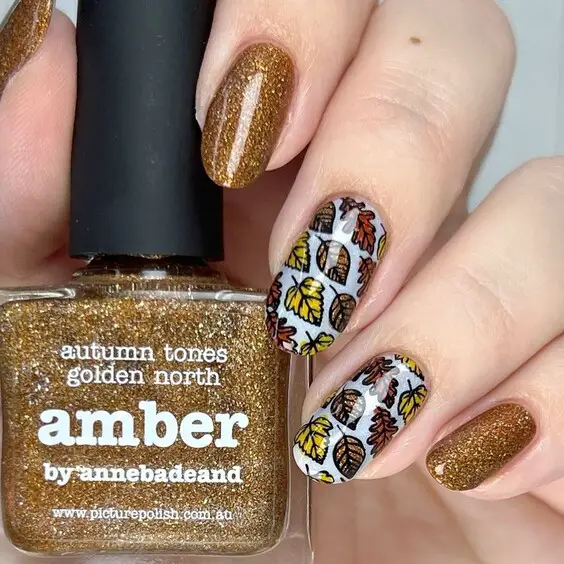
Consumables Needed
- Golden Glitter Polish: For the base.
- White Polish: For leaf outlines.
- Black Polish: For accentuating details.
- Fine Brush: For precise designs.
- Top Coat: To seal in the sparkle.
DIY Instructions
Paint your nails with golden glitter polish as the base. Once dry, use white polish to outline leaves, and then trace the outlines with black polish for definition. Apply a top coat for a dazzling and durable finish.
Radiant Autumn Reds
This design features a radiant red base with green leaves that capture the vibrancy of the autumn season. The shiny finish on the red polish makes the green leaves stand out, reflecting the lively contrast seen in nature during fall.
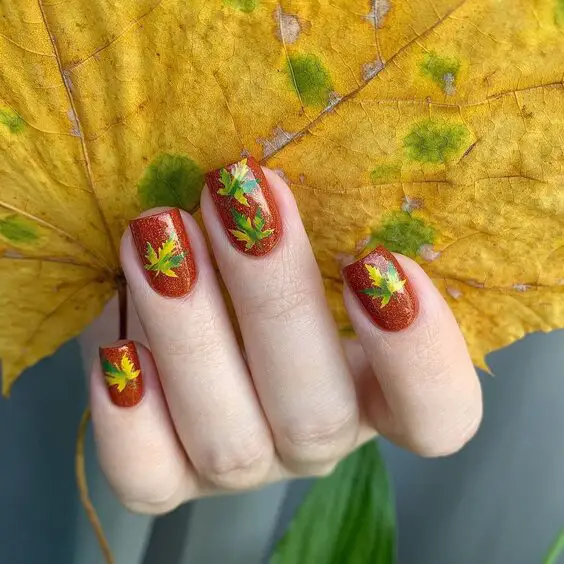
Consumables Needed
- Radiant Red Polish: As the base color.
- Green Polish: For the leaves.
- Fine Brush: For detailed leaf art.
- Top Coat: To enhance the gloss and durability.
DIY Instructions
Begin by applying a radiant red polish as the base. Use a fine brush with green polish to draw small, intricate leaves, creating a pattern that mimics the scattering of leaves in autumn. Finish with a top coat to ensure your manicure shines through the season.
Shimmering Leaf Illusions
This intricate design marries the natural beauty of fall leaves with the mesmerizing allure of metallic sheens. Each nail is a canvas featuring a gradient of autumnal hues overlaid with detailed leaf patterns, creating an illusion of leaves rustling in a gentle breeze. The use of metallic paints adds a luxurious shimmer, elevating the overall aesthetic.
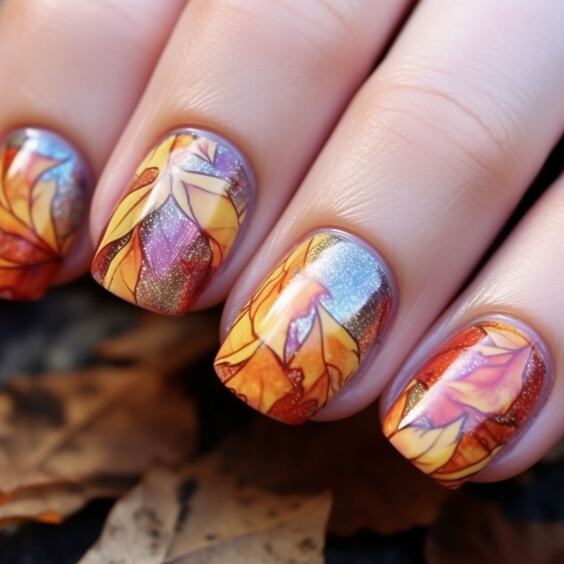
Consumables Needed
- Metallic Polishes: Copper, gold, and silver for gradient effects.
- Leaf Stencils: To create sharp, detailed designs.
- Sponge: For a smooth gradient application.
- Top Coat: To seal and enhance the metallic finish.
DIY Instructions
Begin by applying a base coat. Use a sponge to dab on the metallic polishes, blending them gently to create a gradient effect. Place leaf stencils on the nails and apply a contrasting polish to fill in the designs. Remove the stencils and finish with a top coat for a shimmering, durable manicure.
Artistic Leaf Interpretations
Showcasing a creative and artistic approach to leaf designs, this manicure features abstract and stylized interpretations of foliage in bold colors on a white base. Each nail presents a unique pattern, combining black outlines with shades of purple, green, and orange, reminiscent of a modern art painting.
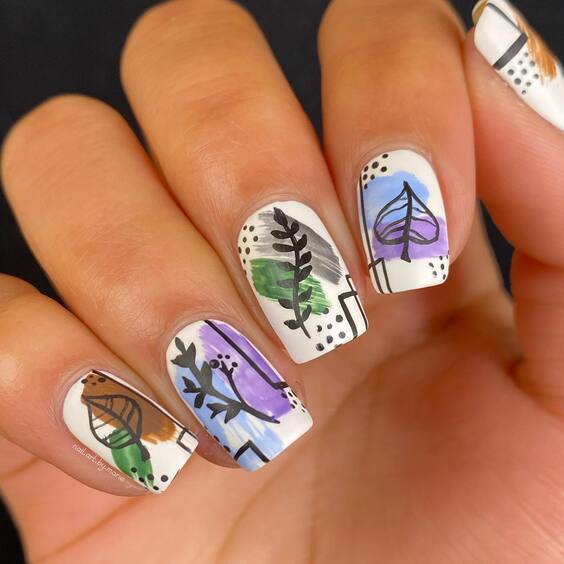
Consumables Needed
- White Base Polish: For a clean background.
- Colored Polishes: Purple, green, orange, and black for detailing.
- Fine Brush: For precise outline work.
- Top Coat: Ensures longevity and enhances color vibrancy.
DIY Instructions
Start with a white base coat on each nail. Once dry, use a fine brush to create abstract leaf patterns in various colors, outlining each with black to define the shapes clearly. Apply a top coat to protect and highlight the artistic designs.
Soft Pastel Leaves
This design takes a softer approach to fall leaf nail art with pastel tones and minimalist leaf outlines. It combines soft pinks and whites with vibrant leaf accents in orange and yellow, creating a fresh, youthful look perfect for any casual or formal autumn event.
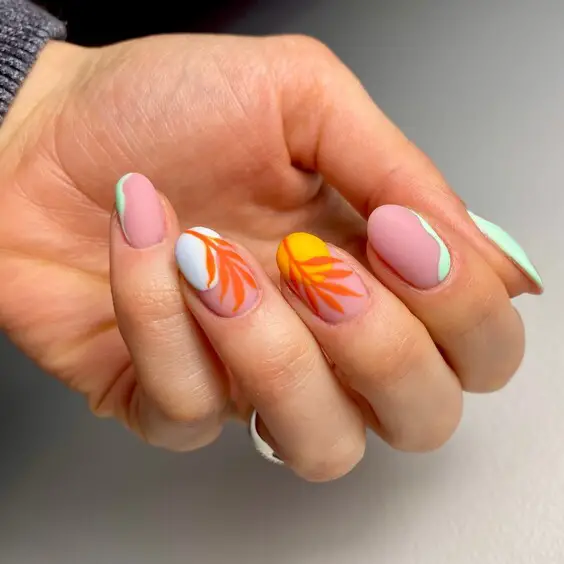
Consumables Needed
- Pastel Polishes: Soft pink and white.
- Accent Colors: Orange and yellow for the leaves.
- Fine Brush: For delicate detailing.
- Top Coat: To maintain softness and prevent chips.
DIY Instructions
Paint nails with a soft pink base, leaving some nails white for variety. Use a fine brush to add simple leaf designs in orange and yellow on top of the base colors. Seal with a top coat for a gentle, polished finish.
Autumn Red Splendor
Embodying the vibrant energy of autumn, this design features a bold red base with delicate leaf patterns in black and gold over a clear polish, showcasing a dramatic yet elegant contrast. The occasional touch of gold glitter adds a festive sparkle, making it ideal for holiday seasons or special autumn gatherings.
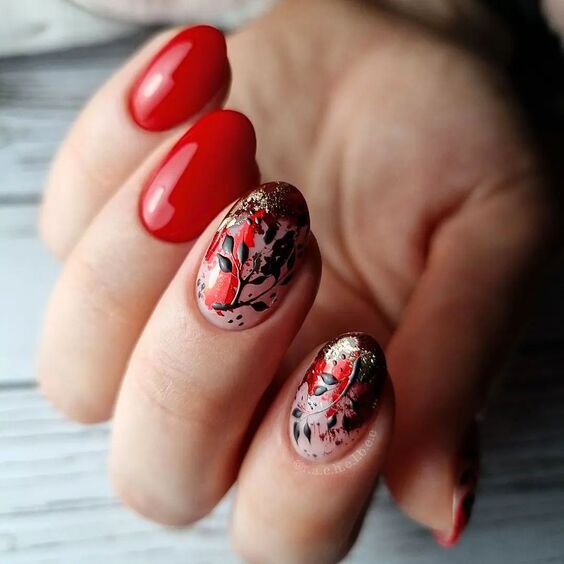
Consumables Needed
- Red Polish: For a vibrant base.
- Black and Gold Polishes: For detailed leaf designs.
- Gold Glitter: For added sparkle.
- Clear Polish: To overlay.
- Top Coat: For a glossy, enduring finish.
DIY Instructions
Apply two coats of red polish as the base. Once dry, use clear polish over which you will paint black leaf outlines, filling some with gold polish and adding gold glitter accents. Finish with a top coat to secure the glitter and ensure a long-lasting manicure.
Whispering Winds
This serene nail design showcases an exquisite wind-swept pattern, with subtle leaf imprints creating a sense of gentle movement across a frosty background. The use of minimal color highlights a sophisticated style that’s both modern and understated, ideal for those who prefer a more nuanced approach to fall nail art.
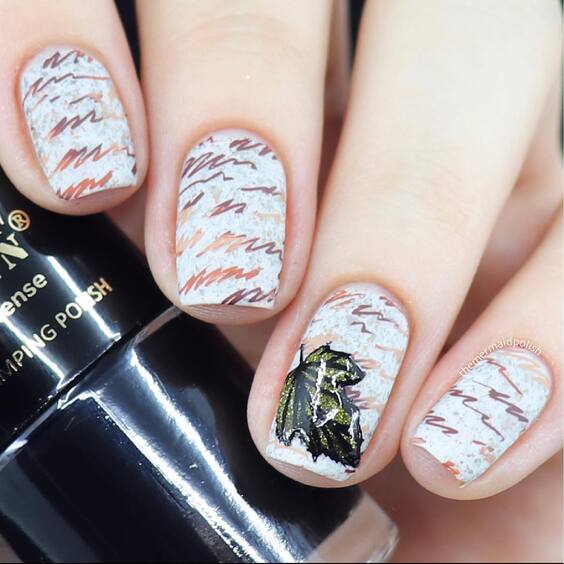
Consumables Needed
- Frosty White Polish: For the base.
- Brown and Gray Polishes: For the leaf patterns.
- Top Coat: To seal and add shine.
- Fine Brush: For detailed leaf strokes.
DIY Instructions
Begin by painting your nails with a frosty white polish for a clean base. Use a fine brush to gently stroke on wind-swept patterns with brown and gray polishes, mimicking the look of leaves blown by the wind. Seal the design with a top coat for a flawless finish.
Modern Leaf Art
Embrace a contemporary art style with this nail design, which combines sleek leaf silhouettes with a chic pink background. The leaf patterns are elegantly simplified, presenting a modern take on traditional fall imagery, perfect for fashion-forward individuals.
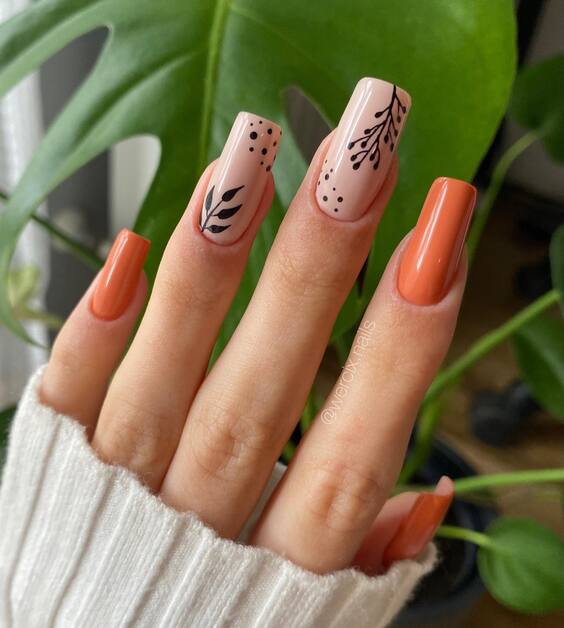
Consumables Needed
- Soft Pink Polish: As the base color.
- Black Polish: For the leaf outlines.
- Top Coat: For durability and gloss.
- Dotting Tool: For dotted details.
DIY Instructions
Apply a soft pink polish as the base. Once it’s dry, use black polish with a fine brush to draw simplified leaf shapes on each nail, adding small dots with a dotting tool to enhance the design’s modernity. Finish with a top coat to protect your artwork.
Fiery Leaf Impressions
This bold design captures the fiery essence of autumn with its vibrant blend of red and gold. The leaf patterns are stamped in black over a glittering background, making each nail a dazzling display of seasonal color and brilliance.
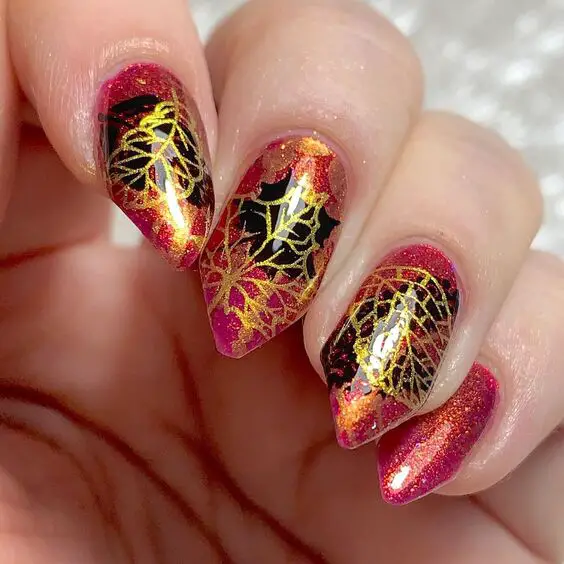
Consumables Needed
- Red and Gold Glitter Polish: For the base.
- Black Stamping Polish: For the leaf designs.
- Stamping Plate: With leaf patterns.
- Top Coat: To enhance and protect the shine.
DIY Instructions
Start with a base of red and gold glitter polish to create a sparkling effect. Use a stamping plate with leaf patterns and black stamping polish to apply the designs over the glitter base. Seal the design with a top coat to ensure longevity and extra sparkle.
Subtle Elegance
This design offers a subtle yet striking take on fall nail art, featuring delicate black leaf outlines over a clear polished base. It’s a minimalist approach that speaks volumes, ideal for those who appreciate understated beauty.
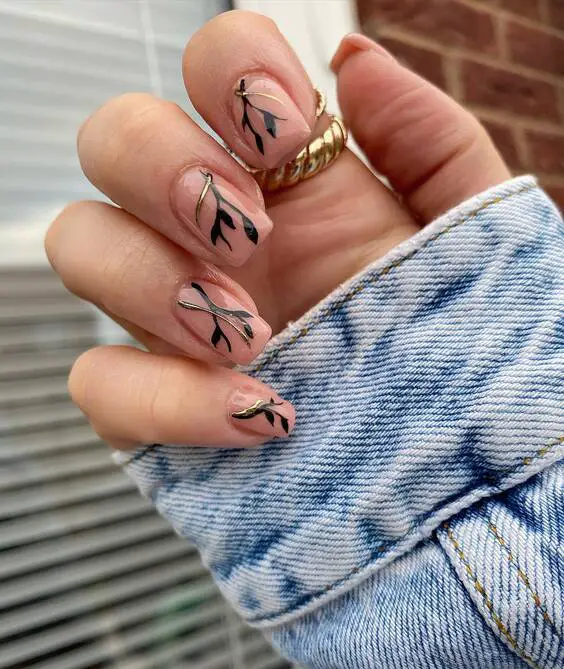
Consumables Needed
- Clear Polish: As the base.
- Black Polish: For the leaf outlines.
- Fine Brush: For precision in detailing.
- Top Coat: For a lasting finish.
DIY Instructions
Apply a clear polish as the base to emphasize the natural beauty of your nails. Once dry, use a fine brush with black polish to draw elegant leaf outlines on each nail. Complete the look with a top coat to protect and showcase the subtle designs.
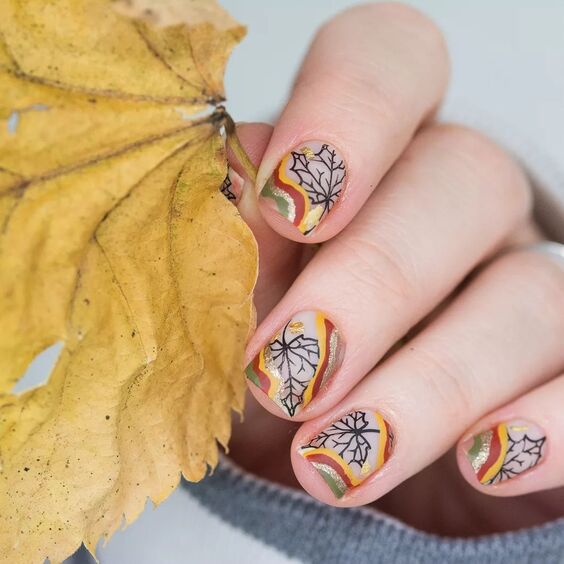
Autumn Canvas
This design beautifully integrates various autumn elements into a cohesive nail art piece. Each nail serves as a canvas showcasing different aspects of fall, from delicate leaf outlines to vibrant color patches, reflecting the season’s rich palette.
Consumables Needed
- Yellow and Orange Polishes: For the base colors.
- Black Polish: For leaf detailing.
- Fine Brush: For intricate designs.
- Top Coat: To seal and add shine.
DIY Instructions
Start with a base of yellow and orange polishes, applied in a soft, blended manner. Use a fine brush and black polish to add detailed leaf outlines over the colorful base. Finish with a top coat to enhance the visual depth and protect your designs.
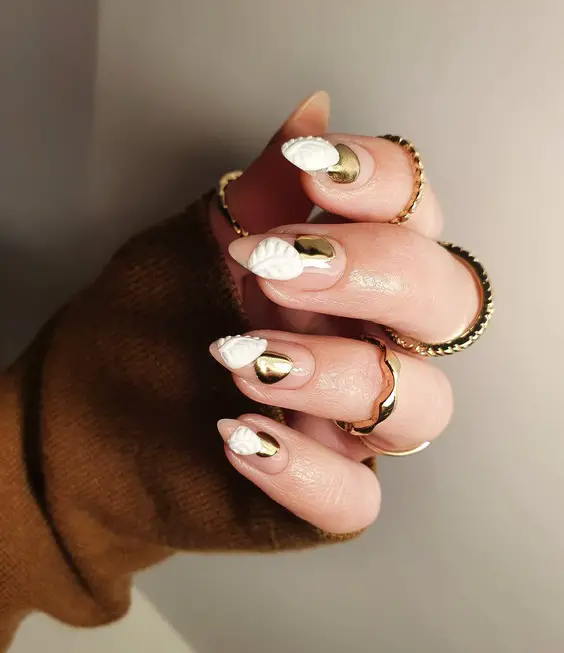
Golden Leaves
Elevate your nail art with this luxurious design featuring white 3D leaf appliqués on a golden metallic base. The combination of the textured leaves and the shimmering background creates a sophisticated, opulent look perfect for any autumnal event.
Consumables Needed
- Gold Metallic Polish: For the shimmering base.
- White 3D Leaf Appliqués: For texture and visual interest.
- Top Coat: To secure the appliqués and add a glossy finish.
DIY Instructions
Apply a gold metallic polish as the base. Once dry, carefully place the white 3D leaf appliqués on the nails, positioning them to maximize aesthetic appeal. Seal everything with a top coat to ensure durability and a high-gloss finish.
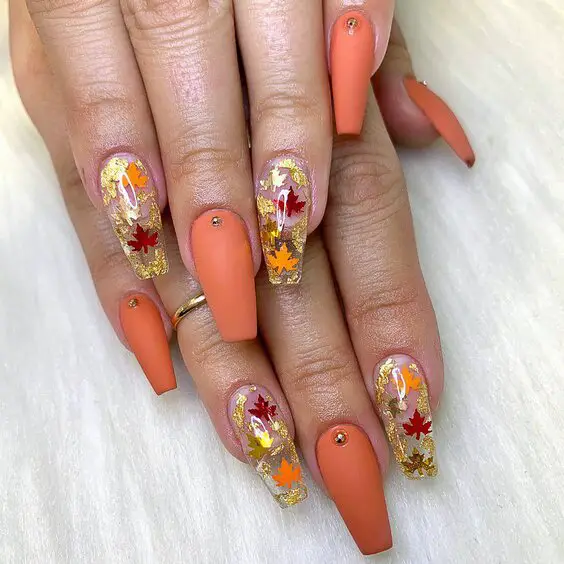
Festive Fall
This festive design is perfect for celebrating the spirit of fall, featuring a vivid display of leaf decals on a clear base interspersed with golden accents. The colorful leaves are enhanced by the glittery touches, making each nail a celebration of the season.
Consumables Needed
- Clear Polish: As the base to showcase the decals.
- Leaf Decals: In various autumnal colors.
- Gold Glitter Polish: For accents.
- Top Coat: For a smooth, protective finish.
DIY Instructions
Start by applying a clear polish as your base. Arrange the leaf decals on each nail, creating a vibrant, layered look. Add touches of gold glitter polish around the decals to enhance the festive feel. Finish with a top coat to seal the design and add a professional-quality shine.
This comprehensive guide to fall leaf nail designs not only provides a plethora of ideas but also equips you with the know-how to bring these beautiful autumnal themes to your fingertips. Whether you prefer subtle elegance or bold statements, there’s a style here to suit your fall mood and activities. Embrace the season with these inspired designs and watch as your nails become a topic of conversation at your next fall gathering!

