19 Stunning Lavender Acrylic Nails: Designs & DIY Tips
Lavender Acrylic Nails with Embellishments
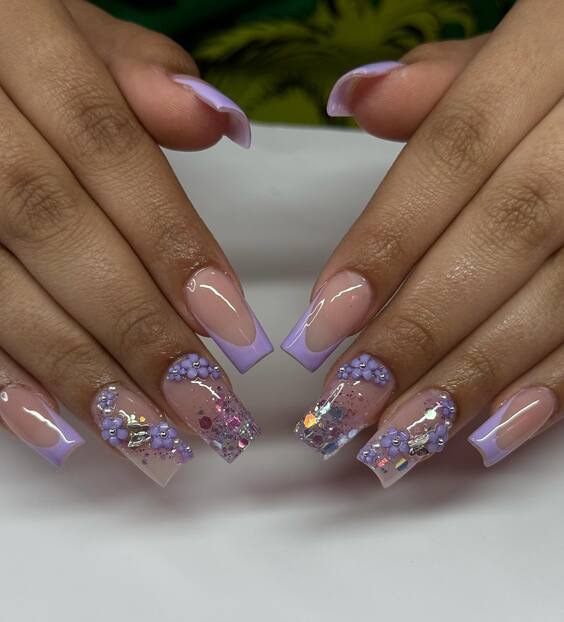
The featured lavender acrylic nails exemplify elegance with their coffin long shape, bringing a touch of sophistication and modern flair. The nails are adorned with various embellishments including subtle glitter and delicate floral decals in hues of purple and silver, enhancing their aesthetic appeal. This design not only captures the essence of luxury but also offers a versatile look suitable for both everyday elegance and special occasions.
Consumables List
- Base Polish: Lavender acrylic base
- Top Coat: High-gloss finish
- Embellishments:
- Silver glitter polish
- Purple floral decals
- Small rhinestones
- Tools:
- Fine-tip brush (for detailed decal application)
- Dotting tool (for precise glitter placement)
DIY Instructions
- Prepare Your Nails: Start by cleaning and shaping your nails into a coffin long shape, ensuring each nail has a smooth surface.
- Apply Base Polish: Use a lavender acrylic polish as the base. Apply two coats, allowing each coat to dry thoroughly.
- Add Embellishments: While the second coat is still tacky, gently place the floral decals and sprinkle some glitter using a dotting tool for precision. Add small rhinestones for an extra sparkle.
- Seal with Top Coat: Finish with a high-gloss top coat to seal in the embellishments and ensure a long-lasting finish
Lavender Acrylic Nails with Encapsulated Design
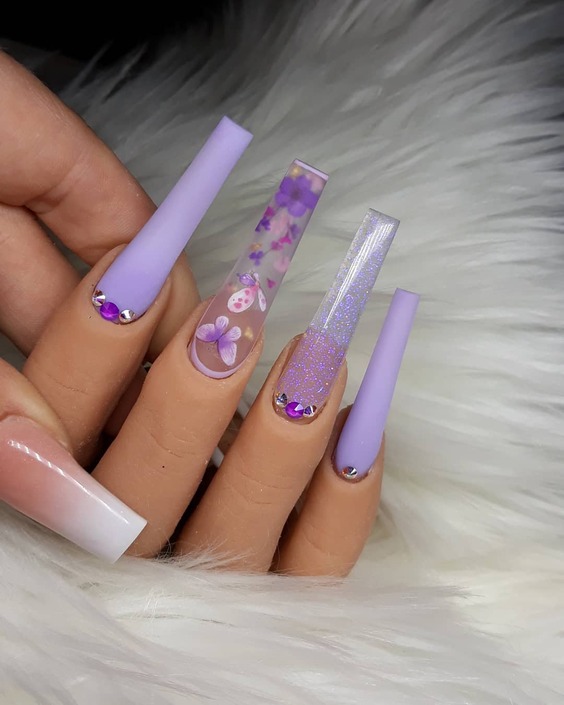
This striking design features lavender acrylic nails in an almond long shape, showcasing a unique encapsulated style. Inside the clear acrylic, small lavender and white flowers are suspended, creating a captivating three-dimensional effect. This technique not only adds depth but also allows for creative expression, making each nail a miniature piece of art. The choice of soft lavender enhances the femininity of the design, making it perfect for those who favor a subtle yet artistic nail look.
Consumables List
- Base Polish: Lavender acrylic base
- Clear Acrylic: For encapsulation
- Embellishments:
- Miniature lavender and white flowers
- Fine glitter dust
- Tools:
- Acrylic brush
- Tweezers (for placing flowers)
DIY Instructions
- Prepare Your Nails: Clean, buff, and shape your nails into an almond long profile.
- Apply Base Color: Coat your nails with a lavender acrylic base. Allow it to dry completely.
- Encapsulate Design: After the base is set, apply a layer of clear acrylic. Use tweezers to place the miniature flowers and a sprinkle of glitter inside the acrylic before it dries.
- Finish and Shape: Cap the design with another layer of clear acrylic and shape the nails as desired. Finish with a high-gloss top coat to enhance the depth and protect your design.
Lavender Acrylic Nails with Heart Accents
These charming lavender acrylic nails feature a short almond shape, perfectly suited for those who prefer a more practical length without sacrificing style. The design is highlighted by white heart accents over a translucent lavender base, giving it a playful yet elegant look. This design is ideal for everyday wear or for special occasions like Valentine’s Day, embodying a sweet and romantic aesthetic.

Consumables List
- Base Polish: Translucent lavender acrylic
- Accent Polish: White acrylic for hearts
- Top Coat: Matte finish for a modern look
- Tools:
- Detail brush (for heart accents)
- Stencil or freehand tool (optional for precision in heart shapes)
DIY Instructions
- Prepare Your Nails: Ensure your nails are clean, buffed, and shaped into a short almond form.
- Apply Base Polish: Start with a translucent lavender base. Allow it to dry thoroughly.
- Create Heart Accents: Using a detail brush, paint small white hearts. You can use a stencil for uniformity or freehand for a more organic look.
- Seal with Top Coat: Apply a matte top coat to provide a contemporary finish and protect your design.
Lavender Acrylic Nails with Floral 3D Art
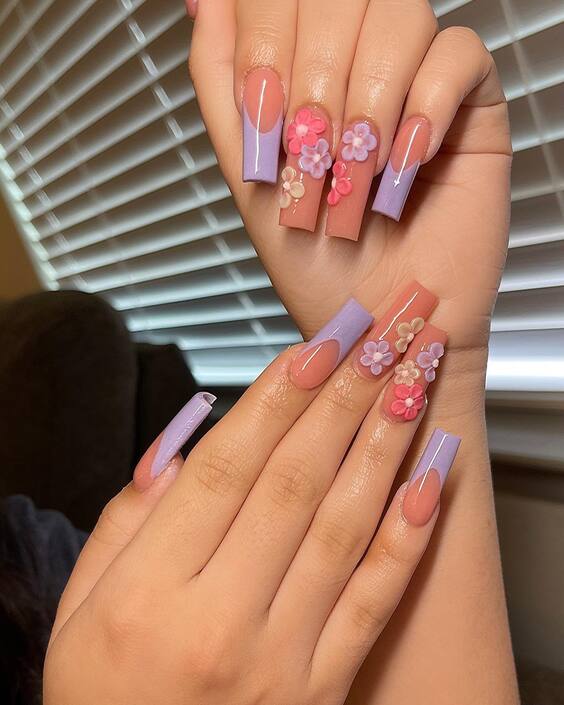
This set of lavender acrylic nails beautifully combines various shades of lavender and pink to create a multi-dimensional and textured appearance. The use of 3D floral art in complementary shades enhances the overall aesthetic, providing a tactile element that is both visually appealing and unique. The coffin long shape offers a bold canvas for the intricate flower designs, making it a standout choice for events where you want to make a statement.
Consumables List
- Base Polish: Gradient of lavender to pink acrylic
- 3D Art: Resin flowers in pink and white
- Top Coat: High-gloss finish for durability
- Tools:
- 3D art tweezers
- Detailing brush
DIY Instructions
- Prepare Your Nails: File and clean your nails, shaping them into a coffin long style.
- Apply Base Polish: Start with a base of light lavender and blend into a pink towards the tips using a sponge for a gradient effect.
- Attach 3D Flowers: Use tweezers to carefully place resin flowers on the nail while the base is still tacky.
- Seal with Top Coat: Finish with a layer of high-gloss top coat to protect your design and enhance the shine.
Lavender Acrylic Nails with Pearls and Lace Detail
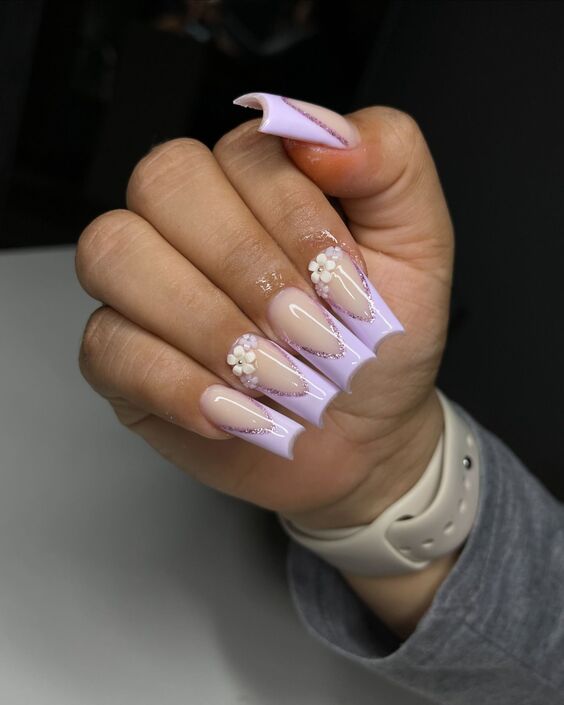
Elegance meets sophistication in these almond-shaped lavender acrylic nails, adorned with delicate white lace detailing and tiny pearls. This design exudes a bridal or formal event vibe, perfectly blending traditional motifs with modern nail art. The matte finish over the lavender base adds a contemporary touch, making the intricate details stand out beautifully.
Consumables List
- Base Polish: Matte lavender acrylic
- Embellishments:
- Small white pearls
- Lace decals
- Top Coat: Matte finish
- Tools:
- Fine-tip brush
- Precision tweezers
DIY Instructions
- Prepare Your Nails: Ensure your nails are clean and shaped into an almond profile.
- Apply Base Polish: Use a matte lavender polish as the foundation.
- Apply Lace and Pearls: Position the lace decals carefully, and then use precision tweezers to place pearls along the designs.
- Finish with Top Coat: Apply a matte top coat to seal in the embellishments and ensure a flat, elegant finish.
Lavender Acrylic Nails with Minimalist Designs
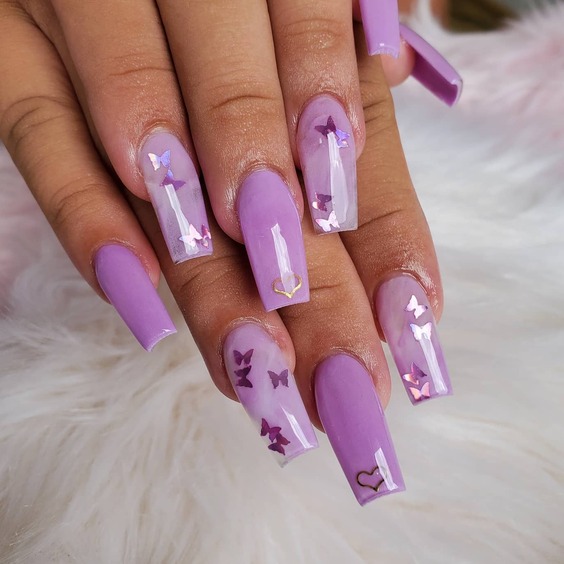
This design showcases minimalist chic with its clean lines and simple geometric shapes on a lavender base. The use of transparent sections interspersed with solid lavender and adorned with small gold accents gives these nails a modern, artistic flair. The oval shape is versatile and complements the understated design, making it suitable for both professional environments and casual outings.
Consumables List
- Base Polish: Lavender acrylic
- Accents: Gold foil strips
- Top Coat: High-gloss for a smooth finish
- Tools:
- Striping tape for precise lines
- Scissors
DIY Instructions
- Prepare Your Nails: Buff and clean your nails, shaping them into an oval form.
- Apply Base Polish: Paint your nails with a lavender acrylic polish.
- Design with Gold Foil: Use striping tape to create geometric patterns, then apply small pieces of gold foil for embellishment.
- Seal with Top Coat: Apply a high-gloss top coat to secure the design elements and enhance the overall shine.
Lavender Acrylic Nails with Elegant Swirls and Charms
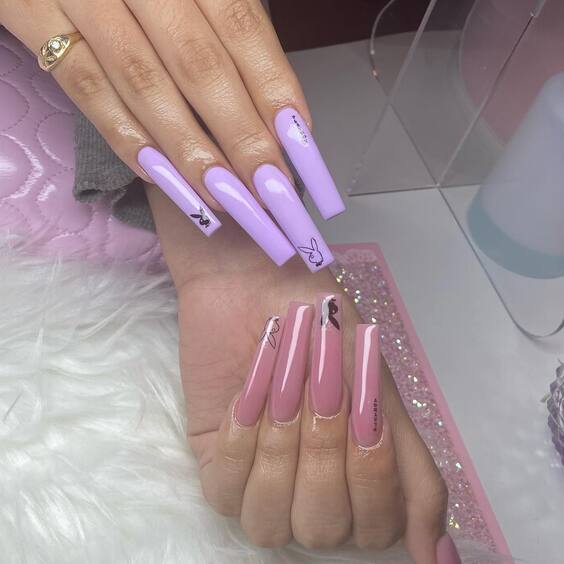
This delightful design showcases lavender acrylic nails with a playful twist of pink swirls and miniature charm accents. The coffin long shape provides ample space for the swirling designs to flow beautifully across each nail, creating an eye-catching effect. The subtle addition of tiny silver charms adds a whimsical touch, perfect for adding a bit of personality to a classic color scheme.
Consumables List
- Base Polish: Soft lavender acrylic
- Design Elements: Pink acrylic paint for swirls, silver nail charms
- Top Coat: High-gloss finish
- Tools:
- Detail brush for swirls
- Tweezers for charm placement
DIY Instructions
- Prepare Your Nails: Shape your nails into a coffin long style and ensure they are clean.
- Apply Base Polish: Paint a base of soft lavender acrylic.
- Create Swirls: Using a detail brush, add pink swirls across each nail. Let it partially dry.
- Add Charms: Place small silver charms along the swirls with tweezers.
- Seal with Top Coat: Apply a high-gloss top coat to protect your artwork and enhance the shine.
Lavender Acrylic Nails with White Floral Designs
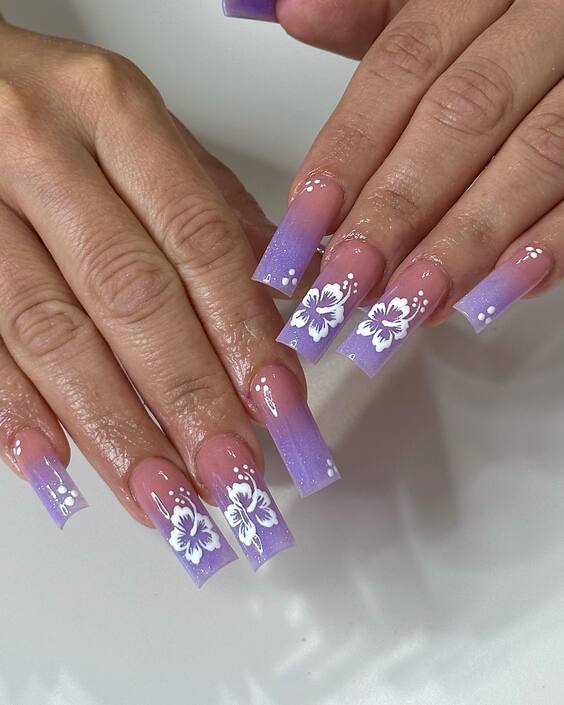
These lavender acrylic nails feature an elegant transition from a nude base to lavender tips, adorned with white floral designs. The sophisticated gradient provides a natural yet polished backdrop for the detailed flowers, which are expertly painted to appear almost lifelike. This design is particularly suited for spring and summer occasions, offering a fresh and clean look.
Consumables List
- Base Polish: Nude to lavender gradient
- Embellishments: White acrylic paint for floral designs
- Top Coat: High-gloss finish to enhance details
- Tools:
- Fine brush for detailed floral art
- Sponge for smooth gradient application
DIY Instructions
- Prepare Your Nails: Ensure nails are clean and shaped to your preference.
- Apply Base Gradient: Start with a nude base at the cuticle, blending into lavender towards the tips using a sponge.
- Paint Floral Designs: With a fine brush, carefully paint white flowers over the gradient background.
- Seal with Top Coat: Finish with a high-gloss top coat to protect your designs and bring out their vibrancy.
Lavender Acrylic Nails with Golden Flakes
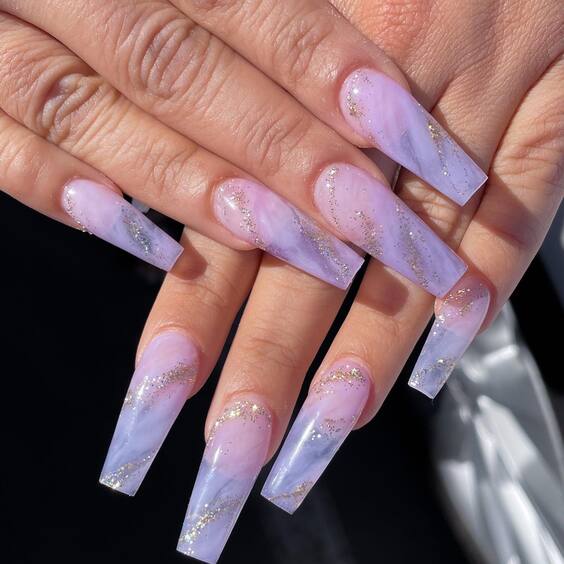
These long stiletto lavender acrylic nails are infused with a dreamy blend of soft purple hues and adorned with golden flakes. The translucent effect combined with gold accents creates a luxurious and ethereal appearance, ideal for those seeking a bold yet elegant nail design. This set is particularly striking under sunlight, where the gold flakes catch the light beautifully.
Consumables List
- Base Polish: Translucent lavender acrylic
- Embellishments: Gold leaf flakes
- Top Coat: High-gloss finish
- Tools:
- Tweezers for applying gold flakes
- Brush for blending acrylic
DIY Instructions
- Prepare Your Nails: File and clean your nails, shaping them into a long stiletto form.
- Apply Base Polish: Use a translucent lavender acrylic for a glass-like effect.
- Add Gold Flakes: While the base is tacky, gently apply gold leaf flakes with tweezers for precision.
- Seal with Top Coat: Apply a high-gloss top coat to encapsulate the flakes and enhance the overall finish.
Lavender Acrylic Nails with Geometric and Jewel Accents
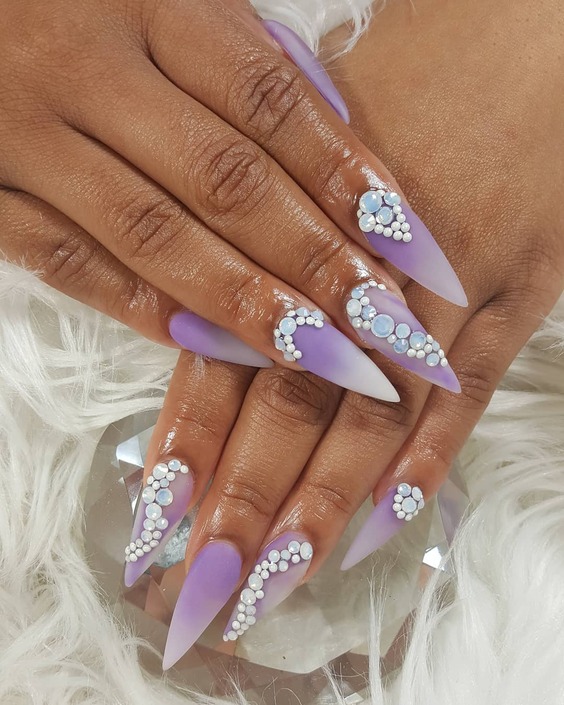
These stiletto-shaped lavender acrylic nails are artistically adorned with geometric patterns and jewel accents. The contrast between the smooth lavender base and the crisp white patterns creates a striking visual effect. The addition of jewel accents not only enhances the luxury of the design but also adds a touch of glamour, making these nails perfect for both day and evening wear.
Consumables List
- Base Polish: Lavender acrylic
- Embellishments:
- White acrylic paint for geometric patterns
- Jewel accents
- Top Coat: High-gloss finish
- Tools:
- Detail brush for patterns
- Tweezers for jewel placement
DIY Instructions
- Prepare Your Nails: Clean and shape your nails into a stiletto form.
- Apply Base Polish: Start with a lavender acrylic base coat.
- Create Patterns: Use a detail brush to paint geometric patterns in white.
- Add Jewels: Place jewel accents at strategic points on the patterns using tweezers.
- Seal with Top Coat: Finish with a high-gloss top coat to protect your design and enhance the visual impact.
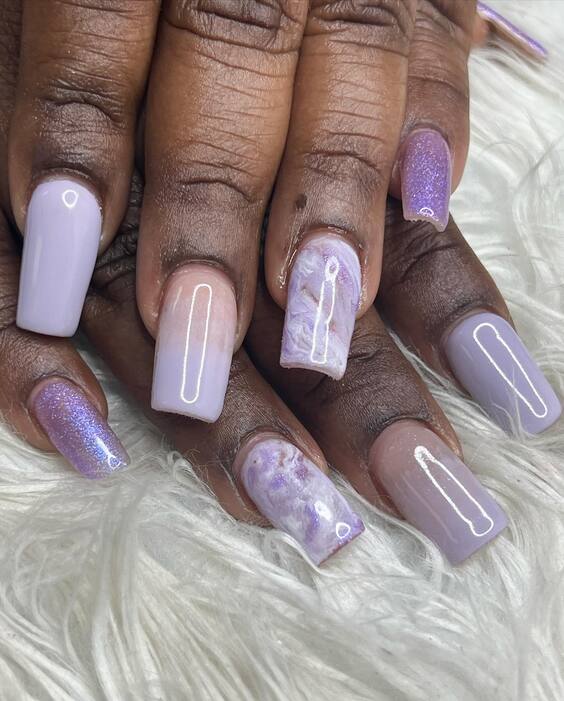
This set of lavender acrylic nails showcases a variety of artistic finishes, from solid colors to subtle marbling and line accents. The mix of matte and glossy finishes on different nails adds a contemporary touch, while the encapsulated design with floating elements brings depth and intrigue. This assortment is perfect for those who appreciate a dynamic yet cohesive nail design palette.
Consumables List
- Base Polishes: Matte lavender, glossy lavender, clear acrylic for encapsulation
- Embellishments:
- White line accents
- Glitter and floating elements for encapsulated nails
- Top Coat: Matte and glossy, depending on the nail
- Tools:
- Fine brush for line work
- Tweezers for placing encapsulated elements
DIY Instructions
- Prepare Your Nails: Ensure they are clean and shaped according to your preferred style.
- Apply Base Polishes: Use matte lavender on some nails and glossy lavender on others. Apply clear acrylic where encapsulation is desired.
- Add Details: For the clear acrylic nails, encapsulate glitter and floating elements. Use a fine brush to draw precise white lines on matte nails.
- Seal with Top Coat: Apply the appropriate top coat—matte or glossy—to each nail to enhance the finish and protect the design.
Lavender Acrylic Nails with Opalescent Sheen
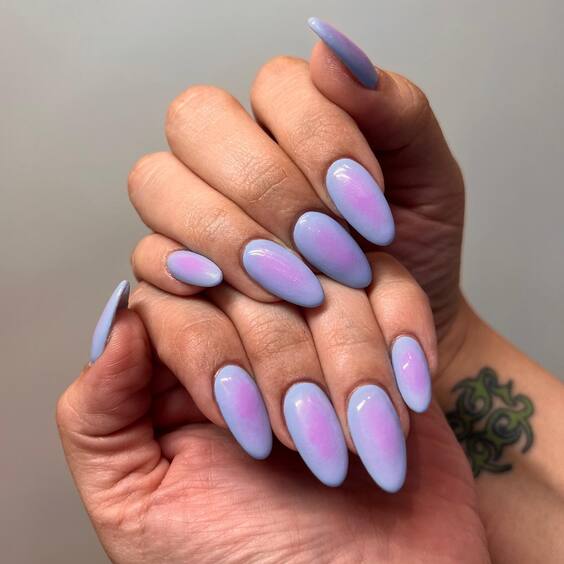
These almond-shaped nails feature a mesmerizing opalescent sheen that shifts colors between pink, blue, and lavender, depending on the light. The seamless blend of colors creates a dreamy, ethereal look that is both modern and enchanting. This design is perfect for those seeking a subtle yet impactful nail style that catches the eye with every movement.
Consumables List
- Base Polish: Opalescent lavender
- Top Coat: High-gloss for enhanced iridescence
- Tools:
- Sponge for a smooth application of the opalescent polish
DIY Instructions
- Prepare Your Nails: Clean and buff your nails, shaping them into an almond form.
- Apply Base Polish: Sponge on the opalescent lavender polish to ensure an even, smooth coverage.
- Seal with Top Coat: Finish with a high-gloss top coat to maximize the iridescent effect and ensure longevity.
Lavender Acrylic Nails with Glitter and Heart Accents
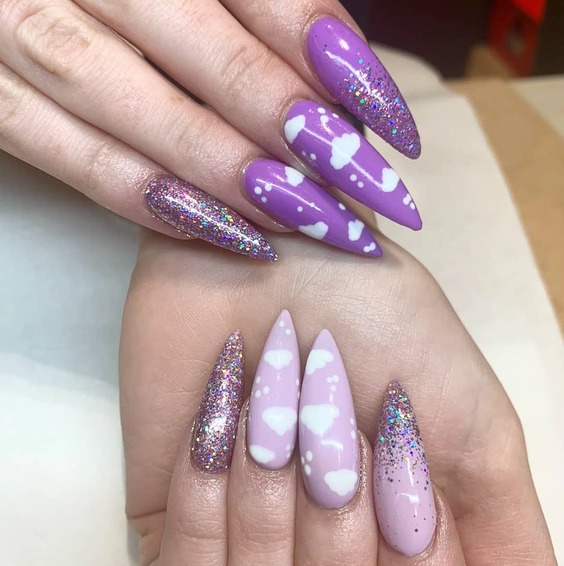
This playful set combines deep lavender hues with glitter and charming white heart accents for a bold yet romantic look. The alternating designs between sparkling glitter and clean, heart-adorned tips make each nail stand out, perfect for special occasions or everyday flair if you love a more decorative style.
Consumables List
- Base Polishes: Deep lavender, glitter polish
- Embellishments:
- White acrylic paint for heart accents
- Top Coat: High-gloss to seal and protect
- Tools:
- Dotting tool or small brush for heart accents
- Brush for glitter application
DIY Instructions
- Prepare Your Nails: Ensure nails are clean, buffed, and shaped, ideally into stiletto or almond forms for this design.
- Apply Base Polishes: Alternate between deep lavender and glitter polishes on different nails.
- Add Heart Accents: Use a dotting tool or a small brush to create heart shapes on the tips of the glitter-free nails.
- Seal with Top Coat: Apply a high-gloss top coat to each nail for a dazzling finish and lasting wear.
Lavender Acrylic Nails with Marble Effect
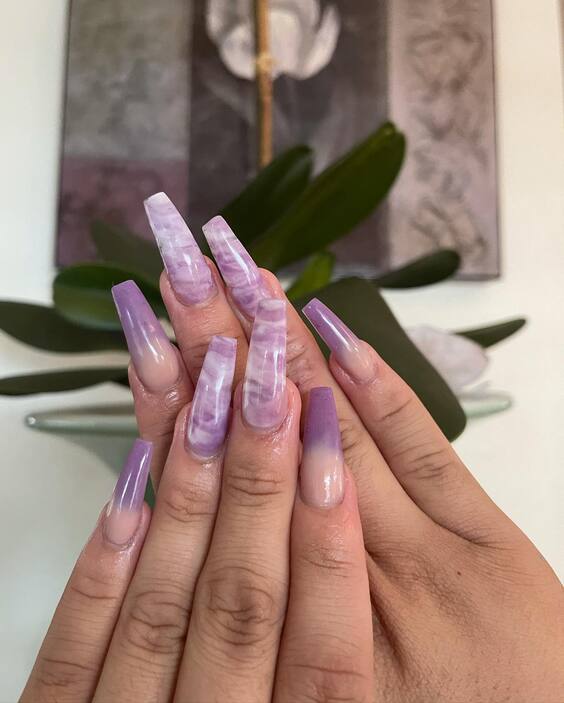
These stunning lavender acrylic nails feature a captivating marble effect, blending soft shades of white and lavender to create a delicate, cloud-like appearance. The coffin long shape provides a sleek canvas that complements the ethereal design, making it perfect for those who appreciate subtle elegance. The design’s natural flow enhances the overall aesthetic, giving a serene and sophisticated vibe.
Consumables List
- Base Polish: Lavender and white acrylics for marbling
- Top Coat: High-gloss for a smooth finish
- Tools:
- Thin brush for marbling
- Sponge for blending
DIY Instructions
- Prepare Your Nails: File and clean your nails, shaping them into a coffin long style.
- Apply Base Polish: Use a sponge to blend lavender and white acrylics, creating a marble effect on each nail.
- Enhance Marble Effect: Use a thin brush to refine the marble lines and add depth.
- Seal with Top Coat: Apply a high-gloss top coat to bring out the design’s clarity and shine.
Lavender Acrylic Nails with Gold Leaf Accents
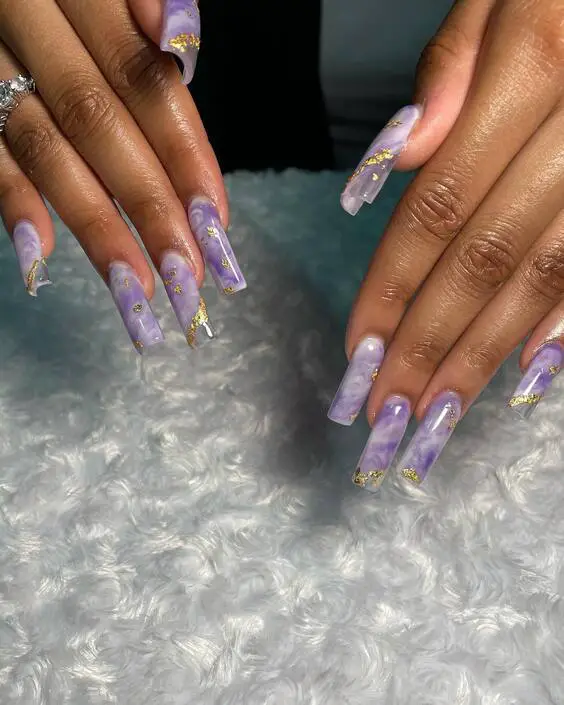
This design features a blend of translucent lavender with gold leaf accents, adding a luxurious touch to the nails. The gold leaf pieces are strategically placed to enhance the nails’ natural beauty while offering a hint of glamour. The clear tips combined with the rich lavender base and gold elements create a striking contrast, making these nails ideal for special occasions.
Consumables List
- Base Polish: Translucent lavender acrylic
- Embellishments: Gold leaf
- Top Coat: High-gloss finish
- Tools:
- Tweezers for placing gold leaf
- Brush for application
DIY Instructions
- Prepare Your Nails: Shape your nails into a coffin long form and clean them thoroughly.
- Apply Base Polish: Use translucent lavender acrylic as the base.
- Add Gold Leaf: While the base is still tacky, carefully place gold leaf pieces using tweezers.
- Seal with Top Coat: Finish with a high-gloss top coat to secure the gold leaf and enhance the overall shine.
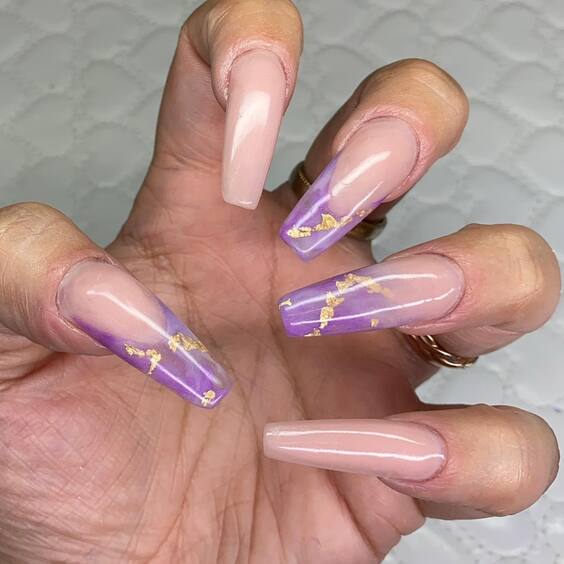
Lavender and Nude Acrylic Nails with Minimalist Design
This chic set of nails combines a nude base with lavender tips, adorned with minimalist gold accents. The use of negative space and the elegant transition from nude to lavender create a refined look, perfect for those who prefer a more understated yet sophisticated style. The minimalist gold accents add a touch of luxury without overpowering the simplicity of the design.
Consumables List
- Base Polish: Nude and lavender acrylics
- Embellishments: Gold accents
- Top Coat: High-gloss for a polished finish
- Tools:
- Detail brush for precise application
- Tweezers for gold accents
DIY Instructions
- Prepare Your Nails: Clean, buff, and shape your nails into a coffin long style.
- Apply Base Polish: Paint the nails with a nude base, then apply lavender on the tips.
- Add Gold Accents: Use a detail brush or tweezers to apply small gold accents on the tips.
- Seal with Top Coat: Apply a high-gloss top coat to protect the design and give it a professional finish.
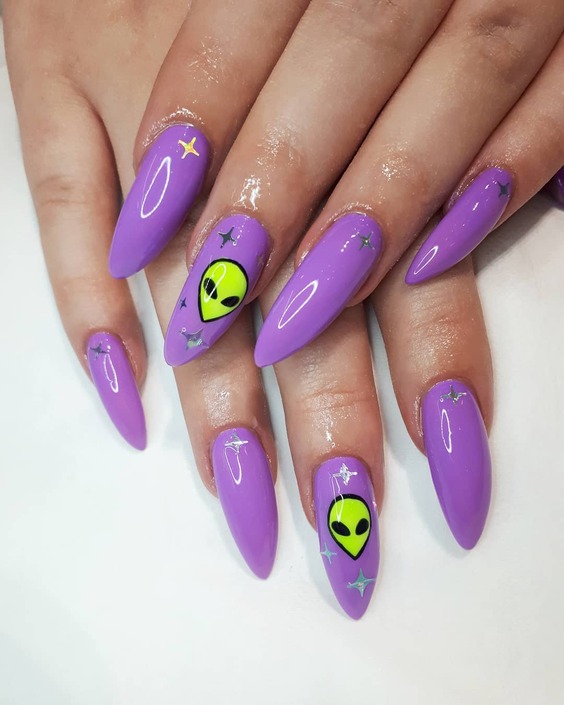
Lavender Acrylic Nails with Alien Art
This playful design features lavender acrylic nails with a quirky twist: neon green alien faces and silver star decals. The almond shape of the nails enhances the fun and unique aesthetic, making this design perfect for anyone looking to express their individuality. The contrast between the bright green aliens and the soft lavender base creates a striking and memorable look that stands out from more traditional nail art styles.
Consumables List
- Base Polish: Lavender acrylic
- Design Elements: Neon green paint for alien faces, silver decals for stars
- Top Coat: High-gloss to enhance shine and longevity
- Tools:
- Fine detail brush for painting alien faces
- Tweezers for placing star decals
DIY Instructions
- Prepare Your Nails: Shape your nails into an almond style and clean them thoroughly.
- Apply Base Polish: Paint all nails with a lavender acrylic base.
- Create Alien Faces: Using a fine detail brush, paint neon green alien faces on selected nails. Add black details for eyes and mouth.
- Add Star Decals: Place silver star decals around the alien faces for an added cosmic touch.
- Seal with Top Coat: Apply a high-gloss top coat to protect your artwork and give the nails a polished finish.
Conclusion
Lavender acrylic nails are not only a chic and stylish choice but also a versatile canvas for endless creativity. Whether you prefer simple and elegant designs or bold and vibrant art, there’s a lavender look for everyone. By experimenting with different shapes, finishes, and embellishments, you can express your unique style and stand out. We hope this guide has inspired you to try something new and embrace the beauty of lavender nails. Remember, your nails are an extension of your personality, so have fun and get creative with your next manicure!


