20 Fall Toe Nail Art Designs: Explore Seasonal Style & Color Trends
Earthy Tones and Nature-Inspired Designs
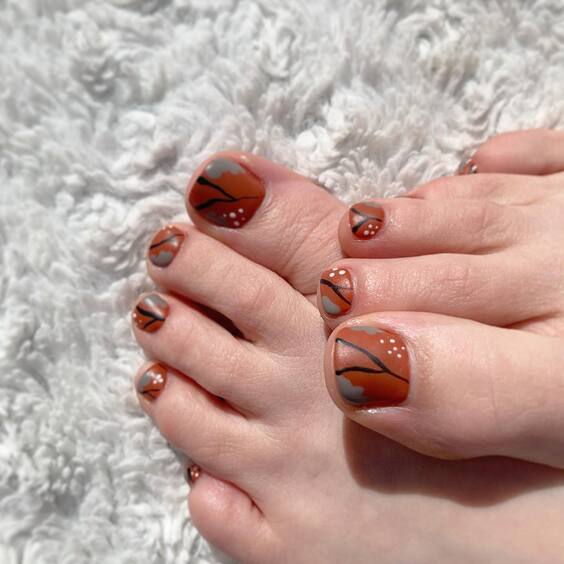
This design captures the quintessential essence of fall with its soft, earthy base color and contrasting nature-inspired patterns. The use of muted orange evokes the feeling of autumn leaves, while the delicate black branches are reminiscent of the bare trees, often seen during late fall. It’s a subtle nod to the season without being overly dramatic, perfect for someone who appreciates a natural and understated aesthetic.
Consumables List:
- Base coat: Sally Hansen Double Duty
- Orange polish: Essie’s “Playing Koi”
- Black art paint: Sally Hansen Nail Art Pen in Black
- Top coat: Seche Vite Dry Fast Top Coat
DIY Instructions:
- Prepare your nails: Start with a clean, shaped toenail, applying a base coat to protect your nails.
- Apply base color: Once the base coat is dry, apply two coats of Essie’s “Playing Koi” for a vibrant, but earthy orange.
- Design branches: Using the Sally Hansen Nail Art Pen, carefully draw thin branches starting from the bottom of your nail upwards. Allow some branches to overlap slightly for a natural look.
- Seal the design: After the design has dried completely, apply a top coat to seal in your artwork and add a glossy finish.
Bold Leopard Print with a Touch of Gold
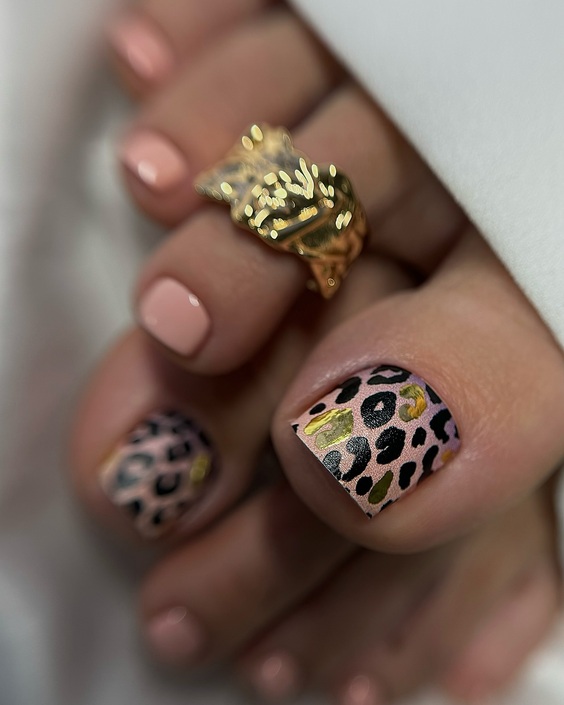
Leopard print is a timeless choice that transitions perfectly into fall fashion. This particular design elevates the classic pattern with a splash of gold, integrating a luxurious and bold element that’s perfect for autumn. The contrast between the matte beige and the glossy leopard spots provides a captivating texture that is both chic and playful.
Consumables List:
- Base coat: Essie Here to Stay
- Beige polish: OPI “Don’t Pretzel My Buttons”
- Leopard spots polish: Black and Gold from CND Vinylux
- Matte top coat: Matte About You by Essie
DIY Instructions:
- Base application: After your base coat, apply two coats of OPI’s “Don’t Pretzel My Buttons” for a neutral beige background.
- Creating leopard spots: Dip a dotting tool into black polish to create the outline of leopard spots. Fill in some spots with gold polish for that hint of sparkle.
- Matte finish: Once your design is dry, apply a matte top coat to give a contemporary look to your bold design.
Classic French Tip with a Fall Twist
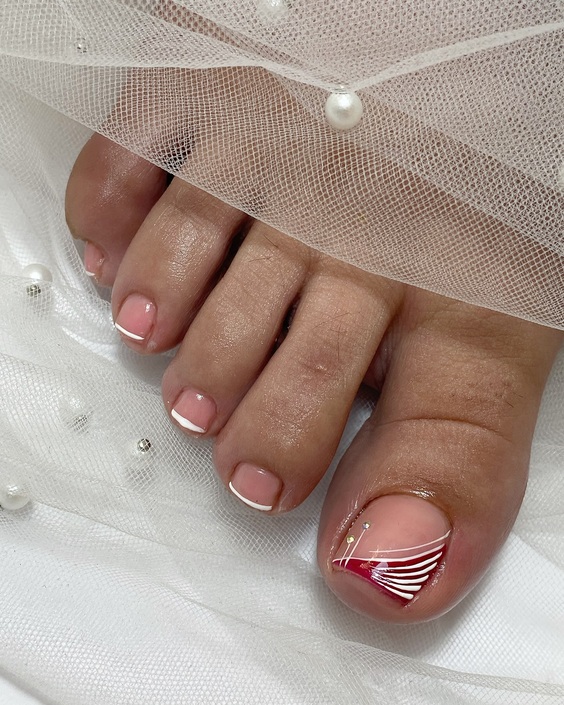
The French tip never goes out of style but adding a fall twist with a deep burgundy line instead of the classic white brings a seasonal touch to this timeless design. The use of a sheer nude base keeps it elegant and subtle, while the burgundy tips celebrate the deep hues of fall foliage.
Consumables List:
- Base coat: Base Coat by Butter London
- Nude polish: Zoya’s “Rue”
- Burgundy polish: Essie’s “Bordeaux”
- Top coat: Quick-E by Essie
DIY Instructions:
- Base preparation: Apply a base coat followed by two coats of Zoya’s “Rue” for a clean, nude look.
- Adding color to tips: Carefully paint the tips with Essie’s “Bordeaux” to create a sleek burgundy French tip.
- Finishing touches: Finish with a fast-drying top coat to add shine and prolong the durability of your pedicure.
Floral Elegance with Metallic Accents
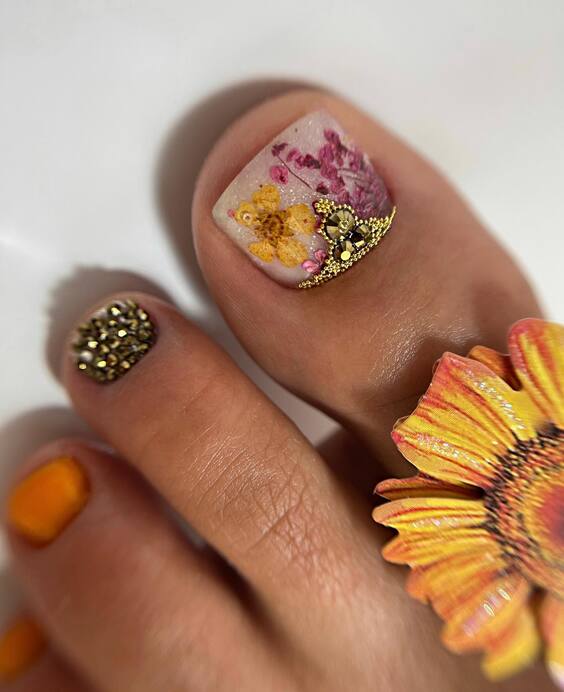
This toe nail art design is a testament to the delicacy and intricate beauty of fall. The clear polish serves as a pristine canvas for the floral decals scattered across the big toe, highlighted with radiant gold and yellow microbeads that mimic the rich, warm hues of autumn flowers. The smaller toes complement this with full coverings of gold beads, creating a harmonious yet striking look perfect for any autumnal event.
Consumables List:
- Base coat: OPI Start to Finish
- Clear polish: Essie’s “Gel Setter”
- Floral decals: Sally Hansen Salon Effects Real Nail Polish Strips in Floral
- Gold microbeads: Born Pretty Nail Art Microbeads
- Top coat: Essie’s “Good To Go”
DIY Instructions:
- Prepare your nails: Apply a base coat to protect your nails and create a smooth surface.
- Apply clear polish: Apply two coats of Essie’s “Gel Setter” for a glossy, clear finish.
- Place floral decals: Carefully apply floral decals on the big toe while the polish is still tacky.
- Add microbeads: While the clear polish is wet, carefully place gold and yellow microbeads on the edges of the floral decals using a fine-tip tool.
- Finish with a top coat: Seal your design with a top coat to ensure longevity and a beautiful gloss.
Timeless Black Sophistication
Embracing the deeper tones of fall, this design features a bold, glossy black that speaks of elegance and sophistication. Perfect for both casual outings and formal events, the rich black polish provides a stunning contrast against any skin tone, making it a versatile choice for any fall wardrobe.
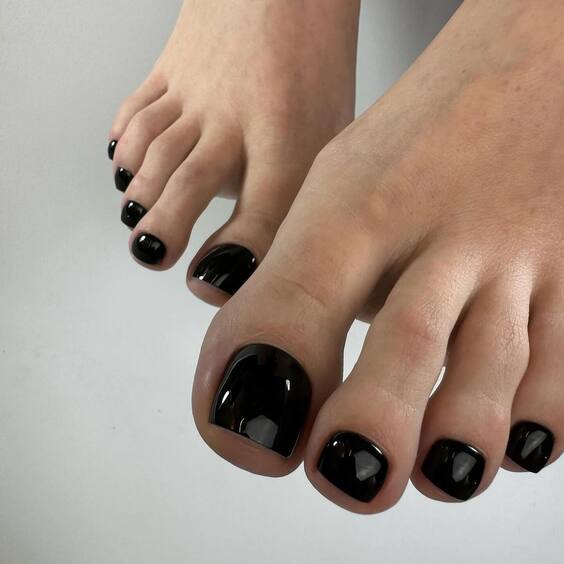
Consumables List:
- Base coat: CND Stickey Base Coat
- Black polish: China Glaze’s “Liquid Leather”
- Top coat: OPI Top Coat
DIY Instructions:
- Base layer: Start with a thorough application of base coat to prevent staining and improve polish adhesion.
- Apply black polish: Apply two coats of China Glaze’s “Liquid Leather” for a deep, opaque black.
- Seal the design: Finish with a layer of OPI Top Coat to add shine and protect your polish from chipping.
Autumn-Inspired Geometric Art
This artistic design combines the playful geometry of autumn with vibrant orange polish, reminiscent of fall foliage. The geometric pattern on the big toe adds an avant-garde twist to the traditional fall palette, making it a standout choice for those looking to make a statement.
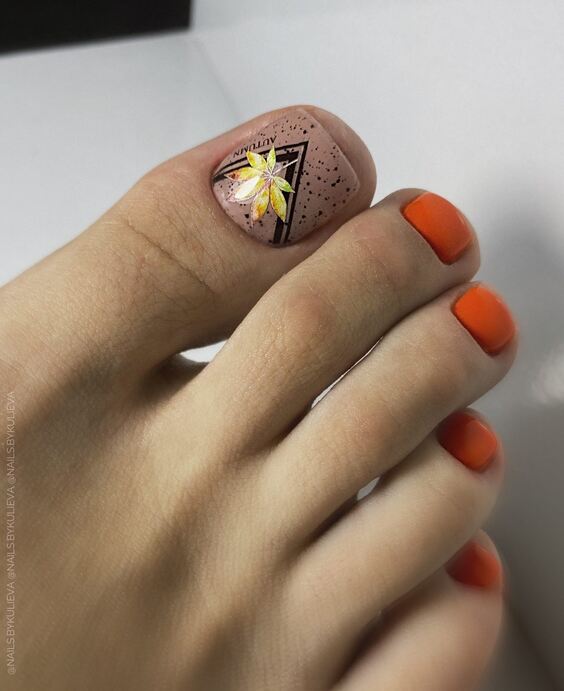
Consumables List:
- Base coat: Essie All in One
- Orange polish: OPI “It’s a Piazza Cake”
- Nude polish: Zoya “Cala”
- Nail art tape: Fine Line Tape
- Top coat: Sally Hansen Miracle Gel Top Coat
DIY Instructions:
- Prepare the base: Apply a base coat to protect your nails.
- Color application: Paint all toes with Zoya “Cala” as the base color. Use OPI “It’s a Piazza Cake” on the big toe for a vibrant base.
- Create geometric patterns: Use nail art tape to create sharp lines and patterns on the big toe.
- Finish up: Carefully remove the tape and apply a top coat to seal the design and add gloss.
Subtle Glam with Matte and Gold Flecks
This toe nail art combines the understated elegance of a matte finish with the sparkling allure of gold flecks. The deep charcoal hue serves as a perfect backdrop for the gold embellishments, which catch the light beautifully. This design is ideal for those who prefer a sophisticated yet subdued aesthetic that subtly nods to the festive elements of fall.
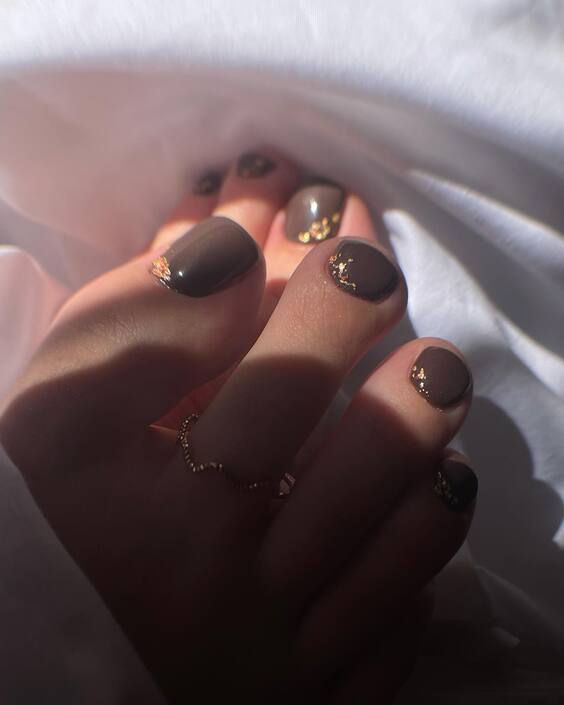
Consumables List:
- Base coat: Revlon Quick Dry Base Coat
- Matte black polish: OPI “Matte Top Coat” over “Lincoln Park After Dark”
- Gold leaf flecks: Sally Beauty Gold Leaf Top Coat
- Top coat: OPI Matte Top Coat
DIY Instructions:
- Base preparation: Apply a base coat to protect the nail and extend the life of the manicure.
- Apply base color: Paint the nails with two coats of OPI’s “Lincoln Park After Dark,” a rich charcoal.
- Add gold flecks: Before the second coat dries, delicately place gold leaf flecks using a fine tweezer for precision.
- Matte finish: Once dry, apply OPI Matte Top Coat to achieve a chic matte finish that complements the sparkle of the gold.
Wild Side with Metallic Zebra Stripes
Embrace your wild side with this bold and dynamic toe nail art featuring black and shimmering metallic zebra stripes. The contrast between the matte black and the metallic stripes creates a visually striking effect, perfect for making a statement this fall. This design is not only eye-catching but also creatively captures the adventurous spirit of the season.
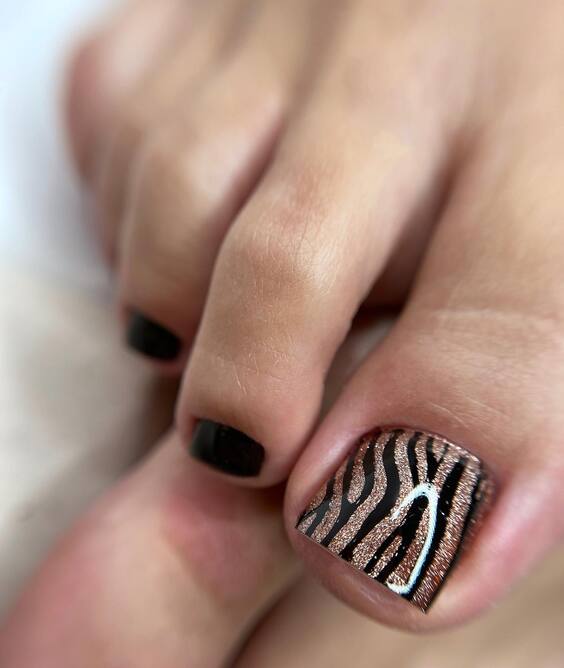
Consumables List:
- Base coat: Essie “Grow Stronger”
- Black polish: China Glaze “Liquid Leather”
- Metallic polish: Essie “Penny Talk”
- Top coat: Seche Vite Dry Fast Top Coat
DIY Instructions:
- Apply base coat: Protect your nails with a layer of base coat.
- Color base: Apply two coats of “Liquid Leather” for a deep black background.
- Create stripes: Use a thin brush to paint metallic stripes with “Penny Talk,” mimicking zebra patterns.
- Protect your design: Finish with Seche Vite Top Coat for a glossy and durable finish.
Rustic Elegance with Gold Leaf Accents
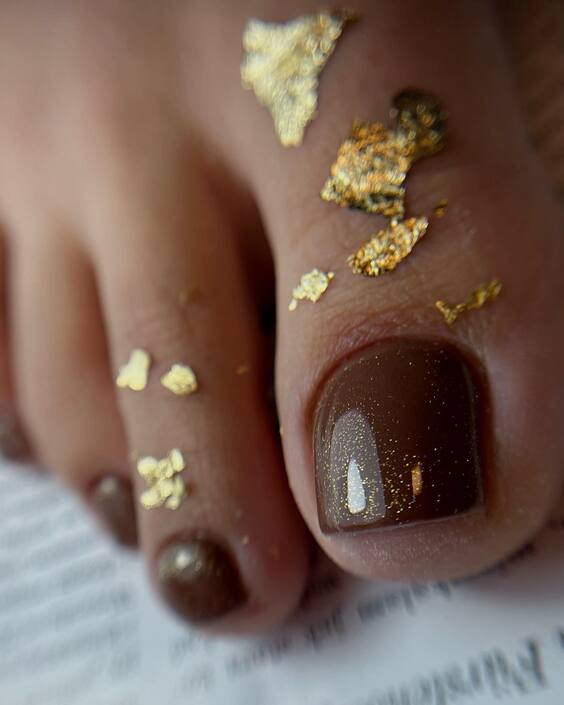
This design perfectly embodies the essence of fall with its rustic, deep brown base adorned with gold leaf accents. The placement of the gold leaf in fragmented, natural patterns gives the appearance of fallen leaves scattered across a wet autumn path. It’s an elegant and artistic choice for anyone looking to celebrate the season’s beauty through their nail art.
Consumables List:
- Base coat: Butter London Nail Foundation
- Brown polish: OPI “Espresso Your Style”
- Gold leaf: Genuine Gold Leaf Sheets
- Top coat: OPI High-Gloss Top Coat
DIY Instructions:
- Start with a base coat: Apply a smooth layer to protect your nails.
- Apply the brown polish: Paint your nails with two coats of “Espresso Your Style” for a rich, coffee-like hue.
- Add gold leaf: Tear small pieces of gold leaf and apply them sporadically over the still-wet second coat of polish.
- Seal the design: Finish with a high-gloss top coat to enhance the depth and longevity of your nail art.
Artistic Flair with Monochrome and Gold
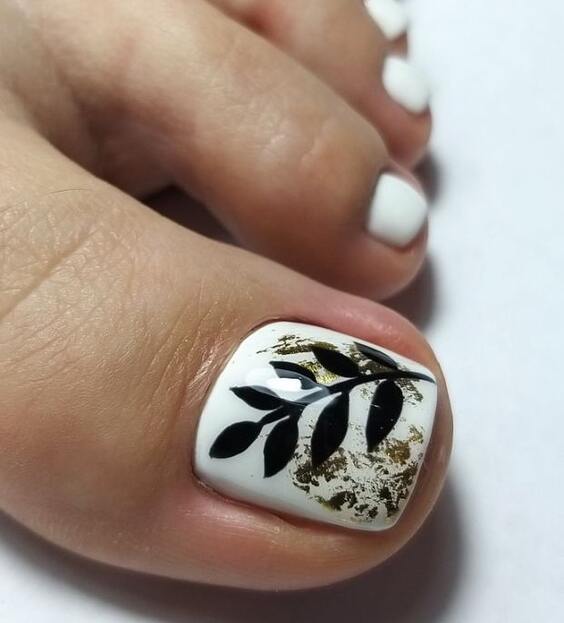
This design brings an artistic flair to fall toe nail art with its striking monochrome leaf patterns set against a pure white background. The addition of gold flakes adds a touch of luxury and perfectly complements the stark contrast of the black design. This style is ideal for those who appreciate detailed artwork that captures the eye without overwhelming the senses.
Consumables List:
- Base coat: China Glaze Strong Adhesion Base Coat
- White polish: Sally Hansen Insta-Dri in “White On Time”
- Black detail polish: OPI “Black Onyx”
- Gold leaf flakes: Craft-type Gold Leaf
- Top coat: China Glaze Fast Forward Top Coat
DIY Instructions:
- Base preparation: Start with a protective base coat to ensure your nail art lasts longer.
- Apply white polish: Apply two coats of “White On Time” for a crisp, clean background.
- Design details: Use a fine brush to paint the black leaf patterns. Practice the design on paper if necessary to ensure precision.
- Add gold flakes: Apply small gold leaf flakes sparingly to enhance the design without overpowering it.
- Seal with a top coat: Finish with a fast-drying top coat to protect and set your beautiful design.
Harvest Season Inspiration
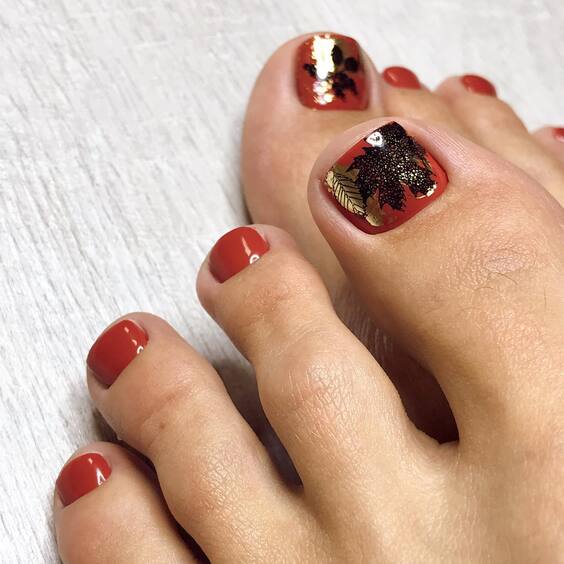
Capturing the essence of the harvest season, this toe nail art features a deep red base with golden accents that reflect the colors of autumn leaves and sunsets. The bold use of gold flake overlays adds an element of texture and dimension, making this design both festive and fashionable for the fall season.
Consumables List:
- Base coat: OPI Natural Nail Base Coat
- Red polish: Essie “With the Band”
- Gold flakes: Real Gold Leaf Flakes
- Top coat: Sally Hansen Mega Shine Top Coat
DIY Instructions:
- Base coat application: Protect your nails with a base coat.
- Apply red polish: Paint your nails with two coats of “With the Band” for a rich, harvest-inspired hue.
- Gold flake application: Carefully place gold flakes on the wet polish on selected nails for a striking effect.
- Top coat to finish: Apply a high-gloss top coat to ensure the longevity and brilliance of your nail art.
Simple Elegance with Deep Autumn Tones
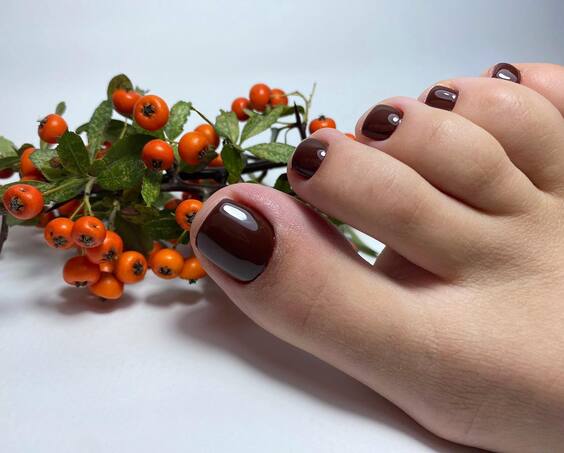
This design epitomizes simple elegance with its deep, glossy autumn-toned polish. The careful placement of small silver studs adds a refined touch that is subtle yet impactful. This style is perfect for anyone looking to embrace the fall season with a classic, understated look that still makes a statement.
Consumables List:
- Base coat: Deborah Lippmann Hard Rock Base and Top Coat
- Autumn brown polish: Zoya “Louise”
- Silver studs: Tiny Silver Nail Art Studs
- Top coat: Deborah Lippmann Addicted To Speed Ultra Quick-Dry Top Coat
DIY Instructions:
- Prepare with a base coat: Apply a base coat to protect your nails and enhance polish adhesion.
- Color application: Paint your nails with Zoya’s “Louise,” a warm, deep brown that echoes the fall palette.
- Stud placement: While the second coat is tacky, carefully place silver studs at the base of each nail for a touch of elegance.
- Seal with top coat: Finish with a quick-dry top coat for a smooth, lasting finish.
Minimalist Chic with Pink and White
This toe nail design embraces minimalist chic with its crisp white and soft pink colors, creating a fresh and clean look. The geometric white lines over the pink base add a modern twist to the classic French tip, making it a perfect choice for those who love a sophisticated yet simple style for their fall pedicure.
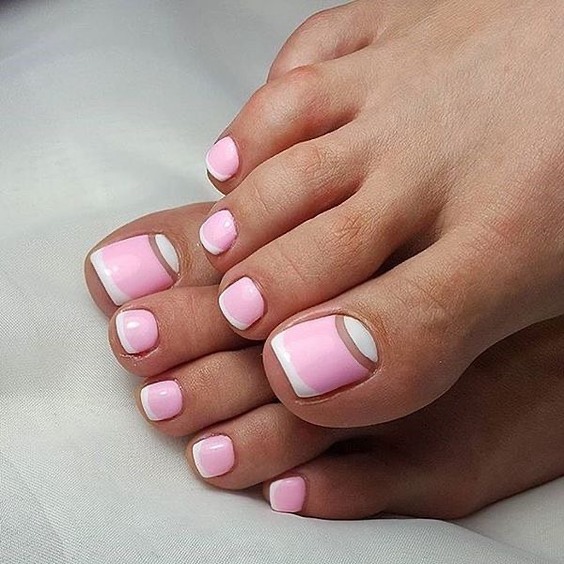
Consumables List:
- Base coat: Essie “First Base”
- Pink polish: OPI “Pink-ing of You”
- White polish: Sally Hansen “White Out”
- Top coat: Essie “Gel Setter”
DIY Instructions:
- Base preparation: Start by applying a base coat to protect your nails.
- Pink base: Apply two coats of “Pink-ing of You” for a full, even color.
- White accent lines: Once the pink base is dry, use a thin brush to draw geometric white lines for a chic, modern look.
- Finish with a top coat: Apply a top coat for a glossy finish and extended wear.
Cozy Elegance with Black and Zebra Print
This design offers a cozy yet elegant look perfect for fall, featuring a deep black base paired with an intricately detailed zebra print accent nail. The use of a matte finish on the black nails adds a contemporary edge, while the zebra print provides a wild contrast that is both bold and stylish.
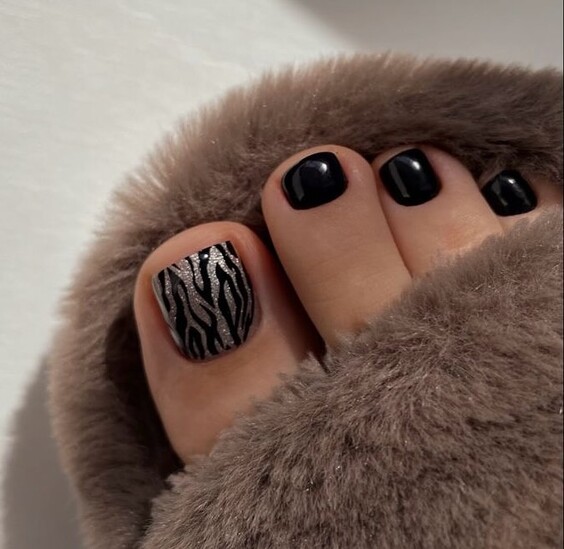
Consumables List:
- Base coat: OPI “Natural Nail Base Coat”
- Black polish: Essie “Licorice”
- White and silver zebra print: Custom decals or hand-painted with a thin brush
- Matte top coat: Matte About You by Essie
DIY Instructions:
- Prepare your nails: Apply a base coat for smooth polish application.
- Apply black polish: Coat the nails with two layers of “Licorice” for a deep, opaque finish.
- Zebra accent nail: For the accent nail, either apply a zebra print decal or hand-paint the design using white and silver polish.
- Matte finish: Apply a matte top coat over the black nails for a modern, velvety effect.
Playful Pop with Teal and Black Leopard Print
Inject a playful pop of color into your fall nail wardrobe with this vibrant teal and black leopard print design. The bright teal provides a cheerful backdrop for the bold black leopard spots, offering a fun and spirited take on traditional fall colors.
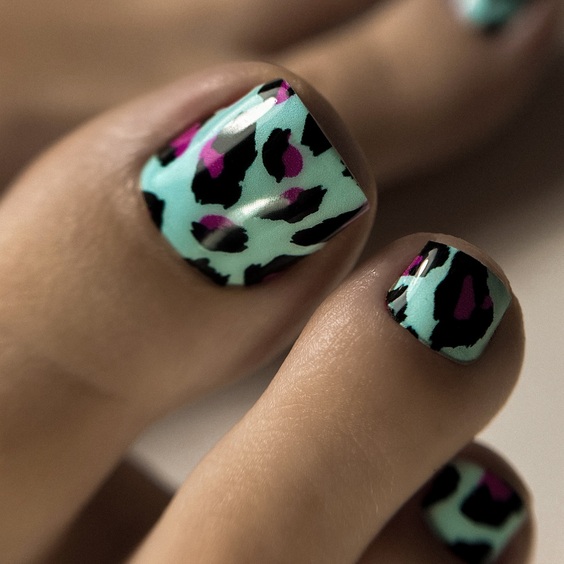
Consumables List:
- Base coat: China Glaze “Strong Adhesion Base Coat”
- Teal polish: Essie “In the Cab-ana”
- Black for spots: OPI “Black Onyx”
- Top coat: Seche Vite Dry Fast Top Coat
DIY Instructions:
- Start with a base coat: Protect your nails and ensure a longer-lasting manicure.
- Teal base: Apply two coats of “In the Cab-ana” for vibrant, full coverage.
- Leopard spots: Use a dotting tool or small brush to create random black spots over the teal base.
- Finish with a top coat: Add a layer of top coat for a shiny finish and to seal in the design.
Vibrant Camouflage Print
This toe nail design takes a creative spin with a vibrant camouflage pattern that combines fall hues like green, orange, and black over a tan base. It’s an expressive choice for those who love a splash of color while still adhering to the seasonal theme.
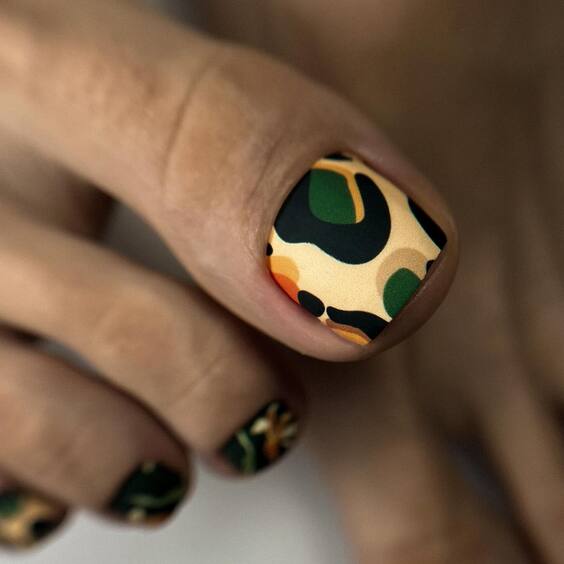
Consumables List:
- Base coat: Essie “Here to Stay”
- Tan polish: OPI “San Tan-tonio”
- Green, orange, and black polishes for camouflage: Various shades from the Essie collection
- Top coat: OPI “Top Coat”
DIY Instructions:
- Prepare with base coat: Apply to protect and smooth out the nail surface.
- Apply base color: Use OPI’s “San Tan-tonio” as the base for a neutral canvas.
- Create camouflage design: Dab patches of green, orange, and black polish with a sponge to create the camouflage effect.
- Finish with top coat: Apply for lasting shine and protection.
Classic Leopard Print
Leopard print is timeless, and this design brings it to fall with a modern twist. The traditional black and brown leopard spots are set against a clear base, making it a standout choice for those who appreciate bold, iconic patterns.
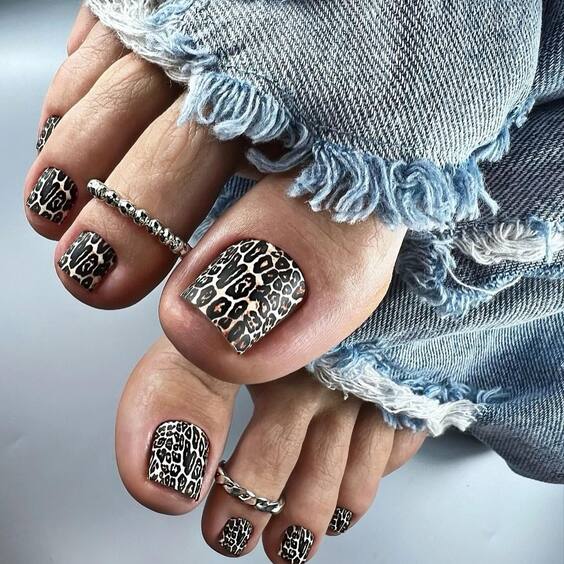
Consumables List:
- Base coat: Sally Hansen “Hard as Nails”
- Clear polish as base: Essie “Gel Setter”
- Brown and black polishes for leopard spots: Essie “Little Brown Dress” and “Licorice”
- Top coat: Seche Vite “Dry Fast Top Coat”
DIY Instructions:
- Base preparation: Start with a clear base coat.
- Apply clear base: Add a layer of clear polish for a transparent background.
- Paint leopard spots: Use a small brush to apply irregular brown spots, bordered with black.
- Seal with top coat: Ensure durability and gloss with a fast-drying top coat.
Geometric Sunshine
Bright and eye-catching, this geometric design uses sharp lines and bold yellow to evoke a sense of sunshine and crisp autumn mornings. The geometric patterns add a contemporary and artistic flair, perfect for those looking to bring a bit of brightness to cooler fall days.
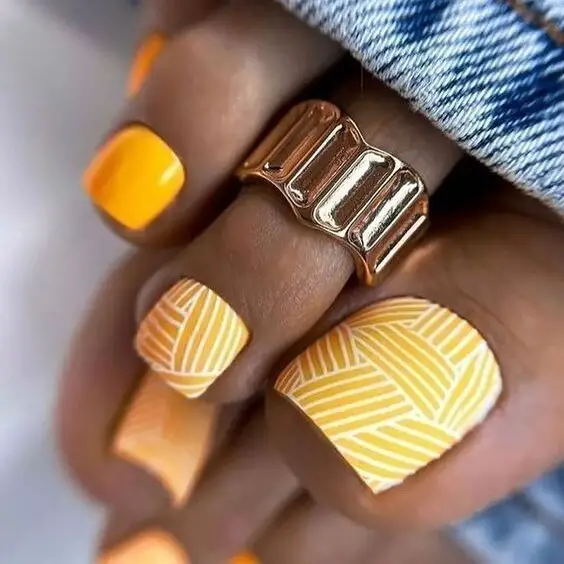
Consumables List:
- Base coat: OPI “Natural Nail Base Coat”
- Yellow polish: China Glaze “Sun Upon My Skin”
- White polish for lines: Sally Hansen “White On”
- Top coat: OPI “Rapidry Top Coat”
DIY Instructions:
- Apply base coat: Protect nails and ensure a longer-lasting manicure.
- Yellow base: Paint two coats for a vibrant look.
- Draw geometric patterns: Use a thin brush to add white lines, creating various geometric shapes.
- Top coat for finish: Add to maintain the nail art’s look and feel.
Luxurious Marble and Gold Leaf Design
This toe nail art blends the elegance of marble textures with the opulence of gold leaf, creating a luxurious and sophisticated design. The marbled effect is achieved using a soft pink and white base with veins of black, which are then accented by bold splashes of gold leaf. This design is perfect for fall occasions that call for a touch of glamour.
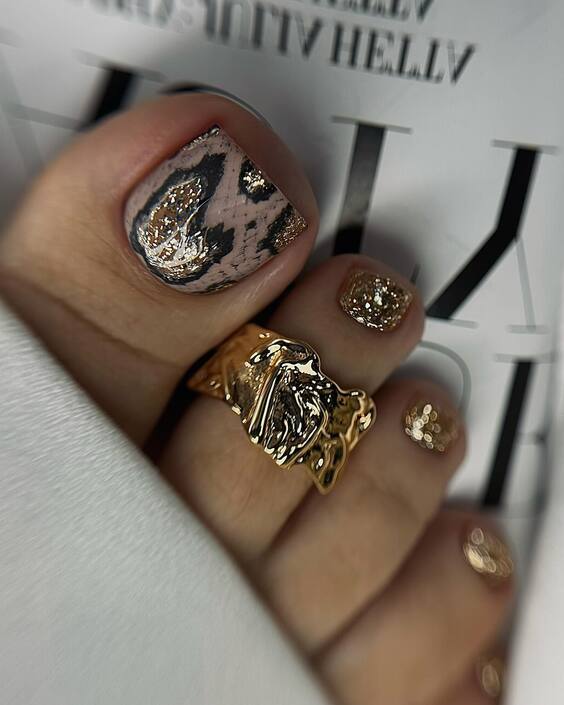
Consumables List:
- Base coat: Butter London Nail Foundation Priming Basecoat
- Pink polish: OPI “Let Me Bayou a Drink”
- White and black polish for marbling: Essie “Blanc” and “Licorice”
- Gold leaf: Artisan Gold Leaf Sheets
- Top coat: OPI Glossy Top Coat
DIY Instructions:
- Base preparation: Apply a base coat to protect the nail.
- Apply base colors: Paint a pink base, then dab on white and black with a sponge for a marble effect.
- Add gold leaf: Once the base is dry, apply small pieces of gold leaf for a luxurious finish.
- Seal with top coat: Use a glossy top coat to enhance the shine and ensure durability.
Golden Hearts on White
This playful yet elegant toe nail art features a bright white base adorned with tiny golden hearts, perfect for adding a romantic touch to your fall style. The hearts are spaced evenly, offering a sweet and whimsical vibe that pairs well with any casual or dressy autumn outfit.
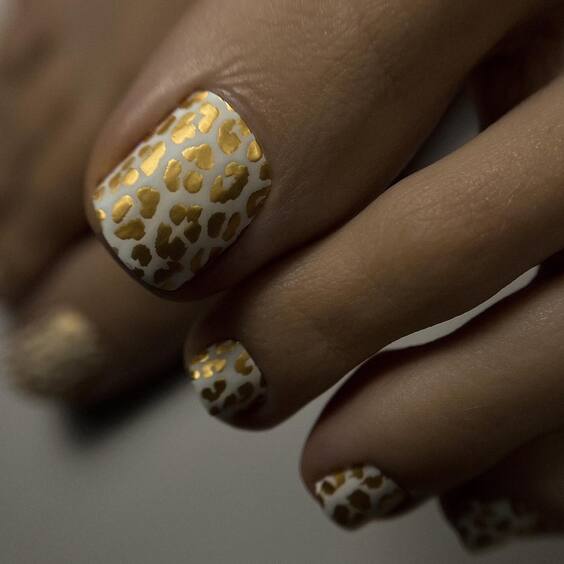
Consumables List:
- Base coat: Revlon ColorStay Gel Envy Longwear Base Coat
- White polish: Sally Hansen “White On”
- Gold polish for hearts: Sally Hansen “Golden-I”
- Top coat: Essie “Speed.Setter”
DIY Instructions:
- Start with a base coat: This helps to smooth any imperfections and prolongs the wear of the polish.
- Apply white polish: Cover the nails with two layers of “White On” for a crisp background.
- Paint golden hearts: Use a fine brush or a dotting tool to create small hearts with “Golden-I.”
- Finish with a top coat: Apply a quick-drying top coat for a glossy finish and additional protection.
Conclusion
From the cozy hues of golden leaves to the luxurious details of marbling and metallics, we’ve explored a wide array of fall toe nail art designs that are sure to elevate your autumn wardrobe. These designs offer something for everyone, whether you’re attending a formal event or just want to add a little extra sparkle to your everyday look. Embrace these creative ideas to express your personal style and keep your toes fashion-forward this season. Remember, the best way to complement the crisp fall weather is with toe nail art that’s as colorful and dynamic as the changing foliage around you. So, go ahead and let your toes do the talking this fall!

