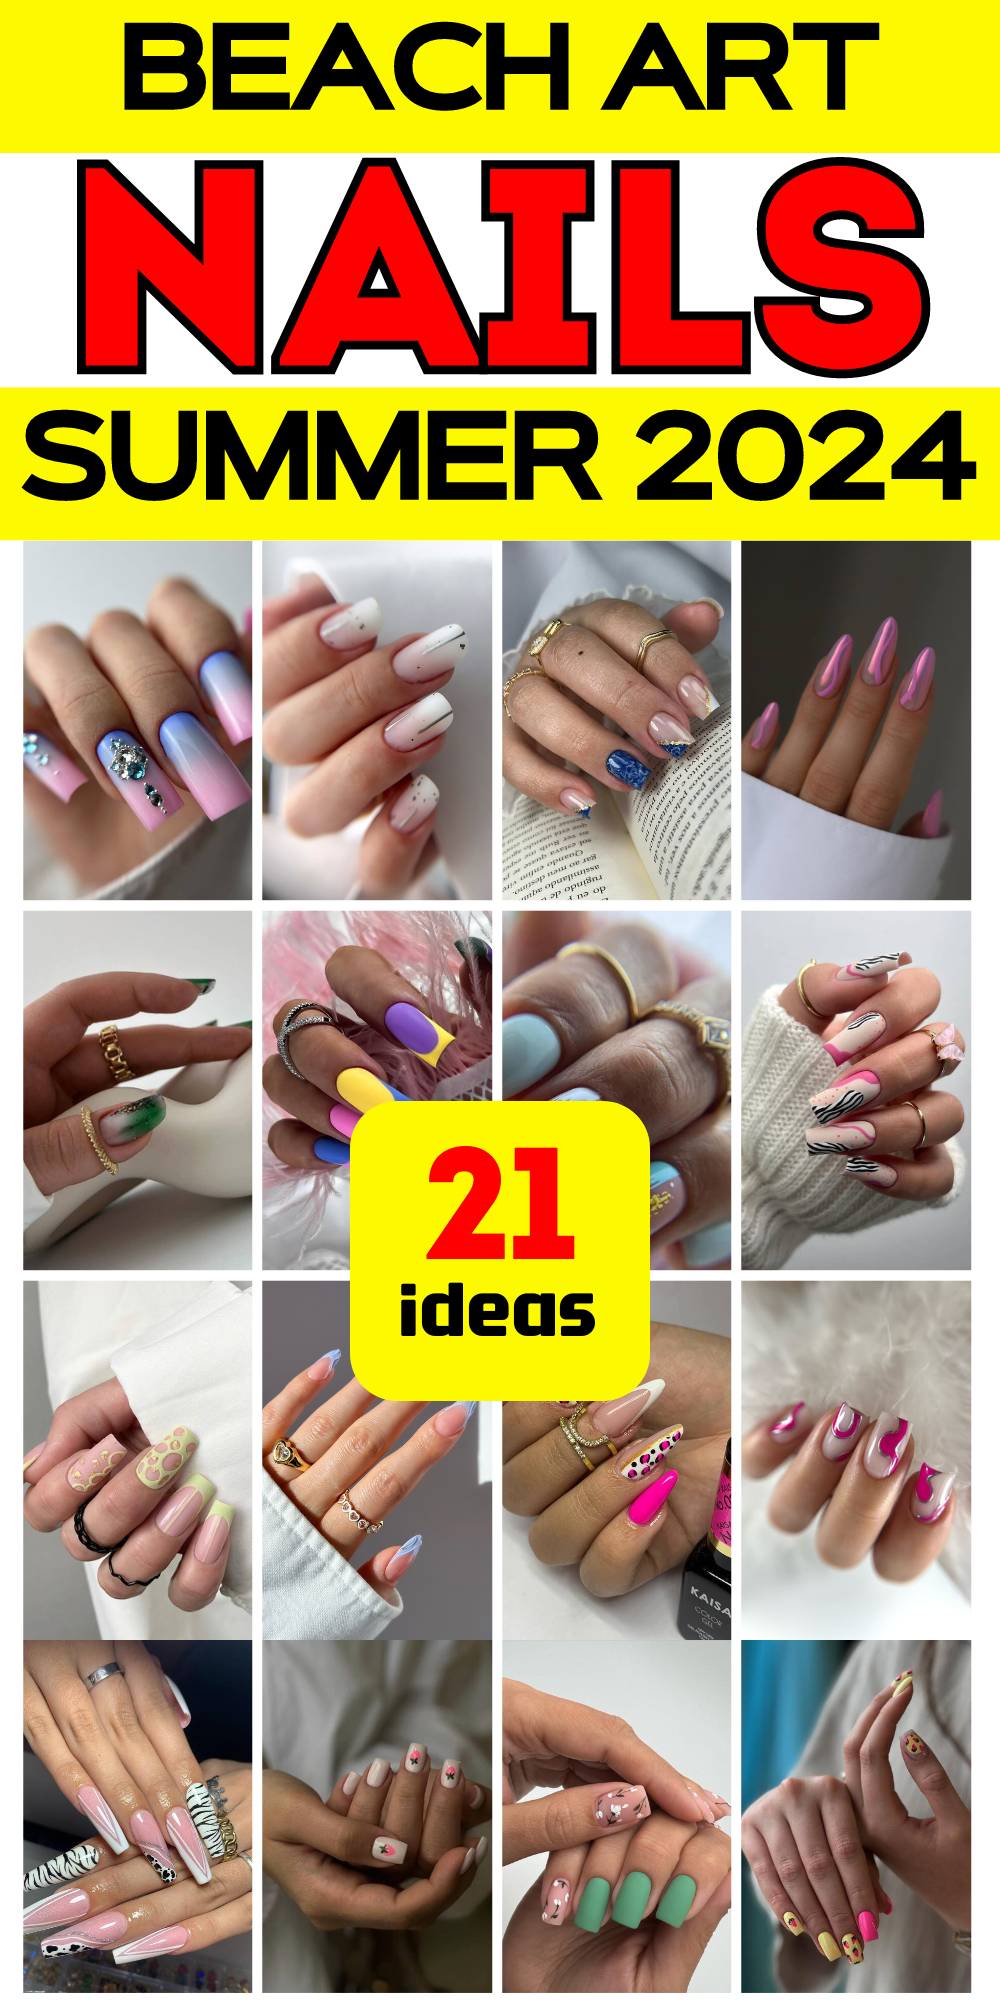
Have you ever wanted your nails to reflect the vibrant, carefree spirit of a day at the beach? With summer in full swing, beach nail art has surged in popularity, combining eye-catching designs with a dash of seaside magic. Whether you’re planning a vacation to Goa or just dreaming of the ocean waves, these nail art ideas are perfect for adding a splash of the sea to your style.
Ocean Whispers
This nail design whispers tales of the sea with its delicate blend of sea blue and sandy beige. The nails are adorned with a gradient that mimics the horizon where sky meets sea. Accents like tiny seashells and starfish in a matte finish transport the wearer straight to the shoreline. The design not only celebrates the beauty of the ocean but does so with a sophistication that’s both stylish and understated.
Consumables List
- Base Coat: OPI Natural Nail Base Coat
- Polishes: Sally Hansen’s “Sea Cruise” for the sea blue, and Essie’s “Sand Tropez” for the beige
- Matte Top Coat: Matte About You by Essie
- Decorations: Mini seashells and starfish decals from Born Pretty
- Recommendation: Apply the decals with a tweezer for precision, and seal everything with the matte top coat to enhance the beachy texture.
DIY Instructions
Start by applying a base coat to protect your nails. Create a gradient effect using a sponge—dip it into the blue, then the beige polish, and dab gently onto the nail. Once dry, use tweezers to place the seashell and starfish decals. Finish with a matte top coat to give your beach nails a natural, textured look.
Summer Sails
Evoking the crisp sails on a bright summer day, these nails feature stark white and deep navy stripes, perfect for a nautical theme. The precision in the stripes is exemplary, paired with a glossy finish that mimics the ocean’s glare under the summer sun. This design is ideal for anyone who loves classic designs summer flair with a modern twist.
Consumables List
- Base Coat: Revlon Quick Dry Base Coat
- Polishes: China Glaze’s “White on White” and “Up All Night”
- Top Coat: Seche Vite Dry Fast Top Coat
- Recommendation: Use striping tape to achieve clean, crisp lines and apply a quick-dry top coat to prevent smudging.
DIY Instructions
Apply your base coat for a smooth foundation. Use striping tape to outline where the white and navy polishes will go, ensuring sharp lines. Apply two coats of each color, then carefully remove the tape while the polish is still tacky. Seal your design with a fast-drying top coat for a shiny, durable finish.
Tropical Flair
This design captures the essence of tropical paradise with its bold use of color and intricate palm tree designs. The vibrant pink serves as a fantastic backdrop for the detailed green palm accents. It’s a playful yet intricate design that screams summer and fun, perfect for both long and beach nail art for short nails.
Consumables List
- Base Coat: CND Stickey Base Coat
- Polishes: OPI’s “Hotter Than You Pink” and “Green-wich Village”
- Top Coat: Glossy top coat by Glisten & Glow
- Tools: Fine brush for the palm details
- Recommendation: Practice the palm tree design on paper before attempting on nails to ensure precision.
DIY Instructions
After your base coat, apply two coats of the pink polish as the background. Using a fine brush, paint small palm trees in green on each nail. Allow ample drying time before applying a layer of glossy top coat to seal and protect your artwork.
Wave Rhythm
Capturing the rhythmic dance of ocean waves, this nail art design features fluid, wavy patterns in a striking pink hue that transitions into a crisp white. The seamless flow of the waves, achieved through expert hand-painting, symbolizes the continuous ebb and flow of the sea. It’s a bold statement piece that’s both artistic and evocative of beach nail art designs ocean waves.
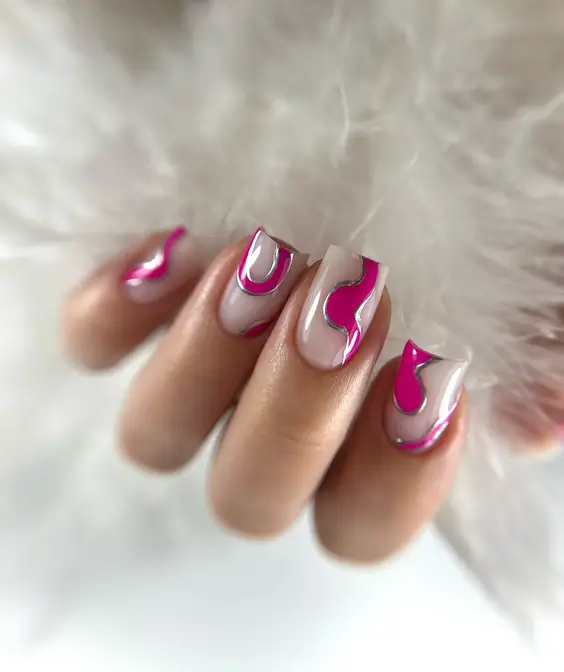
Consumables List
- Base Coat: Sally Hansen Double Duty
- Polishes: “Pink Bikini” by Essie and “Alpine Snow” by OPI
- Top Coat: High-gloss top coat by Essie
- Tools: Thin brush for wave details
- Recommendation: Keep your hand steady to ensure the waves have a natural and fluid appearance. Finish with a high-gloss top coat to enhance the design’s vibrancy.
DIY Instructions
Apply a clear base coat to protect your nails. Paint the entire nail with the pink shade as the base. Once dry, use a thin brush to draw intricate wave patterns with the white polish. Finish with a glossy top coat to give the design a gleaming, wet look, reminiscent of sunlight sparkling on the sea surface.
Safari Beach
This adventurous nail art combines the wild essence of a safari with the soft tones of a beach sunset. The design integrates zebra and leopard prints juxtaposed against a soft pink background, capturing both the wildness of the animals and the tranquility of the beach. It’s perfect for those who like to mix elements of nature and designs summer in their style.
Consumables List
- Base Coat: Butter London Nail Foundation
- Polishes: “Tickle My France-y” by OPI for the base, “Black Onyx” by OPI for zebra stripes, and “Black” and “White” by Sinful Colors for the leopard spots
- Top Coat: Quick-drying top coat by Seche Vite
- Tools: Detailing brush and dotting tool
- Recommendation: Use a detailing brush for the stripes and a dotting tool for the leopard spots to achieve precise and sharp designs.
DIY Instructions
Start with a smooth base coat. Apply the nude pink polish as the background. For the zebra stripes, use a thin brush to create black lines with a slight curve. For leopard spots, place small blobs of black polish with the dotting tool, then surround these with small white dots to create the spot effect. Seal your artwork with a fast-drying top coat for longevity and shine.
Starfish Splendor
This minimalist design elegantly showcases tiny starfish decals on a clean white base, embodying the simple beauty of the beach. Each nail serves as a canvas for a small, detailed starfish, making this ideal for enthusiasts of beach nail art designs starfish who prefer subtlety over extravagance.
Consumables List
- Base Coat: Chanel Base Protectrice
- Polish: “Private Weekend” by Essie for the white base
- Top Coat: Gel top coat by Gelish for a durable finish
- Decorations: Miniature starfish decals
- Recommendation: Position the decals while the base polish is still slightly tacky to ensure they adhere well without sliding.
DIY Instructions
After applying your base coat, coat the nails with two layers of the white polish. Carefully place a starfish decal on each nail using tweezers while the polish is still a bit sticky. Apply a gel top coat to secure the decals in place and to add a smooth, glassy finish that enhances the simplicity of the design.
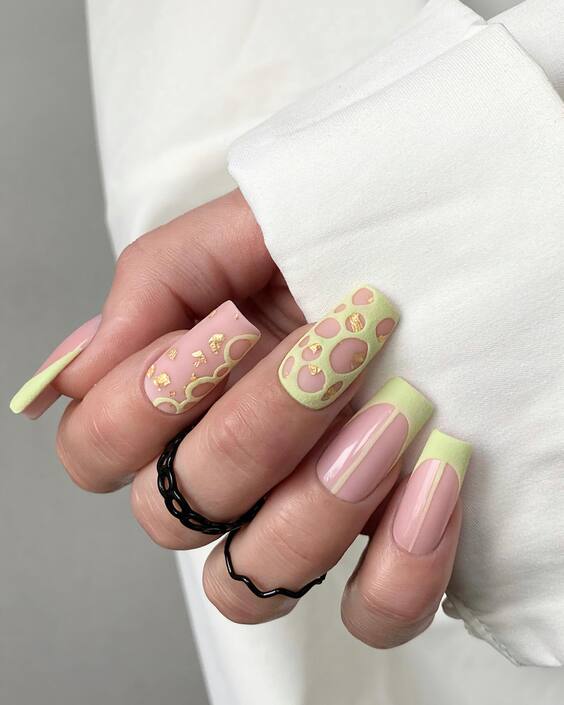
Seaside Blossom
The ‘Seaside Blossom’ design blends soft pastel tones with a vibrant touch of green, capturing the essence of seafoam and sandy beaches. The delicate floral patterns add a romantic touch, suggesting blooming flowers along a coastal path. This nail art design beautifully balances the serenity of nature with a pop of beach nail art designs summer enthusiasm.
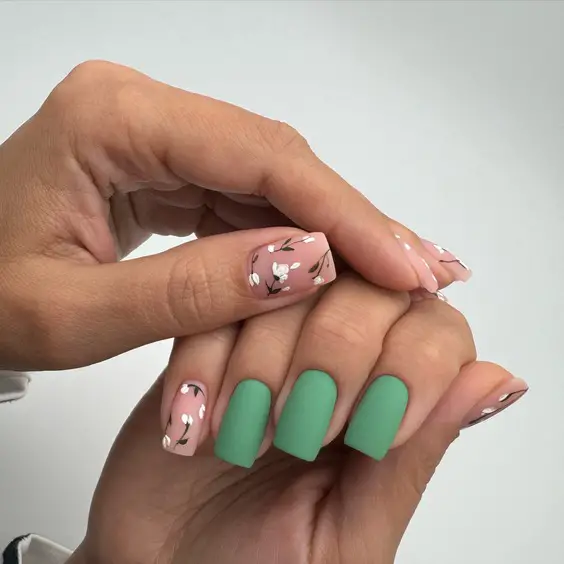
Consumables List
- Base Coat: Zoya Anchor Base Coat
- Polishes: “Mint Candy Apple” by Essie for the green, and “Ballet Slippers” by Essie for the pastel pink
- Top Coat: High Shine Top Coat by OPI
- Decorations: White floral decals
- Recommendation: Apply the floral decals using a fine-tip tweezers for precision, and always finish with a high shine top coat to protect the decals and enhance their color.
DIY Instructions
Begin with a base coat to protect your nails. Apply two coats of pastel pink as the foundation. Alternate the green on selective nails for contrast. Once dry, apply the floral decals on the pink base. Seal your design with a high shine top coat for a smooth and protective finish.
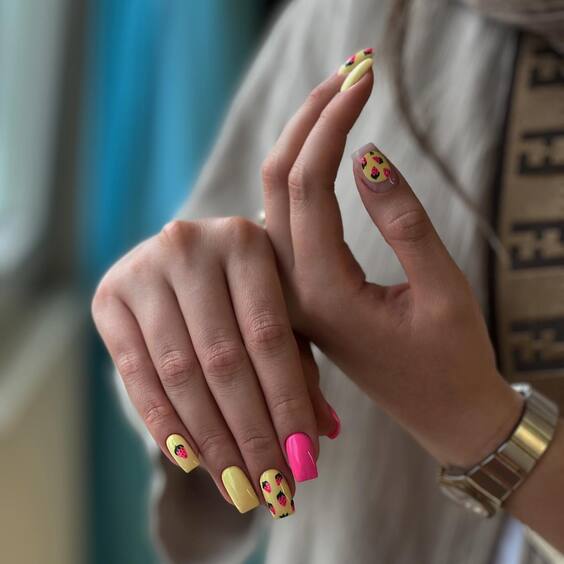
Tropical Vibes
This vibrant design is a kaleidoscope of colors featuring bold pinks and playful patterns, including beach nail art designs sea motifs like tiny waves and starfish. It combines the lively atmosphere of tropical beaches with the exciting patterns of marine life, making it a perfect choice for beach-goers and summer lovers.
Consumables List
- Base Coat: Essie All-in-One Base
- Polishes: “Canary Yellow” and “Watermelon” by Sally Hansen for the base colors, and “Black Out” by Sally Hansen for the details
- Top Coat: Essie Gel Setter
- Tools: Detailing brush and dotting tools
- Recommendation: Use a steady hand for the details and consider using stencils for intricate patterns to ensure precision.
DIY Instructions
Start with a strong base coat to ensure polish adherence. Apply the yellow as the base on some nails and pink on others for variety. Use a detailing brush and black polish to add unique sea-inspired patterns on each nail. Finish with a gel top coat to capture the vibrancy of the colors and ensure a long-lasting wear.
Neon Waves
‘Neon Waves’ brings an electrifying twist to traditional beach nail art with its neon green and yellow swirls, mimicking the unpredictable movements of the ocean waves. This futuristic yet beach-themed design stands out for its bold color choices and dynamic patterns, ideal for making a statement during the summer.
Consumables List
- Base Coat: OPI Natural Nail Base Coat
- Polishes: “Neon Green” and “Solar Power” by China Glaze
- Top Coat: Sally Hansen Miracle Gel Top Coat
- Tools: Striping tape for precise lines
- Recommendation: Practice the swirl patterns on paper first to ensure smooth lines when applying on nails.
DIY Instructions
Apply a base coat to start. Use striping tape to create sections for the neon green and yellow colors. Carefully paint the sections, using the tape as a guide for sharp, clean lines. Remove the tape while the polish is still slightly wet to prevent peeling. Finish with a gel top coat for a glossy, eye-catching look.
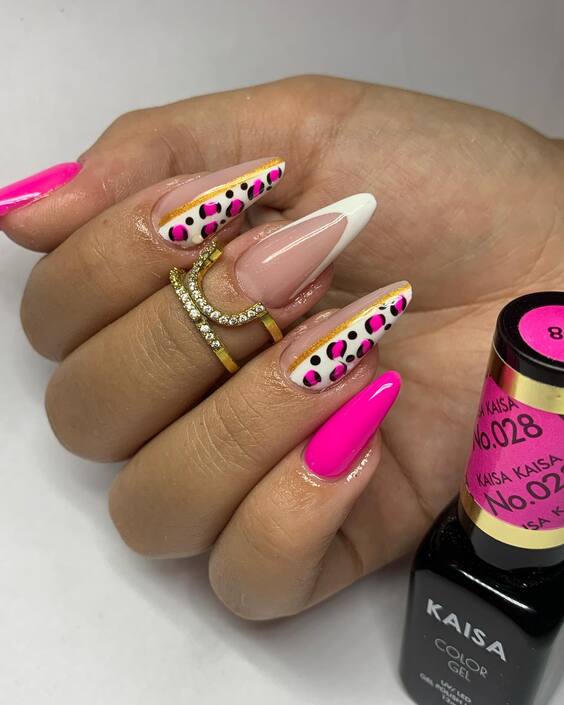
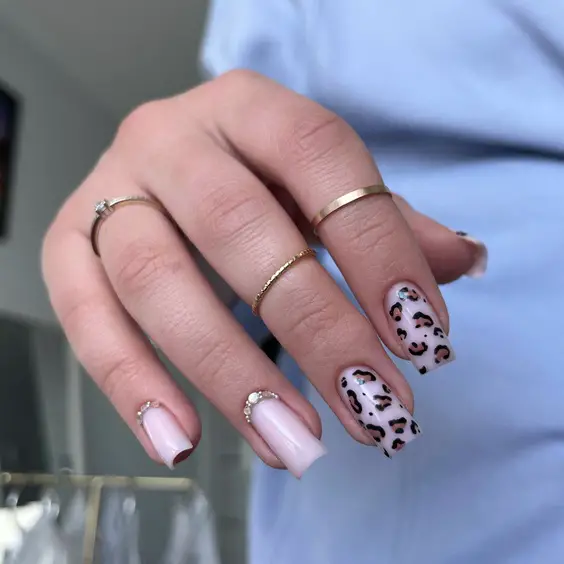
Soft Wild
Embracing a chic yet wild aesthetic, this nail design features soft pink bases with bold leopard spots, offering a contrast that is both alluring and playful. The addition of subtle rhinestones adds a touch of glamour, making it ideal for those looking to combine a natural motif with a hint of sophistication. This design perfectly marries the wild patterns of the jungle with the delicate hues of beach nail art designs sea.
Consumables List
- Base Coat: Deborah Lippmann Gel Lab Pro
- Polishes: “Pale Pink” by Essie for the base, and “Jet Black” by OPI for the spots
- Top Coat: Essie Glossy Shine
- Decorations: Small clear rhinestones
- Recommendation: Apply spots with a dotting tool for precision and add rhinestones while the top coat is still tacky to ensure they adhere properly.
DIY Instructions
Start with a base coat to protect your nails. Apply a pale pink polish as the base. Once dry, use a dotting tool to create leopard spots with black polish. Carefully place rhinestones to accent the design. Seal with a glossy top coat for a durable and shiny finish.
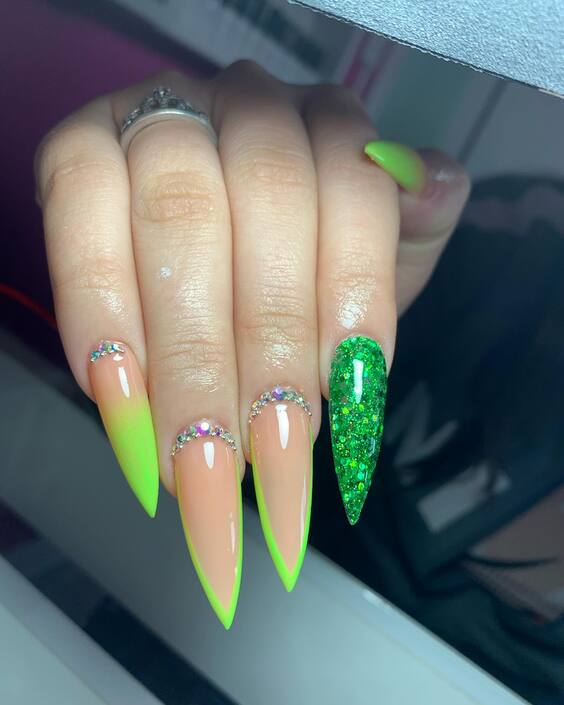
Neon Beach Lights
This vibrant design captures the essence of neon lights against a twilight beach. The gradient from a glowing neon green to a subtle peach echoes the vivid colors of a seaside sunset, enhanced by sparkling beach nail art designs summer glitters that mimic the shimmering sea under moonlight.
Consumables List
- Base Coat: ORLY Bonder
- Polishes: “Neon Green” by China Glaze and “Peach Side Babe” by Essie
- Glitter Polish: “Starry Night” by Sally Hansen
- Top Coat: INM Out The Door
- Recommendation: Use a sponge for the gradient effect to achieve a smooth transition between colors. Apply glitter polish selectively for a starry effect.
DIY Instructions
After your base coat, apply the lighter peach polish first. Then, use a makeup sponge dipped in neon green to dab towards the nail base, blending it upwards to create a smooth gradient. Add a layer of glitter polish for sparkle. Finish with a fast-drying top coat to encapsulate the design’s vibrancy.
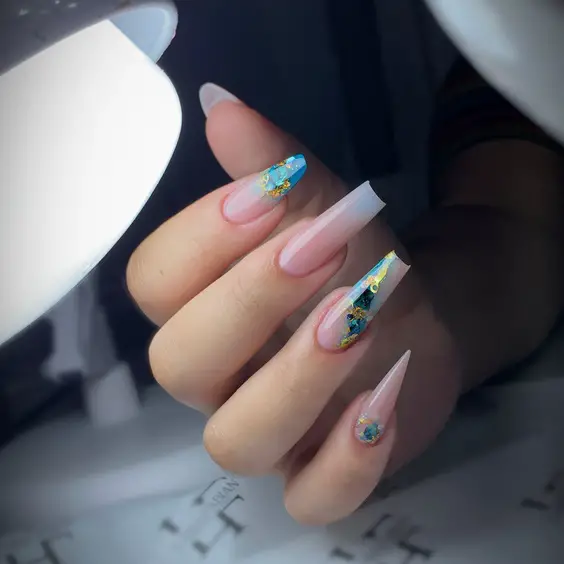
Sea Treasure
Inspired by the treasures of the deep sea, this design features aqua blue accents and intricate golden adornments that resemble precious underwater artifacts. The combination of pastel pink and striking blue creates a beach nail art atmosphere, while the luxurious embellishments bring a sense of oceanic royalty to the nails.
Consumables List
- Base Coat: CND Stickey Base Coat
- Polishes: “Romper Room” by Essie for the pink and “Bikini So Teeny” by Essie for the blue
- Decorations: Gold micro-beads and sea-themed charms
- Top Coat: Sally Hansen Diamond Strength
- Recommendation: Place the decorations with precision using tweezers and seal with a thick layer of top coat to ensure longevity.
DIY Instructions
Apply a protective base coat. Paint your nails with the pink polish, leaving some nails for the blue. Once dry, use tweezers to apply gold micro-beads and charms to the blue nails. Use a thick top coat over the decorations to keep them in place and enhance the overall shine of the manicure.
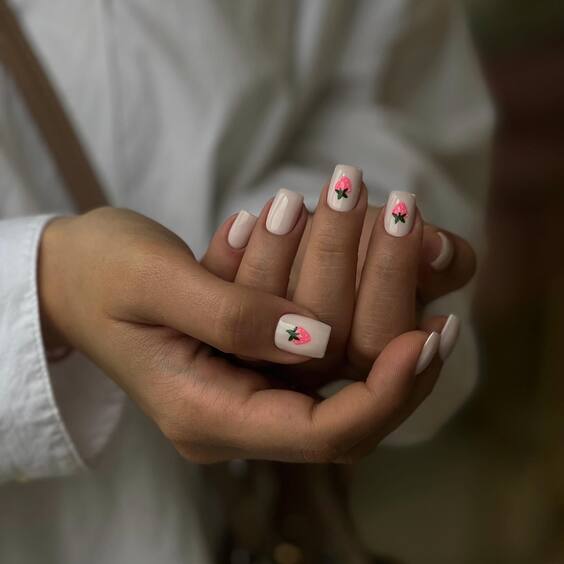
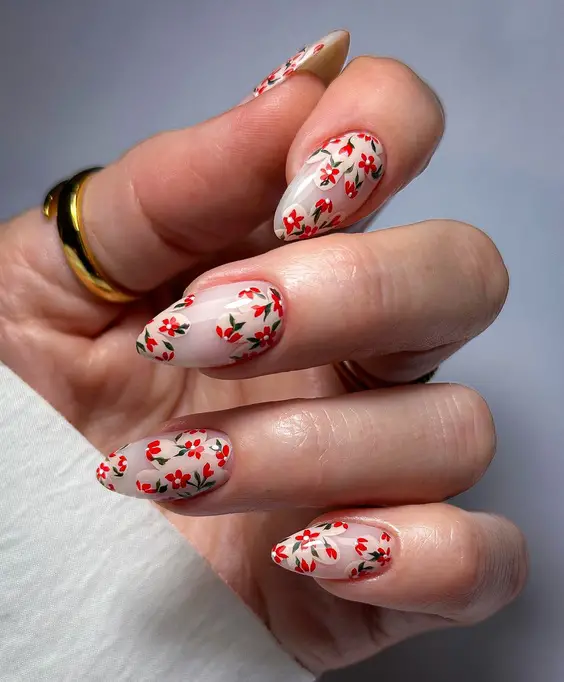
Floral Whisper
The ‘Floral Whisper’ design captivates with its delicate red floral patterns scattered across a translucent white base. This nail art combines the freshness of spring flowers with the serene beauty of a sandy beach, creating a soft, romantic look. It’s perfect for those who appreciate subtlety and elegance in their beach nail art designs.
Consumables List
- Base Coat: Essie Strong Start
- Polishes: “Marshmallow” by Essie for the base, and “Really Red” by Essie for the flowers
- Top Coat: High Shine Top Coat by OPI
- Tools: Fine detailing brush for the flowers
- Recommendation: Practice the flower patterns on a piece of paper first to ensure accuracy and confidence when painting on the nails.
DIY Instructions
Apply a base coat to protect your nails. Use a sheer white polish to create a clean, translucent base. With a fine brush, delicately paint small red flowers and green leaves onto each nail. Ensure each design element is small and detailed for a refined look. Finish with a high shine top coat for a durable and glossy appearance.
Modern Minimalist
This modern minimalist design features a white base with simple black accents and specks, emulating the contemporary art scene fused with beachside vibes. The design is understated yet bold, perfect for those who enjoy a clean and sophisticated look with a creative twist on traditional beach nail art simple styles.

Consumables List
- Base Coat: OPI Natural Nail Base Coat
- Polishes: “Alpine Snow” by OPI for the base, “Black Onyx” by OPI for the details
- Top Coat: Seche Vite Dry Fast Top Coat
- Tools: Dotting tool and fine liner brush
- Recommendation: Use a steady hand for the linear details, and keep the design elements balanced for an uncluttered look.
DIY Instructions
Start with a base coat to ensure nail health. Apply two coats of white polish for a solid base. Using a fine liner brush, add thin black lines and a few black specks randomly across each nail for a minimalist yet artistic effect. Seal with a fast-drying top coat to maintain the design’s crisp lines and prevent smudging.
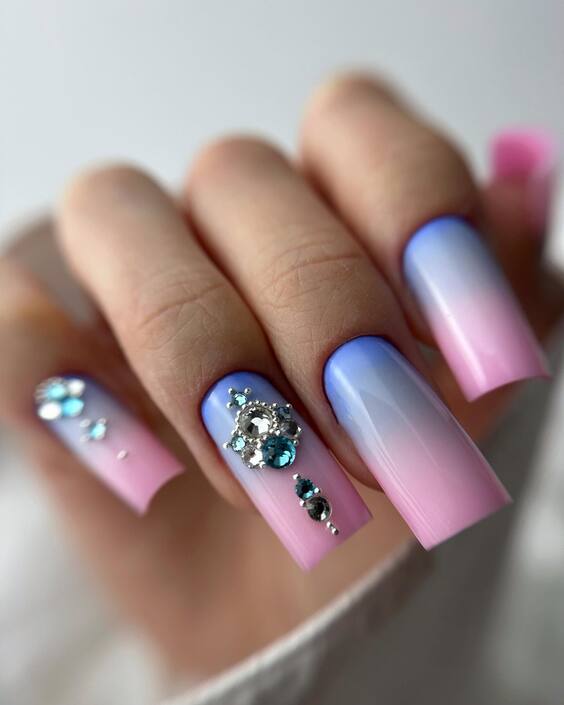
Gradient Glam
‘Gradient Glam’ brings a luxurious twist to beach nail art with its smooth gradient from lavender to pink, adorned with sparkling rhinestones and sequins. This design is inspired by the vibrant colors of a beach sunset and the glamorous nights on coastal terraces, making it ideal for summer evenings and festive beach events.
Consumables List
- Base Coat: Sally Hansen Hard as Nails
- Polishes: “Forget-Me-Not” by Sally Hansen and “Pink Diamond” by Revlon
- Decorations: Rhinestones and small sequins
- Top Coat: INM Out the Door Top Coat
- Tools: Sponge for the gradient effect
- Recommendation: Apply the rhinestones and sequins while the top coat is still wet to ensure they adhere properly and last longer.
DIY Instructions
Apply a clear base coat to protect your nails from staining. Use a sponge to apply the gradient effect, starting with lavender at the base and blending into pink towards the tip. While the gradient is still tacky, strategically place rhinestones and sequins to add a touch of glamour. Finish with a fast-drying top coat to seal the design and enhance the sparkle.
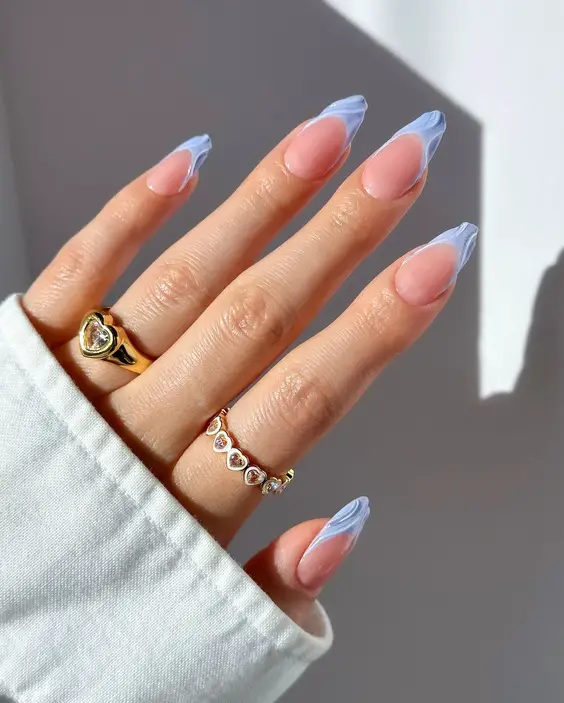
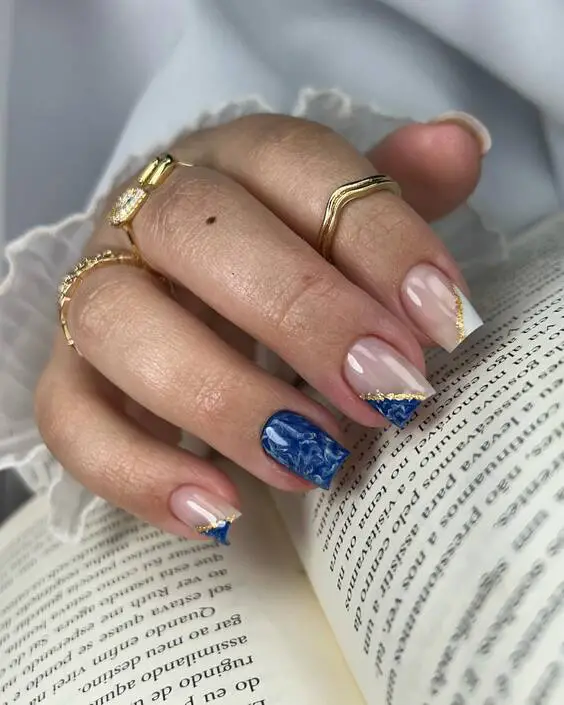
Ocean’s Edge
This stunning design, titled “Ocean’s Edge,” artfully combines soft pinks with dynamic blue accents and gold foil for a luxurious yet beach-inspired look. The blue nail features a crushed foil technique that evokes the texture of waves crashing against the shore, while the pink nails keep the style elegant and understated. It’s a perfect blend of sophistication and marine allure, ideal for embodying the beach nail art designs ocean waves theme.
Consumables List
- Base Coat: ORLY Bonder Rubberized Basecoat
- Polishes: “Ballet Slippers” by Essie for the pink, “Butler Please” by Essie for the blue
- Gold Foil: Nail art gold foil sheets
- Top Coat: Essie Gel Setter Top Coat
- Recommendation: Apply the gold foil in small pieces to create a natural, fragmented look. Seal with a gel top coat to ensure longevity and maintain the metallic sheen.
DIY Instructions
Begin with a base coat to protect your nails. Paint the pink nails with two coats of “Ballet Slippers.” For the blue nail, apply two coats of “Butler Please” and allow it to dry slightly. Then, gently press pieces of gold foil onto the nail, using tweezers for precision. Finish with a gel top coat to smooth over the texture and lock in the design.
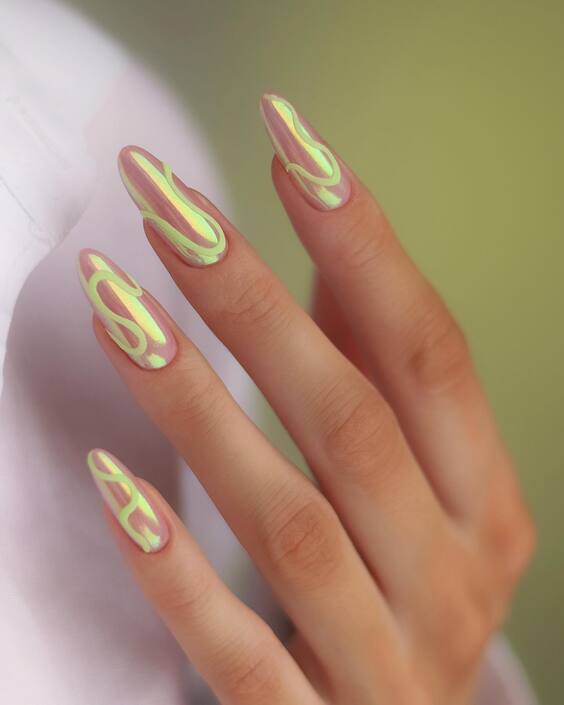
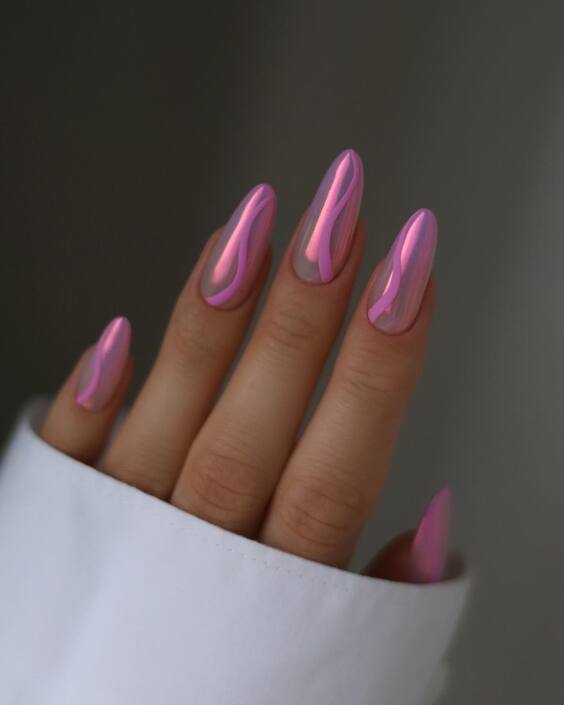
Cosmic Swirl
“Cosmic Swirl” features a mesmerizing iridescent swirl on a glossy pink base, creating a futuristic yet feminine look. This design uses a technique that mimics the fluid motion of ocean currents but with a cosmic twist, incorporating shades of pink that are reminiscent of a sunset on a distant planet. It’s a bold, artistic choice for beach nail art designs summer.
Consumables List
- Base Coat: Sally Hansen Miracle Gel Base Coat
- Polishes: “Pink Cadillacquer” by Deborah Lippmann
- Iridescent Topper: Iridescent swirl polish
- Top Coat: Sally Hansen Miracle Gel Top Coat
- Recommendation: Use a thin brush to swirl the iridescent topper into the semi-wet base polish to achieve the desired fluidity in the design.
DIY Instructions
Apply a base coat to all nails. Paint a solid pink base using “Pink Cadillacquer.” While the base is still tacky, gently swirl in an iridescent topper using a thin brush to create a flowing, cosmic pattern. Finish with a top coat to enhance the glossiness and durability of the design.
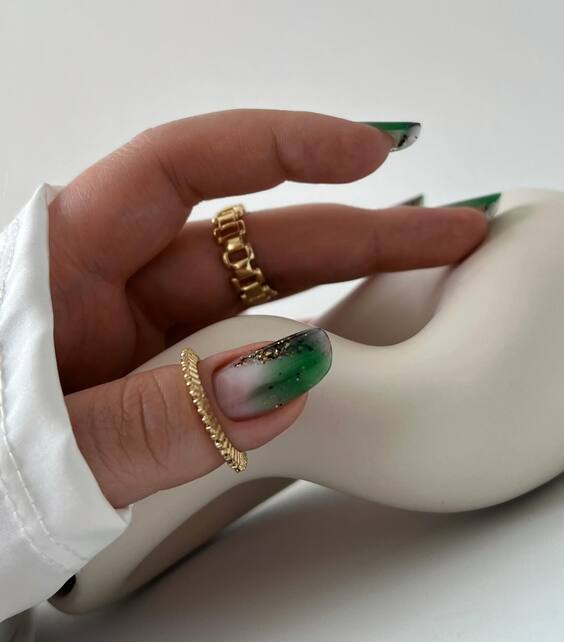
Emerald Shores
The “Emerald Shores” design captures the essence of lush coastal landscapes with its deep green and white marbling effect, accented by golden flecks. This nail art design evokes the richness of emerald green sea waters meeting white sandy beaches, decorated with gold like treasures washed ashore. It is an exquisite representation of beach nail art designs sea.
Consumables List
- Base Coat: CND Sticky Base Coat
- Polishes: “Going Incognito” by Essie for the green, “Alpine Snow” by OPI for the white
- Gold Flakes: Fine gold leaf flakes
- Top Coat: INM Out the Door Top Coat
- Tools: Detailing brush for marbling
- Recommendation: Apply the gold flakes sparingly to mimic the random distribution of natural gold flecks found on beaches.
DIY Instructions
Start by applying a base coat for durability. Paint a base layer of green polish on your nails. While wet, add small dots of white polish and use a detailing brush to swirl the colors together for a marbled effect. Sprinkle a few gold flakes onto the wet polish for a touch of luxury. Seal with a quick-drying top coat to protect your beach-inspired masterpiece.
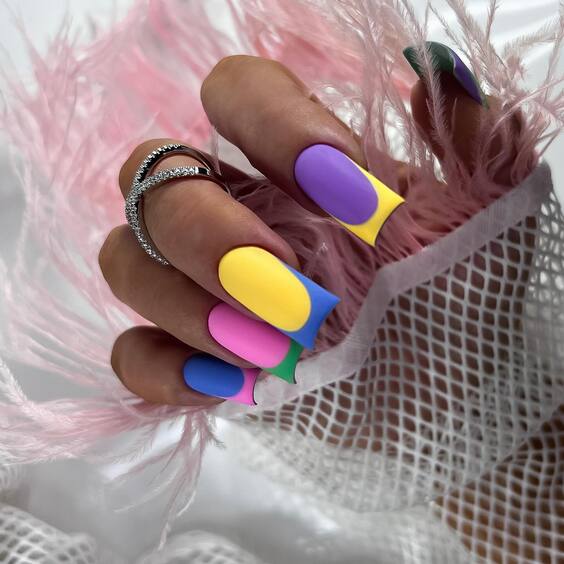
Tropical Pop
“Tropical Pop” bursts with vibrant colors, capturing the lively spirit of tropical destinations. This design features an array of saturated hues like yellow, purple, blue, and green, applied in bold, segmented patterns that mimic the dynamic shades found in tropical birds and flowers. It’s a playful yet chic choice for those who adore colorful beach nail art designs summer and wish to stand out with a pop art-inspired aesthetic.
Consumables List
- Base Coat: SuperChic Lacquer Bring It On! Base Coat
- Polishes: Various colors by OPI, including “Do You Lilac It?”, “Big Apple Red”, “Gargantuan Green Grape”, and “No Room for the Blues”
- Top Coat: CND Vinylux Weekly Top Coat
- Tools: Detailing brushes for precise color separation
- Recommendation: Maintain clean lines between each color segment to enhance the graphic appeal of the design.
DIY Instructions
Apply a base coat to protect the nails. Use a detailing brush to carefully apply each color in blocked segments, ensuring they do not overlap. Let each color dry thoroughly before applying the next to avoid smearing. Seal with a durable top coat to keep the colors vibrant and long-lasting.
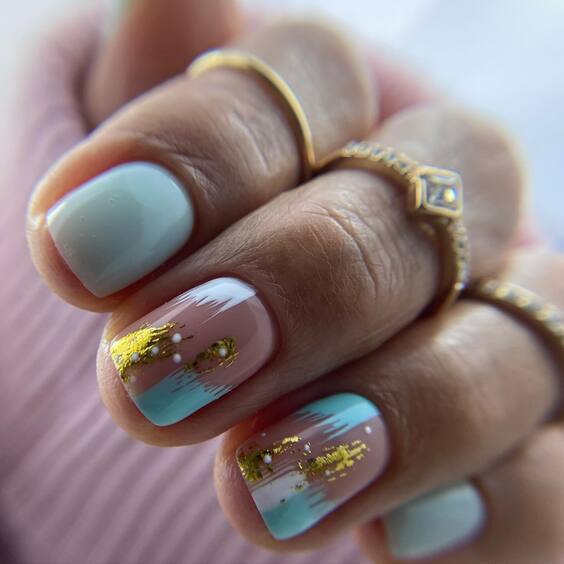
Seafoam and Gold
“Seafoam and Gold” reflects the serene colors of the beach, combining soft seafoam green with sandy pink and gold flake accents. The gradient mimics the gentle meeting of sea waves and the beach, enhanced by the luxurious touch of gold, reminiscent of sunlight flickering on water. It’s perfect for those seeking a sophisticated beach nail art designs sea that also incorporates a touch of glamour.
Consumables List
- Base Coat: Jessica Cosmetics Reward Base Coat
- Polishes: “Mint Candy Apple” by Essie for the seafoam, “Ballet Slippers” by Essie for the pink
- Gold Flakes: Nail art gold leaf
- Top Coat: Essie Good to Go Top Coat
- Tools: Sponge for the gradient effect
- Recommendation: Apply the gold flakes gently with tweezers and seal with a top coat to prevent the edges from lifting.
DIY Instructions
Start with a base coat to protect your nails. Apply the light pink polish as a base, and then use a sponge to dab on the seafoam green polish, creating a soft gradient effect. While the polish is tacky, place small pieces of gold leaf randomly to emulate the shimmer of sunlight on water. Finish with a fast-drying top coat for a glossy and protected finish.
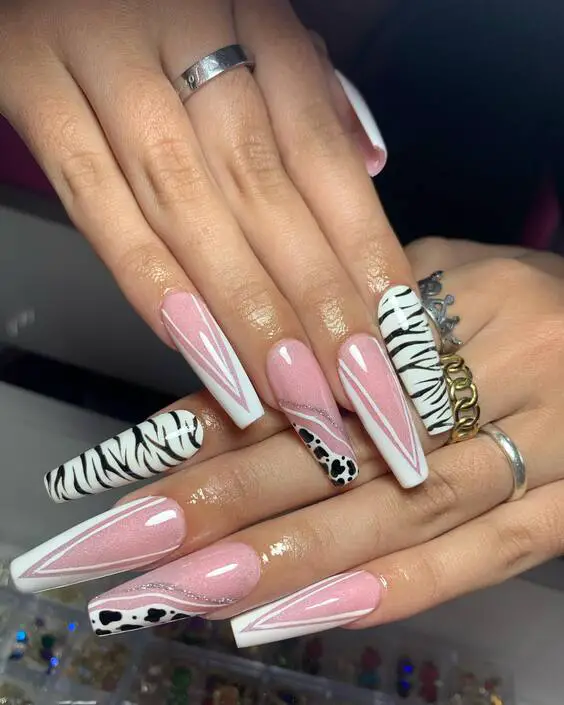
Modern Safari
“Modern Safari” combines wild animal prints with soft pastel colors, creating a striking contrast that’s both bold and feminine. The design includes zebra stripes over a clean white base, accented with pink and black details, embodying a modern twist on traditional safari themes. This design is ideal for those who love to incorporate elements of nature into their beach nail art designs with a stylish, contemporary edge.
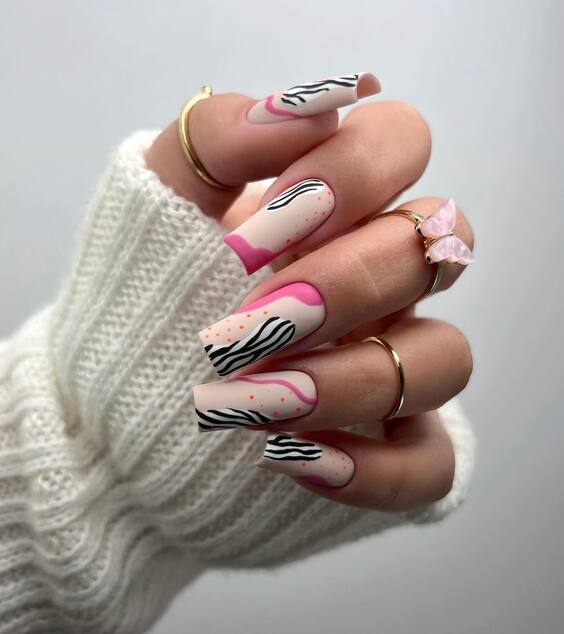
Consumables List
- Base Coat: Butter London Nail Foundation
- Polishes: “Alpine Snow” by OPI for the white base, “Mod About You” by OPI for the pink accents
- Top Coat: Seche Vite Dry Fast Top Coat
- Tools: Striping brush for the zebra patterns
- Recommendation: Practice the zebra patterns on paper before attempting on the nails to ensure a smooth application.
DIY Instructions
Apply a base coat to protect the nails. Paint the nails with “Alpine Snow” as the base color. Use a striping brush to add zebra stripes in black over the white base. Add pink accents sparingly for a pop of color. Finish with a top coat to seal in the design and add a glossy sheen.
In this exploration of beach nail art, we’ve traversed from the understated elegance of ocean-inspired designs to the vibrant dynamism of tropical hues, encapsulating the essence of the beach in every brushstroke. Each design not only serves as a fashionable complement to your summer style but also embodies the spirited freedom and creative expression found at the seaside. Whether you prefer the subtle gradients that mirror the serene shoreline or the bold, eye-catching colors that echo the lively beach atmosphere, these nail art ideas offer a delightful way to bring the beauty of the beach to your fingertips, ensuring your nails are as summer-ready as you are.