21 Stunning Burnt Orange Fall Nail Designs
Fall is the perfect season to embrace warm and earthy tones, and there’s no color more quintessentially autumnal than burnt orange. From subtle designs to bold statements, burnt orange nails capture the essence of fall foliage, pumpkin spice, and cozy evenings by the fire. Whether you’re looking for inspiration for your next manicure or you’re a nail artist seeking new ideas, these burnt orange fall nail designs are sure to spark your creativity. Let’s dive into a world of burnt orange beauty and explore 21 stunning nail designs that embody the spirit of fall.
Retro Vibes with Burnt Orange and Dice
This nail design combines retro elements with modern flair. The burnt orange base is adorned with detailed drawings of dice, cars, and flames, giving it a playful yet edgy vibe. The sharp almond shape of the nails enhances the retro look, making it a perfect choice for those who love to stand out with unique designs.
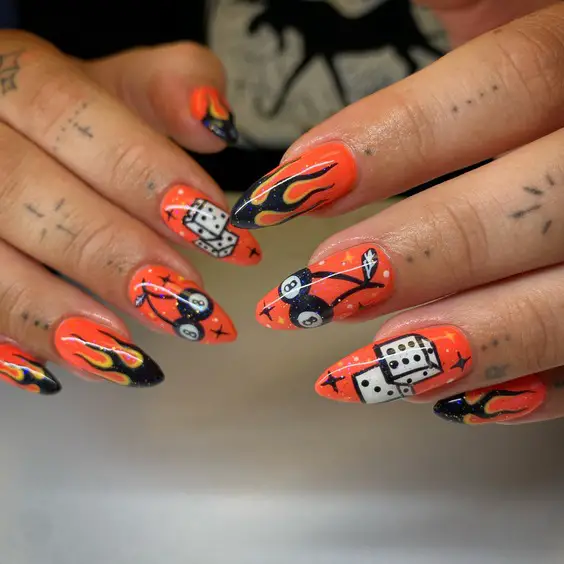
Consumables List
- Base Color: OPI Nail Lacquer in “A Good Man-darin is Hard to Find”
- Detail Paints: Sally Hansen Nail Art Pen in Black and White
- Top Coat: Seche Vite Dry Fast Top Coat
These products ensure vibrant colors and a long-lasting finish, perfect for this intricate design.
DIY Instructions
- Start with a clean, buffed nail surface.
- Apply two coats of the burnt orange polish as your base.
- Once dry, use the nail art pens to draw the dice, cars, and flame details.
- Seal your artwork with a top coat for a glossy and enduring finish.
Chic Burnt Orange French Tips
A modern twist on the classic French manicure, this design features burnt orange tips on a nude base. The minimalist approach gives it a chic and sophisticated look, perfect for any occasion. The short, square shape of the nails adds to the elegance, making it a versatile choice for fall.
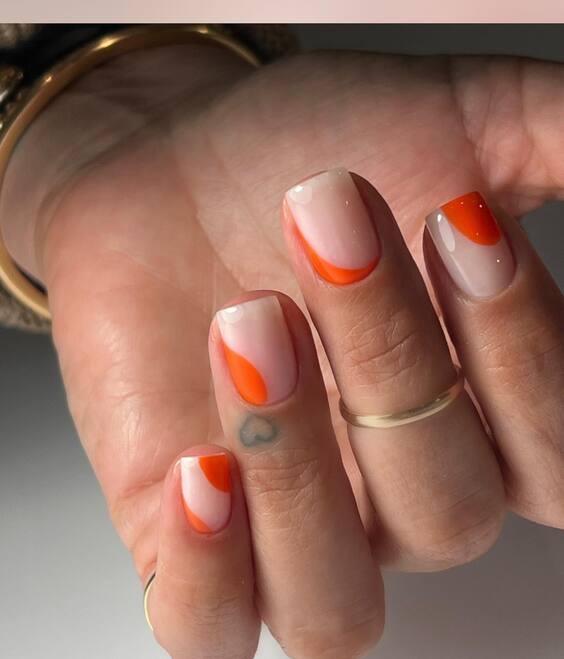
Consumables List
- Base Color: Essie Nail Polish in “Ballet Slippers”
- Tip Color: OPI Nail Lacquer in “A Good Man-darin is Hard to Find”
- Top Coat: Essie Gel Couture Top Coat
These products will help you achieve a sleek and polished French manicure with a fall twist.
DIY Instructions
- Prepare your nails by cleaning and buffing them.
- Apply the nude base color and let it dry.
- Using the burnt orange polish, paint the tips of your nails.
- Finish with a top coat to seal the design and add shine.
Vibrant Orange Glow
This design features a vibrant burnt orange color with a glossy finish. The simplicity of the solid color allows the vibrancy of the burnt orange to shine through, making it a bold statement for the fall season. The medium length and square shape of the nails add to the overall impact of this design.
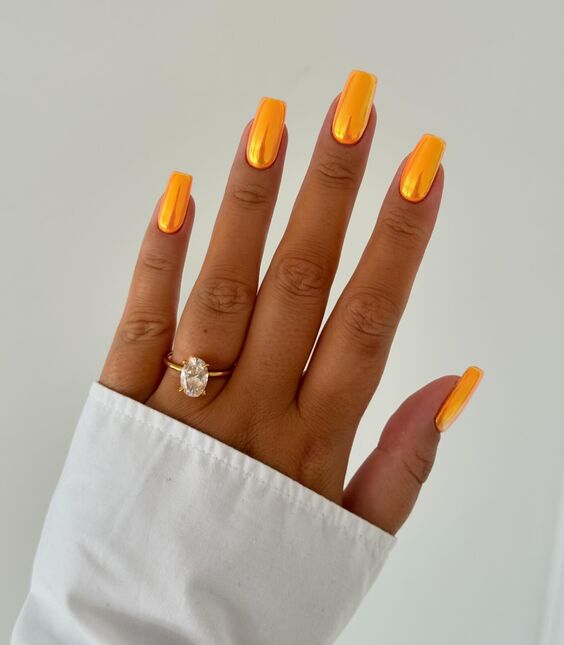
Consumables List
- Base Color: China Glaze Nail Lacquer in “Orange Knockout”
- Top Coat: Seche Vite Dry Fast Top Coat
These products ensure a bright, eye-catching color with a smooth, glossy finish.
DIY Instructions
- Start with a clean and prepared nail surface.
- Apply two coats of the burnt orange polish for full coverage.
- Finish with a top coat to add a glossy shine and protect the color.
Neon Burnt Orange Stiletto Nails
For those who love bold and daring designs, these neon burnt orange stiletto nails are a must-try. The sharp, elongated shape adds drama, while the neon orange color ensures that your nails will be noticed. This design is perfect for making a statement during the fall season.
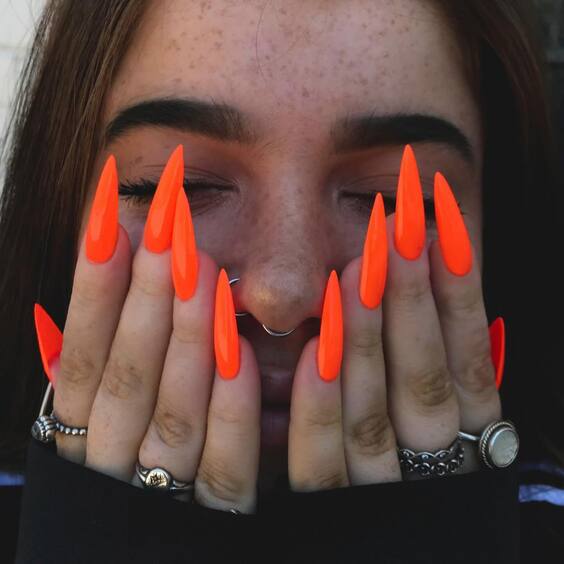
Consumables List
- Base Color: Orly Nail Lacquer in “Tropical Pop”
- Top Coat: Essie Gel Couture Top Coat
These products will help you achieve a vibrant and long-lasting neon look.
DIY Instructions
- Clean and shape your nails into a stiletto form.
- Apply two coats of the neon burnt orange polish.
- Seal with a top coat to ensure durability and shine.
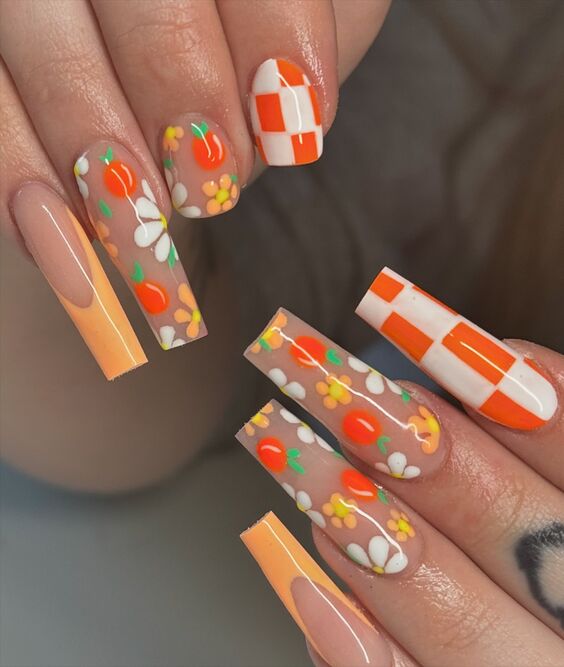
Playful Floral Burnt Orange Nails
This design features a mix of playful elements with a burnt orange base, including floral accents and checkerboard patterns. The long coffin shape provides a large canvas for these intricate details, making it a fun and creative choice for fall.
Consumables List
- Base Color: OPI Nail Lacquer in “It’s a Piazza Cake”
- Detail Paints: Sally Hansen Nail Art Pen in White and Green
- Top Coat: Seche Vite Dry Fast Top Coat
These products ensure that your intricate designs remain vibrant and intact.
DIY Instructions
- Start with clean, shaped nails.
- Apply two coats of the burnt orange polish as your base.
- Use nail art pens to add floral and checkerboard details.
- Finish with a top coat to seal the design and add shine.
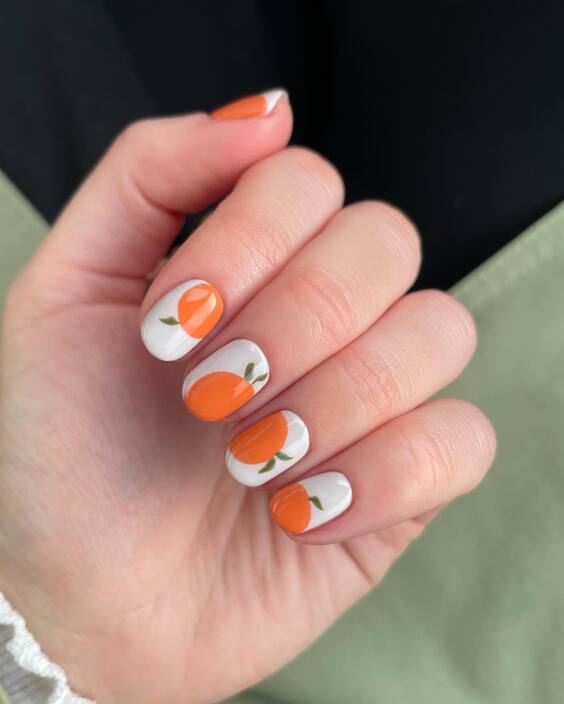
Autumn Pumpkin Nail Art
Embrace the essence of fall with these cute pumpkin designs on a white base. The short, round shape of the nails gives a cozy feel, perfect for the autumn season. The bright orange pumpkins against the white background create a striking and festive look.
Consumables List
- Base Color: Essie Nail Polish in “Blanc”
- Detail Paint: OPI Nail Lacquer in “A Good Man-darin is Hard to Find”
- Top Coat: Seche Vite Dry Fast Top Coat
These products will help you achieve a crisp and vibrant pumpkin design.
DIY Instructions
- Clean and prepare your nails.
- Apply two coats of the white polish for the base.
- Use the orange polish to paint small pumpkins on each nail.
- Seal with a top coat to protect your design and add shine.
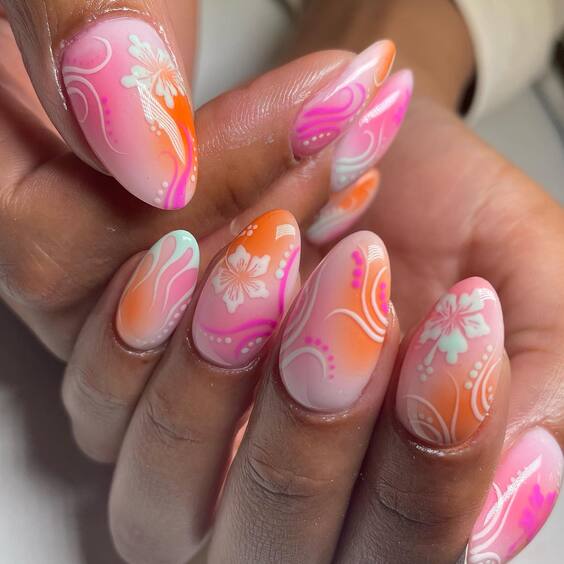
Floral Burnt Orange Ombre
This beautiful design features a soft ombre effect with floral accents. The blend from nude to burnt orange creates a gradient that is both subtle and striking. The almond shape of the nails complements the design, making it a perfect choice for fall.
Consumables List
- Base Color: Essie Nail Polish in “Mademoiselle”
- Ombre Color: OPI Nail Lacquer in “A Good Man-darin is Hard to Find”
- Detail Paint: Sally Hansen Nail Art Pen in White
- Top Coat: Seche Vite Dry Fast Top Coat
These products will help you achieve a smooth ombre effect with delicate floral details.
DIY Instructions
- Start with clean, shaped nails.
- Apply the nude base color and let it dry.
- Create the ombre effect by blending the burnt orange polish from the tips down to the base.
- Add floral accents using the white nail art pen.
- Finish with a top coat to seal the design.
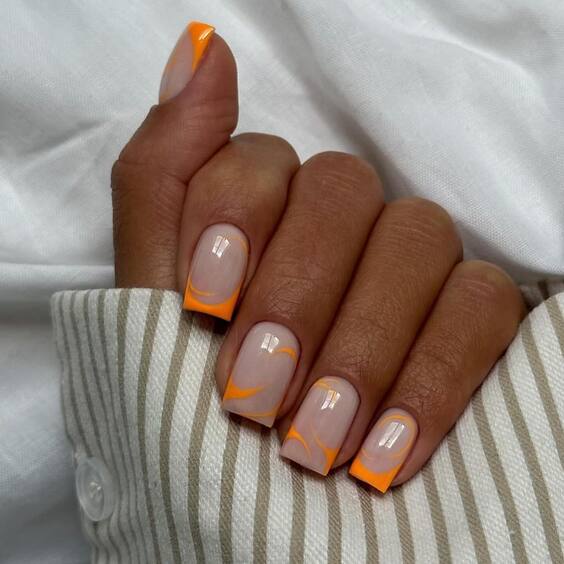
Neon Orange French Tips
These nails feature a fun twist on the classic French tip design. The neon burnt orange tips against a clear base make for a striking contrast. The short, square shape adds a modern touch, perfect for a playful fall look.
Consumables List
- Base Color: OPI Nail Lacquer in “Clear”
- Tip Color: China Glaze Nail Lacquer in “Orange Knockout”
- Top Coat: Seche Vite Dry Fast Top Coat
These products will help you achieve a vibrant and modern French manicure.
DIY Instructions
- Clean and shape your nails.
- Apply the clear polish as your base.
- Paint the tips with the neon burnt orange polish.
- Seal with a top coat to ensure a long-lasting finish.
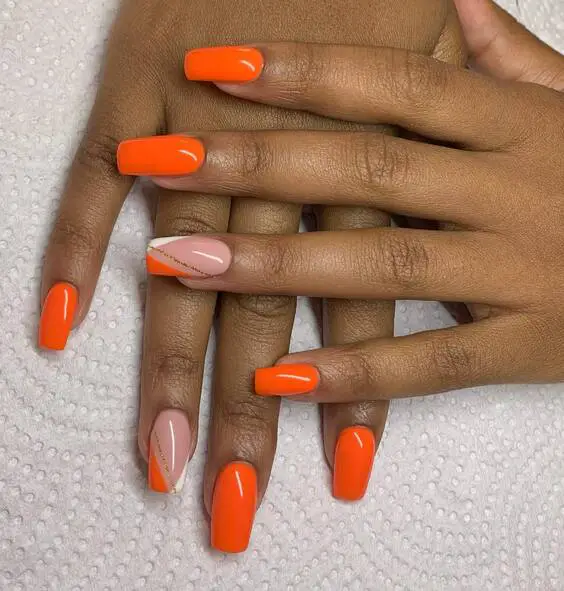
Orange and Gold Geometric Design
This design features a sophisticated geometric pattern in burnt orange and gold. The combination of sharp lines and rich colors makes it a chic choice for fall. The medium length and square shape of the nails enhance the elegance of the design.
Consumables List
- Base Color: OPI Nail Lacquer in “A Good Man-darin is Hard to Find”
- Detail Paint: Essie Nail Polish in “Good as Gold”
- Top Coat: Seche Vite Dry Fast Top Coat
These products will help you create a refined and stylish geometric design.
DIY Instructions
- Prepare your nails by cleaning and shaping them.
- Apply two coats of the burnt orange polish for the base.
- Use the gold polish to paint geometric patterns on each nail.
- Finish with a top coat to seal the design and add shine.
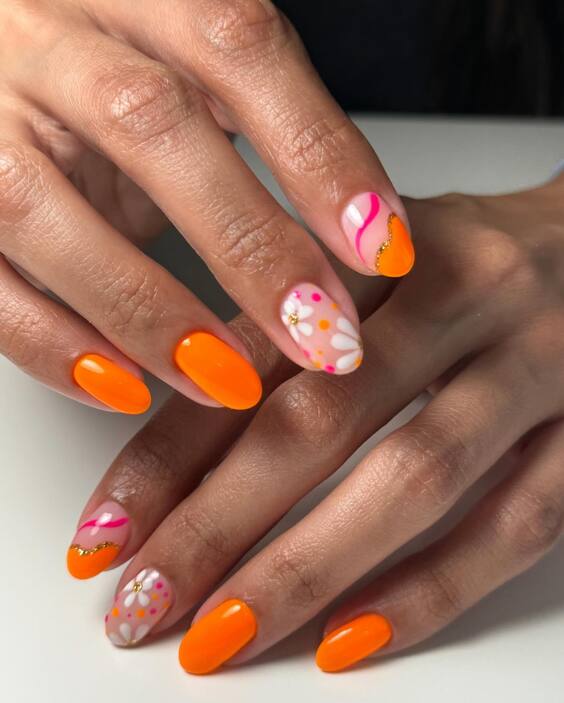
Playful Swirls and Dots
This design is all about playful creativity, featuring swirls and dots in various shades of orange. The almond shape of the nails provides a perfect canvas for this whimsical design, making it a fun choice for fall.
Consumables List
- Base Color: Essie Nail Polish in “Blanc”
- Detail Paints: OPI Nail Lacquer in “A Good Man-darin is Hard to Find” and “Orange Knockout”
- Top Coat: Seche Vite Dry Fast Top Coat
These products will help you achieve a playful and vibrant nail art design.
DIY Instructions
- Start with clean, shaped nails.
- Apply the white polish as your base and let it dry.
- Use the orange polishes to create swirls and dots on each nail.
- Seal with a top coat to protect your design.
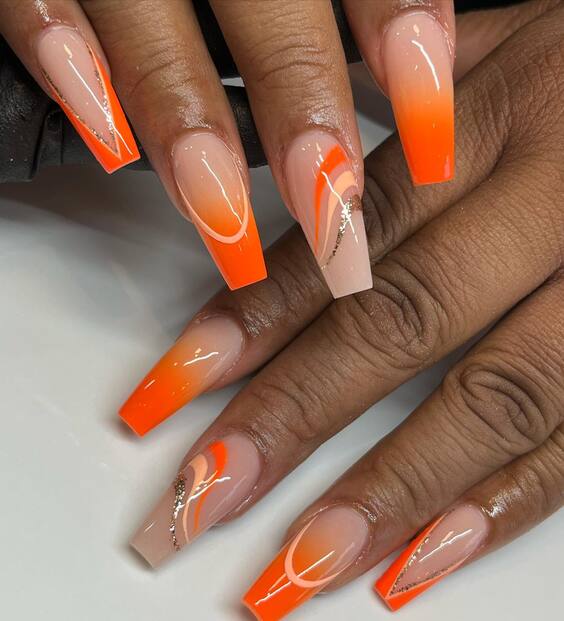
Gradient Burnt Orange and Gold
This elegant design features a gradient from nude to burnt orange, embellished with gold lines. The combination of colors and the long coffin shape make it a sophisticated choice for fall. The gold accents add a touch of glamour, perfect for any occasion.
Consumables List
- Base Color: Essie Nail Polish in “Mademoiselle”
- Gradient Color: OPI Nail Lacquer in “A Good Man-darin is Hard to Find”
- Detail Paint: Essie Nail Polish in “Good as Gold”
- Top Coat: Seche Vite Dry Fast Top Coat
These products will help you achieve a luxurious and long-lasting gradient design.
DIY Instructions
- Clean and shape your nails.
- Apply the nude base color and let it dry.
- Create the gradient effect by blending the burnt orange polish from the tips down to the base.
- Add gold lines for an elegant touch.
- Finish with a top coat to seal the design.
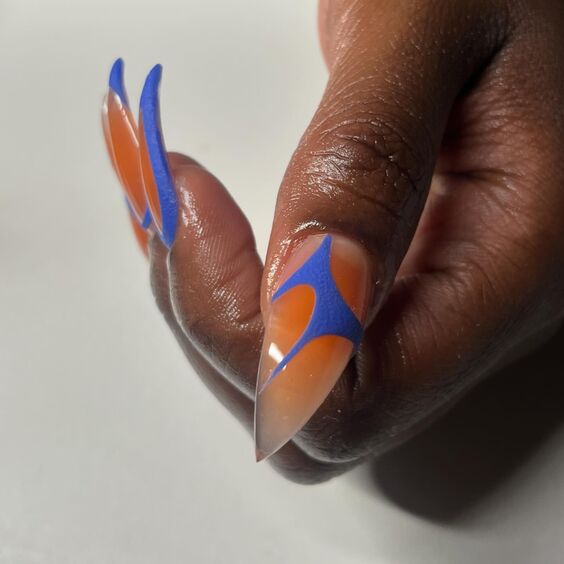
Retro Blue and Burnt Orange
This design features a striking combination of blue and burnt orange in a retro pattern. The sharp stiletto shape adds an edgy touch, making it a bold choice for those who love to stand out. The contrast between the two colors creates a dynamic and eye-catching look.
Consumables List
- Base Color: Essie Nail Polish in “Blanc”
- Detail Paint: OPI Nail Lacquer in “A Good Man-darin is Hard to Find” and “Blue My Mind”
- Top Coat: Seche Vite Dry Fast Top Coat
These products will help you achieve a vibrant and retro-inspired design.
DIY Instructions
- Clean and shape your nails into a stiletto form.
- Apply the white base color and let it dry.
- Use the blue and burnt orange polishes to create the retro pattern.
- Seal with a top coat to protect your design and add shine.
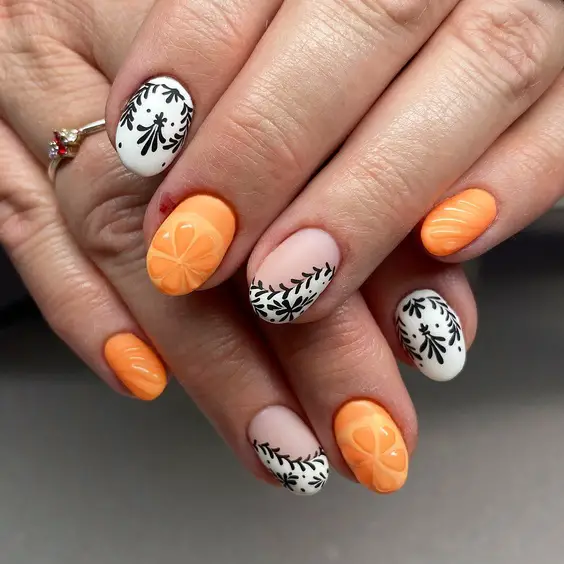
Sophisticated Floral Burnt Orange
This design combines sophistication and playfulness with floral patterns in black and white on a burnt orange base. The short, round shape of the nails adds to the elegance, making it a perfect choice for a refined fall look.
Consumables List
- Base Color: OPI Nail Lacquer in “A Good Man-darin is Hard to Find”
- Detail Paints: Sally Hansen Nail Art Pen in Black and White
- Top Coat: Seche Vite Dry Fast Top Coat
These products will help you create a detailed and sophisticated floral design.
DIY Instructions
- Start with clean, shaped nails.
- Apply two coats of the burnt orange polish as your base.
- Use the black and white nail art pens to create floral patterns on each nail.
- Finish with a top coat to seal the design and add shine.
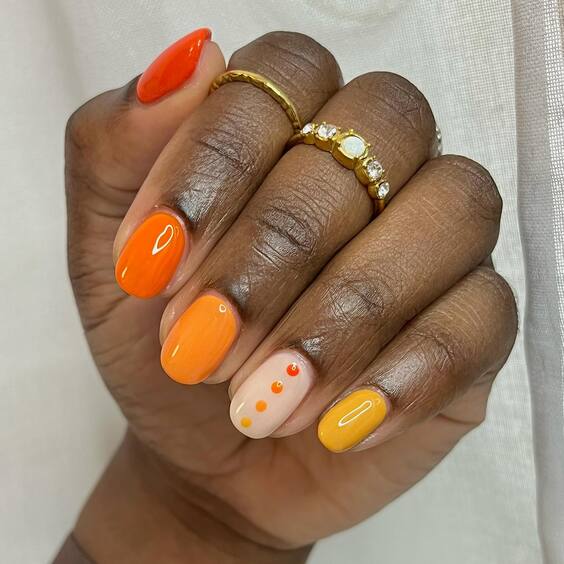
Autumn Gradient and Dots
This playful design features a gradient of autumn colors with dots for added fun. The short, square shape makes it a practical yet stylish choice for fall. The mix of orange, yellow, and nude creates a warm and cheerful look.
Consumables List
- Base Colors: OPI Nail Lacquer in “A Good Man-darin is Hard to Find” and “Sun, Sea, and Sand in My Pants”
- Top Coat: Seche Vite Dry Fast Top Coat
These products will help you achieve a smooth gradient with vibrant dots.
DIY Instructions
- Clean and shape your nails.
- Apply the nude base color and let it dry.
- Create a gradient effect with the orange and yellow polishes.
- Add dots using the same colors for a playful touch.
- Seal with a top coat to protect your design.
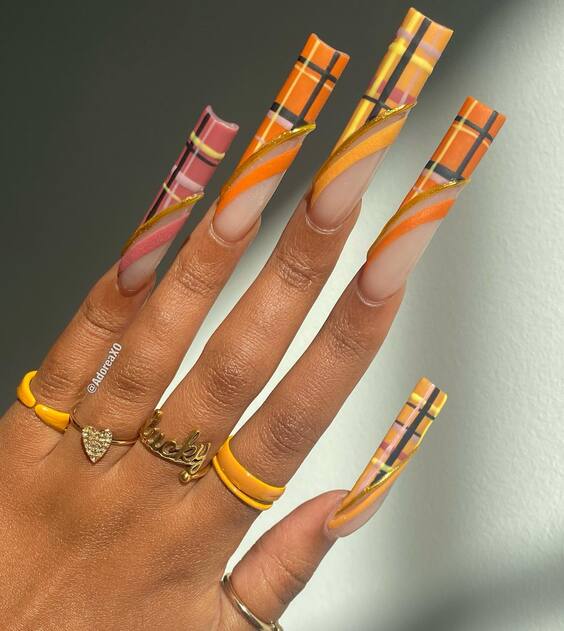
Plaid Burnt Orange Nails
Plaid patterns are a fall favorite, and this design incorporates burnt orange for a seasonal twist. The long coffin shape provides a large canvas for the intricate plaid details, making it a stylish and trendy choice for fall.
Consumables List
- Base Color: Essie Nail Polish in “Mademoiselle”
- Detail Paints: OPI Nail Lacquer in “A Good Man-darin is Hard to Find” and “Black Onyx”
- Top Coat: Seche Vite Dry Fast Top Coat
These products will help you achieve a detailed and trendy plaid design.
DIY Instructions
- Start with clean, shaped nails.
- Apply the nude base color and let it dry.
- Use the orange and black polishes to create the plaid pattern on each nail.
- Finish with a top coat to seal the design.
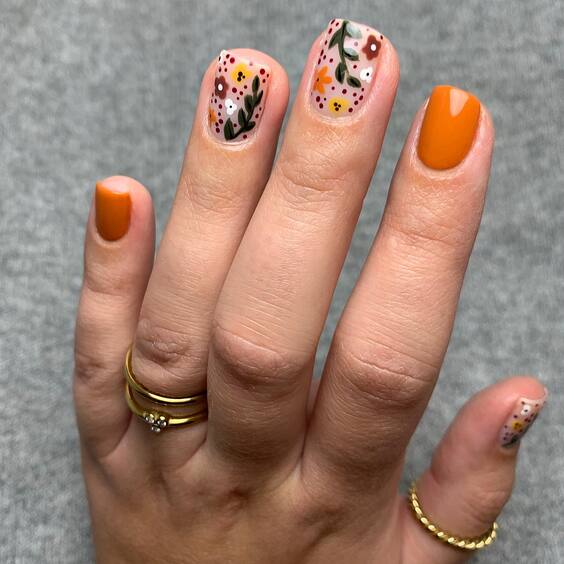
Elegant Floral Accents
This elegant design features floral accents on a burnt orange base. The combination of colors and the short, square shape make it a refined choice for fall. The delicate floral patterns add a touch of sophistication, perfect for any occasion.
Consumables List
- Base Color: OPI Nail Lacquer in “A Good Man-darin is Hard to Find”
- Detail Paints: Sally Hansen Nail Art Pen in Black and White
- Top Coat: Seche Vite Dry Fast Top Coat
These products will help you achieve a detailed and elegant floral design.
DIY Instructions
- Clean and shape your nails.
- Apply two coats of the burnt orange polish as your base.
- Use the black and white nail art pens to create floral patterns on each nail.
- Seal with a top coat to protect your design and add shine.
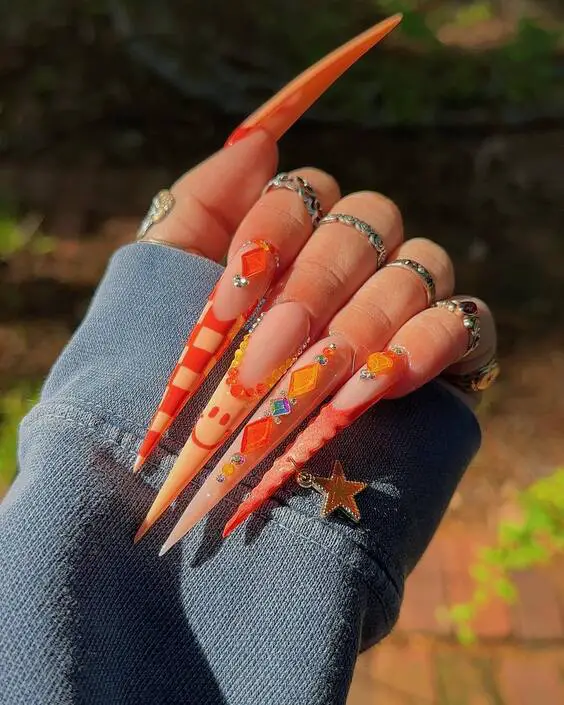
Crystal Embellished Burnt Orange
For those who love a bit of sparkle, this design features crystal embellishments on a burnt orange base. The long, stiletto shape adds drama, while the crystals add glamour, making it a perfect choice for special occasions during the fall season.
Consumables List
- Base Color: Essie Nail Polish in “Playing Koi”
- Crystals: Swarovski Flatback Crystals
- Top Coat: Seche Vite Dry Fast Top Coat
These products will help you achieve a luxurious and long-lasting design.
DIY Instructions
- Start with clean, shaped nails.
- Apply two coats of the burnt orange polish for the base.
- Place the crystals on each nail using nail glue.
- Seal with a top coat to ensure durability and shine.
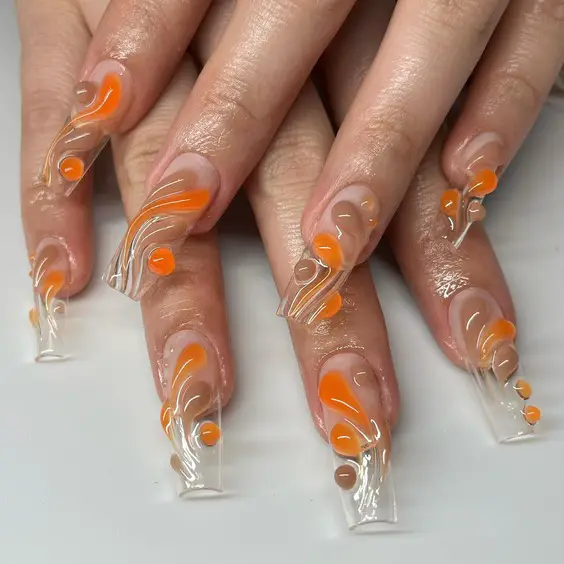
Burnt Orange and Clear Acrylics
This modern design features burnt orange accents on clear acrylic nails. The unique combination of colors and the long, square shape make it a trendy and stylish choice for fall. The clear acrylic base adds a modern twist to the classic burnt orange color.
Consumables List
- Base Color: Clear Acrylic Powder
- Accent Color: OPI Nail Lacquer in “A Good Man-darin is Hard to Find”
- Top Coat: Seche Vite Dry Fast Top Coat
These products will help you achieve a sleek and modern design.
DIY Instructions
- Prepare your nails with clear acrylic powder.
- Apply the burnt orange polish to create accent designs.
- Seal with a top coat to add shine and protect the design.
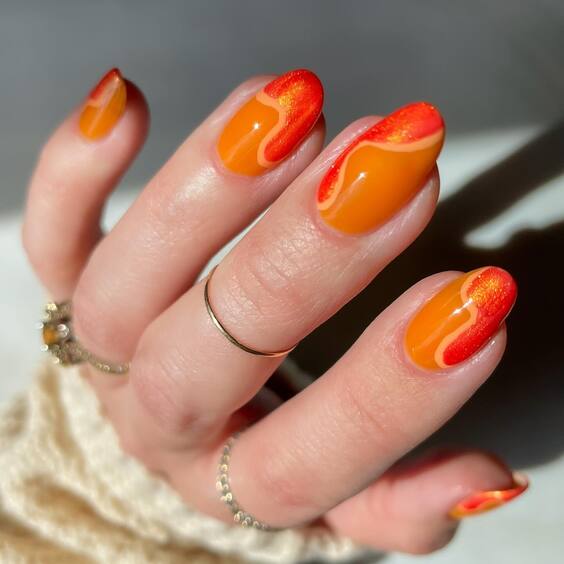
Burnt Orange and Gold Swirls
This elegant design features burnt orange and gold swirls on a clear base. The short, round shape of the nails adds to the sophistication, making it a perfect choice for a refined fall look. The gold swirls add a touch of glamour, perfect for any occasion.
Consumables List
- Base Color: Clear Acrylic Powder
- Accent Colors: OPI Nail Lacquer in “A Good Man-darin is Hard to Find” and Essie Nail Polish in “Good as Gold”
- Top Coat: Seche Vite Dry Fast Top Coat
These products will help you achieve a detailed and elegant design.
DIY Instructions
- Prepare your nails with clear acrylic powder.
- Apply the burnt orange and gold polishes to create swirl designs.
- Seal with a top coat to add shine and protect the design.
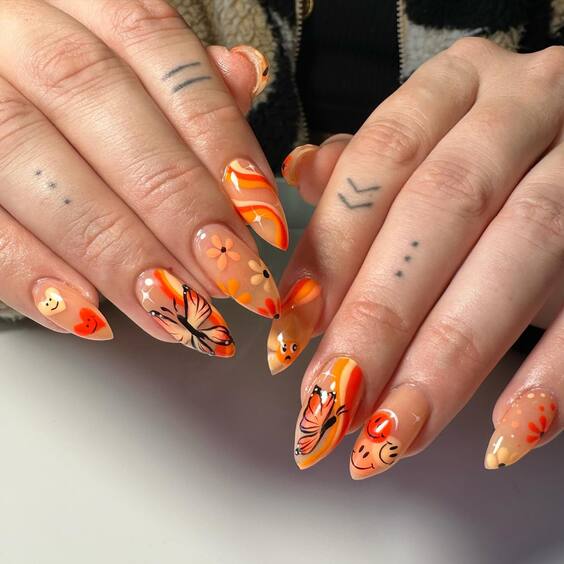
Burnt Orange Butterflies and Flowers
This whimsical design features butterflies and flowers on a burnt orange base. The almond shape of the nails provides a perfect canvas for these intricate details, making it a fun and creative choice for fall.
Consumables List
- Base Color: OPI Nail Lacquer in “A Good Man-darin is Hard to Find”
- Detail Paints: Sally Hansen Nail Art Pen in Black and White
- Top Coat: Seche Vite Dry Fast Top Coat
These products will help you create a vibrant and detailed butterfly and flower design.
DIY Instructions
- Start with clean, shaped nails.
- Apply two coats of the burnt orange polish as your base.
- Use the black and white nail art pens to create butterfly and flower designs.
- Seal with a top coat to protect your design and add shine.
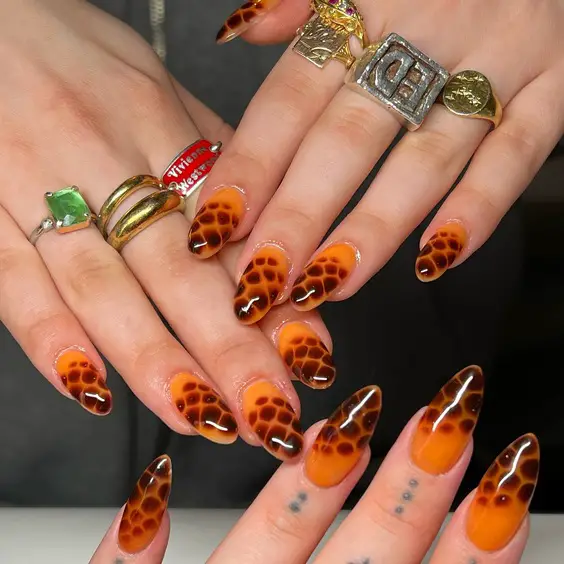
Tortoiseshell Burnt Orange Nails
This unique design mimics the look of tortoiseshell, using shades of burnt orange and brown. The medium length and almond shape add to the elegance of the design, making it a stylish and trendy choice for fall.
Consumables List
- Base Color: OPI Nail Lacquer in “A Good Man-darin is Hard to Find”
- Accent Colors: Essie Nail Polish in “Good as Gold” and “Licorice”
- Top Coat: Seche Vite Dry Fast Top Coat
These products will help you achieve a detailed and realistic tortoiseshell design.
DIY Instructions
- Clean and shape your nails.
- Apply the burnt orange polish as your base.
- Use the gold and black polishes to create the tortoiseshell pattern.
- Seal with a top coat to add shine and protect the design.
Conclusion
Burnt orange is a versatile and stunning color for fall nails, offering a wide range of design possibilities from simple and elegant to bold and playful. Whether you prefer intricate patterns or solid colors, there’s a burnt orange nail design to suit every taste and occasion. By following these professional insights and DIY instructions, you can achieve salon-quality results at home and embrace the beauty of fall with your nails.

