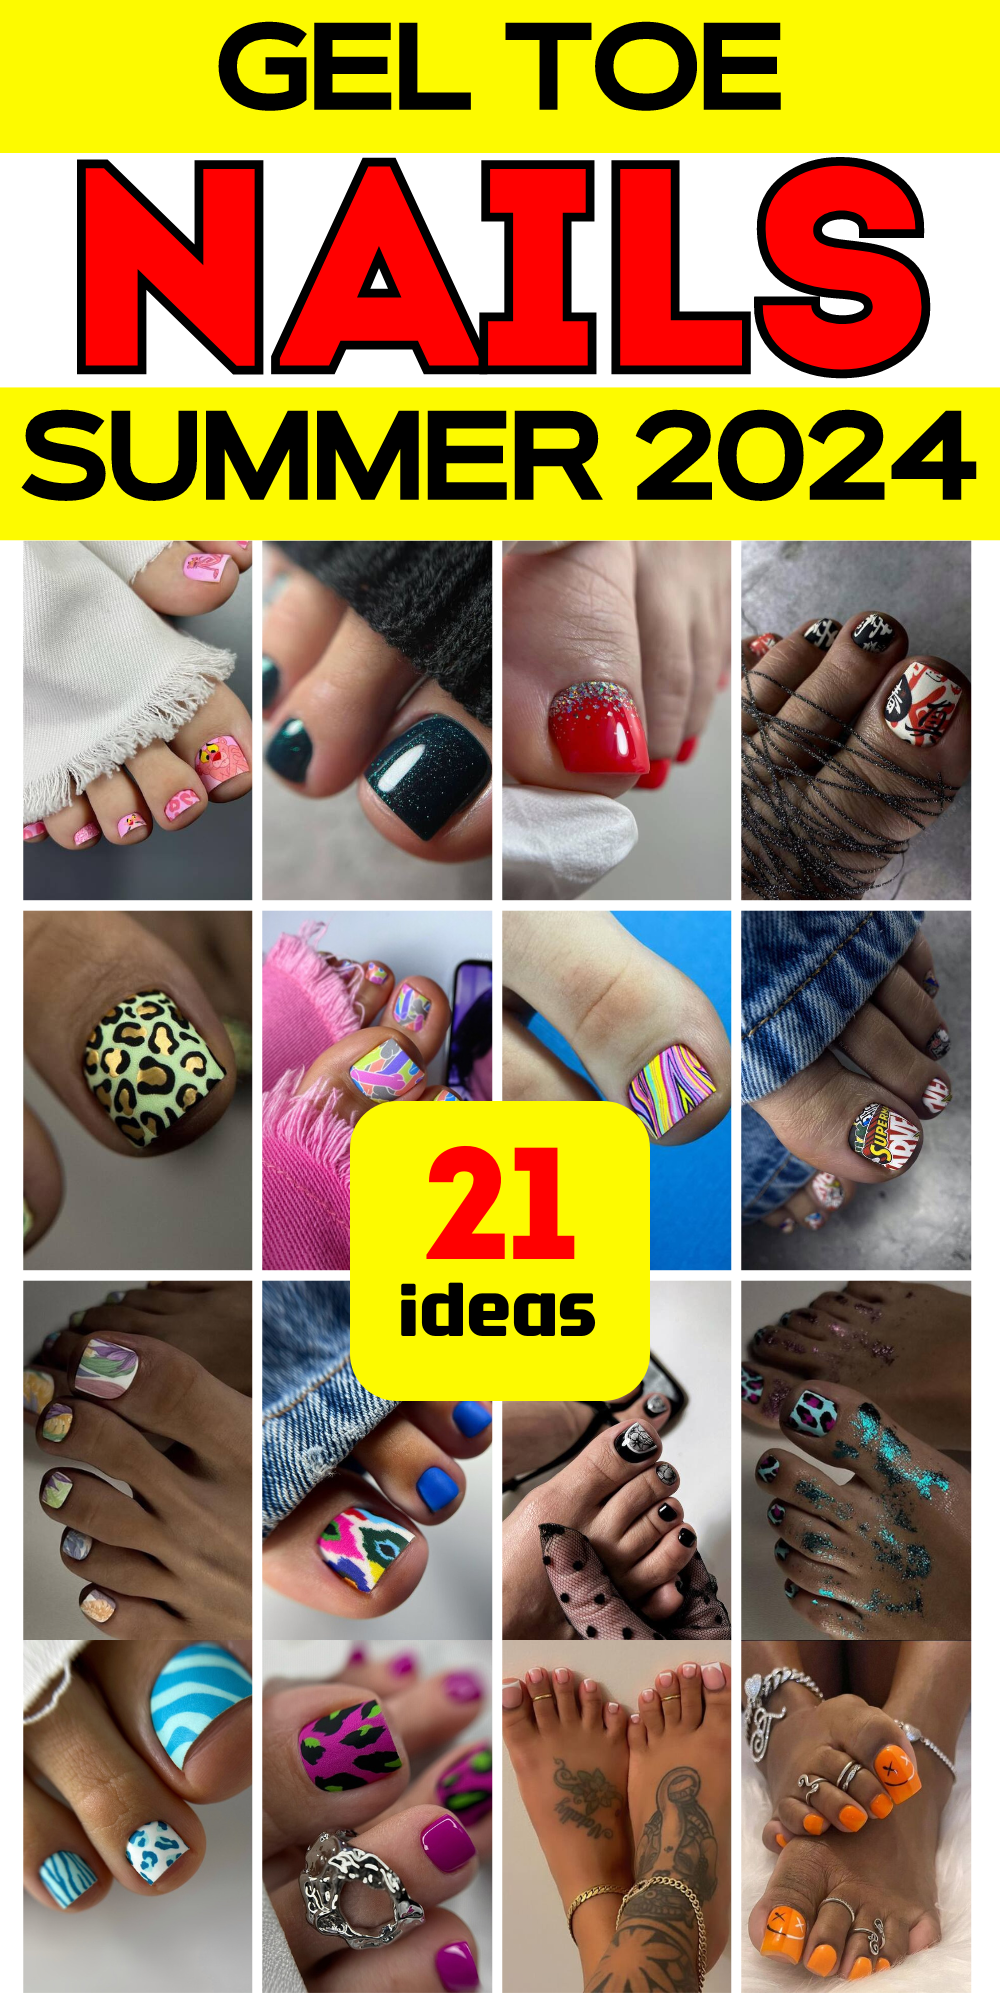
Ever wondered how to elevate your summer style with just a splash of color and creativity at your toes? Gel toe nails are not just a beauty statement but a canvas for expression right at your feet. What kind of designs can you sport this season? How do they reflect your personality and style? Whether it’s bold, subtle, or artfully detailed, this article will walk you through a variety of gel toe nails ideas, complete with professional insights, practical tips, and a guide to achieving them yourself.
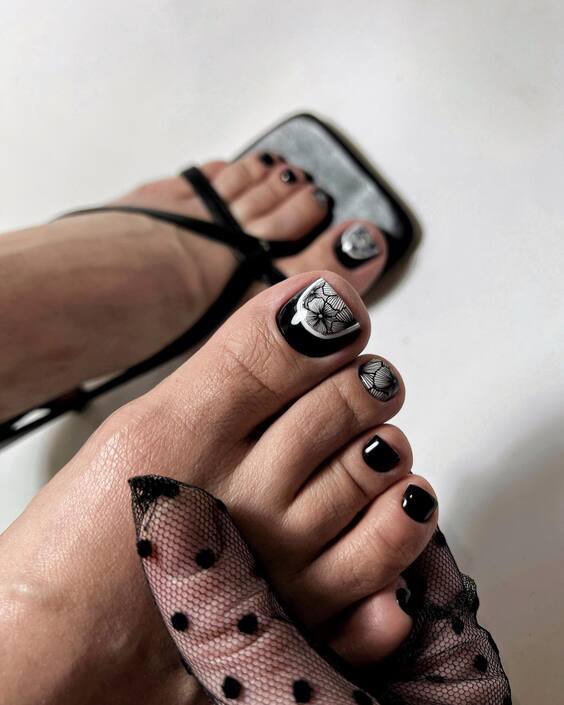
Classic Black Sophistication
Embodying elegance with a twist, this gel toe nails design showcases a glossy black base paired with a striking white floral motif on the big toe. The design is perfect for both formal and casual settings, providing a chic contrast that catches the eye yet maintains a dignified subtlety.
Consumables Needed
- Glossy Black Gel Polish: A must for the base.
- White Gel Polish: For the floral details.
- Detailing Brushes: Essential for intricate designs.
- Glossy Top Coat: To seal and shine.
- UV/LED Lamp: Necessary for curing.
DIY Instructions
- Base Prep: Clean and shape your toenails, pushing back cuticles for a neat start.
- Apply Base Color: Paint all toes with black gel polish, cure under UV/LED lamp.
- Design Details: Use a detailing brush to paint the floral design on the big toe; cure.
- Top Coat: Apply a glossy top coat for a lasting finish and cure under the lamp.
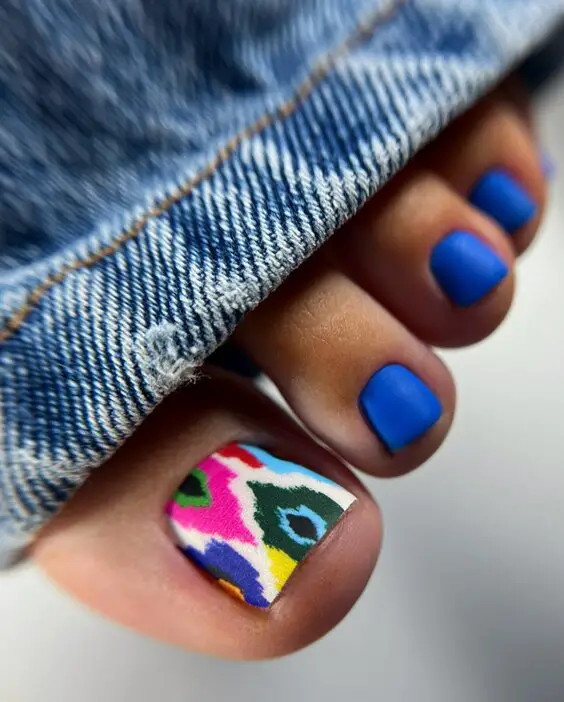
Playful Summer Vibes
This vibrant design features an electric blue base with playful geometric accents on the big toe, reflecting the lively essence of summer. It’s an ideal choice for those looking to add a pop of color and fun to their seasonal wardrobe.
Consumables Needed
- Electric Blue Gel Polish: The base color.
- Assorted Gel Colors: For the geometric patterns.
- Precision Brush: For detailed art.
- Matte and Glossy Top Coats: To alternate finishes.
- UV/LED Lamp: For curing.
DIY Instructions
- Base Color: Apply the electric blue polish on all toes; cure.
- Pattern Play: Use various colors to create designs on the big toe; add a gloss top coat on the designs for emphasis.
- Finish: Apply matte top coat on the other toes; cure for a complete look.
Serene Spring Pastels
Soft pastel tones with a smooth gradient give this design a gentle, soothing appearance. It’s perfect for spring days or anytime you want a subtle yet stylish expression through your gel toe nails.
Consumables Needed
- Pastel Gel Polishes: A spectrum for the gradient.
- Sponge: For the gradient effect.
- Base and Top Coats: To protect and perfect.
- UV/LED Lamp: Essential for curing.
DIY Instructions
- Gradient Technique: After the base coat, dab on pastel colors with a sponge for a gradient effect; cure.
- Clean Up: Use a brush dipped in polish remover for neat edges.
- Sealing: Apply top coat; cure for durability and shine.
Bold and Playful Patterns
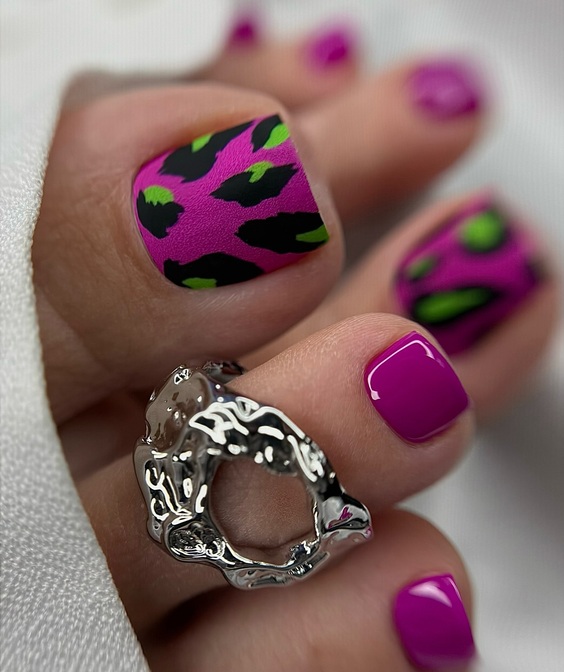
This vibrant design features a daring mix of magenta and neon green leopard prints on the big toe, surrounded by solid magenta on the other toes. It’s a fearless choice that embodies fun and screams summer. This design is not just eye-catching; it’s a statement, perfect for those who love to stand out with their gel toe nails.
Consumables Needed
- Magenta Gel Polish: Base for a vivid look.
- Neon Green Gel Polish: For the leopard spots.
- Black Gel Polish: To outline the spots.
- Fine Detailing Brush: For precise spot creation.
- Glossy Top Coat: Ensures lasting shine and protection.
- UV/LED Lamp: For curing the polish.
DIY Instructions
- Prepare the Toes: Clean, buff, and lay down a base coat. Cure under the lamp.
- Apply Base Color: Coat all toes in magenta, cure.
- Design the Pattern: On the big toe, dab neon green spots, outline in black, and blend slightly for a natural look. Cure after each step.
- Final Touch: Seal with a glossy top coat for durability and gloss. Cure.
Citrus Splash
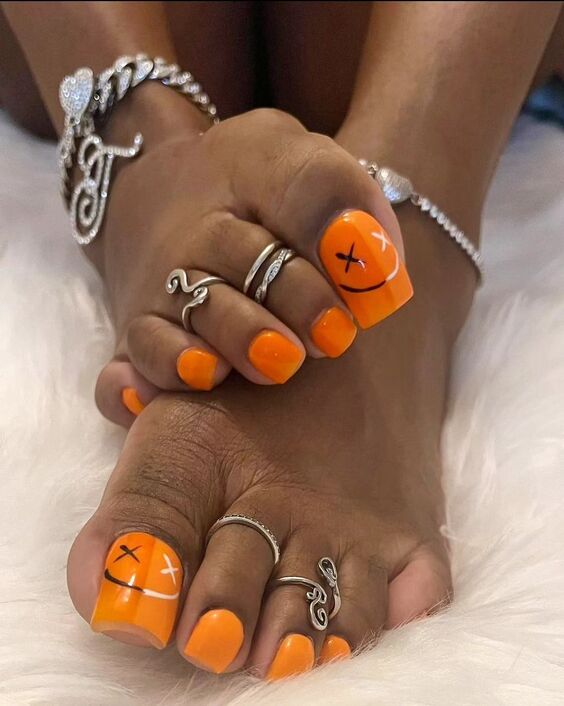
Bright and citrusy, this toe nail design uses a sunny orange base adorned with playful white art and black crosses, giving a fresh and energetic vibe to your gel toe nails. It’s perfect for beach days or just adding a pop of color to your daily look.
Consumables Needed
- Bright Orange Gel Polish: Sunny and vibrant.
- White Gel Polish: For art details.
- Black Gel Polish: For crosses.
- Detailing Brush: Necessary for fine art.
- UV/LED Lamp: Cures the gel polish.
- Glossy Top Coat: For a smooth finish.
DIY Instructions
- Base Color: Apply two coats of bright orange gel polish on each toe, curing between coats.
- Add Details: On the big toes, draw the white art and black crosses. Cure.
- Top Coat: Apply a final glossy coat to enhance and protect the design. Cure.
Classic French with a Twist
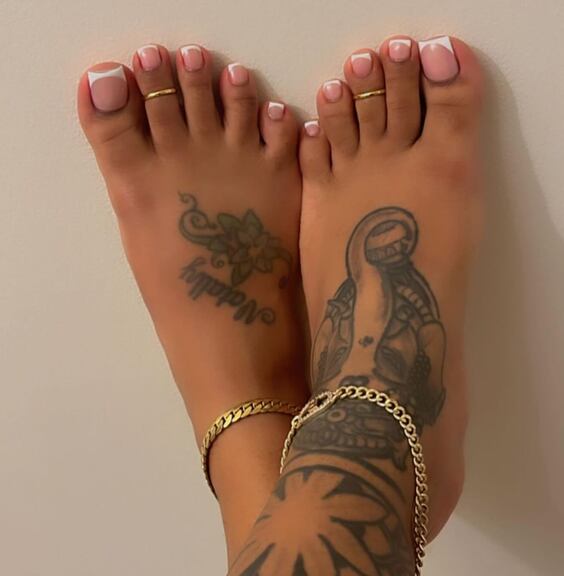
This elegant toe nail design reinvents the classic French tip with a soft pink base and crisp white tips. It’s understated yet chic, perfect for those who prefer their gel toe nails to have a subtle yet sophisticated flair. The design is versatile and timeless, suitable for any occasion.
Consumables Needed
- Soft Pink Gel Polish: For a subtle base.
- White Gel Polish: For the tips.
- UV/LED Lamp: Essential for curing.
- Glossy Top Coat: For a flawless finish.
DIY Instructions
- Prep and Base: Prepare your toenails, apply a base coat, and then the soft pink polish. Cure.
- Tips: Carefully paint the white tips, using a thin brush for precision. Cure.
- Seal the Design: Apply a top coat for shine and protection. Cure.
Enchanted Pearls
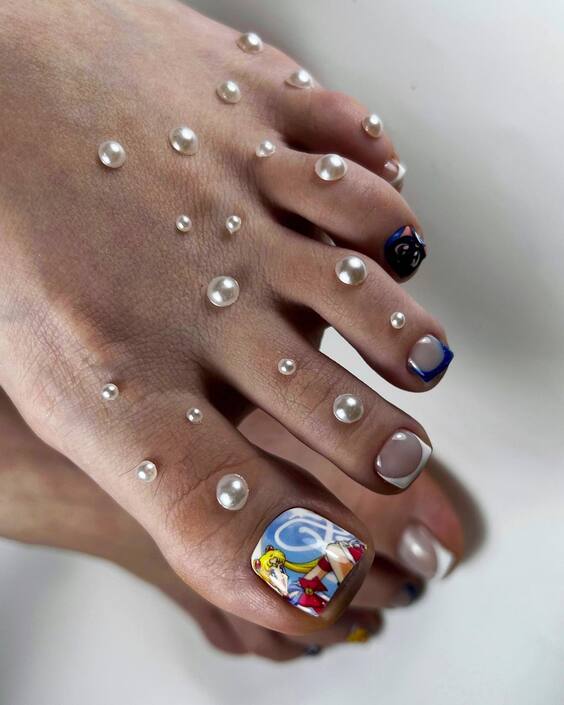
This unique and exquisite design on gel toe nails combines elegance with a hint of fantasy, featuring a matte nude base on most toes and a detailed illustration on the big toe, highlighted by delicate pearl embellishments scattered across the foot. It’s a whimsical yet sophisticated look perfect for those special occasions or bridal moments.
Consumables Needed
- Matte Nude Gel Polish: For a subtle and elegant base.
- Illustration Colors: Various shades for the detailed art on the big toe.
- Pearl Embellishments: Small pearls to be affixed.
- Adhesive: To securely attach the pearls.
- Matte Top Coat: To seal in the design and pearls.
- UV/LED Lamp: For curing all layers.
DIY Instructions
- Base Preparation: Apply a matte nude polish as the base, and cure under the UV/LED lamp.
- Artwork: Paint the detailed illustration on the big toe using a fine brush; cure.
- Pearl Placement: Attach pearls using adhesive, spacing them aesthetically across the toes and foot.
- Finish: Apply a matte top coat to protect your design and cure.
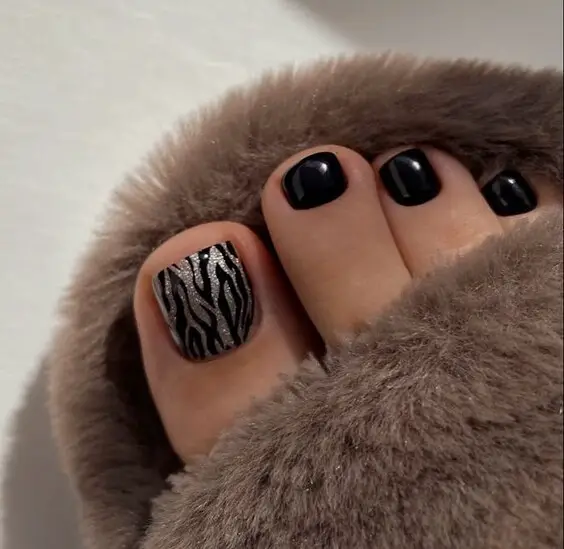
Zebra Chic
Bold and timeless, this toe nail design features a classic black gel base with a striking zebra print on the big toe. It’s a perfect blend of wild patterns with the chic simplicity of black, making it versatile for both everyday wear and special nights out.
Consumables Needed
- Black Gel Polish: For the base and zebra stripes.
- White Gel Polish: For the zebra print background.
- Detailing Brush: Essential for precise striping.
- Glossy Top Coat: To enhance and protect the design.
- UV/LED Lamp: Necessary for curing the gel layers.
DIY Instructions
- Base Coat: Apply black gel polish on all toes; cure.
- Design the Print: On the big toe, use white gel polish as the base; then draw black stripes for the zebra pattern; cure.
- Seal the Look: Apply a glossy top coat for a sleek finish and extra durability; cure.
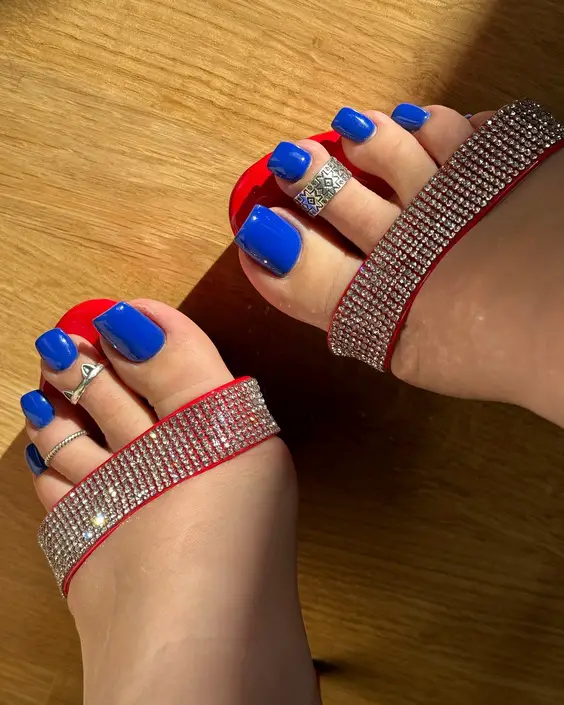
Blue Sky Boldness
This vibrant design flaunts a striking cobalt blue on all toes, with a geometric pattern on the big toe accented with silver rhinestones. It’s an audacious and cheerful look that’s bound to turn heads and is perfect for those sunny days or a bold summer outfit.
Consumables Needed
- Cobalt Blue Gel Polish: For a vivid base.
- Silver Rhinestones: For added sparkle.
- Adhesive: To secure rhinestones.
- Glossy Top Coat: For a radiant finish.
- UV/LED Lamp: For curing the gel polish.
DIY Instructions
- Prepare the Base: Apply two coats of cobalt blue polish on all toes; cure between each layer.
- Accent with Rhinestones: Add rhinestones on the geometric design of the big toe using adhesive; cure to secure.
- Final Cure: Apply a glossy top coat for lasting shine and protection; cure.
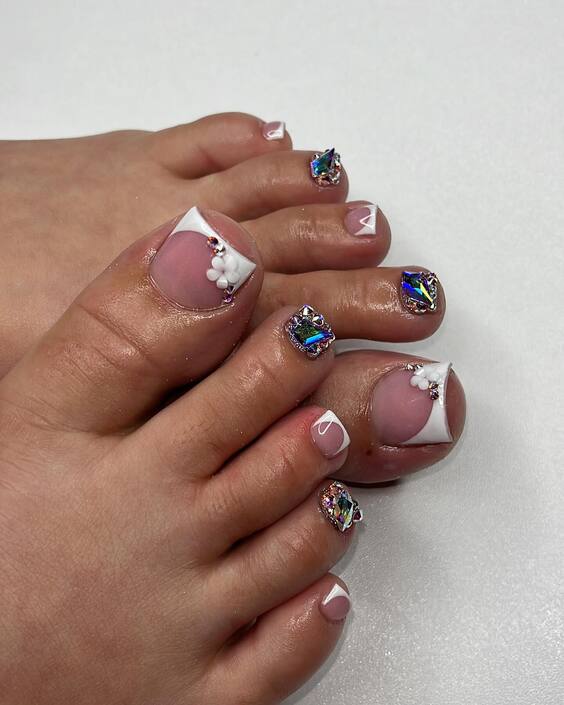
Sophisticated Sparkles
This dazzling gel toe nails design features a sheer pink base complemented by geometric white tips, adorned with sparkling gemstones and delicate white floral accents on the big toe. It embodies grace and elegance, making it an ideal choice for weddings or any formal gathering where you want your feet to sparkle just as much as your outfit.
Consumables Needed
- Sheer Pink Gel Polish: For a soft, elegant base.
- White Gel Polish: For the geometric tips and floral details.
- Gemstones and Tiny Pearls: For embellishment.
- Adhesive: To secure the decorations.
- Glossy Top Coat: For a durable, shiny finish.
- UV/LED Lamp: For curing the design.
DIY Instructions
- Base Coat: Apply a sheer pink polish on all toes; cure under the lamp.
- Tips and Floral Art: Paint geometric white tips, and add floral designs on the big toe; cure.
- Embellishments: Attach gemstones and pearls with adhesive for an elegant touch; cure.
- Seal the Design: Finish with a glossy top coat to protect and enhance the sparkles; cure.
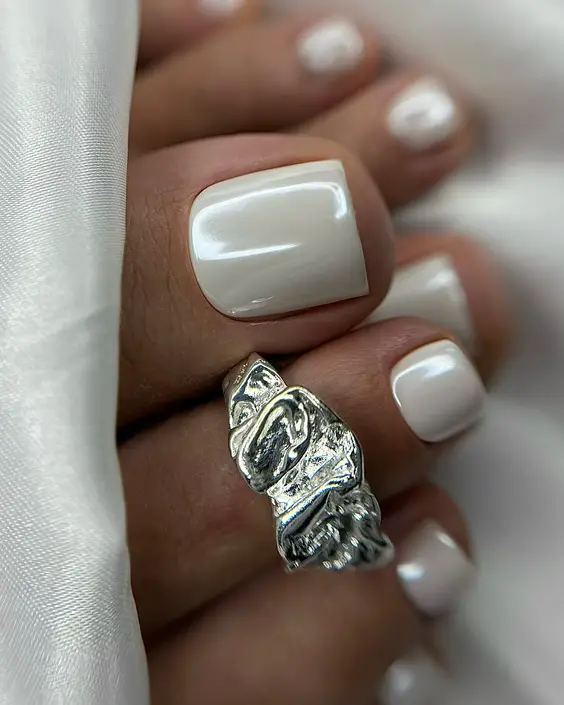
Timeless White
Pure and pristine, this gel toe nails design showcases a classic all-white look that speaks volumes with its simplicity. The glossy finish on the square-cut nails provides a modern touch, suitable for both everyday elegance and special occasions.
Consumables Needed
- White Gel Polish: For that flawless, crisp look.
- Glossy Top Coat: To ensure the white stays vibrant and protected.
- UV/LED Lamp: Essential for curing the polish.
DIY Instructions
- Prepare and Paint: Apply white gel polish over a prepped base coat, ensuring even coverage; cure.
- Top Coat: Apply a glossy top coat to enhance the shine and extend durability; cure.
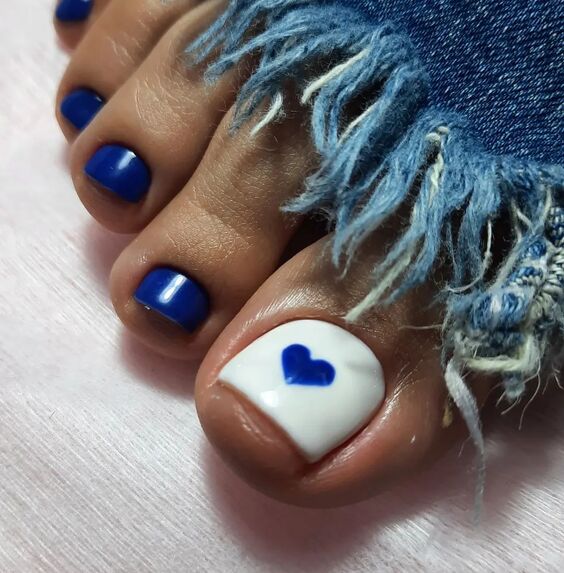
Blue Heart Charmer
This playful and charming gel toe nails design features a vibrant cobalt blue base with a lovely white heart on the big toe, making it a perfect pick for adding a splash of color and affection to your look. It’s a fun choice for casual outings and summer days.
Consumables Needed
- Cobalt Blue Gel Polish: For a bold, eye-catching base.
- White Gel Polish: For the heart detail.
- Fine Detail Brush: For precise heart shaping.
- Glossy Top Coat: To secure and shine.
- UV/LED Lamp: For curing each layer.
DIY Instructions
- Base Color: Apply two coats of cobalt blue gel polish on all toes; cure after each coat.
- Heart Detail: Use a fine brush to paint a white heart on the big toe; cure.
- Finish Strong: Apply a glossy top coat to protect and highlight the design; cure.
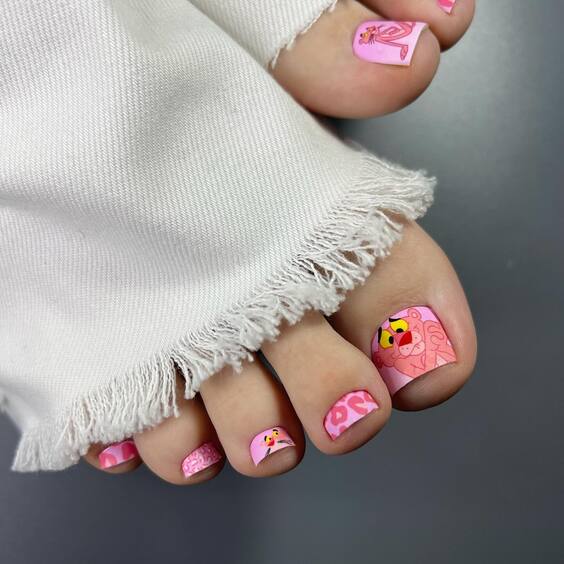
Playful Pink Panache
This charming design infuses playful artistry with a pink backdrop, adorned with creative patterns and adorable character illustrations on the big toe. It’s a fun, youthful style that brings a smile with its lighthearted and whimsical visuals, perfect for casual summer days or themed parties.
Consumables Needed
- Soft Pink Gel Polish: As the base color.
- Various Art Colors: For the detailed characters and patterns.
- Detailing Brushes: For precise art work.
- Glossy Top Coat: To protect and enhance the designs.
- UV/LED Lamp: To cure each layer of polish.
DIY Instructions
- Base Application: Start with a base of soft pink gel polish; cure.
- Artistic Flair: Use detailing brushes to add playful patterns and character art on the big toe; cure.
- Top Coat Application: Apply a glossy top coat to secure the artwork and add shine; cure.
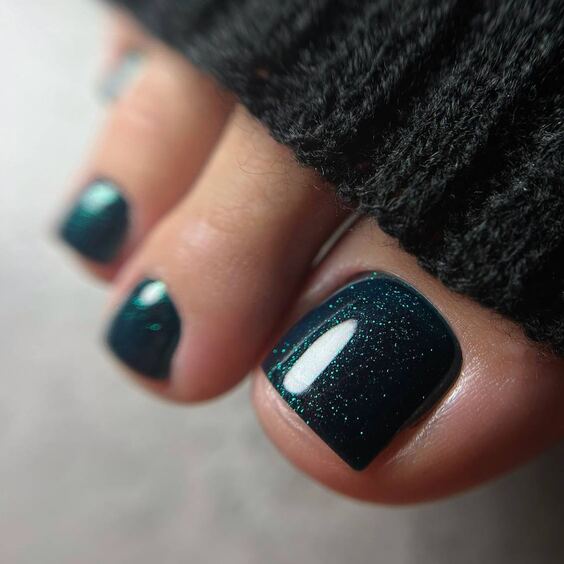
Stellar Night Sky
This design captures the mystique of the night sky with a deep teal base speckled with fine glitter, mimicking the starry expanse. It’s an elegant, yet subtly dramatic look suitable for evening events or as a day-to-day sophisticated style.
Consumables Needed
- Deep Teal Gel Polish: For the starry night effect.
- Fine Glitter: To sprinkle over the base.
- Glossy Top Coat: For a seamless finish.
- UV/LED Lamp: Essential for curing the gel polish.
DIY Instructions
- Prepare and Paint: Apply the deep teal gel polish as the base; cure.
- Add Glitter: While the second coat is tacky, lightly sprinkle fine glitter for a starry effect; cure.
- Seal the Look: Finish with a glossy top coat to enhance the depth and sparkle; cure.
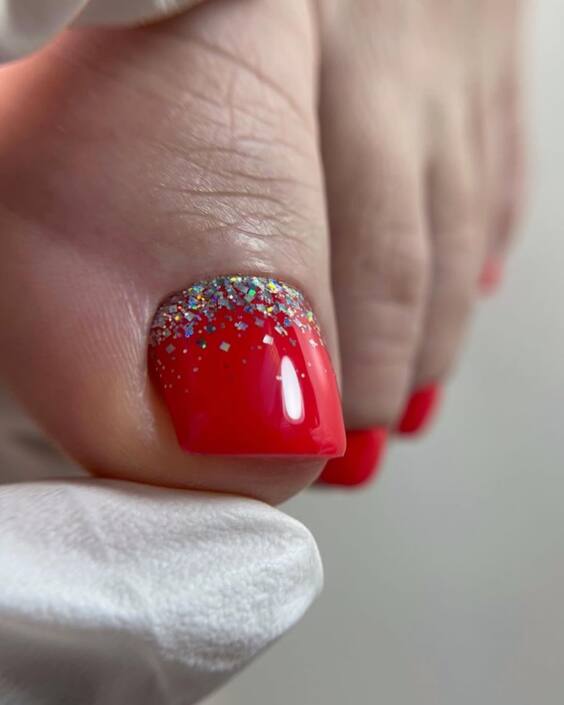
Festive Red Sparkle
This vibrant red gel toe nail design is perfect for celebrating, featuring a gradient red to clear transition adorned with multicolored glitter that catches the light beautifully. It’s ideal for festive seasons or any time you want to add a splash of color and sparkle to your steps.
Consumables Needed
- Vibrant Red Gel Polish: For the base.
- Multicolored Glitter: To create a festive sparkle.
- Sponge: For a gradient effect.
- Glossy Top Coat: To protect and magnify the design.
- UV/LED Lamp: For curing the polish.
DIY Instructions
- Base Layer: Apply vibrant red gel polish at the nail base, fading towards the tip; cure.
- Glitter Application: Pat multicolored glitter onto the tip using a sponge, blending into the red; cure.
- Finish: Apply a glossy top coat to seal in the glitter and enhance the shine; cure.
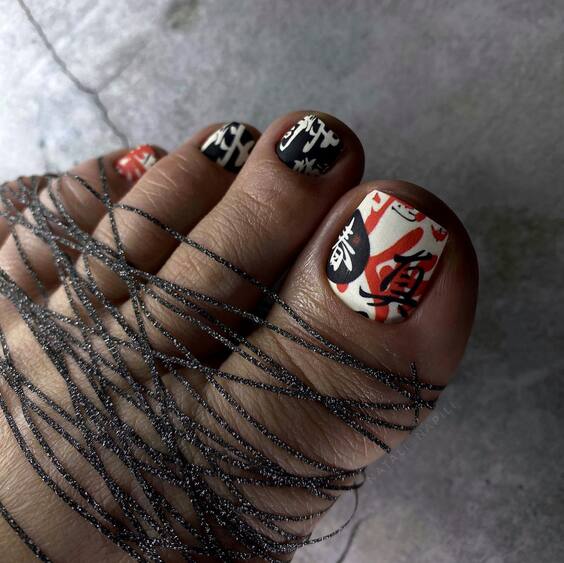
Cultural Art Fusion
This bold and culturally rich design showcases an intricate mix of traditional symbols and characters on a classic red background. Each toe is a canvas depicting different traditional motifs, making it a profound choice for those appreciating art that tells a story.
Consumables Needed
- Classic Red Gel Polish: As the vibrant base.
- Black and White Gel Polish: For the detailed symbols and characters.
- Fine Detail Brushes: For intricate designs.
- Glossy Top Coat: To seal and protect the artwork.
- UV/LED Lamp: For curing the layers.
DIY Instructions
- Prepare the Base: Apply a classic red gel polish on all toes; cure.
- Artistic Detailing: Use fine brushes and black or white gel polish to paint the symbols and characters on each toe; cure.
- Finish with a Top Coat: Apply a glossy top coat to enhance the details and protect the design; cure.
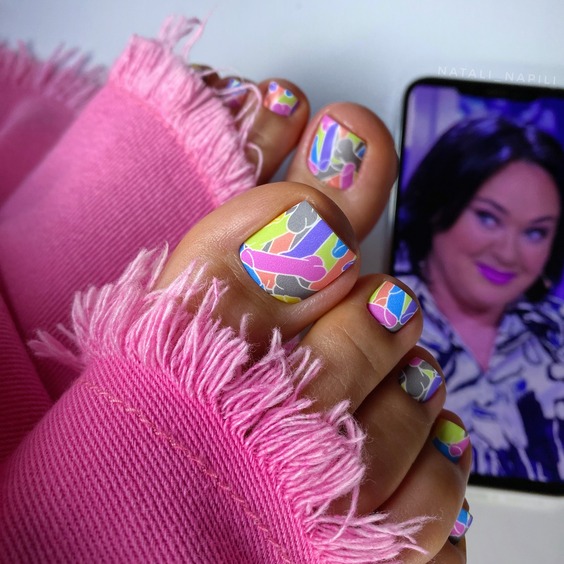
Pop Art Playfulness
This playful toe nail design is inspired by pop art, featuring vibrant color blocks and abstract patterns that pop against the backdrop of each nail. It’s a fun, expressive choice for those who love to showcase their bubbly personality through their toe nails.
Consumables Needed
- Multiple Gel Polishes: For the color blocks.
- Detailing Brush: For precise pattern work.
- Glossy Top Coat: To give a lustrous finish and ensure durability.
- UV/LED Lamp: Essential for curing each layer.
DIY Instructions
- Color Blocking: Start with a clean base, then apply different gel polishes in blocks or patterns; cure.
- Pattern Work: Add abstract patterns or details using a detailing brush; cure.
- Seal the Art: Apply a glossy top coat to all toes for a shiny finish and to protect your art; cure.
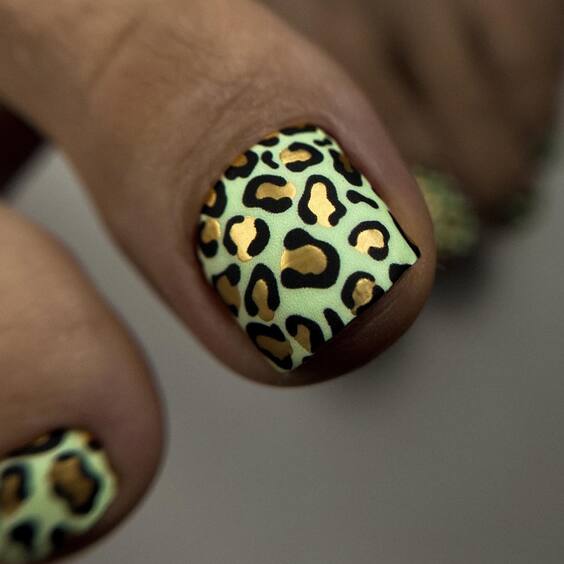
Modern Safari
Embrace the wild side with this modern safari-inspired design, featuring a matte finish on a soft mint background with bold leopard spots. This look combines the untamed essence of leopard prints with a contemporary twist, making it perfect for both adventure seekers and fashion enthusiasts.
Consumables Needed
- Soft Mint Gel Polish: For the modern base.
- Black and Golden Gel Polish: For the leopard spots.
- Matte Top Coat: For a stylish, contemporary finish.
- UV/LED Lamp: For curing the polish.
DIY Instructions
- Base Application: Apply soft mint gel polish on all toes; cure.
- Leopard Spots: Use black and golden gel polish to create the spots; cure.
- Matte Finish: Apply a matte top coat to mute the sheen and give a modern look; cure.
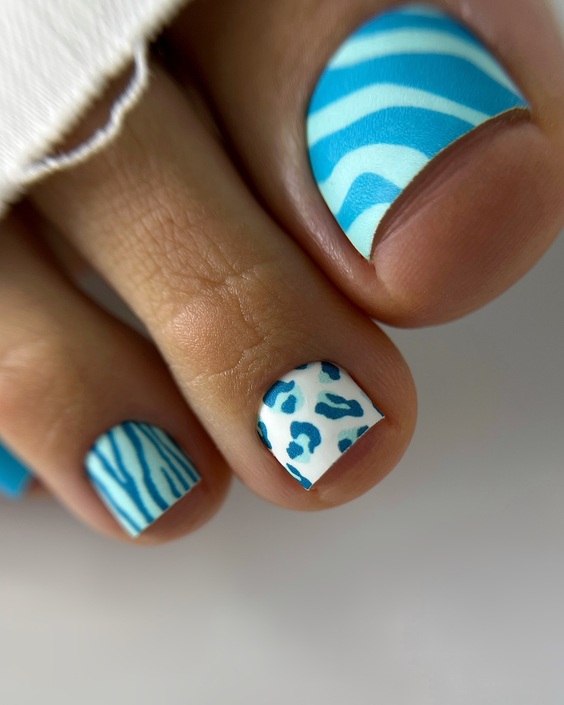
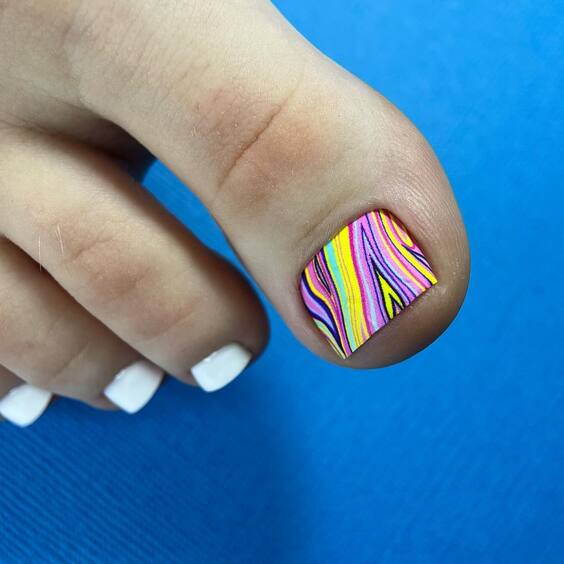
Vibrant Zigzag Charm
This toe nail design features a kaleidoscope of vibrant, zigzagging lines that capture the essence of fun and freedom. The bold mix of colors against a neutral base makes it a standout choice for those looking to make a statement with their gel toe nails.
Consumables Needed
- Neutral Gel Polish: For the base.
- Vibrant Gel Colors: For the zigzag patterns.
- Detailing Brush: For precise line work.
- Glossy Top Coat: To seal in the design and add shine.
- UV/LED Lamp: For curing the gel polish.
DIY Instructions
- Base Prep: Apply a neutral base coat; cure.
- Zigzag Application: Use vibrant colors to create zigzag patterns; cure after each color.
- Finish with a Top Coat: Apply a glossy top coat for a lustrous finish and durability; cure.
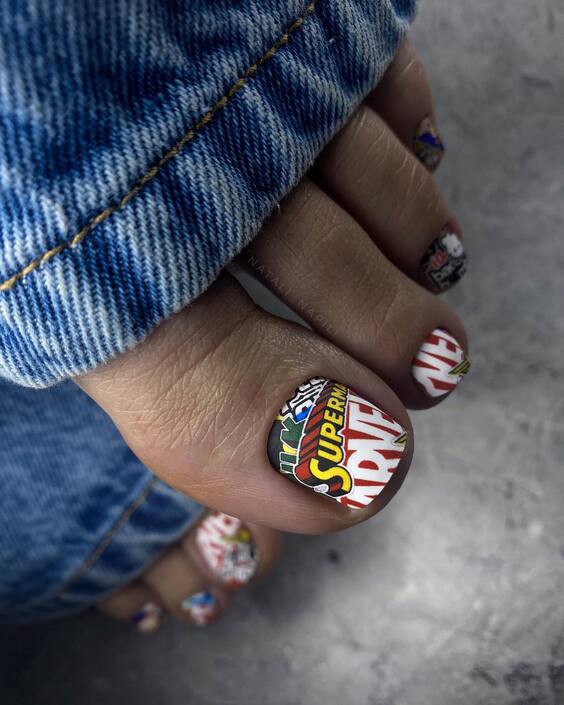
Urban Fashion Statements
Featuring iconic brand logos and modern design elements, this toe nail art embraces urban fashion. Each toe serves as a canvas for different pop culture symbols, making it an edgy choice for fashionistas and street style enthusiasts alike.
Consumables Needed
- White Gel Polish: As the base to make colors pop.
- Colored Gel Polishes: For the brand logos and text.
- Fine Detail Brush: For detailed artwork.
- Glossy Top Coat: To enhance and protect the design.
- UV/LED Lamp: Essential for curing.
DIY Instructions
- White Base: Apply a white base coat to ensure vivid color presentation; cure.
- Design Details: Carefully paint logos and text using various colors; cure.
- Seal with Gloss: Finish with a glossy top coat to add shine and longevity to the design; cure.
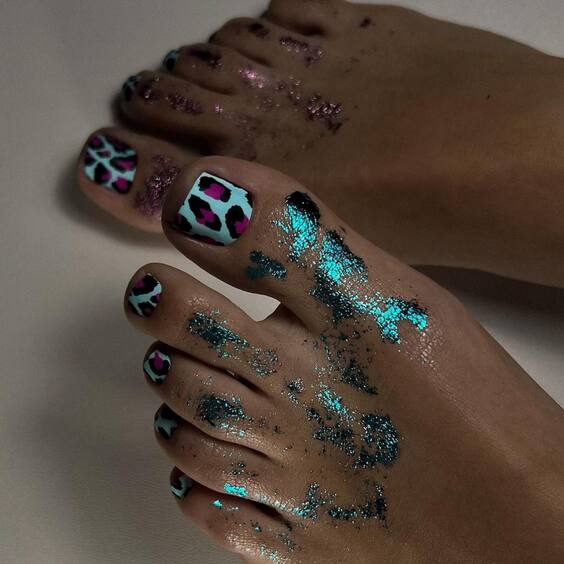
Tropical Leopard Print
This toe nail design combines a tropical teal background with bold leopard spots, highlighted by glittering accents. It’s perfect for summer getaways or anyone looking to add a touch of the exotic to their look.
Consumables Needed
- Teal Gel Polish: For the tropical background.
- Black and Gold Gel Polish: For the leopard spots.
- Glitter Accents: To enhance the spots.
- Matte Top Coat: For a contemporary finish.
- UV/LED Lamp: For curing all layers.
DIY Instructions
- Teal Base: Start with a teal base on all toes; cure.
- Leopard Spots: Add leopard spots with black and gold polish; sprinkle some glitter on the spots before curing.
- Matte Finish: Apply a matte top coat for a stylish, modern look; cure.
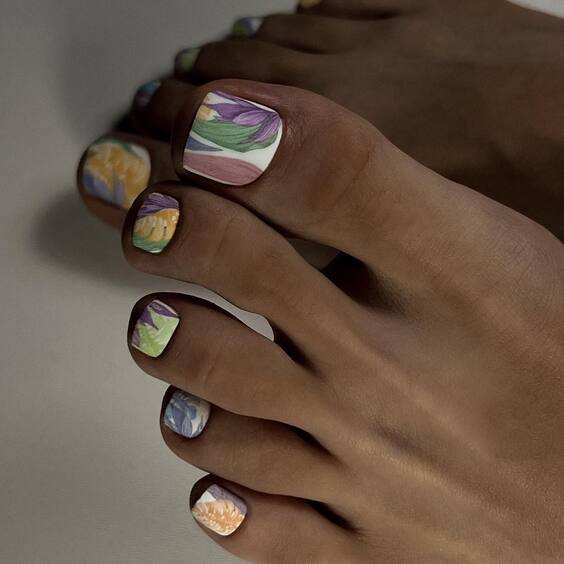
Impressionist Dream
Drawing inspiration from Impressionist art, this design features a series of soft, brushstroke patterns in a soothing palette of pastel colors. Each nail is a piece of art, with blended strokes creating a serene, dream-like effect. This sophisticated style is perfect for those who appreciate a subtle artistic touch in their gel toe nails.
Consumables Needed
- Pastel Gel Polishes: For the base colors and brushstrokes.
- Detailing Brushes: For creating soft, blended lines.
- Glossy Top Coat: To enhance and protect the artwork.
- UV/LED Lamp: For curing each layer of polish.
DIY Instructions
- Prepare the Base: Apply a light pastel color as the base; cure.
- Create Art: Use different pastel shades with a fine brush to add soft, overlapping strokes on each toe; blend slightly to mimic an Impressionist style; cure.
- Finish with a Gloss: Apply a glossy top coat for a smooth, protective finish; cure.
Conclusion
Exploring the vibrant world of gel toe nails opens up a canvas for creativity and personal expression. Whether you’re drawn to the subtle elegance of pastel Impressionist strokes, the daring boldness of urban-inspired art, or the playful charm of tropical prints, there’s a gel toe nail design to match every mood and occasion. These styles not only enhance the beauty of your feet but also offer a fun way to complement your overall look with a splash of color and art.