23 Stunning Fall Nail Designs: Explore Top Trends for Beautiful Manicures
As the leaves turn and the air grows crisp, it’s time to transition your nail style to match the vibrant colors of autumn. Fall is the perfect season to experiment with rich, warm tones and innovative designs on your nails. Are you ready to discover some of the most beautiful fall nails for 2024? Let’s dive into a variety of styles that celebrate the essence of autumn.
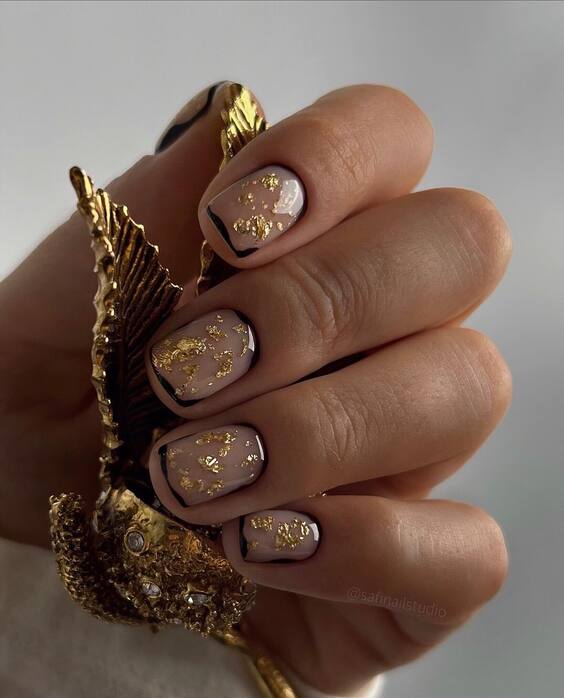
The Elegant Gold Leaf Embellishment
This nail design exemplifies sophistication with its subtle use of golden flakes on a mauve background. The muted purple shade provides a perfect canvas for the shimmering gold, creating an autumnal feel that’s both luxurious and understated. The use of gold leaf as an accent adds a touch of elegance, making this manicure ideal for both everyday wear and special autumn events.
Consumables Needed
- Base color: Mauve polish (e.g., Essie’s “Merino Cool”)
- Accent: Gold leaf sheets
- Top coat: High-gloss finish (e.g., Seche Vite Dry Fast Top Coat)
From a professional standpoint, the contrast between the matte mauve and the shiny gold leaf creates a stunning visual impact that’s surprisingly easy to achieve but looks incredibly sophisticated.
DIY Instructions
- Prep your nails: Ensure your nails are clean, filed, and buffed.
- Apply the base color: Paint two coats of the mauve polish, letting each coat dry thoroughly.
- Add the gold leaf: Use tweezers to apply small pieces of gold leaf to the nails while the second coat is still tacky.
- Seal the design: Apply a top coat to protect the design and add a glossy finish.
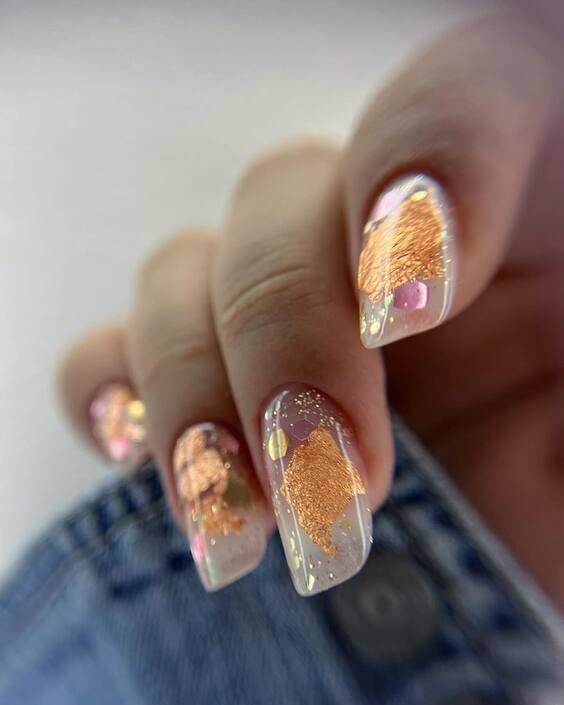
Copper Glitter Gradient
Capturing the essence of falling autumn leaves, this nail design features a stunning copper glitter gradient that fades into a clear base. The sparkle mimics the autumn sunlight catching on falling leaves, ideal for those who love a bit of drama on their fingertips.
Consumables Needed
- Base coat: Clear polish
- Glitter: Copper glitter polish (e.g., OPI’s “Worth a Pretty Penne”)
- Top coat: Gel finish for lasting wear
As a manicurist, I appreciate designs that offer versatility and a high impact with relatively simple application techniques.
DIY Instructions
- Apply the base coat: Start with a clear polish to protect your natural nails.
- Create the gradient: Using a sponge, dab on the copper glitter polish from the tips, moving downwards to create a fading effect.
- Finish with a top coat: Add a gel top coat for a durable, shiny finish.
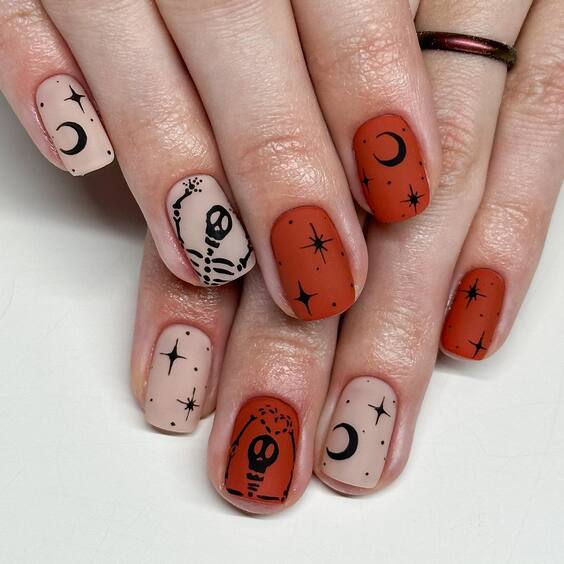
Halloween Inspired Art
This design is perfect for those looking to embrace the Halloween spirit without sacrificing style. Featuring spooky motifs like skulls and moons on a muted orange and beige palette, it strikes a balance between festive and chic.
Consumables Needed
- Colors: Beige and orange nail polish
- Art supplies: Black nail art pen for detailed drawing
- Top coat: Matte finish
This is a fantastic choice for those who want to participate in seasonal festivities while keeping their manicure elegant and understated.
DIY Instructions
- Apply your base colors: Alternate beige and orange on each nail.
- Draw designs: Use a black nail art pen to add skulls, moons, and stars.
- Finish with a matte top coat: This will give your spooky designs a sophisticated look.
Autumnal Flame Art
This design embodies the fiery spirit of autumn with its flame-like patterns in shades of black and orange. The sharp contrasts and flowing lines mimic the dynamic movement of fire, making each nail a bold statement piece. It’s a perfect choice for those who want to bring warmth and excitement to cooler fall days.
Consumables Needed
- Base color: Black polish
- Accent colors: Orange and yellow acrylic paint
- Top coat: High-gloss finish to enhance the fiery effect
This look is particularly striking and can be a conversation starter at any fall event.
DIY Instructions
- Prepare your nails: Apply a base coat to protect your nails and improve polish adherence.
- Paint the base: Use a black polish as the foundation to make the colors pop.
- Create the flames: With a thin brush, paint intertwining flames using orange and yellow acrylic paint over the black base.
- Finish with a top coat: Apply a glossy top coat to give the design a vibrant, shiny finish.
Fiery Amber Swirls
This manicure captures the essence of a blazing autumn sunset with its swirls of black, amber, and red. The dark tones beautifully contrast against the vibrant orange, embodying the season’s fiery hues. The asymmetrical placement of colors makes each nail a unique piece of art, perfect for those who embrace bold, statement looks.
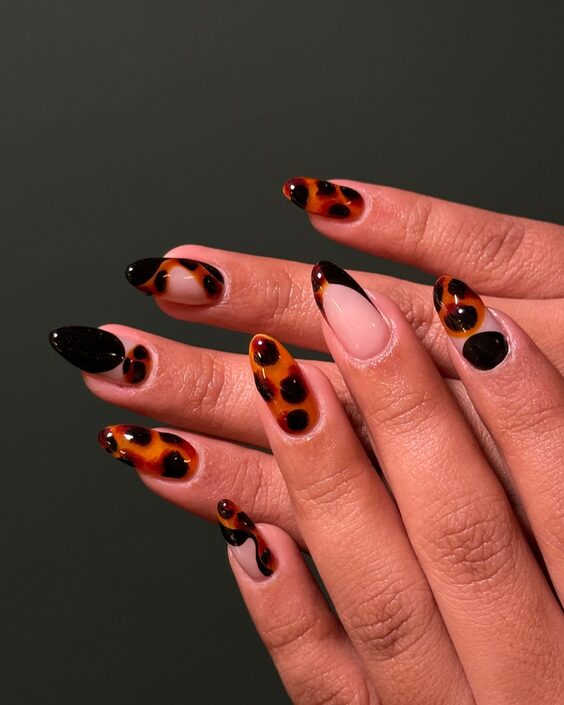
Consumables Needed
- Base coat: Clear polish
- Colors: Black, red, and amber nail polish
- Top coat: High-gloss finish
This design demands precision and creativity, making it a stunning choice for fall gatherings.
DIY Instructions
- Apply the base coat: Start with a clear polish for a smooth canvas.
- Swirl the colors: While the base is tacky, use a fine brush to swirl black, red, and amber polishes together.
- Finish with a top coat: Seal the design with a high-gloss finish to enhance the depth and vibrancy of the colors.
Sleek Neon Contours
These nails feature an edgy twist on traditional autumn themes by incorporating neon pink contours on a black base. The sleek, thin lines create a modern and chic look, proving that fall designs can go beyond the typical earth tones.
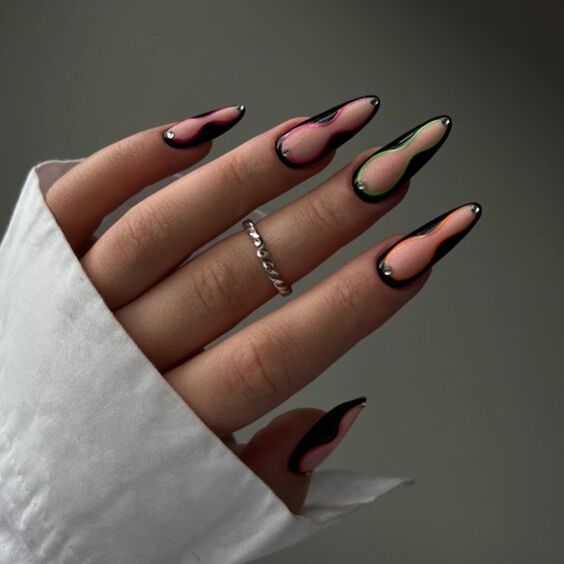
Consumables Needed
- Base color: Matte black polish
- Detailing: Neon pink striping tape
- Top coat: Matte finish
This style is for those looking to stand out from the crowd with a minimalist yet striking manicure.
DIY Instructions
- Apply the matte black base: Ensure it’s evenly coated for a smooth finish.
- Add the neon contours: Place neon pink striping tape along the edges of the nails.
- Seal with a matte top coat: This will keep the tape in place and maintain the matte aesthetic.
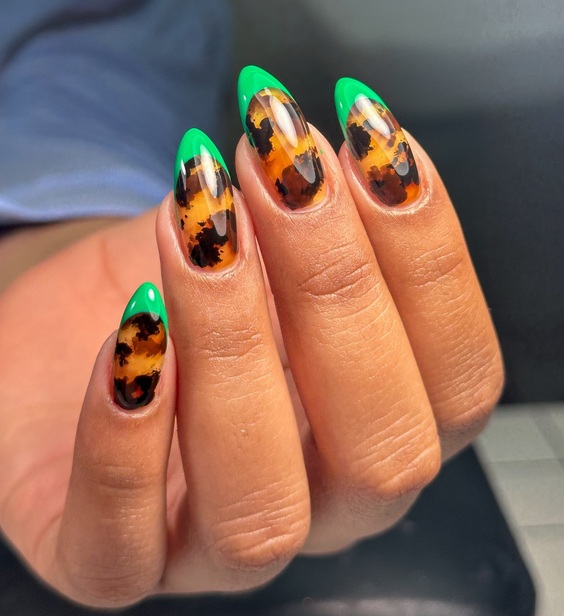
Classic Tortoiseshell Elegance
Tortoiseshell patterns are timeless, and this nail design is no exception. It mixes burnt orange, deep brown, and black to mimic the natural tortoiseshell pattern, ideal for those who prefer classic styles with a twist.
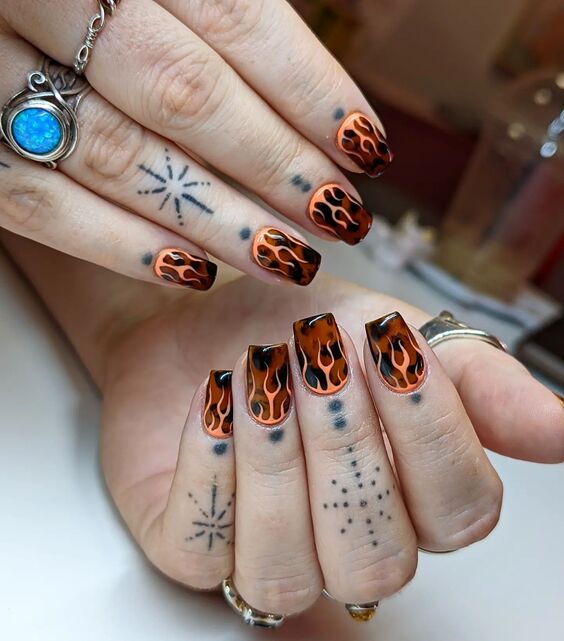
Consumables Needed
- Colors: Orange, brown, and black gel polish
- Top coat: High-gloss gel for a shiny, durable finish
This design is sophisticated yet playful, suitable for both professional environments and casual outings.
DIY Instructions
- Layer the colors: Apply a base of orange gel polish, then add spots of brown and black while wet.
- Swirl gently: Use a fine tip brush to gently swirl the colors together.
- Cure and finish: Cure under a UV lamp and apply a glossy top coat for extra shine.
Dramatic Butterfly Wings
These butterfly wing nails are a true masterpiece of nail art. Each nail forms part of a butterfly’s wing, with vivid pinks and oranges outlined in black. The design is not only visually stunning but also symbolizes transformation and the beauty of change.
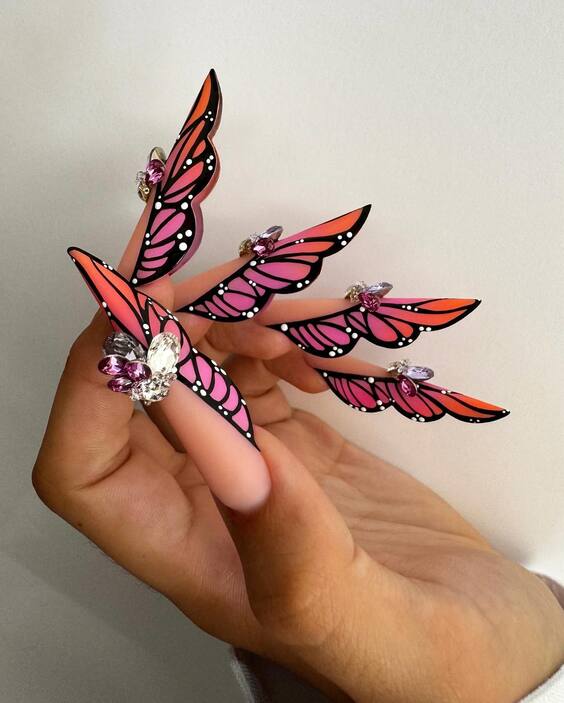
Consumables Needed
- Base color: Light pink polish
- Details: Black and orange acrylic paint
- Embellishments: Small rhinestones
- Top coat: Clear glossy finish
This manicure is perfect for those who love to express their personality through their nail art.
DIY Instructions
- Paint the base: Apply a light pink polish as the background.
- Add details: Use black and orange acrylic paint to draw the intricate patterns of butterfly wings.
- Embellish: Adorn with rhinestones for added sparkle.
- Apply a top coat: Finish with a glossy top coat to protect your artwork.
Subtle Elegance with Leaf Motif
This manicure showcases a blend of deep maroon and nude shades, accented beautifully with a delicate leaf motif on one finger, enhanced by tiny gold flakes. This design exudes a serene elegance, perfect for the understated beauty of autumn. The color palette is rich yet subdued, offering a sophisticated nod to the fall season.
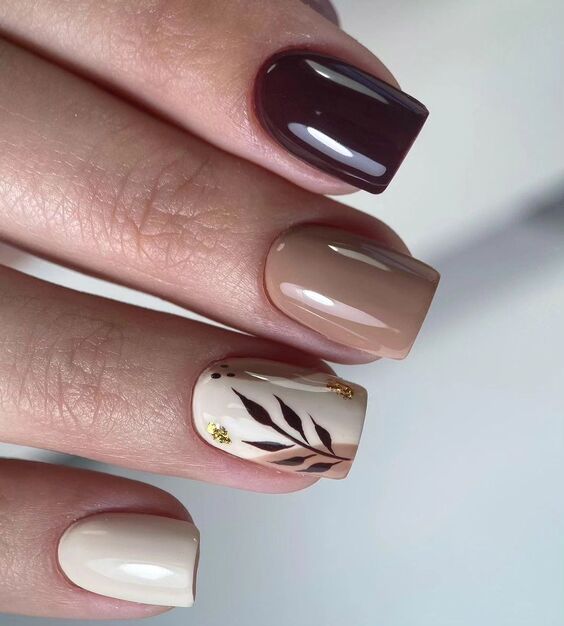
Consumables Needed
- Base colors: Nude and maroon polish
- Detailing: Black paint for the leaf, gold leaf flakes
- Top coat: High-gloss finish
This design requires precision in detail but offers a wonderfully refined aesthetic.
DIY Instructions
- Prepare the nails: Clean, file, and buff your nails for a smooth surface.
- Apply the base colors: Alternate between nude and maroon across different nails.
- Paint the leaf design: Using a fine brush, draw the leaf on the nude base.
- Add gold flakes: Apply small flakes of gold leaf around the leaf design.
- Seal with a top coat: Protect your design with a glossy finish.
Marble and Silver Lines
This look features a soft marble effect in pastel tones, accented by elegant silver lines that contour the nails. The swirls of white and pink create a gentle, flowing appearance, making this design both trendy and timeless. It’s a fantastic choice for someone looking for a subtle yet chic nail art that pairs well with any fall wardrobe.
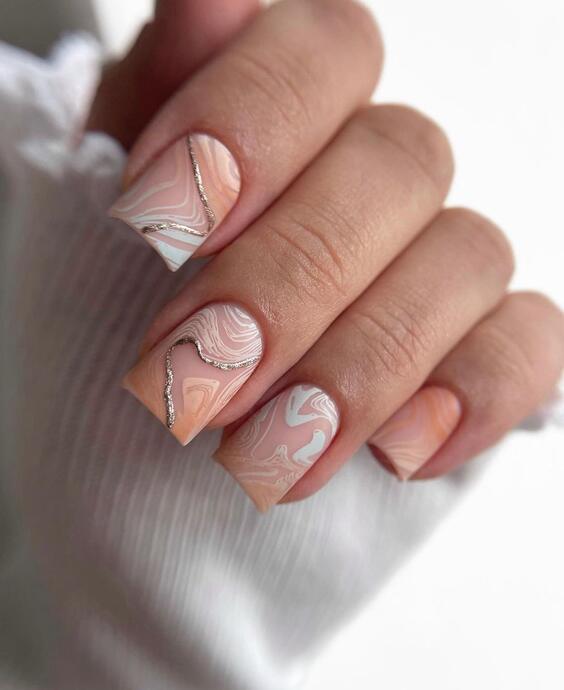
Consumables Needed
- Base color: Light pink polish
- Marbling effect: White and pink swirls
- Detailing: Silver striping tape
- Top coat: Clear glossy finish
DIY Instructions
- Apply the base color: Start with a light pink polish.
- Create the marble effect: Drop white polish into the wet base and swirl gently with a toothpick.
- Add silver lines: Apply silver striping tape once the marble effect is dry.
- Finish with a top coat: Seal everything with a clear glossy top coat for durability and shine.
Bold and Spotted
Embracing a wilder side of fall, this nail design features bold orange polish speckled with black spots, reminiscent of a leopard print. This energetic pattern is perfect for adding an element of fun to your fall fashion, striking a balance between playful and trendy.
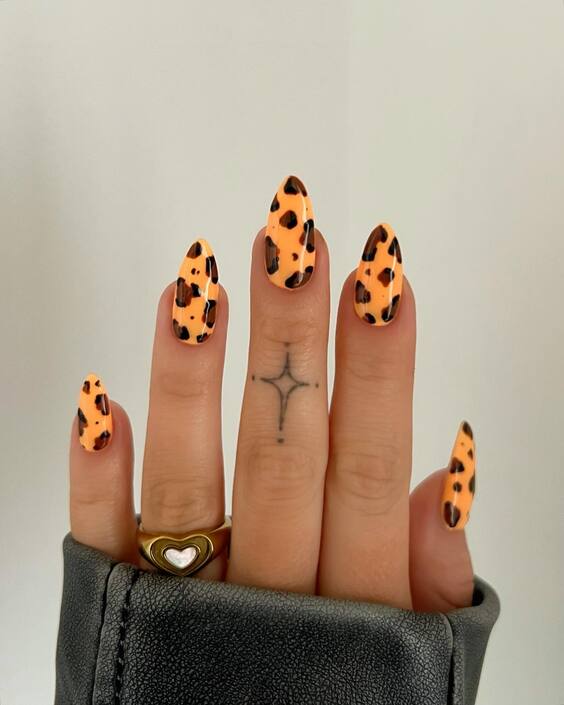
Consumables Needed
- Base color: Vibrant orange polish
- Details: Black for the spots
- Top coat: Matte finish for a modern look
DIY Instructions
- Paint the base: Apply two coats of orange polish.
- Add the spots: Dab black polish using a small dotting tool to create the spots.
- Apply a matte top coat: Finish with a matte top coat for a contemporary texture.
Green with Pink Accents
This design offers a fresh take on fall colors by combining deep green with vibrant pink edges. The clean lines and bold color contrast make this manicure visually striking and uniquely modern. It’s a great choice for those looking to step outside traditional fall color schemes while still embracing the season’s vibe.
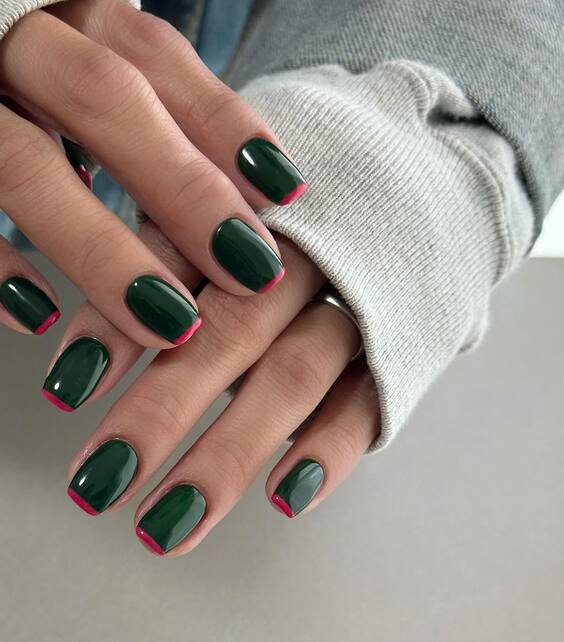
Consumables Needed
- Base color: Deep green polish
- Accent: Bright pink polish
- Top coat: High-gloss finish to enhance the colors
DIY Instructions
- Apply the green base: Paint your nails with a rich, deep green.
- Add pink accents: Carefully line the tips and sides of each nail with bright pink polish.
- Seal with a top coat: A glossy top coat will bring out the depth of the colors and ensure lasting wear.
Holographic Dot Illusion
This nail art offers a futuristic take with its holographic finish and precise dot patterns over a translucent base. The use of light-reflecting particles gives a mesmerizing depth that changes under different lighting, perfect for those who love a bit of glamour and mystique in their manicure.
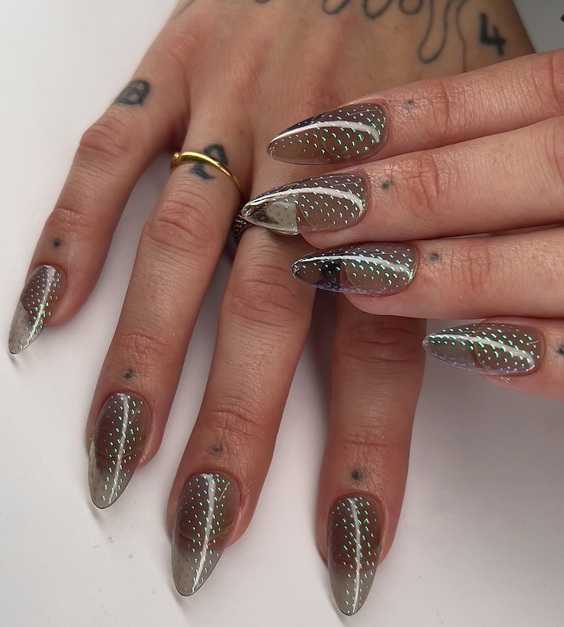
Consumables Needed
- Base coat: Clear polish
- Holographic dots: Specialty holographic nail stickers
- Top coat: Clear high-gloss finish
This look is especially captivating in motion, catching light and attention alike.
DIY Instructions
- Apply the base coat: Start with a clear polish to showcase the natural beauty of your nails.
- Place holographic dots: Strategically position the holographic stickers to create a balanced pattern.
- Seal with a top coat: A glossy finish will enhance the holographic effect and ensure longevity.
Floral Pastel Elegance
This design features soft pastel pink as a base with white floral patterns, creating a gentle and feminine look. The subtle elegance of the florals makes it a perfect choice for serene autumn days or elegant events.
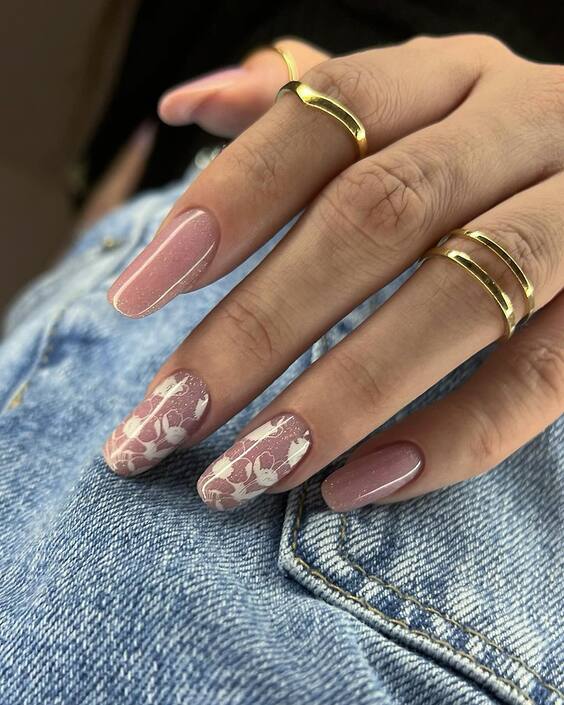
Consumables Needed
- Base color: Pastel pink polish
- Details: White nail paint for florals
- Top coat: Clear matte finish for a sophisticated touch
DIY Instructions
- Paint the base: Apply two coats of pastel pink polish.
- Draw florals: Use a fine brush to paint delicate white flowers.
- Finish with a matte top coat: This will give the design a modern, chic look.
Pink Swirls on Glittery Base
Combining elegance and whimsy, this design uses a glittery base with dramatic pink and black swirls. The sparkling background enhances the dynamic swirls, making this design both playful and sophisticated.
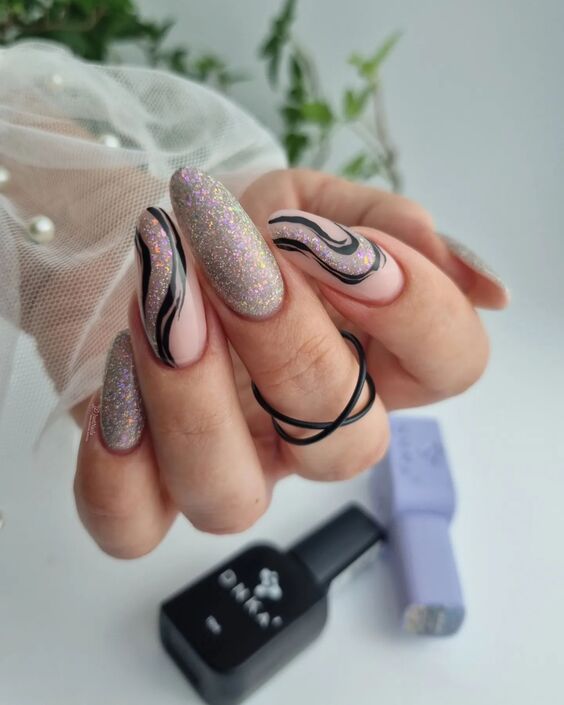
Consumables Needed
- Base color: Glittery silver polish
- Swirl colors: Pink and black acrylic paint
- Top coat: High-gloss finish to maintain sparkle
DIY Instructions
- Apply the glitter base: Start with a glittery silver polish for a shimmering effect.
- Create swirls: Use pink and black paint to add bold swirls over the glitter.
- Seal with a top coat: Ensure the glitter and design stay protected.
Modern Art on Nails
This nail design is a true piece of wearable art, featuring abstract lines and shapes in a sophisticated color palette of green and white. The geometric patterns and sharp contrasts create a visually striking look that is both modern and timeless.
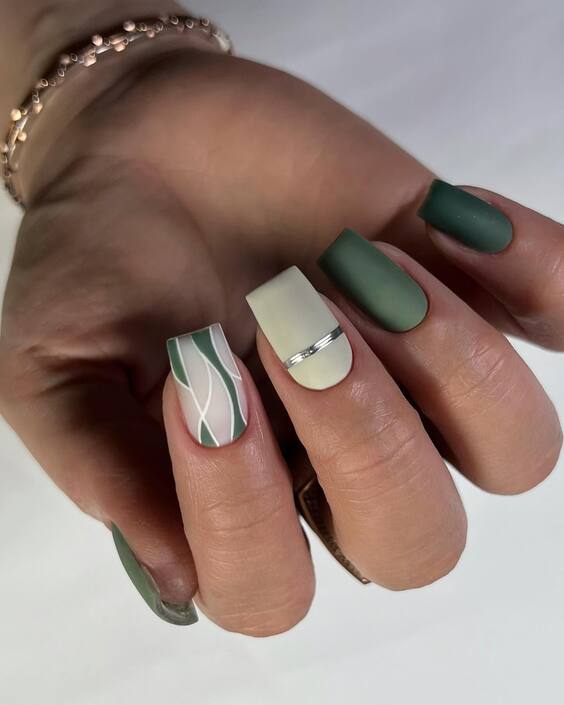
Consumables Needed
- Base colors: Dark green and matte white polish
- Detailing tools: Fine brush for precision lines
- Top coat: Matte finish for a contemporary feel
DIY Instructions
- Paint the base: Alternate dark green and matte white on different nails.
- Add details: Use a fine brush to draw abstract patterns.
- Apply a matte top coat: This enhances the modern aesthetic and protects your artwork.
Marble Majesty with Golden Accents
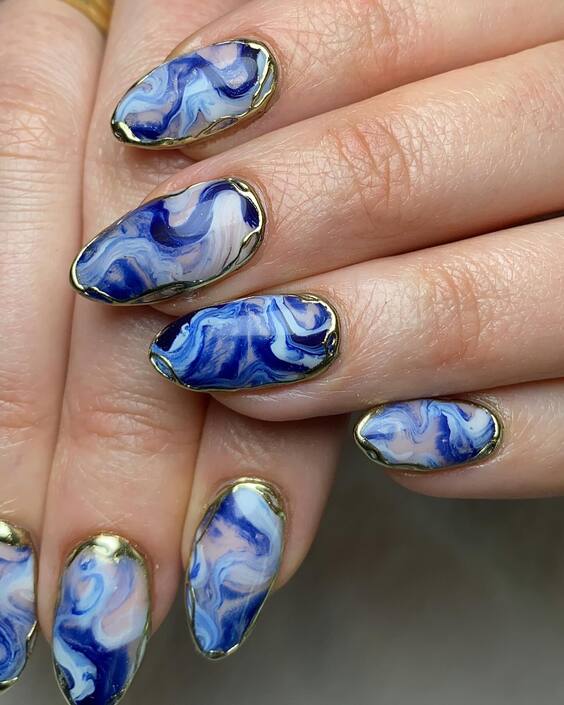
This design captures a luxurious aesthetic with deep blue and white marble patterns encased in golden trim. The marble effect is meticulously crafted to resemble natural stone, enhanced by the rich gold that outlines each nail, offering an opulent finish. This nail art is perfect for those who prefer a touch of royal elegance in their style.
Consumables Needed
- Base colors: Navy and white polish for the marble effect
- Detailing: Gold acrylic paint for the borders
- Top coat: High-gloss finish for a gleaming look
DIY Instructions
- Create the marble base: Apply a navy base coat, then drop in white polish and swirl gently with a fine brush.
- Add gold trim: Outline each nail with gold paint using a fine brush for precision.
- Seal with a top coat: Apply a glossy top coat to enhance the shine and depth of the marble and gold accents.
Modern Art on Nails
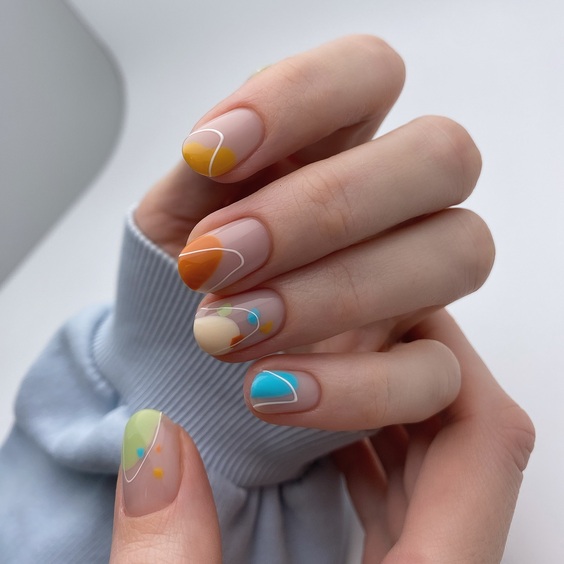
Featuring an abstract play of colors, this nail design utilizes geometric shapes and bold, contrasting hues to create a modern art effect. It’s a vibrant and playful style that captures a creative spirit, ideal for adding a pop of color to any autumn ensemble.
Consumables Needed
- Base colors: Assorted pastel polishes
- Detailing: Various polish colors for the abstract shapes
- Top coat: Matte finish to modernize the overall look
DIY Instructions
- Apply a neutral base: Start with a soft beige or light pink base.
- Paint geometric shapes: Use different colors to add abstract shapes over the base.
- Finish with a matte top coat: This will give the nails a contemporary and stylish matte finish.
Glittering Green Enchantment
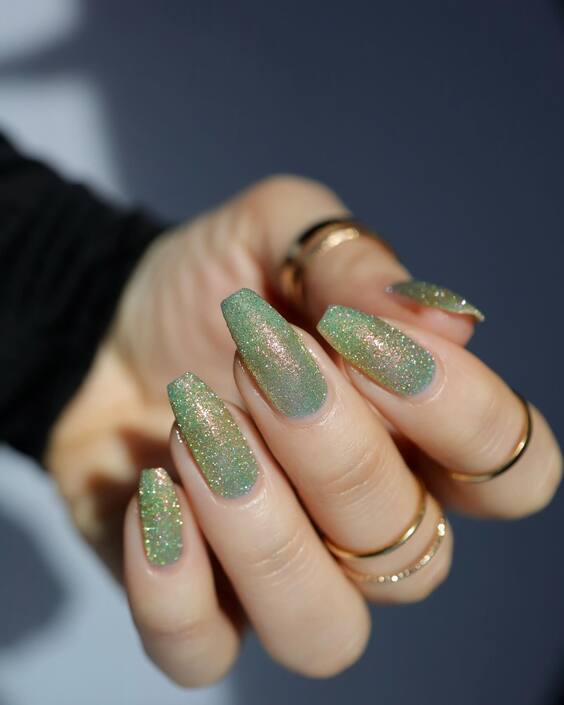
This nail art features a glittery green polish that sparkles with hints of gold, reminiscent of a magical forest. The fine glitter particles catch the light beautifully, making these nails a dazzling choice for festive occasions or a night out during the fall season.
Consumables Needed
- Glitter polish: Green with gold flecks
- Top coat: High-gloss finish to enhance the sparkle
DIY Instructions
- Apply the glitter polish: Coat your nails with the green glitter polish.
- Add an extra layer: For intensified sparkle, apply a second layer of glitter.
- Seal with a top coat: A glossy top coat will keep the glitter in place and maximize shine.
Festive Green and White Spirals
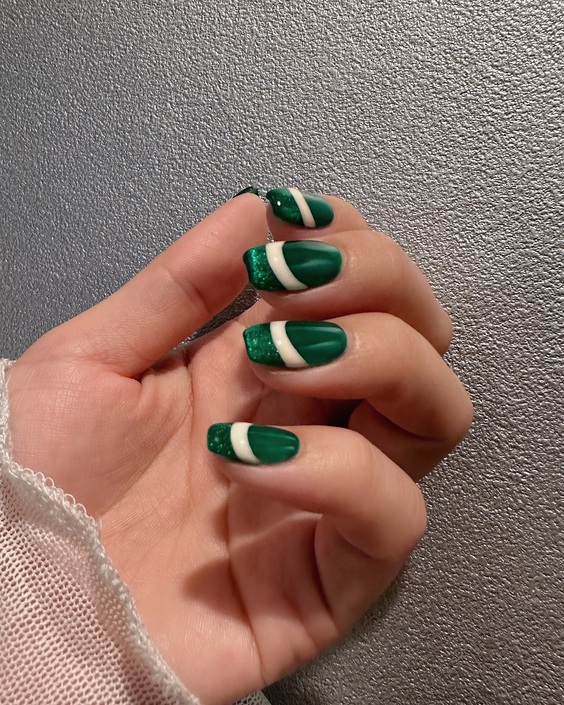
Combining deep green with white spirals, this nail design is perfect for those who enjoy thematic elements in their manicure. The spirals are reminiscent of candy canes, making it a playful option for holiday festivities or simply to bring some joy into the cooler days of fall.
Consumables Needed
- Base color: Deep green polish
- Detailing: White acrylic paint for the spirals
- Top coat: High-gloss finish for durability and shine
DIY Instructions
- Paint the green base: Apply two coats of deep green polish.
- Draw white spirals: Use a fine brush to paint white spirals starting from the base to the tip of each nail.
- Apply a top coat: Finish with a glossy top coat to protect your design and enhance the color contrast.
Serene Blue Sophistication
This nail design elegantly combines soft gray and blue hues, creating a serene and sophisticated look. A single nail features a marble accent with a jewel-like embellishment, adding a hint of luxury. This design is perfect for those who appreciate subtle elegance with a touch of glamour.
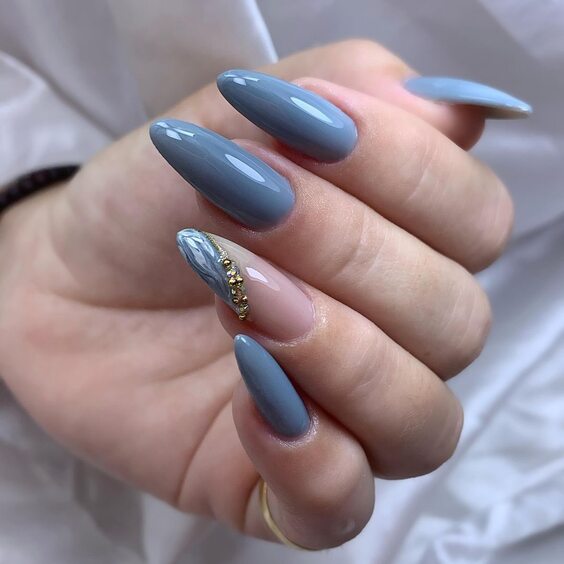
Consumables Needed
- Base colors: Soft gray and blue polish
- Marble effect: White and light blue polish
- Embellishments: Gold beads and crystals
- Top coat: High-gloss finish
DIY Instructions
- Apply the base colors: Alternate soft gray and blue on each nail.
- Create the marble effect: On the accent nail, swirl white and light blue polish.
- Add embellishments: Carefully place gold beads and a crystal on the marble nail.
- Seal with a top coat: A glossy top coat enhances the colors and secures the embellishments.
Vibrant Psychedelic Waves
Embrace vibrant energy with this nail design featuring bold, psychedelic waves in a multitude of colors. This lively pattern is perfect for expressing creativity and adding a splash of color to any outfit, making it a fun choice for social gatherings or just brightening up the day.
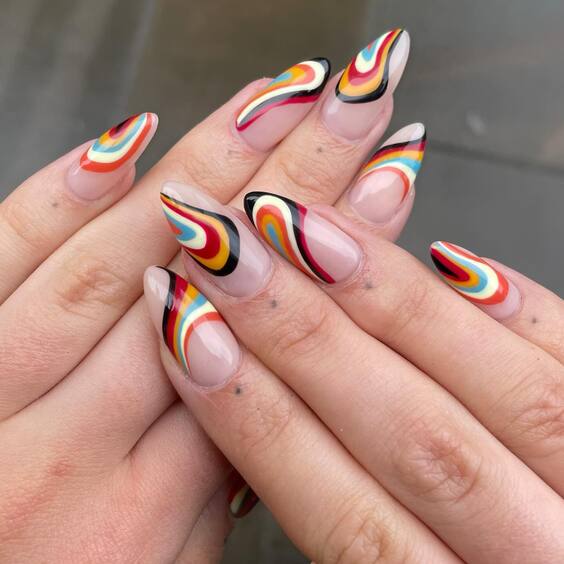
Consumables Needed
- Base color: Clear or neutral polish
- Wave colors: Red, yellow, black, and white polish
- Top coat: High-gloss finish to enhance the vivid colors
DIY Instructions
- Apply a neutral base coat: Start with a clear or light beige base to highlight the colors.
- Paint the waves: Use a fine brush to create multicolored, swirling wave patterns.
- Finish with a top coat: Apply a glossy top coat for shine and durability.
Iridescent Dream
This design showcases an iridescent finish that reflects a spectrum of colors, reminiscent of a dreamy, ethereal look. The subtle pastel base enhances the iridescence, making it ideal for those seeking a magical and enchanting appearance.
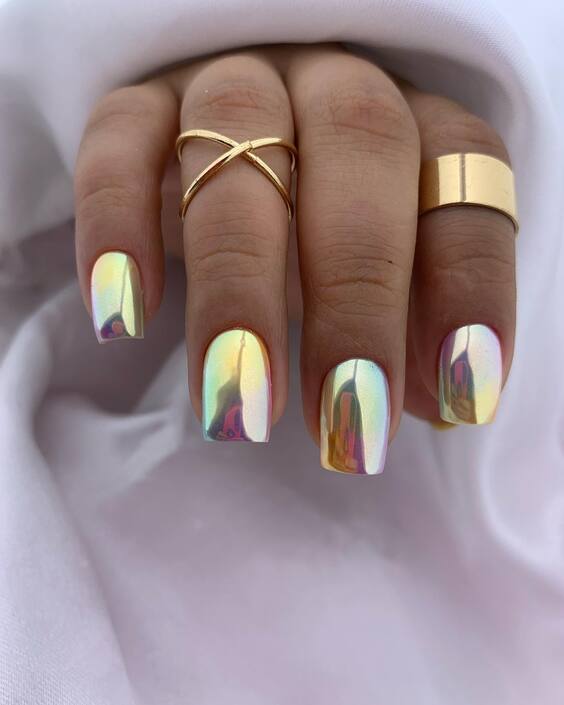
Consumables Needed
- Base color: Pastel iridescent polish
- Top coat: High-gloss finish to maximize the reflective effect
DIY Instructions
- Apply the iridescent polish: Coat your nails with the pastel iridescent polish, building up layers until the desired opalescence is achieved.
- Seal with a top coat: Finish with a glossy top coat to enhance the iridescent effect and protect the polish.
As we wrap up our exploration of beautiful fall nails for 2024, it’s clear that the possibilities are as varied and vibrant as the season itself. From the subtle elegance of marbled designs with gold accents to the lively charm of psychedelic waves, each style offers a unique way to express your personality and complement your autumn wardrobe. Whether you’re a fan of DIY nail art or prefer professional manicures, these trends provide ample inspiration to keep your nails looking fresh and fashionable throughout the season.

