22 Stunning Short Acrylic Nail Designs: Elegant, Bold & Playful Styles
Are you searching for a way to keep your nails fabulous yet functional? Have you ever wondered how short acrylic nails can transform your everyday look into something spectacular? Whether you’re a newbie to the nail art world or a seasoned enthusiast looking for fresh inspirations, this guide is packed with trendy designs and expert tips tailored just for you!
Short Acrylic Nails: Simple and Chic
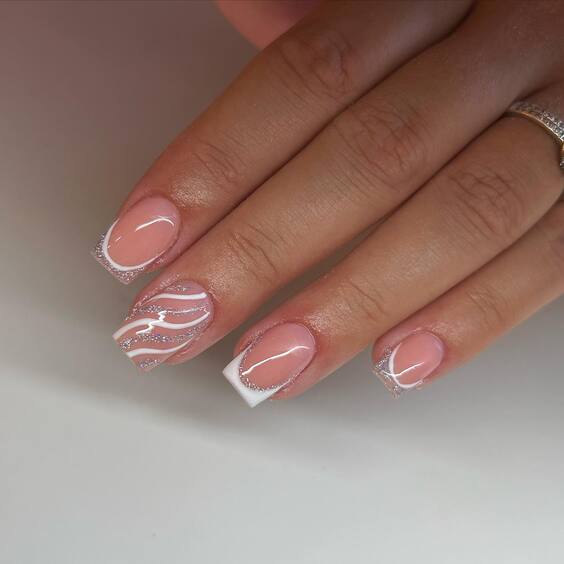
This nail design embodies the essence of simplicity with its clean lines and subtle sophistication. The nails are meticulously crafted with a soft pink base that exudes a natural, healthy glow. The minimalist white detailing on the tips and delicate swirls add a touch of elegance without overpowering the overall aesthetic. As a professional manicurist, I appreciate the precision in the application of the white accents which enhances the nails’ chic appearance.
Consumables Needed
- Base Coat: Opt for a strengthening base to protect your natural nails.
- Soft Pink Polish: A creamy, opaque polish for a subtle look.
- White Nail Art Paint: For precise detailing.
- Top Coat: A glossy finish to seal and protect the artwork. Each product should be of high quality to ensure longevity and a flawless finish.
DIY Tips
To recreate this look at home, start with a thorough manicure. Apply the base coat and two layers of pink polish. Once dry, use a thin brush to add white accents. Finish with a top coat for durability and shine. Patience is key to achieving the crisp lines seen in this design.
Short Acrylic Nails with Initials: Personalized Flair
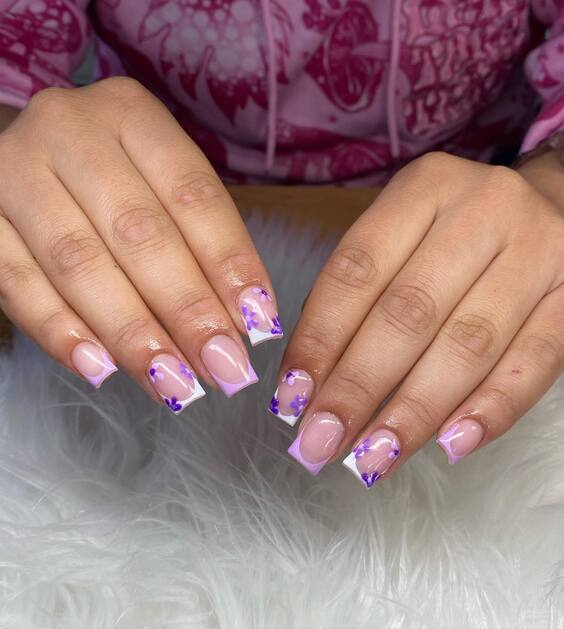
The charm of these short acrylic nails with initials lies in their personalized touch. Each nail features a different letter, painted in a vibrant purple that stands out against the muted pink base. The combination of colors is both bold and playful, making it a perfect choice for those who love to express their individuality through their manicure.
Consumables Needed
- Light Pink Polish: Provides a neutral backdrop.
- Purple Nail Paint: For the initials.
- Fine Detailing Brush: Essential for lettering.
- Matte Top Coat: To give a contemporary finish. Selecting the right shades and tools will ensure the letters are vivid and clear.
DIY Tips
Begin with a base coat followed by your pink base color. Use a detailing brush to carefully paint your initials on each nail. Consider using stencils if you’re new to nail art. Seal with a matte top coat for a modern touch.
Lavender Love: Short Acrylic Nails for Spring 2024
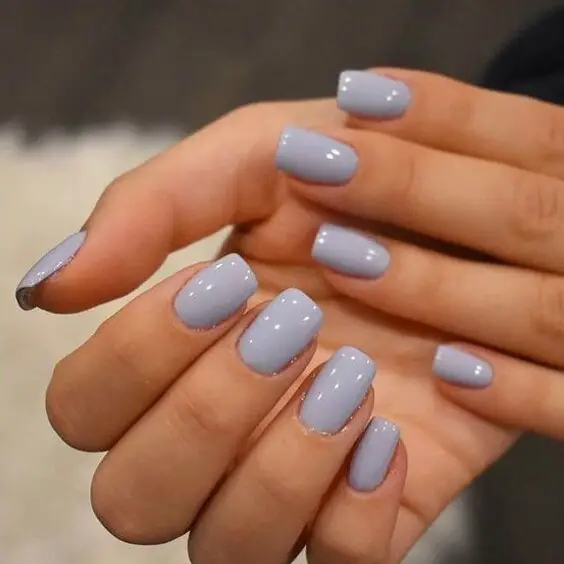
These short acrylic nails spring 2024 feature a refreshing lavender shade that’s perfect for the season. The uniform color and glossy finish reflect a contemporary style that pairs well with any spring wardrobe. The impeccable application and high-gloss finish make these nails a standout choice for spring.
Consumables Needed
- Lavender Nail Polish: A must-have for spring.
- High-Gloss Top Coat: For that desirable shine.
- Nail Hardener: To keep your nails strong underneath. Choosing a polish with a good consistency will help achieve a smooth, even coat.
DIY Tips
Apply a nail hardener as a base to protect your nails. Two coats of lavender polish should follow, allowing each coat to dry thoroughly. Finish with a high-gloss top coat to enhance the color and add durability.
Playful Designs: Short Acrylic Nails with Cute Art
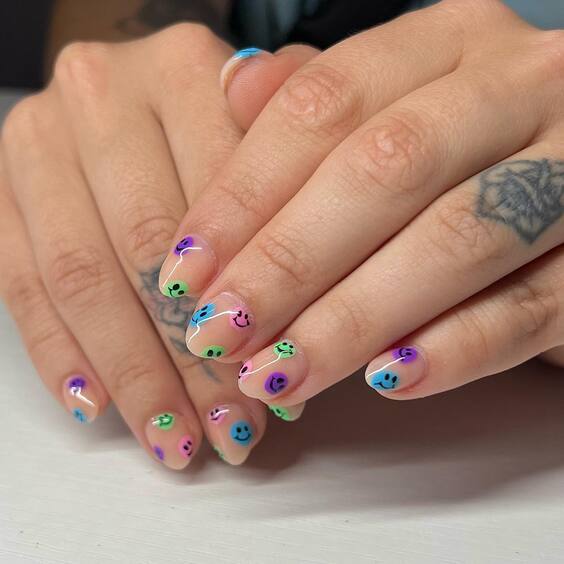
These short acrylic nails are a playful parade of colors and shapes, perfect for those who adore lively and youthful designs. The translucent base serves as an ideal canvas for the array of smiley faces in shades of blue, green, and purple. Each nail presents a unique expression, making this design not just a manicure but a statement of joy.
Consumables Needed
- Clear Acrylic Base: To ensure the colors pop.
- Colored Nail Art Paints: Blue, green, and purple for the smileys.
- Fine Detailing Brushes: Crucial for intricate designs.
- Sealing Top Coat: To protect the art and enhance durability. Choosing vibrant, high-pigment colors will keep the design bright and cheerful.
DIY Tips
Start with a clear acrylic base and use fine brushes to draw the smiley faces. Keep a steady hand and allow each color to dry before adding new layers or details. Finish with a strong top coat to seal in your playful masterpiece.
Elegant Red: Short Acrylic Nails with a Spark
This nail design is a perfect blend of elegance and edge. The deep red hue symbolizes classic beauty, while the glittery red tips add a modern twist. This design is ideal for anyone looking to make a glamorous statement at any event.
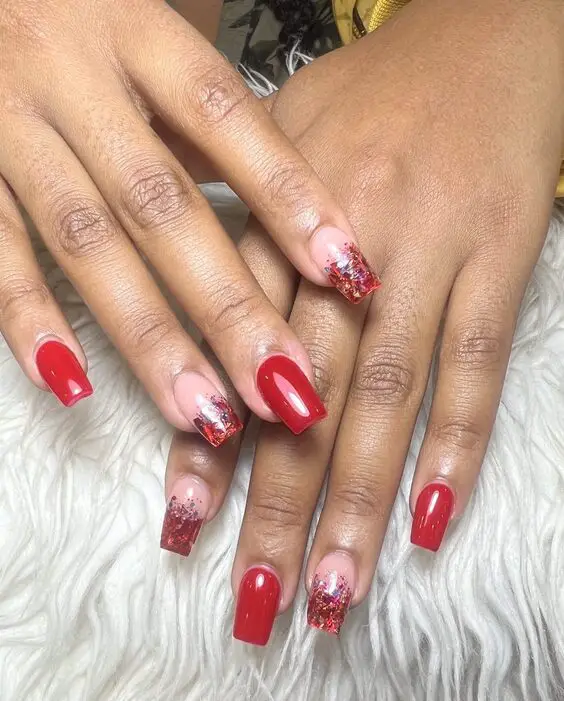
Consumables Needed
- Deep Red Polish: For a bold base.
- Red Glitter: For the dazzling tips.
- Top Coat: Ensures a glossy finish and long-lasting wear. Opt for a glitter that complements the base red to achieve a seamless transition.
DIY Tips
Apply two coats of your red polish as the base. While the second coat is still tacky, gently dab the tips with red glitter using a sponge for a precise application. Seal with a top coat to enhance the sparkle and preserve the design.
Chic and Sleek: Short Acrylic Nails Black with Zebra Accent
These short acrylic nails black showcase an air of sophistication with their sleek black finish. The single zebra-striped accent nail adds an exotic touch, creating a stylish contrast that’s both eye-catching and elegant.
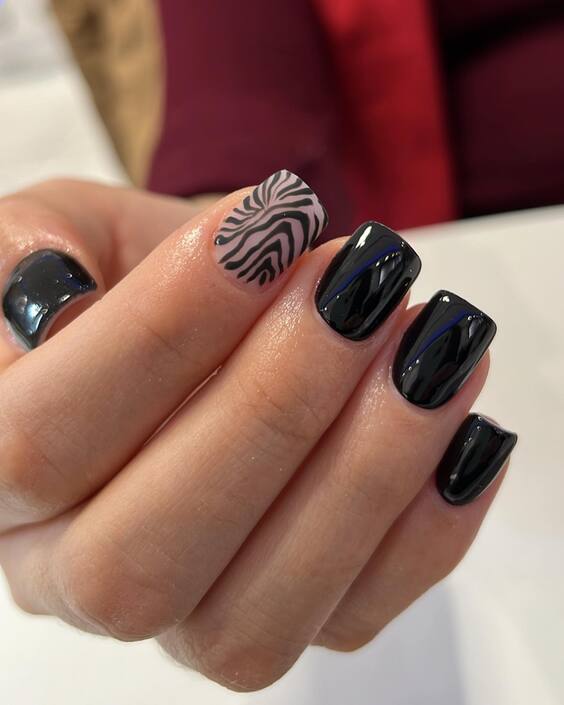
Consumables Needed
- Black Nail Polish: For a deep, rich base.
- White Nail Art Paint: To create the zebra pattern.
- Glossy Top Coat: For a sleek finish. The quality of the black polish is vital for achieving a luxurious, opaque look.
DIY Tips
After your base coat, apply two layers of black polish on all nails. For the accent nail, use a thin brush to draw zebra stripes with white paint. Practice the stripes on paper first if necessary. Finish with a glossy top coat to add shine and protect your design.
Oceanic Waves: Short Acrylic Nails Blue
This nail design draws inspiration from the tranquil blues of the ocean. The seamless blend of a soft, neutral base with bold blue wave-like accents at the tips perfectly captures the serene yet dynamic nature of the sea. It’s an artistic representation that’s both calming and invigorating.
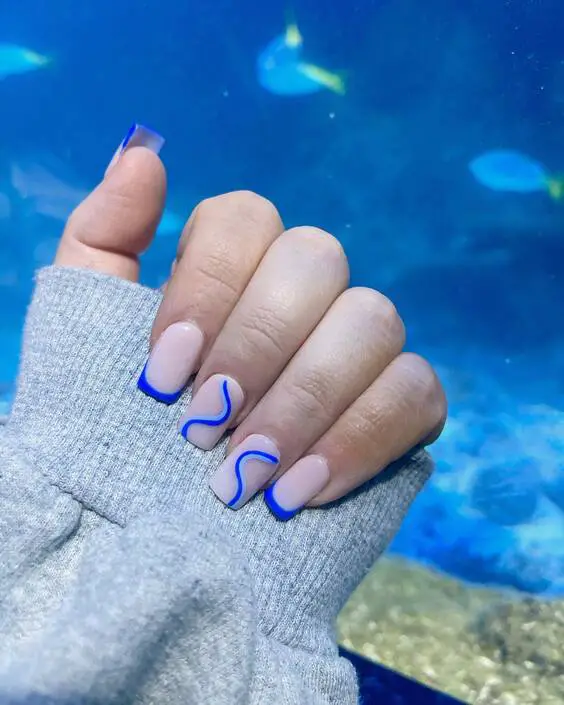
Consumables Needed
- Nude Base Polish: Sets a calm, neutral foundation.
- Vibrant Blue Polish: For the striking wave details.
- Thin Detailing Brush: Essential for creating smooth, flowing lines.
- Glossy Top Coat: To encapsulate the design with a shine that lasts. Using high-quality polishes ensures the colors remain vibrant and the finish smooth.
DIY Tips
Apply a nude base coat and let it dry completely. With a fine brush, draw wavy lines using the blue polish starting from the tip, and gradually decrease the wave’s height as you move downward. Finish with a glossy top coat to enhance the design’s depth and longevity.
Green Spring Delight: Short Acrylic Nails with Floral Touch
These nails feature a refreshing spring theme with mint green tips and delicate white floral accents. The mix of light green and subtle nail art gives these nails a youthful and fresh appearance, perfect for welcoming the spring season.
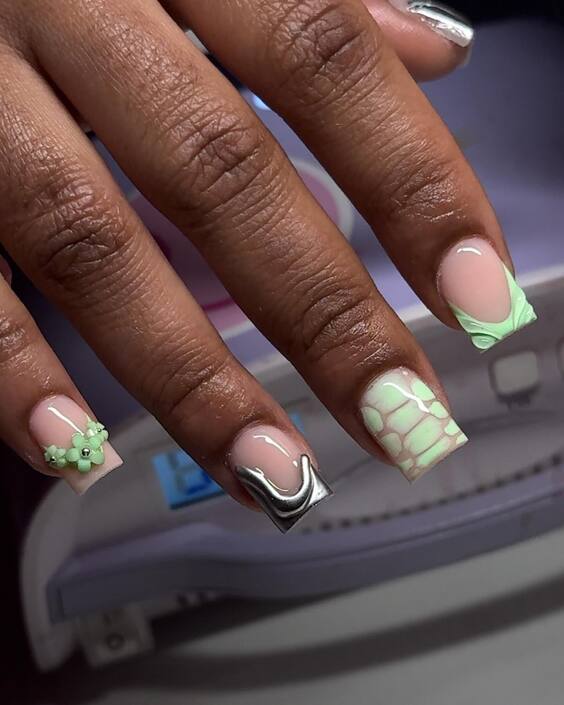
Consumables Needed
- Mint Green Polish: For the tips and some full nail coverage.
- White Nail Art Paint: For the floral details.
- Tiny Rhinestones: Adds a hint of sparkle to the flowers.
- Matte Top Coat: Gives a modern, chic finish. Select pastel colors for a soft, springtime look.
DIY Tips
Start with a clear base coat, then apply mint green on the tips or as full nail coverage on select fingers. Use a fine brush to add white flowers. Embellish the center of each flower with a small rhinestone. Finish with a matte top coat for an elegant, non-glossy look.
Eclectic Expressions: Short Acrylic Nails Black with Mixed Designs
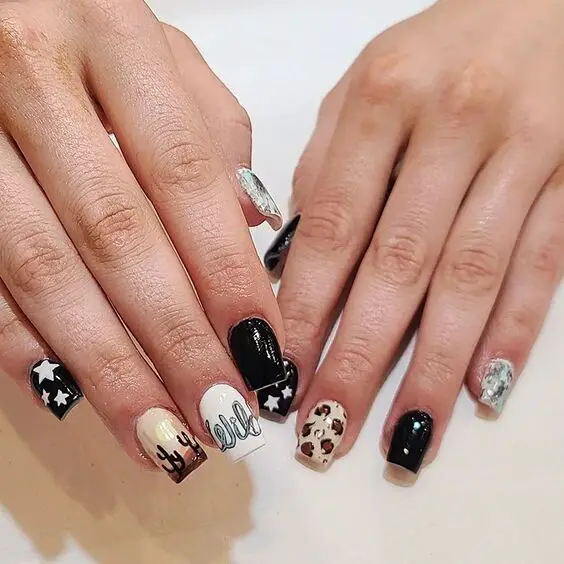
This design is a showcase of individuality with an eclectic mix of patterns including stars, script, and animal print on a backdrop of glossy black. Each nail tells a story, making this set perfect for those who love to express their unique style and personality.
Consumables Needed
- Black Nail Polish: As the base for all designs.
- White Nail Art Paint: For the script and star details.
- Gold and Silver Glitter: For accents and enhancements.
- Animal Print Stickers: For easy application of complex patterns.
- Glossy Top Coat: To seal and protect the designs. Choose adhesives that don’t compromise the polish beneath for best results.
DIY Tips
Apply a solid black base and let it dry. On alternate nails, use white paint for script and stars. Apply animal print stickers as desired. Highlight with gold and silver glitter. Seal everything with a glossy top coat for a stunning finish.
Vivid Blue: Short Acrylic Nails Square
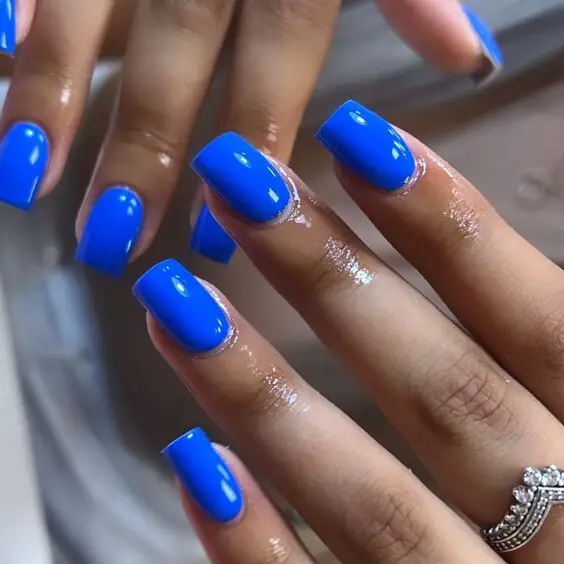
These nails make a dramatic statement with their vibrant, electric blue color. The square cut enhances the boldness of the shade, making this design perfect for those who wish to stand out. The uniform color application is glossy, creating a mesmerizing effect that’s both eye-catching and stylish.
Consumables Needed
- Electric Blue Polish: For a striking look.
- Base Coat: To protect the natural nail.
- High-Gloss Top Coat: For a shiny, durable finish. Using a quality top coat will ensure the color stays vibrant and chip-free longer.
DIY Tips
Start with a clean, buffed nail surface. Apply a base coat to protect your nails. Add two layers of electric blue polish, allowing each layer to dry completely. Finish with a high-gloss top coat for extra shine and protection.
Charming Florals: Short Acrylic Nails Almond
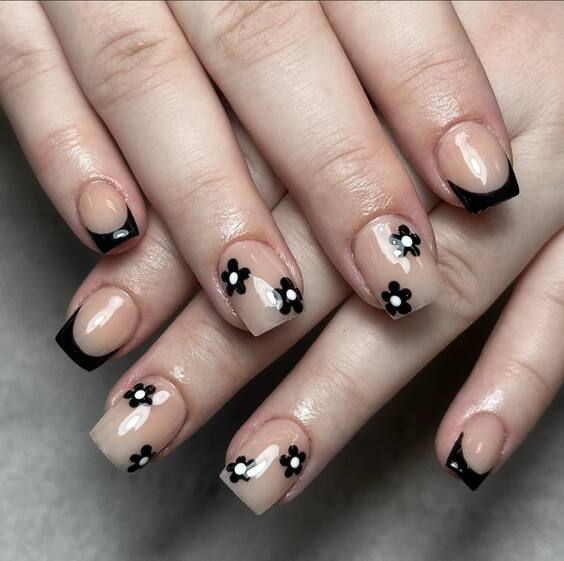
These almond-shaped nails offer a base of nude polish accented with delicate black floral designs and black tips. This design is both sophisticated and playful, ideal for those who appreciate subtle artistry on their nails.
Consumables Needed
- Nude Polish: For the base.
- Black Nail Art Paint: For the tips and floral details.
- Small Detailing Brush: For precision in floral art.
- Matte Top Coat: To give the design a modern finish. The contrast between the matte finish and the glossy details adds an intriguing visual effect.
DIY Tips
Paint your nails with a nude base and let it dry. Use a fine brush to create the black tips and delicate flowers. A matte top coat will provide a contemporary look and feel to your stylish floral nails.
Gradient Pink: Short Acrylic Nails Pink
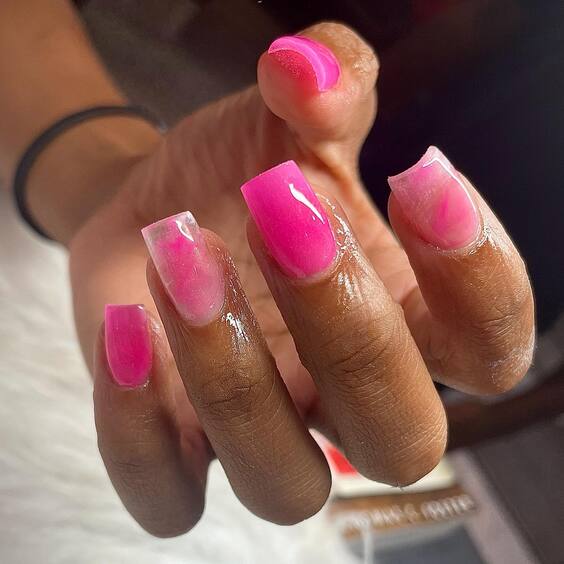
These stunning nails feature a beautiful gradient of pink, flowing from a rich fuchsia to a soft pink at the cuticle. The semi-transparent finish gives these nails a glass-like appearance, perfect for summer or spring looks.
Consumables Needed
- Pink Gradient Polishes: A selection from dark to light pink.
- Sponge: For blending the gradient.
- Clear Top Coat: To seal and add a glassy finish. The right blending technique is crucial for a smooth gradient transition.
DIY Tips
Apply a pale pink base coat and let it dry. Then, using a sponge, dab on a darker pink at the tip, blending towards the middle. Repeat if necessary to enhance the color intensity. Finish with a clear top coat to achieve a glossy, smooth gradient effect.
Marble Elegance: Short Acrylic Nails with Gold Detailing
This design features a stunning blend of sky blue and white marble accented with gold stripes, giving it an opulent and sophisticated look. The gold detailing adds a touch of luxury, making these nails perfect for special occasions or anyone looking to add a little elegance to their daily style.
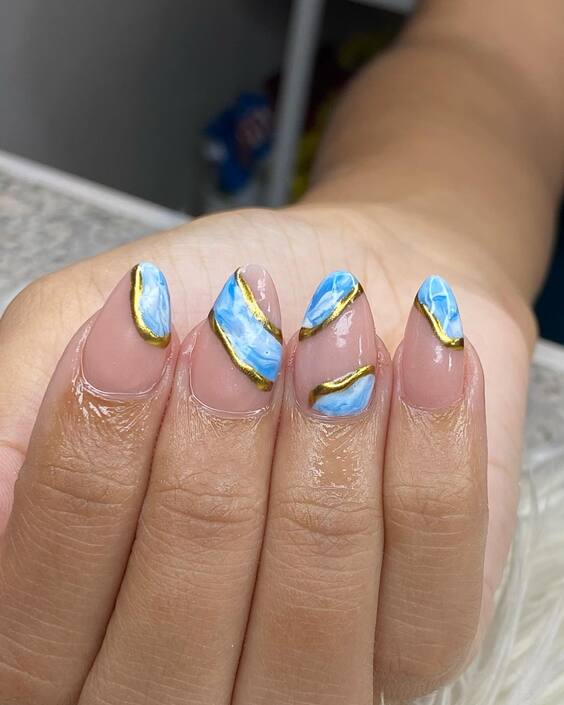
Consumables Needed
- White and Sky Blue Polish: For the marble effect.
- Gold Striping Tape: For the elegant lines.
- Glossy Top Coat: To seal the design and add shine. High-quality polishes and precise tape placement are crucial for a clean, luxurious appearance.
DIY Tips
Apply a white base and while still wet, dab on some sky blue polish. Swirl the two colors gently with a toothpick to create a marble effect. Once dry, apply gold striping tape in clean lines and finish with a glossy top coat for durability and shine.
Sculptural White: Short Acrylic Nails with Pink Stripes
These nails combine a translucent pink base with bold, sculptural white ribbons that create a striking three-dimensional look. This style is modern and artistic, ideal for those who appreciate nails that are both a fashion statement and a piece of art.
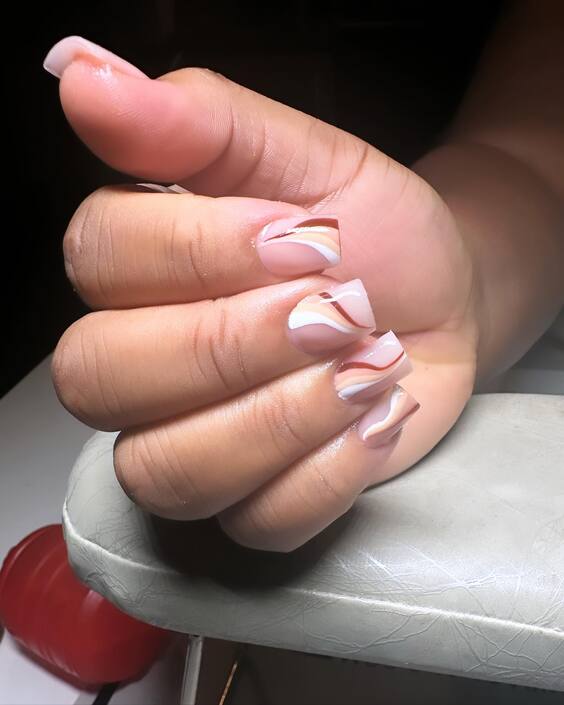
Consumables Needed
- Translucent Pink Polish: For a subtle, soft base.
- White Acrylic Gel: To create the ribbons.
- Fine Brush: For sculpting the details.
- Matte Top Coat: To enhance the sculptural elements without adding shine. Precision in sculpting the gel is essential for achieving the raised, clean lines seen here.
DIY Tips
Start with a base of translucent pink polish. Use a fine brush to apply white acrylic gel in a ribbon pattern. Allow each layer to dry slightly before adding another to build up a three-dimensional effect. Finish with a matte top coat to focus attention on the texture.
Refreshing Spring Swirls: Short Acrylic Nails Pink and Mint
This design captures the freshness of spring with its pastel pink and mint green swirls against a pale pink background. The swirls add a playful twist to the otherwise simple nail, making it perfect for seasonal events or daily wear during the spring.
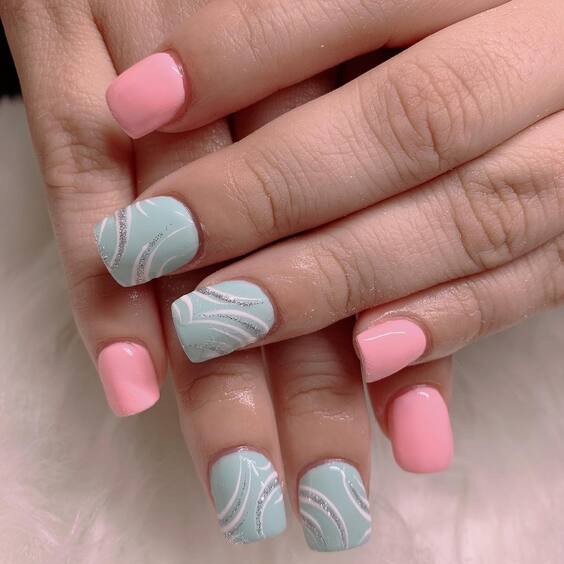
Consumables Needed
- Pale Pink Polish: As the base color.
- Mint Green and Light Pink Polish: For the swirls.
- Detailing Brush: For precise swirl painting.
- Glossy Top Coat: To seal and protect the design. Achieving smooth, clean swirls requires steady handwork and patience.
DIY Tips
Apply a pale pink polish as the base. Once dry, use a fine brush to paint swirls with mint green and light pink polish. Allow each swirl to dry before overlapping with another color to avoid smudging. Finish with a glossy top coat for a vibrant and protective finish.
Playful Prints: Short Acrylic Nails with Animal and Neon Accents
These nails combine the timeless appeal of neutral tones with vibrant neon and classic animal prints, creating a playful yet balanced look. The mix of patterns and colors makes this design suitable for those who love to combine classic and modern styles in their fashion choices.
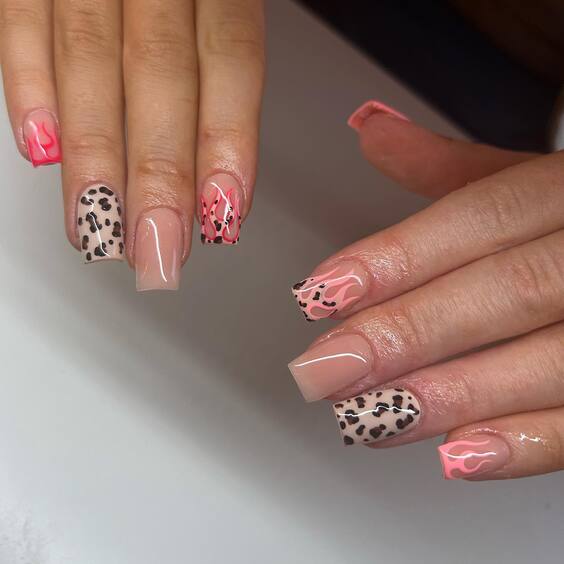
Consumables Needed
- Nude Polish: For the base color.
- Black and Neon Pink Polish: For the animal and neon details.
- Detailing Brushes: For precise pattern creation.
- Glossy Top Coat: To seal the design and add shine. The key is to balance the bold prints and colors with the neutral base for a harmonious look.
DIY Tips
Start with a nude base coat. Use a fine brush to add animal prints in black on some nails. Apply neon pink on other nails either as a full cover or in specific patterns. Finish with a glossy top coat for a vibrant and protective finish.
Candy Delight: Short Acrylic Nails with Playful Pastel Art
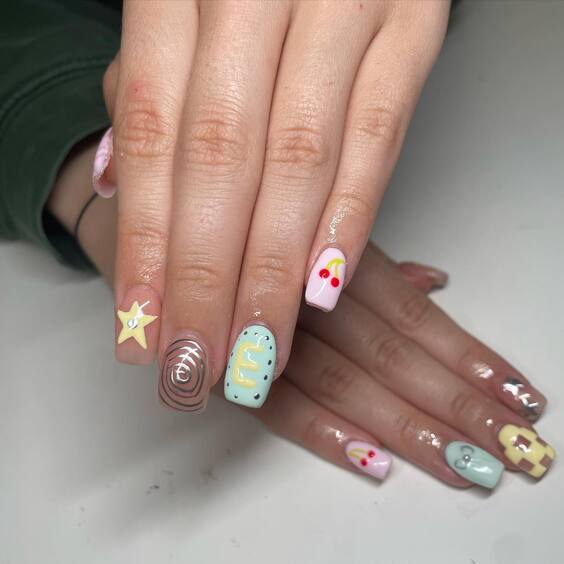
This design features an array of soft pastel shades with adorable illustrations, including stars, spirals, and heart motifs. The candy-like colors and cute art make these nails perfect for spring or just to brighten up a casual look.
Consumables Needed
- Pastel Polishes: Various shades for the base and details.
- Fine Detailing Brush: For the intricate art.
- Matte Top Coat: To give a modern and chic finish. Soft colors and precise art work are essential to replicate this playful yet sophisticated style.
DIY Tips
Paint each nail a different pastel shade as the base. Use a fine brush to draw small, simple designs such as stars, hearts, and spirals in contrasting pastel tones. Finish with a matte top coat to enhance the artwork without adding gloss.
Minimalist Chic: Short Acrylic Nails with Geometric Accents
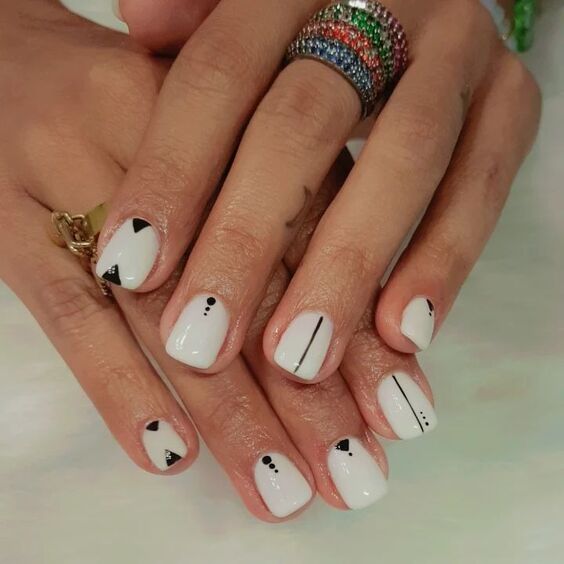
These nails feature a white base with minimalist black geometric designs that make a statement of refined elegance. The simple yet bold accents on a clean background are perfect for those who appreciate minimalism in their style.
Consumables Needed
- White Polish: For a crisp, clean base.
- Black Nail Art Paint: For the geometric designs.
- Detailing Brush: For sharp, clean lines.
- Glossy Top Coat: To ensure the design stands out and lasts. Precision in the geometric patterns is crucial to maintain the minimalist aesthetic.
DIY Tips
Apply a white base coat and let it dry completely. Use a fine brush to paint simple geometric shapes or lines in black. Ensure each line is precise and clean. Finish with a glossy top coat to add a smooth, refined finish.
Soft Pink Elegance: Short Acrylic Nails with Gold Detailing
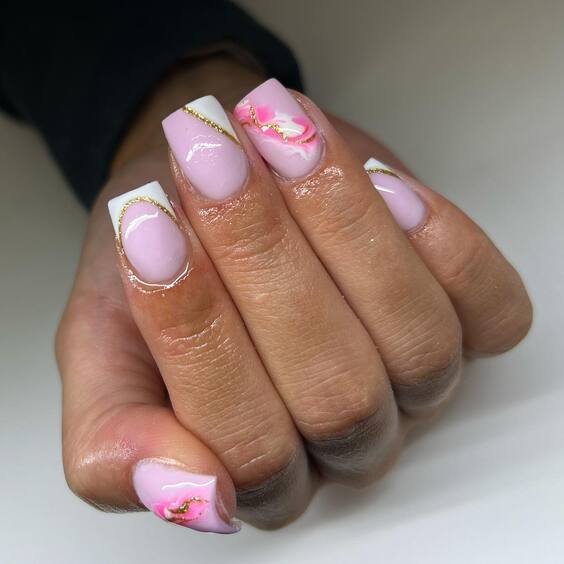
These nails exude elegance with their soft pink base and delicate gold foil accents. The subtle contrast between the matte pink and the shiny gold creates a refined and graceful look, perfect for both everyday elegance and special occasions.
Consumables Needed
- Soft Pink Polish: For a gentle, elegant base.
- Gold Foil: For the accents.
- Matte Top Coat: To give the pink base a soft finish.
- Glossy Top Coat: To highlight the gold detailing. Accuracy in applying the gold foil is key to achieving this look’s delicate elegance.
DIY Tips
Apply the soft pink polish and let it dry. Carefully place small pieces of gold foil where you want the accents. Apply a matte top coat over the pink areas, avoiding the gold to maintain its shine. Finish with a glossy top coat over the gold for extra sparkle.
Whimsical Artistry: Short Acrylic Nails with Custom Illustrations
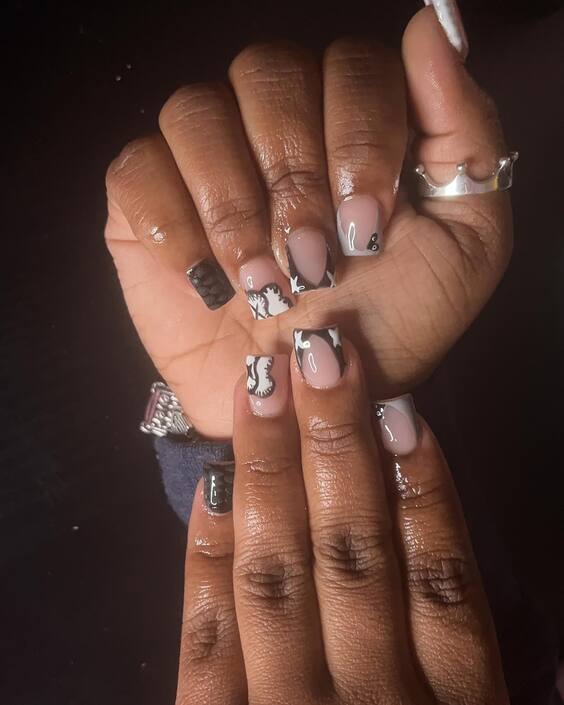
This design features whimsical illustrations that turn each nail into a unique piece of art. The muted color palette provides a perfect canvas for the detailed black and white drawings, making this style ideal for those who love to showcase their personality and artistic taste.
Consumables Needed
- Neutral Base Colors: To serve as a canvas.
- Black Nail Art Pen: For the illustrations.
- Fine Detailing Brush: For precise artwork.
- Glossy Top Coat: To protect the designs and add a radiant finish. The focus here is on precision in the artwork to ensure each illustration is clear and impactful.
DIY Tips
Start with a neutral base color. Use a black nail art pen or a fine brush to create your desired illustrations on each nail. Consider simple but striking designs that reflect your personal style. Finish with a glossy top coat to enhance and protect your artwork.
Modern Monochrome: Short Acrylic Nails with Black and White Design
These nails make a statement with their high-contrast black and white design, featuring sharp geometric shapes and stripes. This bold, modern look is perfect for those who prefer a more dramatic style that captures attention.
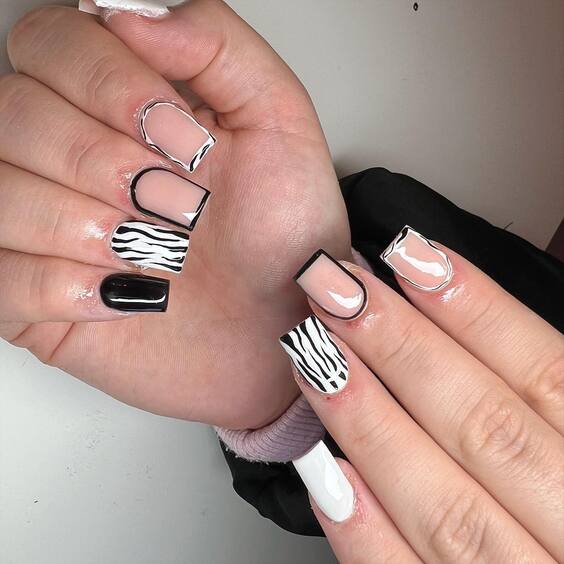
Consumables Needed
- White Nail Polish: As the base for some nails.
- Black Nail Polish: For contrast and design elements.
- Striping Tape: For clean lines and shapes.
- Glossy Top Coat: To seal the design and add a sleek finish. Precision in tape placement and polish application is crucial to achieving the crisp, bold lines of this design.
DIY Tips
Paint some nails white and others black as the base. Use striping tape to create geometric patterns or stripes. Paint over the tape with the opposite color for sharp contrasts. Remove the tape while the polish is still slightly wet. Finish with a glossy top coat for a smooth, shiny effect.
Pink Passion: Short Acrylic Nails with Gradient and Gold Detailing
This nail design celebrates femininity with a gorgeous gradient of pink shades, complemented by intricate gold detailing that adds a luxurious touch. The gradient smoothly transitions from a light pink at the cuticle to a vibrant hot pink at the tips, while the gold accents are delicately placed to enhance the elegant flow of colors.
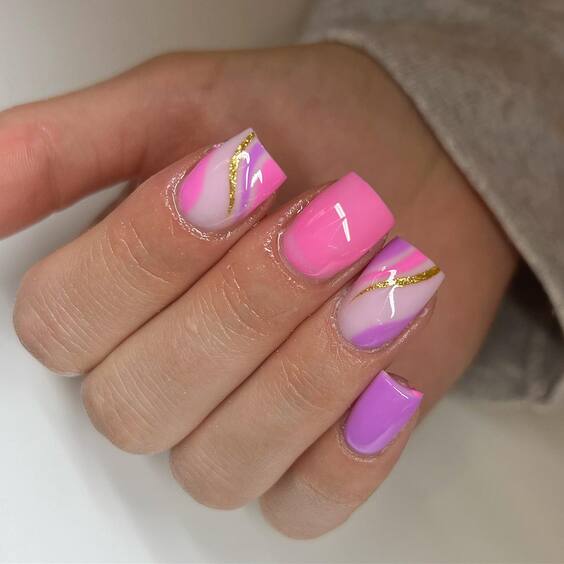
Consumables Needed
- Light Pink and Hot Pink Polishes: For the gradient effect.
- Gold Glitter or Striping Tape: For elegant detailing.
- Sponge: For dabbing and blending the gradient.
- Glossy Top Coat: To seal the design and add a glass-like finish. Achieving a seamless gradient and precise placement of gold accents are key to this design’s charm.
DIY Tips
Begin by applying a light pink polish as the base. While still wet, use a sponge to apply hot pink polish at the tip, blending gently into the base color to create a smooth gradient effect. Once dry, add gold glitter or place striping tape along the gradient’s edge for a refined detail. Finish with a glossy top coat to enhance the overall shine and protect your beautiful design.
This final design encapsulates the elegance and vibrancy of short acrylic nails, showcasing how varied and intricate these styles can be. From sophisticated minimalism to playful artistry and bold modernism, each design has offered a unique way to express personal style through the art of manicure. Whether you’re dressing up for a special occasion or just accentuating your everyday look, these nail designs provide ample inspiration to ensure your nails always make a statement. Enjoy exploring these creative ideas and embrace the endless possibilities of nail art!

