19 Stunning July Toe Nails 2024: Explore Vibrant Summer Designs
Tina Pratsyuk7 June 2024Last Updated: 16 August 2024
0 11 minutes read
Are you ready to dive into the world of toe nail art for July 2024? As summer reaches its peak, it’s the perfect time to explore vibrant, eye-catching designs that make your toes stand out, whether you’re walking along the beach or attending a summer soiree. What new trends can you expect this season, and how can you achieve these looks at home? Let’s uncover the latest styles and practical tips to keep your toenails looking fabulous.
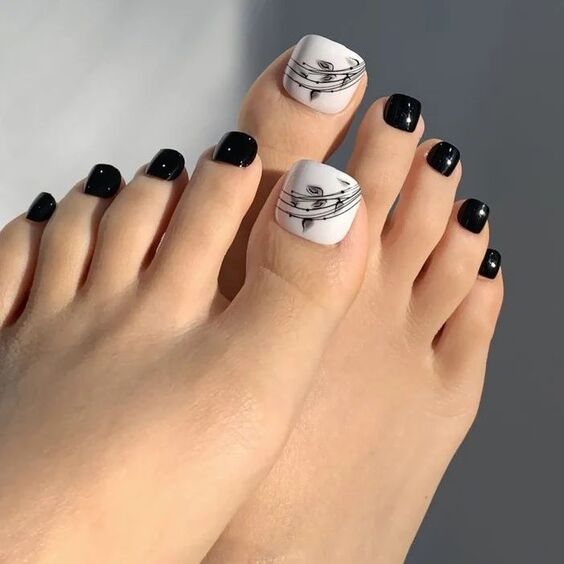
Black and White Swirl Elegance
The classic black and white color palette takes a creative twist with this toe nail design. The bold, glossy black on most toes provides a stark contrast to the intricate white swirls on the big toes. This artistic choice not only adds a touch of elegance but also makes a versatile statement suitable for both casual outings and formal events.
Base coat: Choose a durable base to protect your nails.
Black nail polish: Opt for a high-gloss, long-lasting polish.
White nail polish: A thick, opaque white for clear lines.
Top coat: A glossy top coat to seal in the design and add shine.
Fine brush: For detailed swirl designs.
DIY Steps:
Start with a clean, dry toenail surface. Apply the base coat and let it dry. Next, paint all toes except the big toes with two layers of black polish. On the big toes, use the fine brush and white polish to create swirls over a base of black. Finish with a top coat to enhance durability and gloss.
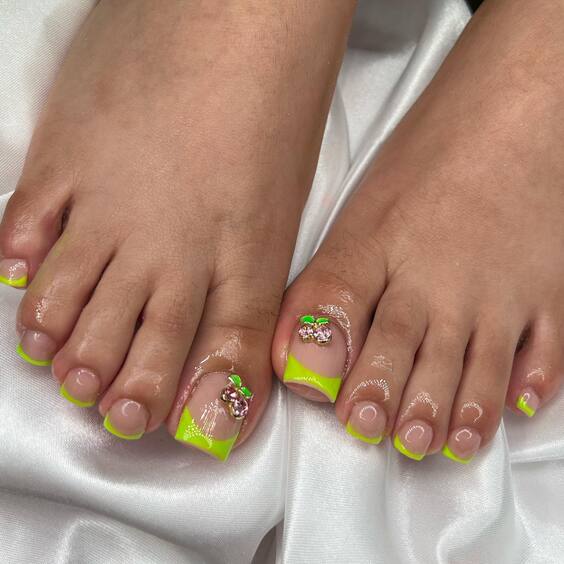
Neon Summer Delight
Capture the essence of summer with these neon yellow toe nails, embellished with tiny rhinestones for an extra sparkle. This bright, cheerful design is perfect for sunny days and instantly draws the eye with its vibrant hue and playful accents.
Neon yellow nail polish: A vibrant, high-pigment polish.
Small rhinestones: Choose clear or colored stones for decoration.
Adhesive: A nail glue for securing rhinestones.
Top coat: To protect the polish and stones.
Tweezers: For precise rhinestone placement.
DIY Steps:
After applying a base coat, paint your toenails with two coats of neon yellow. Once dry, use tweezers to apply a small dot of glue on the nail where you want the rhinestones. Place the rhinestones using the tweezers. Finish with a top coat to seal everything in place.
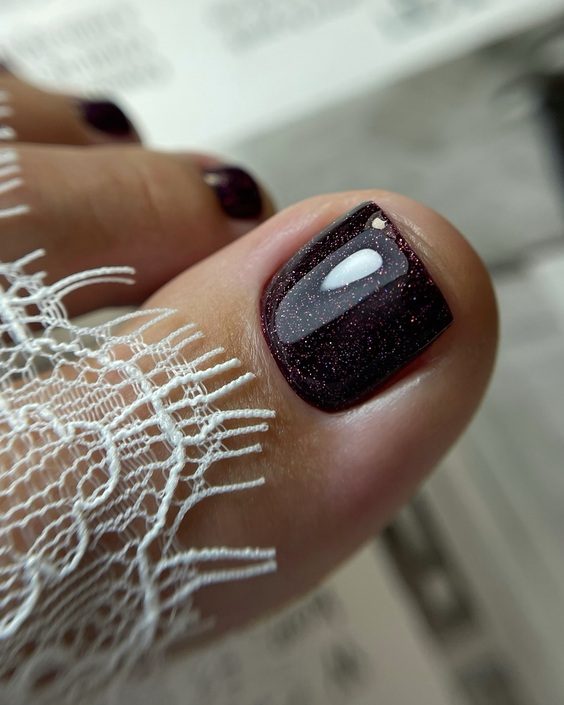
Dark Romance
This design features deep, metallic purple polish that speaks to the mysterious and romantic side of summer nights. The added white accent on one nail creates a unique focal point, while the glittery finish catches the light beautifully.
Metallic purple nail polish: For a rich, shimmering base.
White nail polish: To create contrast.
Glitter top coat: Adds sparkle and protection.
Fine brush: For precise white accents.
DIY Steps:
Apply a base coat to protect your nails. Coat your nails with the metallic purple polish, then let them dry. Use the white polish and a fine brush to add an elegant design to one toe. Finally, apply a glitter top coat for a sparkling finish.
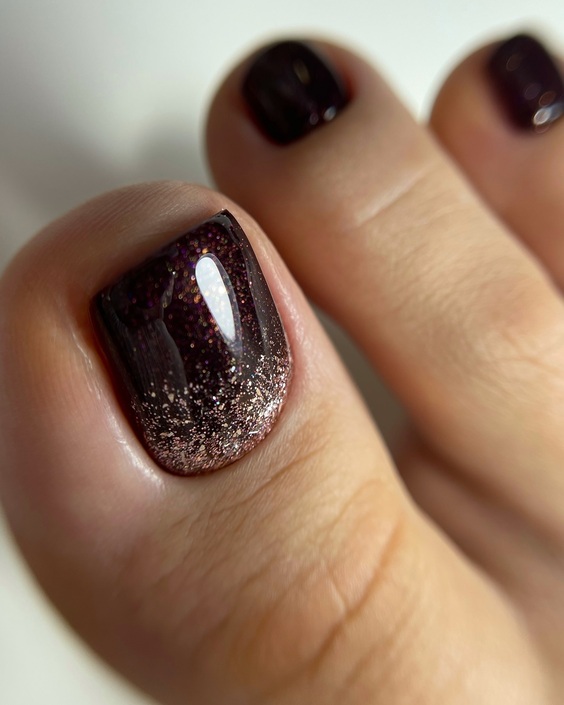
Twilight Shimmer
This design showcases a deep, shimmering burgundy base topped with a gradient of copper glitter, creating a sophisticated evening look. The sparkle subtly descends from the nail bed to the tip, resembling a twilight sky filled with distant stars.
Sponge: To dab on the glitter for a smooth gradient.
Top coat: A durable finish to protect the design.
Fine brush: Optional, for more precise glitter placement.
DIY Steps:
Paint your toenails with two coats of burgundy polish. Once dry, dab a sponge lightly dipped in copper glitter polish starting at the nail bed and fading out towards the tip. Use a fine brush for any touch-ups to ensure a smooth gradient. Seal with a top coat for lasting shine.
Classic French Elegance
Embrace timeless beauty with this French tip design on a sheer pink base. The clean, white tips are executed with precision, offering a chic and polished look ideal for any occasion.
After a base coat, apply two coats of sheer pink polish. Place tip guides or tape on the nail tips once dry, then apply white polish to create the tips. Remove the guides immediately after painting to ensure sharp lines. Finish with a top coat.
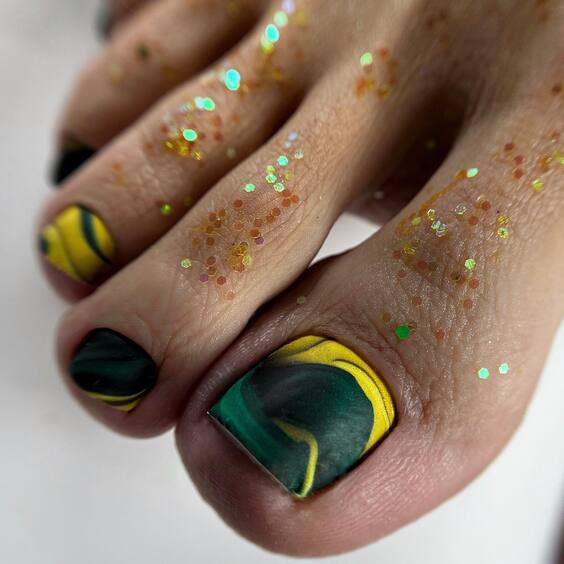
Tropical Swirl
This vibrant design combines deep green and bright yellow in a swirling pattern, reminiscent of tropical foliage and festive vibes. Accents of glitter add a playful sparkle, making it perfect for summer parties or adventurous outings.
Start with a base coat, then paint the nails with green. Use a thin brush to add yellow swirls over the green. Sprinkle some glitter while the polish is still tacky. Finish with a top coat to protect your tropical creation.
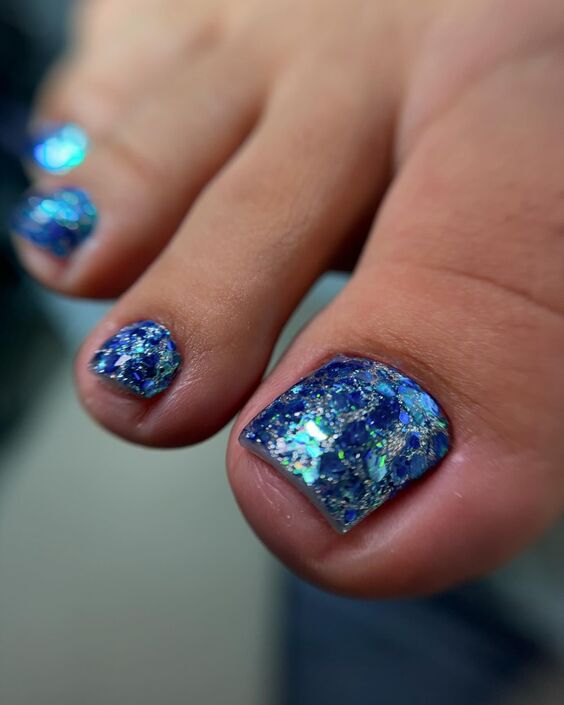
Oceanic Glitter
Dive into the depths of the ocean with these mesmerizing blue glitter toe nails. The design features a rich, ocean-blue base densely packed with varying sizes of glitter, mimicking the shimmering surface of the sea under sunlight.
Ocean blue glitter polish: A vibrant, sparkly base.
Chunky glitter top coat: For added texture and shine.
Base coat: To protect your natural nails.
Top coat: For a smooth, lasting finish.
DIY Steps:
Begin with a protective base coat. Apply two coats of the ocean blue glitter polish, allowing each to dry thoroughly. Add a layer of chunky glitter top coat for extra dimension and finish with a clear top coat to seal and enhance durability.
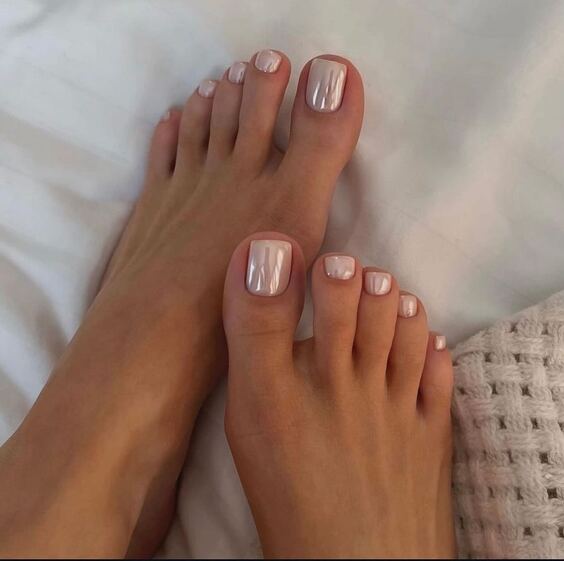
Pastel Perfection
This design captures the soft glow of a summer sunset with pastel shades that seamlessly blend across each toe nail. The gentle transition of colors creates a soothing visual effect, perfect for a relaxed yet stylish look.
Pastel pink, blue, and orange polishes: For the gradient.
Sponge: To create the soft blend of colors.
Top coat: Ensures a smooth finish.
Base coat: Protects the nail surface.
DIY Steps:
Start with a base coat to protect the nails. Apply a white polish as a base to make the colors pop. Dab the sponge into the pastel polishes and gently press onto each nail to create a blended gradient effect. Finish with a top coat for a smooth, lasting look.
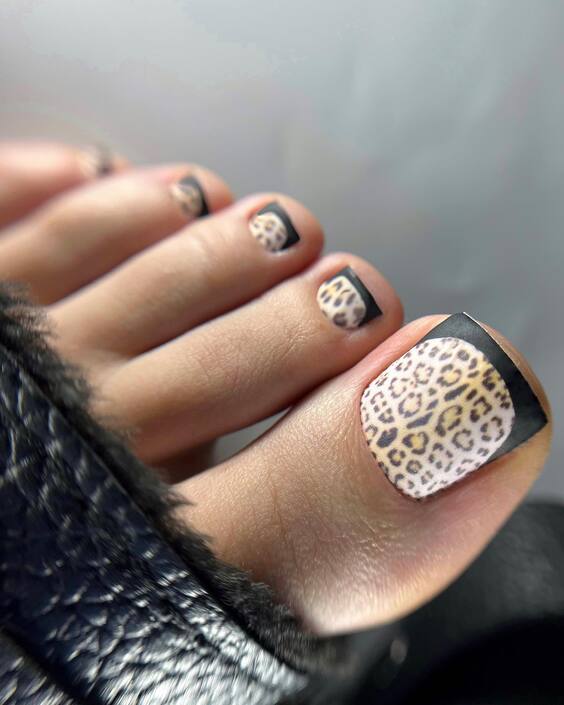
Wild Leopard Luxe
Unleash your wild side with this bold leopard print design, set against a contrasting nude and black background. The meticulous placement of the leopard spots offers a chic, fierce look that’s perfect for making a fashion statement.
Apply a nude polish as the base. Once dry, use a fine brush to paint the black edges and spots. Fill in some spots with gold polish for a luxurious touch. Ensure each layer is dry before applying the next to prevent smudging. Finish with a top coat to seal and protect the design.
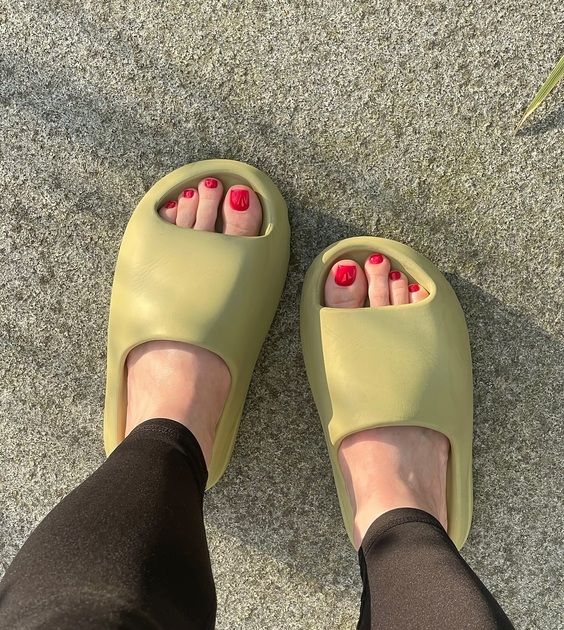
Sunny Day Pop
Bright and bold, this design features a vivid red polish that’s perfect for sunny days and warm evenings. The striking color stands out beautifully against the muted tone of the sandals, showcasing a look that’s both casual and stylishly confident.
Base coat: To protect and smooth the nail surface.
Top coat: For a glossy finish that lasts.
Cotton swabs and remover: For any touch-ups.
DIY Steps:
Begin with a base coat to protect your nails. Apply two coats of the vivid red polish for full coverage. Use cotton swabs dipped in remover to clean up any edges. Finish with a glossy top coat to enhance the color’s vibrancy and longevity.
Soft Whisper
This subtle yet elegant design features a nude polish accented with a soft white tip, reminiscent of a classic French manicure but with a twist. The minimalistic approach makes it versatile for both everyday wear and special occasions.
Apply a base coat to clean, dry nails. Paint the entire nail with nude polish and allow it to dry completely. Place tip guides across the tip of each nail and apply white polish. Remove the guides quickly to ensure crisp lines. Seal the design with a top coat.
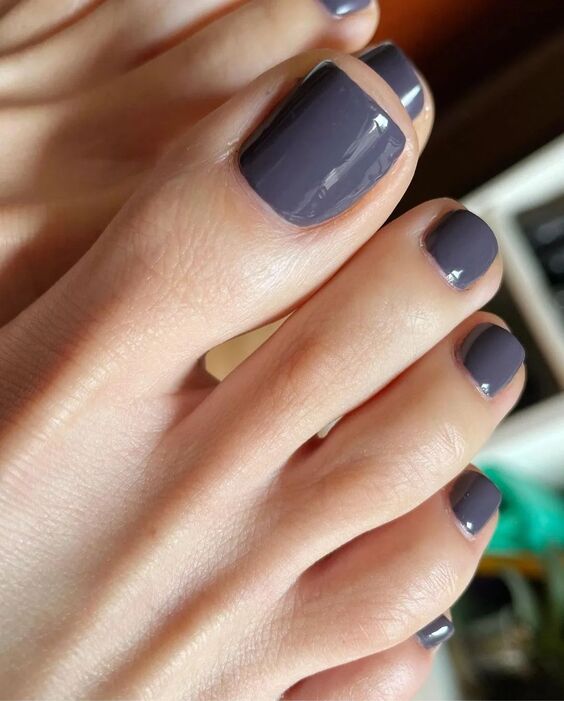
Tranquil Dusk
This design captures the tranquility of dusk with a smooth, matte grey polish that offers a sophisticated and understated look. Perfect for those who prefer a more muted yet refined aesthetic.
Fine brush or dotting tool: For any optional design details.
DIY Steps:
Start by applying a base coat. Paint your nails with two coats of matte grey polish. For those wanting a little extra, use a fine brush or dotting tool to add subtle design elements. Finish with a matte top coat to keep the look uniform and stylish.
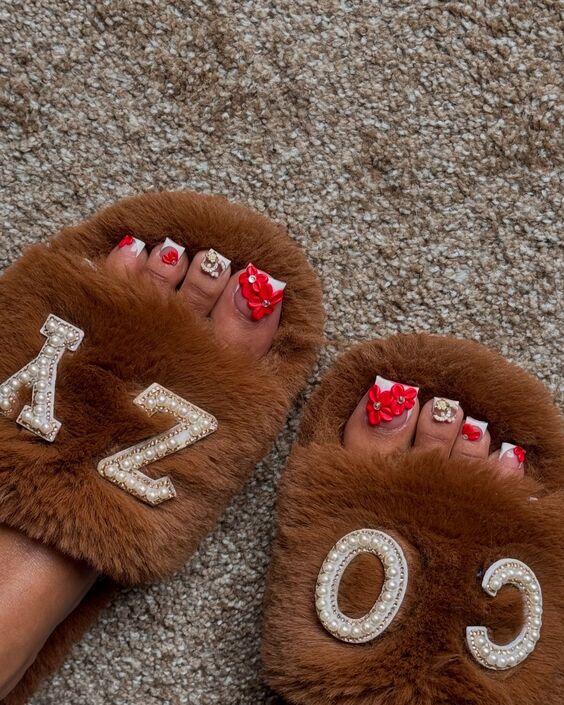
Festive Furry Flair
This playful and festive toe nail design brings a cheerful vibe with its red polish and creative embellishments. The nails feature gleaming rhinestone accents and adorable red bows, making it a standout choice for holiday parties or celebratory events.
Apply a base coat followed by two coats of red polish. Once dry, use tweezers to apply nail glue to the area where you want to place rhinestones and bows. Attach each piece carefully, then apply a top coat to ensure everything stays in place and shines brightly.
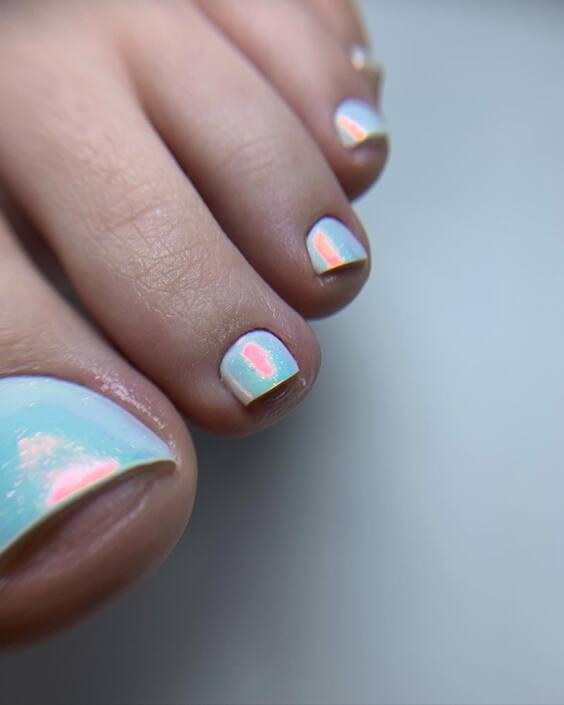
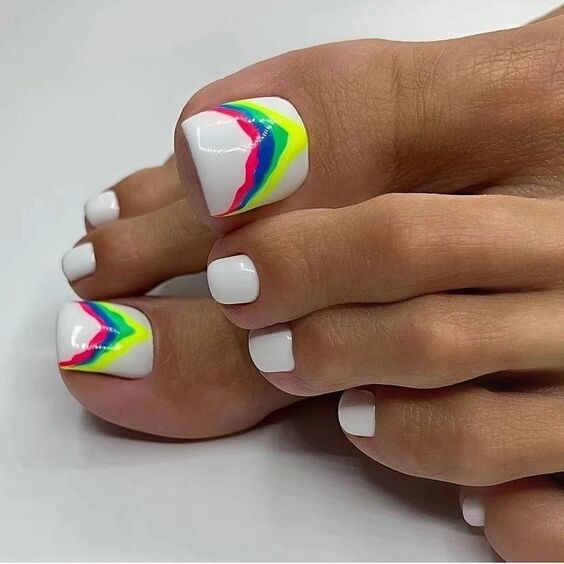
Neon Wave
Embrace the vibrant energy of summer with this toe nail design featuring a white base and a wave of neon colors. The splash of pink, blue, and yellow creates a dynamic and eye-catching effect, perfect for beach days or pool parties.
Neon pink, blue, and yellow polishes: For the colorful wave.
Thin brush: For detailed paint work.
Top coat: To protect the design and enhance shine.
Base coat: For lasting color adherence.
DIY Steps:
Start with a base coat to protect your nails. Apply two coats of white polish as the foundation. Using a thin brush, create a flowing wave design with neon pink, followed by blue and yellow. Allow each color to dry slightly before applying the next to prevent bleeding. Seal with a top coat for durability and gloss.
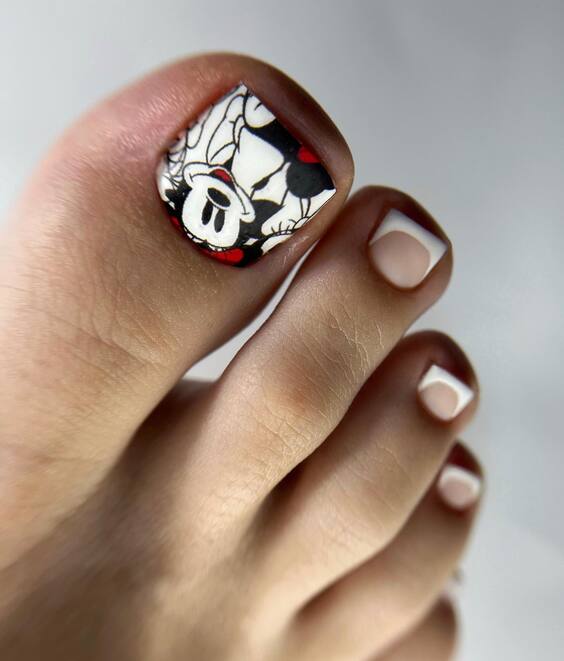
Gothic Charm
This design showcases a bold, gothic look with a cartoon-inspired twist. The central toe features a detailed black and white character illustration set against a solid black background, offering a unique and striking aesthetic.
Apply a base coat for nail protection. Paint all toes black, leaving the central toe for the character design. Use a fine brush and white polish to carefully draw the character on the central toe. Once the artwork is dry, apply a top coat over all nails to protect the design and add a glossy finish.
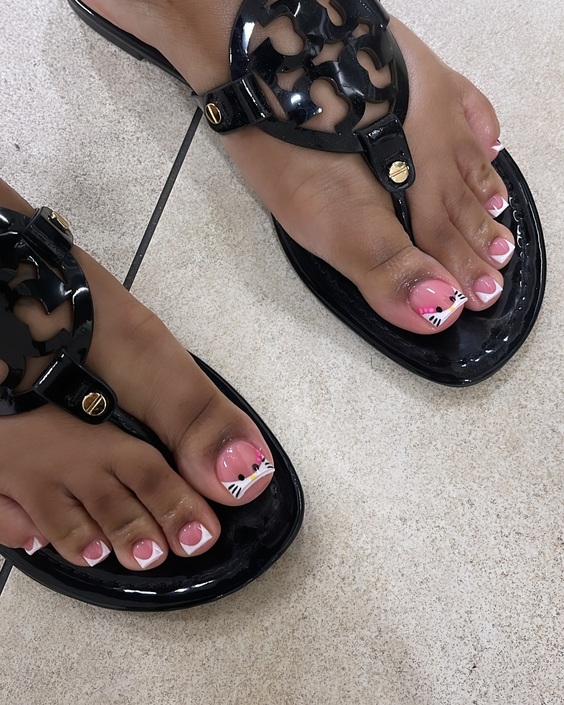
Playful Pink Kitties
These charming toes are dressed up with a playful pink base and adorable kitty accents, perfect for adding a whimsical touch to any casual outfit. The soft pink hue paired with cute cat faces makes this design a delightful choice for cat lovers and those who enjoy playful, youthful styles.
Begin with a base coat to protect your nails. Apply two coats of soft pink polish as the foundation. Once dry, use a fine brush with white and black polish to add kitty face details on select toes. Seal everything with a top coat for a shiny, durable finish.
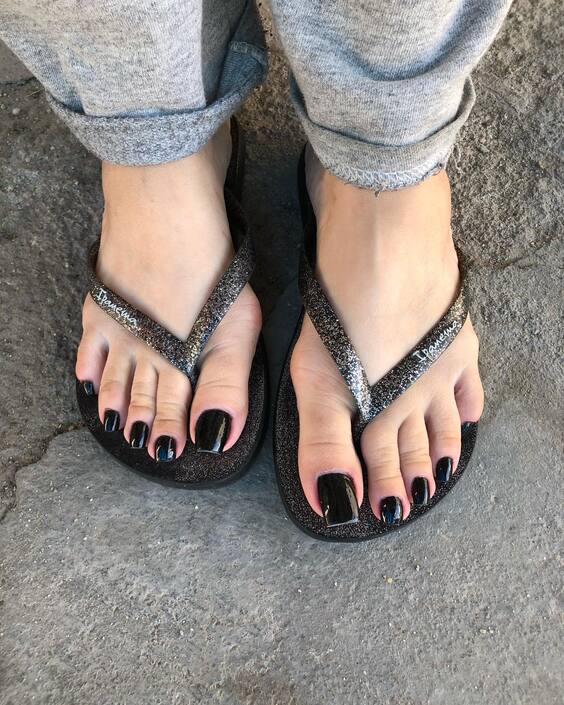
Sleek Midnight
Embrace the elegance of night with these deep, glossy black toe nails. The color is sophisticated and versatile, making it ideal for both daytime wear and evening outings. Its universal appeal ensures it pairs well with any shoe style, from casual flip-flops to more formal sandals.
Base coat: To prevent staining and ensure adherence.
Top coat: For a lasting glossy finish.
Cotton swabs and remover: For cleanup and precision.
DIY Steps:
Apply a base coat to prepare the nails. Paint two coats of glossy black polish for opaque coverage. Use cotton swabs dipped in remover to tidy any edges. Finish with a top coat to enhance the shine and extend the life of your manicure.
Vibrant Pink Sparkle
This toe nail design features a vivid pink polish with sparkling glitter on alternate toes, providing a vibrant and festive look. It’s perfect for summer parties or just adding a pop of color to your daily look.
Start with a base coat to protect your nails. Apply two coats of vivid pink polish to all toes. On alternate toes, dab pink glitter polish with a brush or sponge for a dense, sparkling effect. Finish with a top coat to ensure the glitter stays in place and adds extra shine.
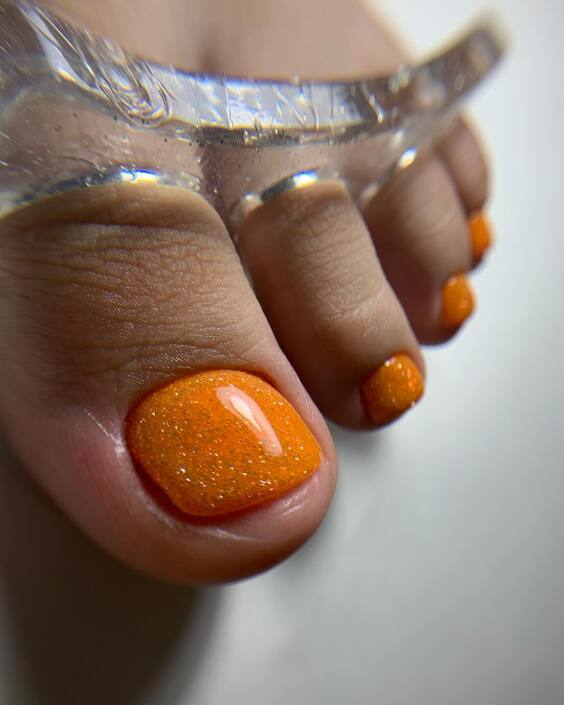
Citrus Sparkle
Capture the essence of summer with this dazzling orange glitter toe nail design. The vivid orange base layered with sparkling glitter evokes the freshness of citrus fruits, making it a perfect choice for lively beach days or refreshing summer evenings.
Vivid orange polish: For a bright and energetic base.
Orange glitter polish: To add a sparkling effect.
Top coat: To secure the glitter and enhance the overall shine.
Base coat: For lasting durability and protection.
Fine brush or sponge: For even glitter application.
DIY Steps:
Begin with a base coat to protect your nails from staining. Apply two coats of vivid orange polish as the foundation. While the second coat is still tacky, use a fine brush or sponge to apply orange glitter polish, focusing on the tips for a gradient effect. Seal everything with a top coat for a glossy, durable finish that will catch the light beautifully.
As we’ve explored various toe nail designs for July 2024, it’s clear that the possibilities are as diverse and vibrant as the summer itself. From the elegant simplicity of matte and French tips to playful designs like neon waves and kitty faces, there is a style to suit every mood and occasion. Whether you prefer the understated elegance of glossy black or the bright, festive appeal of glittery oranges, these designs offer a fantastic way to express your personal style and add a splash of color to your summer adventures.
Remember, the beauty of nail art lies in its versatility and the joy it brings not just to the wearer but also to those who admire it. So, embrace these creative designs, try them out at home, or get inspired to create your own unique styles. Don’t forget to share your favorite looks and maybe even inspire others to explore the fun world of toe nail art. Have a colorful, sparkling summer filled with style and creativity!
Tina Pratsyuk7 June 2024Last Updated: 16 August 2024
Tina Pratsyuk is a talented author, practicing colorist, and passionate enthusiast in the world of beauty, hairstyles, and style. Her journey toward creating a successful website began with a childhood love for experimenting with hair. Today, she combines her professional expertise as a colorist with her creative flair, sharing modern trends, styling tips, and hair care advice to inspire others to embrace their unique beauty.