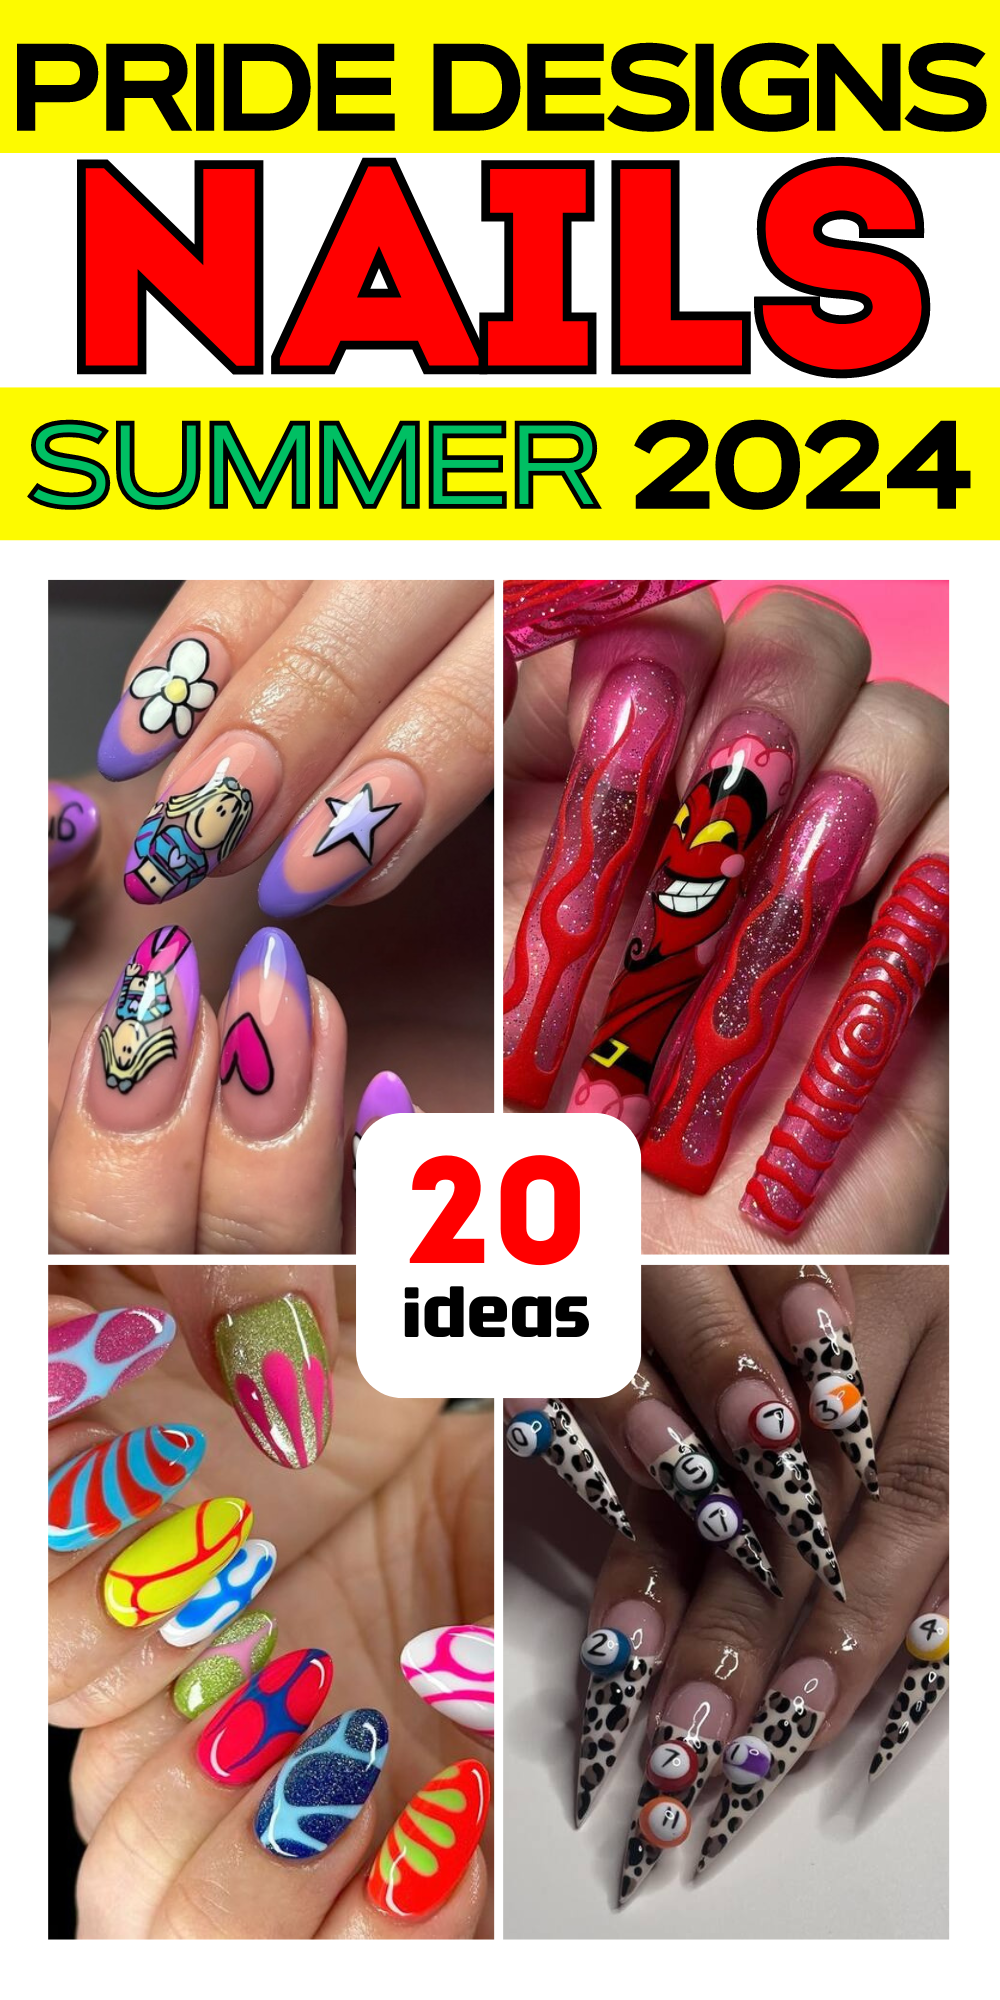
Are you ready to show off your pride with style? Whether you’re stepping out for a parade or just want to add a splash of color to your everyday look, pride nails are a fantastic way to express yourself. From subtle designs to bold statements, the versatility of pride-themed manicures is endless. But how do you choose the right style for you? Are there designs that work better on short nails or with acrylics? Stick around as we explore a rainbow of options, ensuring there’s something special for everyone.
Vibrant Rainbow Stripes and Abstract Art
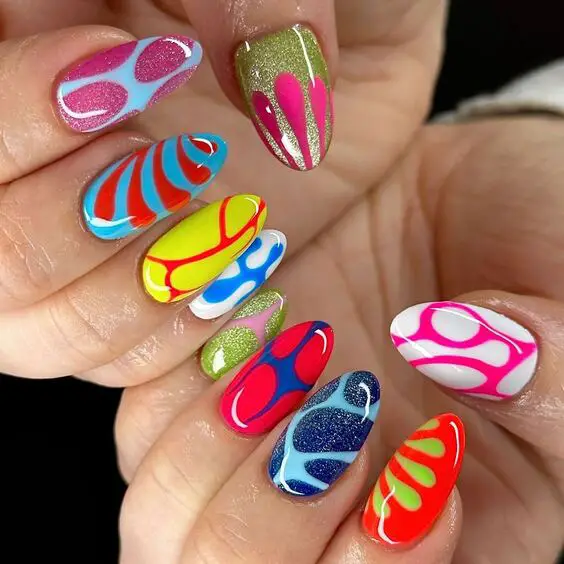
The first design features a dynamic array of pride nails designs with a focus on vibrant, clean rainbow stripes intersecting over a crisp white base, punctuated by abstract black squiggles. This manicure exemplifies a spirited celebration of diversity with its bold colors and artistic flair, making it a perfect choice for pride festivities. The incorporation of metallic gold accents adds a touch of elegance and luxury, enhancing the overall aesthetic.
Consumables List
- Base Coat: OPI Natural Nail Base Coat
- Polishes: Essie’s Rainbow Collection (each color)
- Black Liner Polish: Sally Hansen Nail Art Pen, Black
- Gold Accent Polish: Ciaté London Gilded
- Top Coat: Seche Vite Dry Fast Top Coat
DIY Instructions
- Start with a clean, dry nail and apply the base coat.
- Once dry, apply two coats of white polish as the background.
- Use a fine brush to add each color stripe, starting from the thumb and moving to the pinky with each stripe representing different colors of the rainbow.
- With the black nail art pen, draw abstract lines and curves across the stripes.
- Add small gold accents between the stripes for a shimmering effect.
- Seal everything with a top coat for durability and shine.
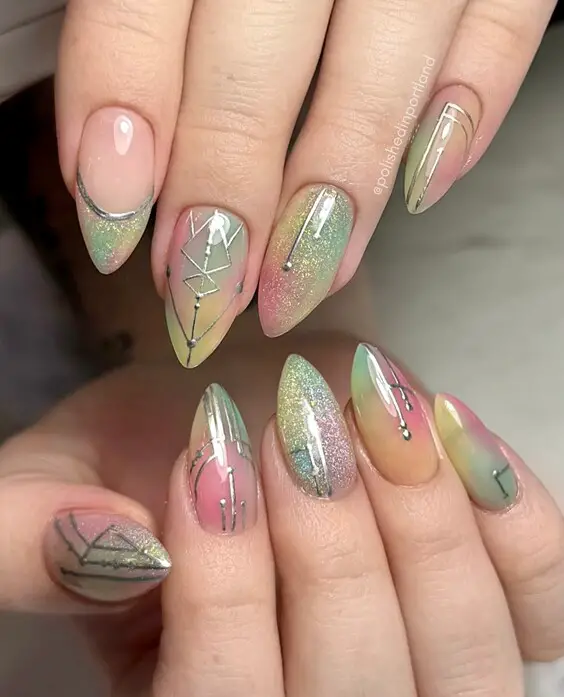
Holographic Charm and Geometric Precision
This design is a stunning example of pride nails designs acrylic long, featuring a holographic sheen that captures the essence of pride with a futuristic twist. The geometric lines, precise and sharp, create an illusion of depth and movement. The subtle transitions of pastel hues reflect a modern take on the traditional rainbow, ideal for those who appreciate a sophisticated approach to pride aesthetics.
Consumables List
- Base Coat: Deborah Lippmann Hard Rock
- Holographic Polish: ILNP Ultra Holographic in ‘Missed Calls’
- Detailing Polish: Zoya in ‘Dove’ (gray)
- Striping Tape
- Top Coat: Seche Vite Dry Fast Top Coat
DIY Instructions
- Apply the base coat to protect your natural nails.
- Apply two coats of the holographic polish as the base layer.
- Once dry, use striping tape to outline various geometric shapes across each nail.
- Fill in some shapes with the gray polish for contrast.
- Carefully remove the tape and let the polish dry.
- Finish with a top coat to enhance the holographic effect and prolong the design’s wear.
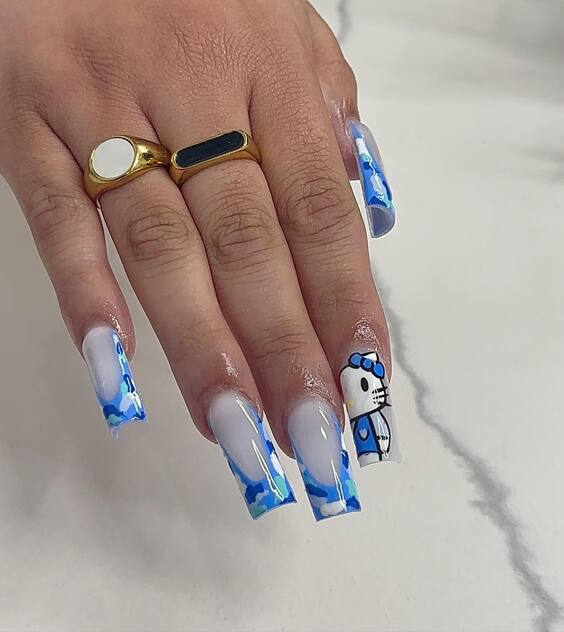
Subtle Yet Playful Blue Marble
For those seeking a pride nails designs simple short, this blue and white marble effect with playful cloud-like patterns offers a dreamy and understated nod to pride. The glossy finish gives a fresh and clean appearance, while the blue splashes mimic the freedom and fluidity of watercolors. This design is particularly suited for those who prefer a more low-key celebration of pride, maintaining elegance and simplicity.
Consumables List
- Base Coat: Sally Hansen Miracle Gel
- White Polish: China Glaze White on White
- Blue Marble Ink: Ranger Tim Holtz Alcohol Ink in ‘Stream’
- Blending Solution
- Top Coat: INM Out The Door
DIY Instructions
- Prepare your nails with a base coat.
- Apply a coat of white polish and let it fully dry.
- Drop blue ink onto the nail and use a blending solution to spread and create the marble effect.
- Use a fine brush to add more detailed wavy lines with blue ink if desired.
- Once satisfied with the design, apply a top coat for a glossy finish and protection.
Playful Pop Art: Bold and Bright
This nails design bursts with the playful spirit of pop art, featuring an array of bold colors and dynamic shapes that shout pride nails designs acrylic. Each nail is a canvas displaying unique patterns ranging from swirly red and orange motifs to cool blue droplets, set against a backdrop of bright pastel yellows, pinks, and blues. This eclectic mix not only captures the essence of pride but also represents individuality and freedom of expression.
Consumables List
- Base Coat: Essie Strong Start
- Polishes: Various colors from OPI Brights Collection
- Detailing Brushes: Fine tip art brushes
- Top Coat: OPI Top Coat for glossy finish
DIY Instructions
- Apply a base coat to protect your nails.
- Paint each nail a different pastel shade as the base color.
- Once dry, use detailing brushes to add the bold patterns on each nail using contrasting colors.
- Finish with a top coat to seal the design and add a vibrant gloss.
Delicate Disney Magic: Soft Pastels and Cartoon Fun
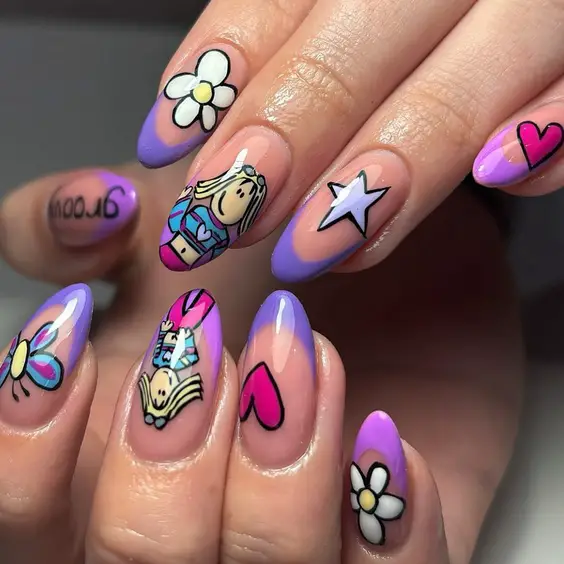
The second image takes a gentler approach with pride nails designs men featuring beloved Disney characters and motifs in soft lavender hues. Perfect for those who prefer subtle yet playful designs, this manicure combines cute illustrations like flowers, stars, and cartoon figures, making it ideal for Disney enthusiasts looking to celebrate pride with a touch of whimsy.
Consumables List
- Base Coat: CND Stickey Base Coat
- Pastel Polishes: Disney by OPI Collection
- Detailing Brushes: For intricate cartoon artwork
- Top Coat: Sally Hansen Miracle Gel Top Coat
DIY Instructions
- Begin with a base coat for nail protection.
- Apply a soft pastel shade as the base.
- Painstakingly add details of Disney characters and other motifs using a fine brush.
- Apply a top coat to protect the artwork and enhance durability.
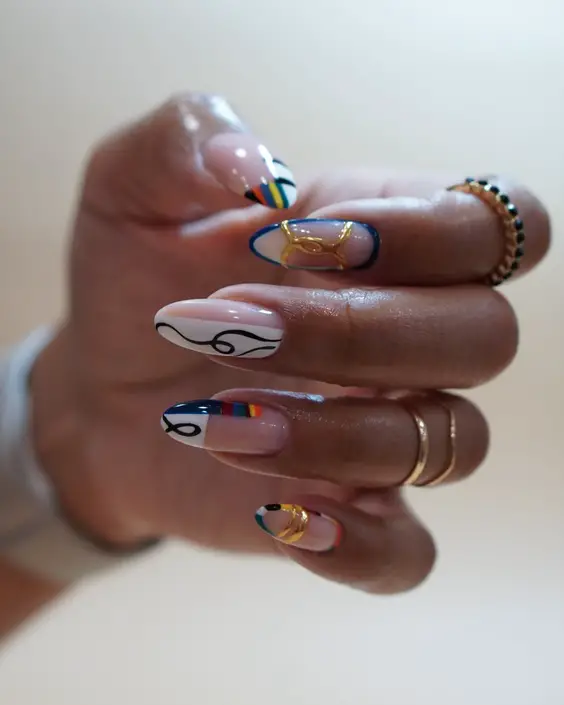
Abstract Minimalism: Subtle and Modern
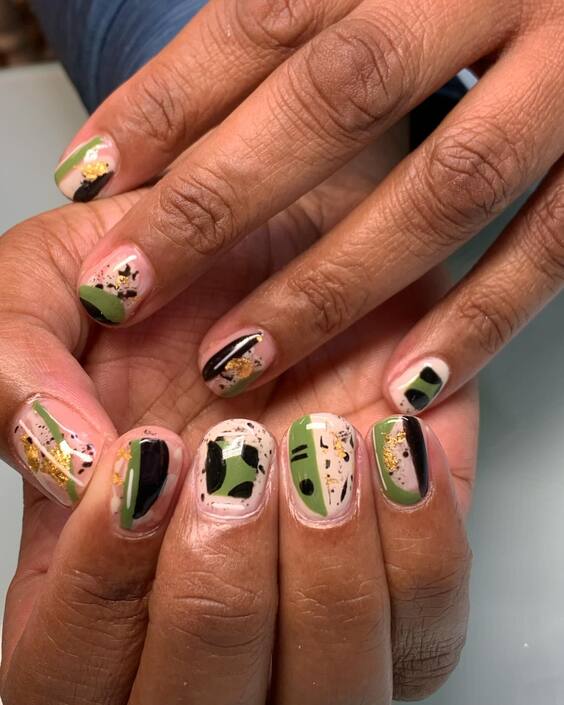
This design features pride nails designs simple short, perfect for those who adore minimalist aesthetics but still wish to make a statement. Utilizing a muted palette with black, white, and hints of green and gold, this manicure is sophisticated, making it suitable for both casual and formal occasions. The abstract patterns give a modern twist to the pride theme, appealing to those who favor understated elegance.
Consumables List
- Base Coat: Zoya Anchor Base Coat
- Polishes: Zoya in ‘Ivory’ and ‘Kelly’, and Essie’s ‘Good as Gold’
- Gold Flakes: For accent
- Detailing Brush: For precise abstract designs
- Top Coat: Zoya Armor Top Coat
DIY Instructions
- Start with a protective base coat.
- Apply the base colors in soft blocks on each nail.
- Use a detailing brush to create abstract designs with the black polish.
- Add a few gold flakes strategically for a touch of luxury.
- Seal the design with a top coat for a smooth, long-lasting finish.
Enchanted Pink: Cute and Quirky
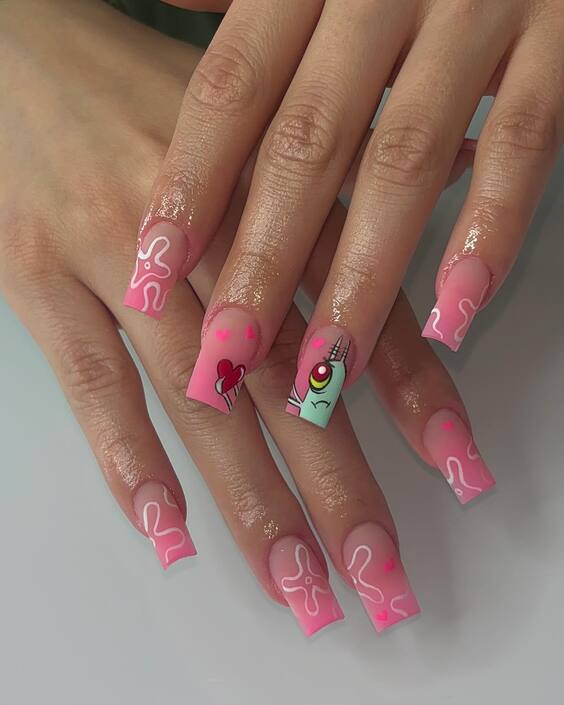
This charming design captures the whimsical side of pride nails designs simple short. Featuring a playful combination of pink bases with quirky character art and abstract patterns, it’s perfect for those who love to express their playful and youthful spirit. The use of a light pink shade as the base allows the white abstract designs and adorable character accents to really pop, making this manicure a delightful expression of pride.
Consumables List
- Base Coat: Butter London Nail Foundation
- Pink Polish: Essie ‘Muchi, Muchi’
- White Art Paint: OPI Nail Lacquer in ‘Alpine Snow’
- Detailing Tools: Fine-tip brushes for intricate designs
- Top Coat: ORLY Glosser Super High-Shine Top Coat
DIY Instructions
- Begin with a smooth base coat to protect your natural nails.
- Apply two coats of light pink polish for a soft, opaque base.
- Using a fine-tip brush, paint the quirky characters and abstract designs in white.
- Allow each layer to dry thoroughly to prevent smudging.
- Finish with a high-shine top coat to make the colors vibrant and long-lasting.
Cosmic Serenity: Abstract and Futuristic
For those who favor a bolder aesthetic, this design offers an abstract take on pride nails designs acrylic long. It utilizes a mesmerizing blend of teal and mint shades, accented with white and silver to create a futuristic, cosmic look. The fluid, organic shapes mimic celestial bodies and ethereal forms, ideal for making a standout pride statement.
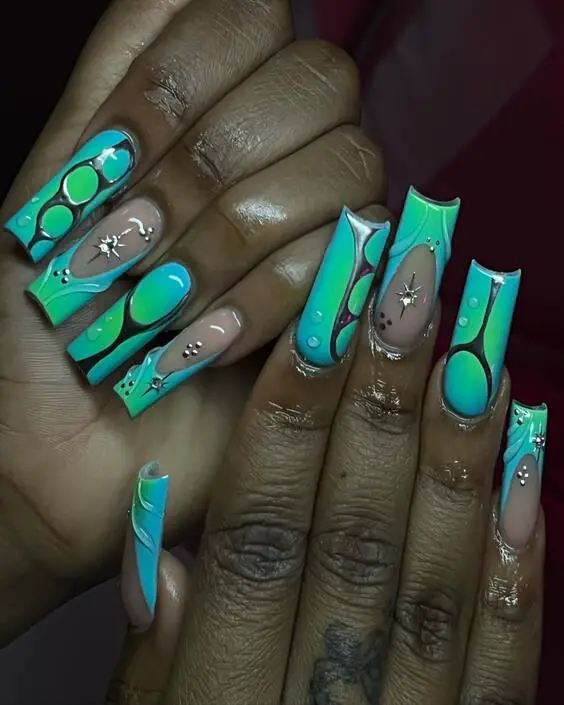
Consumables List
- Base Coat: CND Vinylux Long Wear Base Coat
- Teal and Mint Polishes: China Glaze ‘Too Yacht to Handle’ and ‘Refresh Mint’
- White Liner: NYX White Liquid Liner
- Silver Accents: Sally Hansen Color Foil in ‘Sterling Silver’
- Top Coat: Revlon Extra Life No Chip Top Coat
DIY Instructions
- Apply a durable base coat to prime the nails.
- Alternately paint teal and mint as base colors on different nails.
- Use a thin brush to draw abstract, organic shapes using white liner.
- Add silver accents strategically to enhance the cosmic effect.
- Seal the design with a no-chip top coat for extra longevity.
Artistic Expression: Creative and Boundless
This next set showcases an artistic blend of minimalism and complexity, making it a perfect example of pride nails designs black. The nails feature a nude base adorned with creative silver chain links and colorful charms. Each charm represents a different facet of pride, such as strength, diversity, and freedom, offering a unique way to wear one’s heart on their nails.
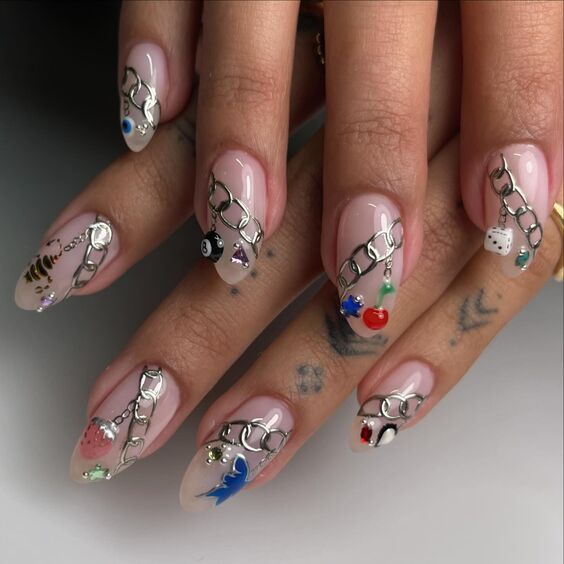
Consumables List
- Base Coat: OPI Natural Nail Base Coat
- Nude Polish: Essie ‘Bare With Me’
- Silver Chain Decals
- Colored Charms: Miniature enamel charms
- Detailing Glue: For securing charms
- Top Coat: INM Out the Door Top Coat
DIY Instructions
- Start with a base coat to protect and smooth the nail surface.
- Apply two coats of nude polish for a clean, subtle background.
- Carefully place silver chain decals along the nails in creative patterns.
- Attach colored charms with detailing glue at various points along the chains.
- Complete the manicure with a fast-drying top coat to ensure the decorations are secure and shine brightly.
Dramatic Flair: Sultry and Theatrical
This design, reminiscent of classic film noir aesthetics, is perfect for those looking for pride nails designs coffin with a dramatic twist. Featuring a striking mix of deep reds and blacks, the nails are adorned with bold, sensuous patterns and a captivating portrait of a femme fatale. This set is perfect for making a powerful statement at any pride event, merging art with personal expression.
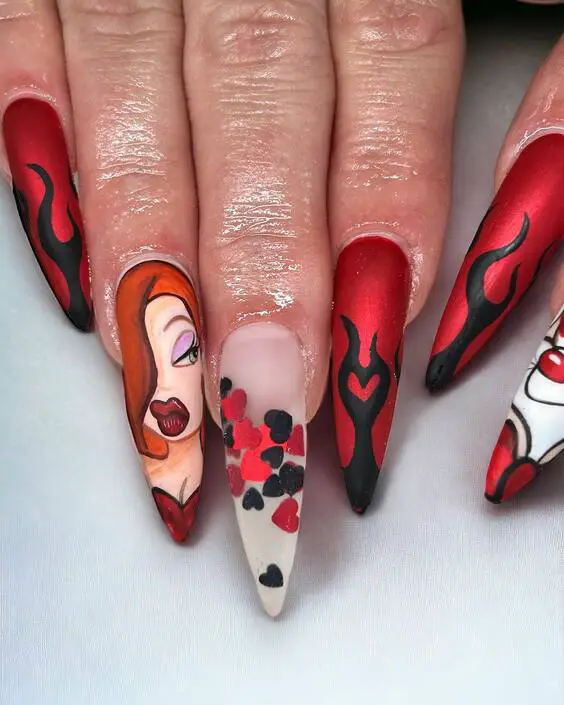
Consumables List
- Base Coat: OPI Natural Nail Base Coat
- Red Polish: Essie ‘Russian Roulette’
- Black Polish: Essie ‘Licorice’
- Detailing Brushes: Fine-tipped for portrait and patterns
- Top Coat: OPI Top Coat for a glossy finish
DIY Instructions
- Apply a base coat to prep your nails.
- Paint the background in deep red and allow it to dry.
- Use black polish to add the sultry patterns and details.
- Carefully paint the portrait with fine brushes for precision.
- Seal with a top coat to enhance the gloss and ensure durability.
Animated Enthusiasm: Vibrant and Energetic
Ideal for pride nails designs Disney, this lively design features an iconic character brought to life with bright pinks and intricate details. The background’s sparkling elements and flowing patterns create a joyous and vibrant atmosphere, perfect for celebrating pride with a touch of magic and nostalgia.
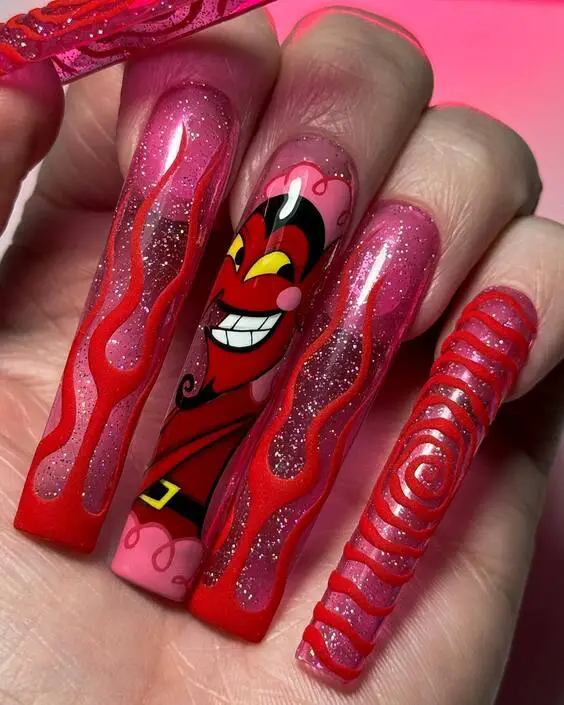
Consumables List
- Base Coat: Sally Hansen Double Duty
- Pink Sparkle Polish: Deborah Lippmann ‘Happy Birthday’
- Red and Yellow Polishes: For character details
- Fine Detailing Brushes
- Top Coat: INM Out The Door Super Fast Drying Top Coat
DIY Instructions
- Start with a base coat to protect your nails.
- Apply the pink sparkle polish as the base.
- Use detailing brushes to draw the character and enhance the features with red and yellow.
- Finish with a top coat to keep the sparkle intact and the details sharp.
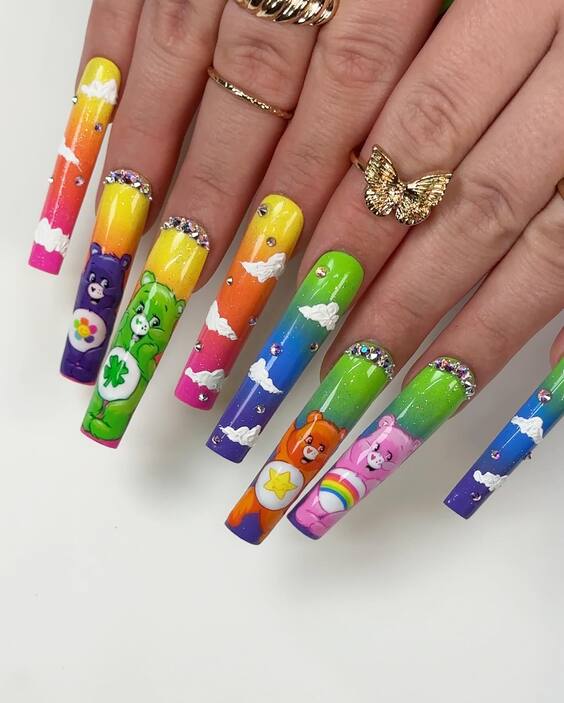
Care Bear Charm: Playful and Colorful
This set exemplifies pride nails designs acrylic long with a playful twist, featuring a delightful Care Bear theme. Each nail showcases a different bear and emblem, rendered in a spectrum of vibrant colors that echo the spirit of pride—perfect for those who cherish childhood memories and enjoy vibrant, narrative-driven nail art.
Consumables List
- Base Coat: China Glaze Strong Adhesion
- Colorful Polishes: Various shades for the bears and backgrounds
- Detailing Brushes: For precise character art
- Top Coat: Seche Vite Dry Fast Top Coat
DIY Instructions
- Protect your nails with a strong base coat.
- Paint each nail with a different base color suitable for the bear it will showcase.
- Carefully paint each Care Bear and its respective emblem using vibrant colors.
- Finish with a quick-dry top coat to protect your artwork and add shine.
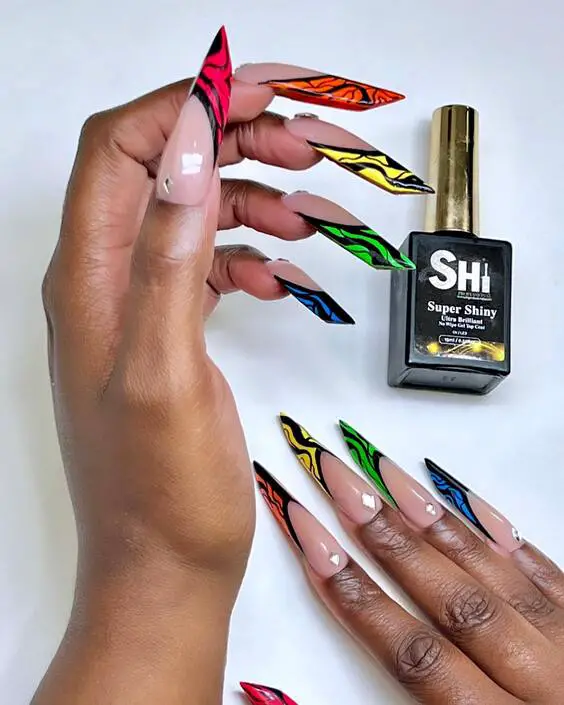
Electric Flame: Vivid and Striking
This design embodies the fiery spirit of pride nails designs acrylic long with its dramatic, flame-inspired artwork stretching over a nude base. The intense colors—vibrant red, yellow, and green on each flame—create a stunning visual contrast that is both eye-catching and symbolic of the passion and energy of pride celebrations.
Consumables List
- Base Coat: Deborah Lippmann Gel Lab Pro
- Nude Polish: OPI ‘Be There in a Prosecco’
- Colored Polishes: Red, Yellow, and Green from the OPI Brights Collection
- Detailing Brushes: For precision in flame designs
- Top Coat: Essie Gel Setter Top Coat
DIY Instructions
- Start with a base coat to ensure a smooth polish application.
- Apply a nude polish as the base color.
- Painstakingly paint the flames using red, yellow, and green polishes with a thin brush for detail.
- Allow each layer to dry thoroughly before applying the next color to avoid smudging.
- Finish with a glossy top coat to make the design pop and last longer.
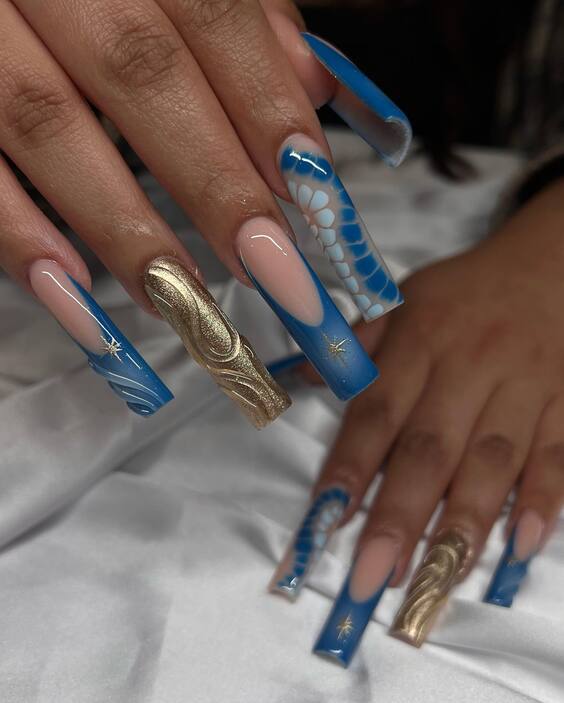
Celestial Blue: Mystical and Deep
Capturing the serenity of the night sky, this set features deep blue hues and golden accents in a celestial theme, ideal for those who love pride nails designs almond. The addition of intricate patterns and metallic gold embellishments gives a luxurious touch to the nails, reflecting a sky full of stars and the boundless possibilities of the universe.
Consumables List
- Base Coat: OPI Bond Aid
- Blue Polishes: Sally Hansen Xtreme Wear in ‘Blue Blitz’
- Gold Foil: For the embellishments
- Detailing Gel: For precision lines and patterns
- Top Coat: Chanel Le Gel Coat
DIY Instructions
- Apply a base coat to prep your nails for the long-lasting design.
- Paint the nails with a rich blue polish.
- Carefully apply gold foil on the tips and along the curves for a celestial effect.
- Use detailing gel to add fine lines and star-like patterns.
- Complete the look with a luxurious top coat for a smooth and shiny finish.
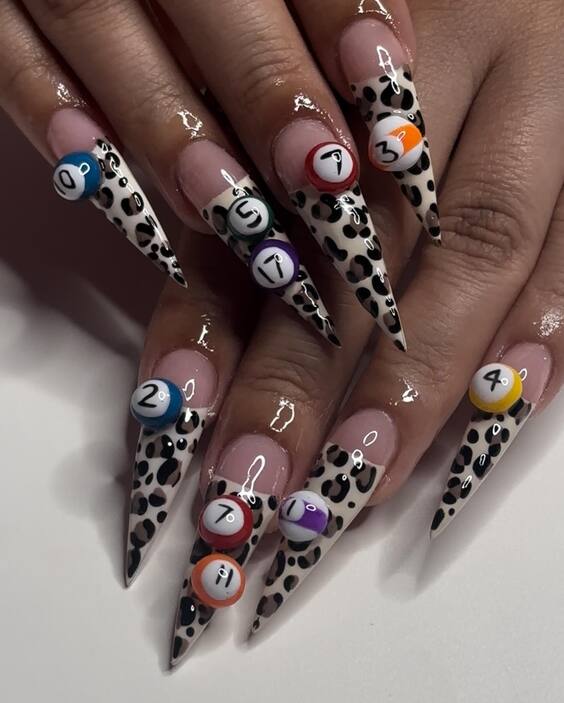
Playful Pool: Whimsical and Fun
This design takes a playful turn with a pool and billiard theme, perfect for those looking for pride nails designs simple short. Each nail depicts a different pool ball, set against a chic black and white spotted backdrop that adds a modern twist to the classic game. This manicure is not only fun but also a great conversation starter.
Consumables List
- Base Coat: Zoya Anchor Base Coat
- White Polish: Essie ‘Blanc’
- Black Polish: China Glaze ‘Liquid Leather’
- Colored Polishes: For the numbered pool balls
- Dotting Tools: For precise dot placement
- Top Coat: Butter London Hardwear Shine UV Topcoat
DIY Instructions
- Begin with a base coat to protect the nails.
- Apply white polish as the base on all nails.
- Paint black spots to create a dalmatian effect.
- On each nail, paint a different pool ball using colored polishes and add the respective number.
- Use dotting tools for accuracy in details.
- Finish with a durable top coat for a glossy effect and extended wear.
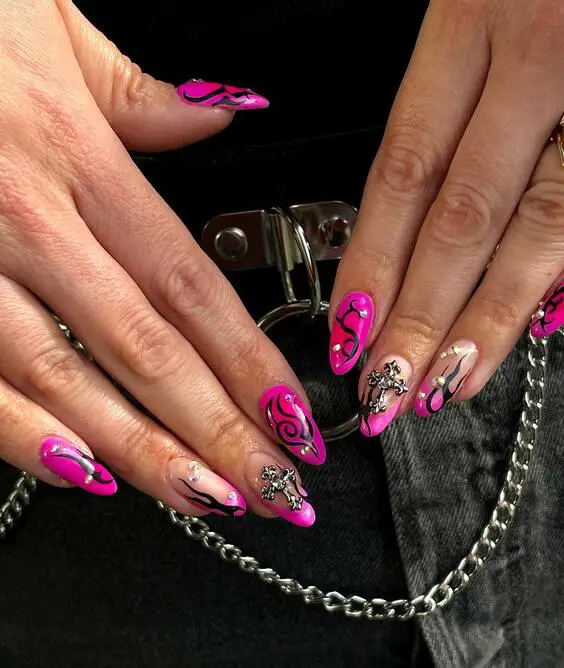
Magnetic Swirls: Bold and Beautiful
These nails showcase pride nails designs acrylic long with a mesmerizing swirl pattern in a vibrant pink hue, accented with elegant silver details and rhinestones. The design is both bold and sophisticated, perfect for those looking to make a statement at pride events or any special occasion.
Consumables List
- Base Coat: Essie Strong Start
- Pink Polish: OPI ‘Hotter Than You Pink’
- Silver Stripe Decals
- Rhinestones: Assorted sizes for embellishment
- Top Coat: Essie Gel Setter
DIY Instructions
- Apply a base coat to protect the nail.
- Paint the nails with a vivid pink polish as the base.
- Once dry, apply silver stripe decals in swirling patterns.
- Embellish with rhinestones at key points along the swirls for a luxurious look.
- Seal with a top coat for a long-lasting, glossy finish.
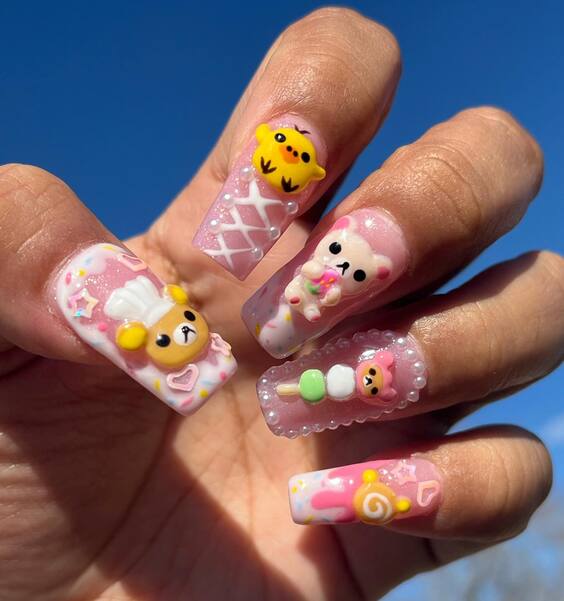
Sweet Confections: Cute and Playful
This design is an adorable example of pride nails designs simple short, perfect for those who love cute aesthetics. It features various confectionery themes with pastel colors and playful candy designs like marshmallows and ice cream. The nails are not only visually delightful but also creatively inspiring.
Consumables List
- Base Coat: OPI Natural Nail Base Coat
- Pastel Polishes: Various shades for a candy-colored look
- Decorative Decals: Candy-themed
- Top Coat: Sally Hansen Insta-Dri Anti-Chip Top Coat
DIY Instructions
- Start with a base coat to ensure smooth polish application.
- Apply different pastel colors as the base for each nail.
- Place candy-themed decals on the nails once the base is dry.
- Complete the design with a top coat for durability and extra gloss.
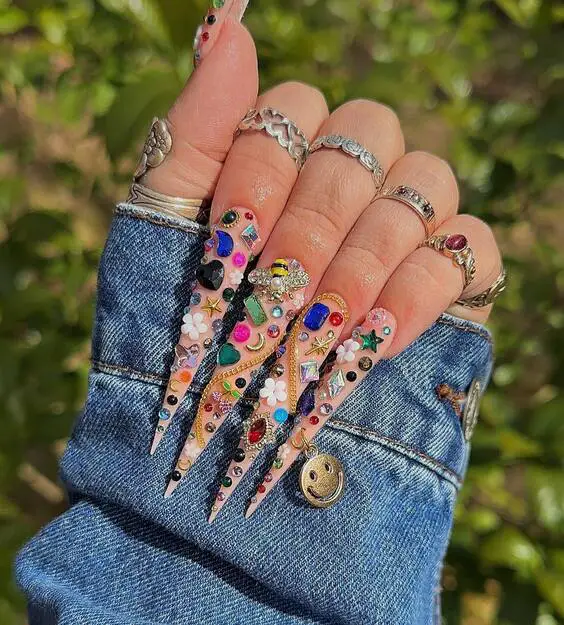
Eclectic Charm: Diverse and Daring
This design is a vibrant celebration of pride nails designs acrylic long, featuring an eclectic mix of colors, patterns, and embellishments that reflect the diversity and inclusivity of the pride community. Each nail is uniquely decorated with elements ranging from floral designs to geometric patterns, making it an eye-catching masterpiece.
Consumables List
- Base Coat: Deborah Lippmann Gel Lab Pro Base Coat
- Colorful Polishes: Wide range for different designs
- Embellishments: Beads, crystals, and charms
- Top Coat: Seche Vite Dry Fast Top Coat
DIY Instructions
- Apply a base coat to protect your nails.
- Paint each nail with a different design using various colorful polishes.
- Add beads, crystals, and charms to enhance each nail’s uniqueness.
- Seal everything with a fast-drying top coat for a stunning and durable finish.
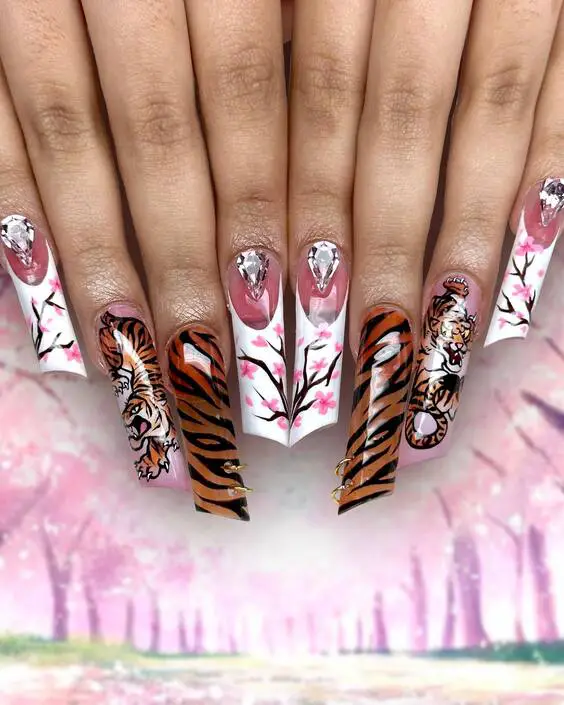
Fierce Jungle: Bold and Exotic
This manicure is a wild celebration of pride nails designs acrylic long, featuring vivid tiger prints paired with elegant floral accents. The combination of fierce animal motifs and delicate cherry blossoms strikes a balance between strength and beauty, perfect for making a bold statement of identity and pride.
Consumables List
- Base Coat: OPI Natural Nail Base Coat
- White Polish: OPI ‘Alpine Snow’
- Black and Orange Polishes: For tiger stripes
- Pink Polish: For cherry blossoms
- Rhinestones: Large crystals for a touch of glamour
- Top Coat: Essie Gel Setter
DIY Instructions
- Apply a base coat to protect your nails.
- Paint the base with white polish.
- Use black and orange polishes to create tiger stripes on alternate nails.
- On floral accent nails, paint delicate cherry blossoms in pink.
- Adorn with large rhinestones at the center of each flower for added elegance.
- Finish with a glossy top coat to seal and protect your design.
Artistic Fusion: Creative and Eclectic
This set demonstrates a creative fusion of pride nails designs acrylic long with various artistic elements including pen designs, translucent colors, and intricate golden embellishments. The blend of materials and textures, from smooth gel to decorative beads, showcases a masterful diversity in nail art—perfect for those who love to stand out with uniquely personalized designs.
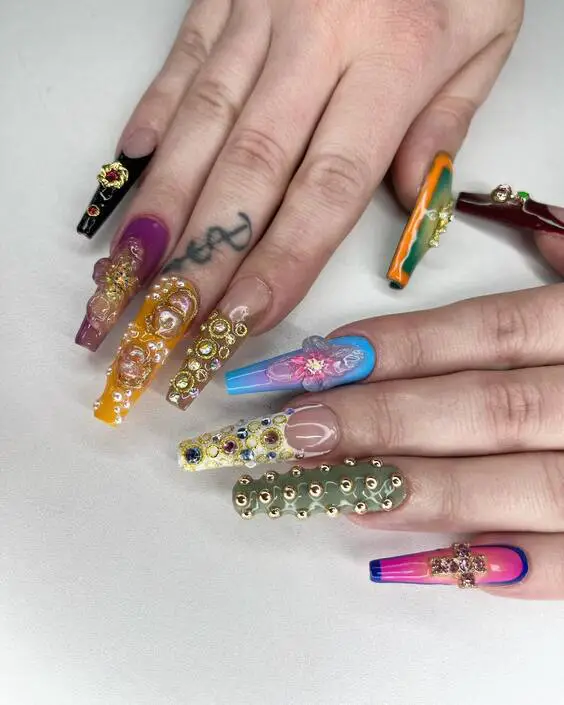
Consumables List
- Base Coat: Deborah Lippmann Gel Lab Pro
- Translucent Gels: Various colors for a see-through effect
- Pen for Designs: For intricate doodling
- Gold Beads and Embellishments
- Top Coat: OPI Rapidry Top Coat
DIY Instructions
- Start with a strong base coat to protect your nails.
- Apply translucent gels in various colors as the base layers.
- Use a pen to add detailed artistic designs on each nail.
- Embellish with gold beads and other decorative elements to enhance the texture and depth.
- Seal everything with a quick-drying top coat for a durable and shiny finish.