20 Ideas Summer Rainbow Nails: Trendy Neon & Pastel Manicures 2024
As the mercury rises and the days lengthen, isn’t it time your nails reflected the vibrant hues of the season? This summer, it’s all about letting your fingertips do the talking with a summer nails rainbow of options. Are you ready to dive into the spectrum of summer’s most enchanting manicure trends?
Rainbow French with a Twist
From my professional vantage point, there’s something timeless about a French manicure, but when infused with a summer nails rainbow french twist, it’s rejuvenated into a contemporary classic. The nails in this design radiate with thinly tipped rainbow hues against a sheer nude base—a playful yet elegant take on the traditional French tip.
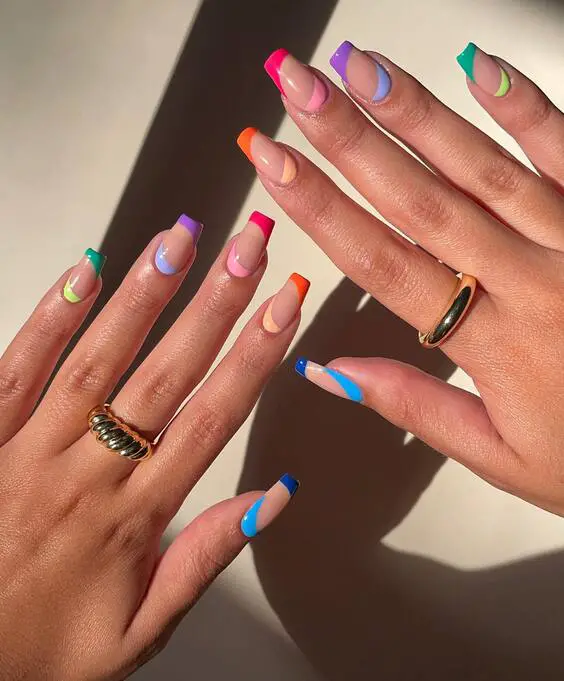
Consumables Needed:
- Sheer nude polish
- Rainbow-colored striping tapes
- Fine-tip brush
- Topcoat (Preferably with a gel finish for longevity)
In my experience, high-quality striping tapes ensure crisp lines, and a good topcoat locks in the design.
DIY Tips: Start with two coats of your favorite sheer nude polish. Once dry, apply the striping tapes at the tips and fill in the colors. A steady hand and a bit of patience go a long way here. Seal the deal with a topcoat for a lasting finish.
Playful Geometry
Gazing upon these nails, I’m reminded of the fun side of summer. The summer nails rainbow design here plays with abstract shapes and bold colors, each nail offering a unique expression. From sky blue to sunshine yellow, these nails are a tapestry of the season’s joy.
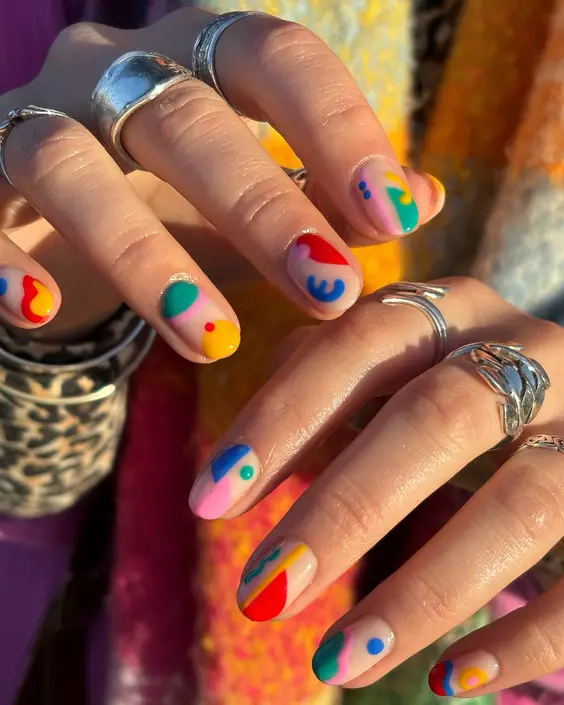
Consumables Needed:
- A selection of colorful polishes (blue, red, yellow, green)
- Dotting tools
- Small brushes for detail work
- Matte topcoat for a modern finish
Remember, a matte topcoat can transform the look, giving it a fresh, contemporary vibe.
DIY Tips: After a base coat, apply your pastel base colors. Use the dotting tools and brushes to create playful shapes and dots. Don’t aim for perfection—embrace the whimsy. A matte topcoat will give your artistry a fashion-forward look.
Neon Glow at the Tips
Neon has a way of shouting summer from the rooftops—or in this case, fingertips. The summer nails rainbow neon tips here are a striking statement, glowing against the muted backdrop like the neon lights of a dusk-till-dawn beach party.
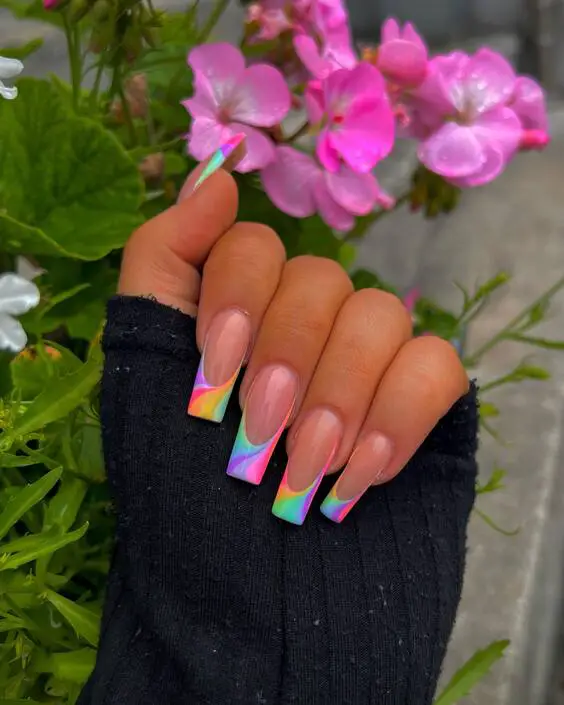
Consumables Needed:
- Neon nail polishes (pink, green, blue, yellow)
- Soft gradient sponges
- High-gloss topcoat
Neons are notoriously tricky, so opt for brands known for their pigmentation.
DIY Tips: Apply a pale or clear base coat. Then, with a sponge, dab on the neon polishes in a gradient style at the tips. Two coats may be necessary for that vibrant payoff. Finish with a glossy topcoat for extra shine and protection.
Pastel Sunrise Blend
The soft gradient of a pastel sunrise is effortlessly captured in this summer nails rainbow pastel design. Each nail is a canvas of smooth transitions, from the warm glow of yellow to the serene touch of lilac. It’s a quiet nod to the pastel dawn of early summer mornings.
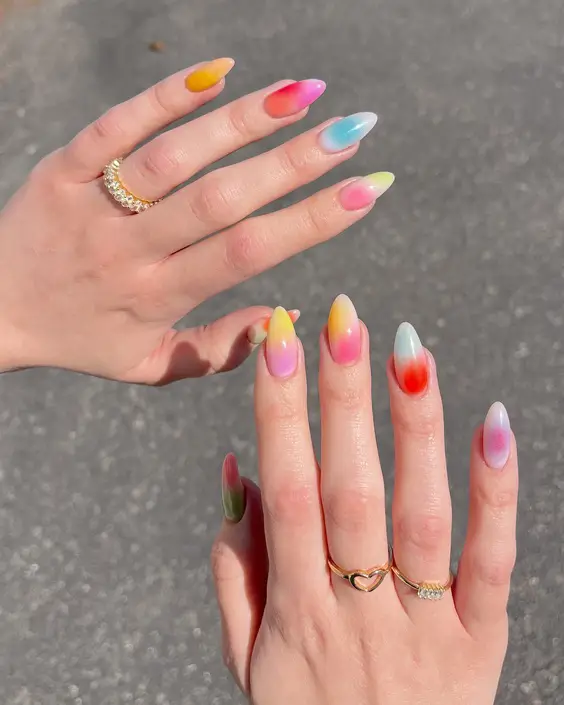
Consumables Needed:
- Pastel shades of yellow, pink, blue, and purple polish
- A fine-grade sponge for gradient application
- High-gloss topcoat for a seamless finish
Quality pastel polishes are essential for that creamy, opaque look.
DIY Tips: Apply a light base coat. With your sponge, blend each pastel shade into the next, working while the polish is still wet. Take your time to achieve the gradient effect. Finish with a high-gloss topcoat to enhance the smooth transition of colors.
Rainbow Bands and Cloudy Accents
Whimsy meets sophistication with this summer nails rainbow design featuring playful rainbow bands and soft, cloudy accents. The subtle nail art over the clear base gives an almost ethereal, sky-like quality to the nails, creating a look that’s both cute and dreamy.
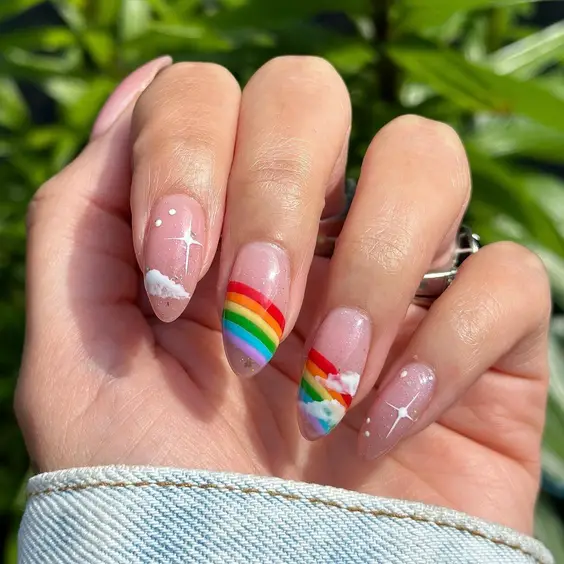
Consumables Needed:
- Clear base coat
- White polish for clouds
- Rainbow striping polish
- A detail brush for intricate designs
- A glossy topcoat to protect and shine
For designs like this, precision is key, so choose a detail brush that allows for fine work.
DIY Tips: After a clear base, use the detail brush to paint white, fluffy clouds. Add rainbow stripes for a pop of color. The secret to cloud designs is a light hand and layers. Seal your artwork with a glossy topcoat.
Playful Pastel Tips and Stars
These summer nails rainbow short nails with their candy-like pastel tips and whimsical star patterns are a cheerful celebration of summer’s playful spirit. They speak to the fun-filled days of sunshine, perfect for a summer festival or a day out with friends.
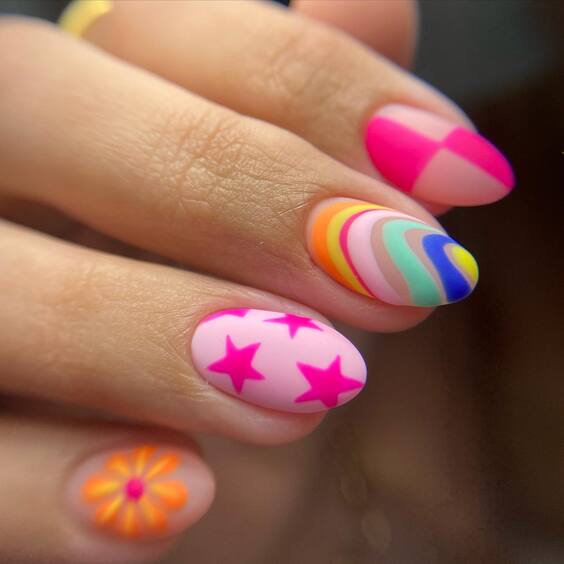
Consumables Needed:
- Pastel polishes in pink, blue, and orange
- Star decals or stencils
- A detail brush for sharp lines
- A long-lasting topcoat to ensure durability
Investing in quality decals can make or break this fun look.
DIY Tips: Apply a pale pink base. Place the star decals on the nails or use a stencil and detail brush to draw them on. Paint the tips with alternating pastel colors for a playful edge. A robust topcoat will keep the stars shining bright throughout your summer escapades.
Subtle Rainbow Dots on Sheer Nails
There’s a certain magic to the simplicity of sheer nails adorned with a trail of rainbow dots. This look encapsulates summer nails rainbow short nails in a demure, yet playful manner. As a manicurist, I find this design to be a breath of fresh air, a perfect choice for those who appreciate a hint of color without overwhelming their style.
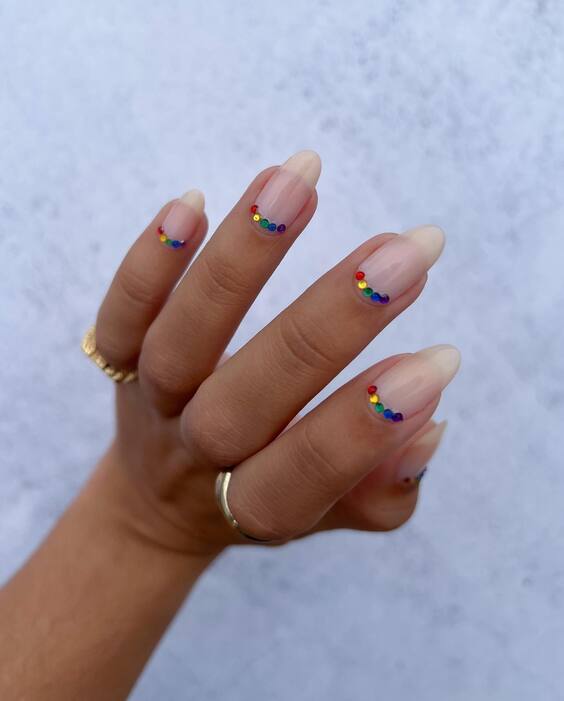
Consumables Needed:
- Sheer nude polish
- Rainbow-colored nail dotting pens
- A clear topcoat for a glass-like finish
It’s best to choose dotting pens that offer a variety of sizes for perfect dots.
DIY Tips: After applying a sheer base, dot your rainbow colors in a curved line from the base to the tip. The beauty lies in the subtlety, so keep the dots small and delicate. Finish with a clear topcoat to encase the colors in a glossy sheen.
Rainbow Waves and Floral Fantasy
When you combine the undulating grace of rainbow waves with the charming detail of tiny flowers, you get a summer nails rainbow design that’s as eye-catching as it is enchanting. The pastel rainbow hues flow seamlessly into one another, while the floral accents add a touch of whimsy.
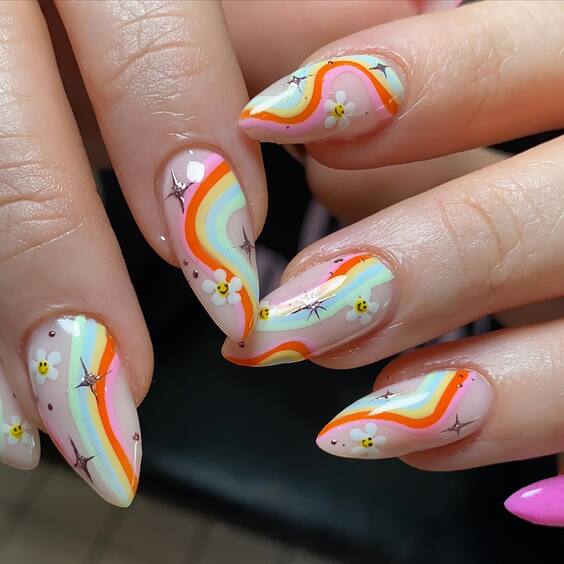
Consumables Needed:
- Pastel rainbow polishes
- White polish for flowers
- A detail brush for precision painting
- A topcoat to ensure your design lasts
Selecting a thin detail brush is crucial for the intricate flower detailing.
DIY Tips: Paint your nails with a clear base coat. Using the detail brush, paint pastel rainbow waves across each nail. With white polish, add little flowers, dabbing a dot in the center for dimension. A glossy topcoat will bring out the details and protect your floral artwork.
Neon Elegance with a Pastel Twist
This nail design merges the boldness of neon with the softness of pastels in a unique summer nails rainbow ombre effect. It’s a celebration of contrast, perfect for the fashion-forward individual looking to make a statement with their summer manicure.
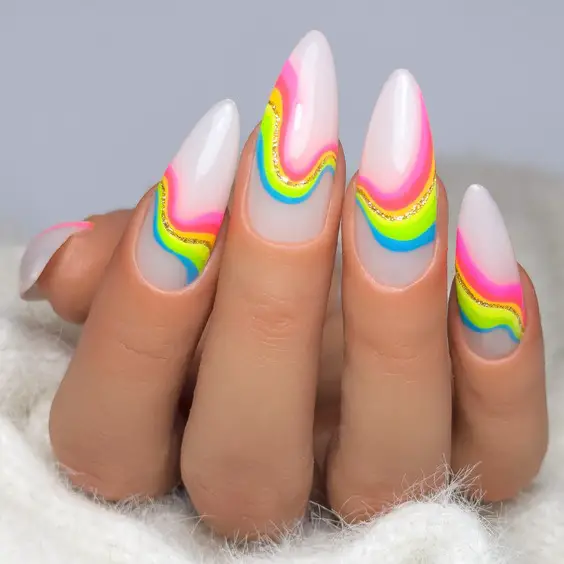
Consumables Needed:
- Neon and pastel polishes for the gradient
- A fine-grade sponge for the ombre effect
- A protective base and topcoat for longevity
For gradients, polishes with a good consistency that don’t dry too quickly are essential.
DIY Tips: Begin with a protective base coat. Then, sponge on your neon and pastel polishes to create the ombre effect, blending as you go for a smooth transition. A topcoat will add a protective, glossy finish to your neon elegance.
Psychedelic Splashes
Behold the summer nails rainbow neon, where each nail becomes a splash of psychedelic hues, reminiscent of a tie-dye shirt on a hot summer day. It’s a bold statement that screams fun and freedom, a true celebration of the season’s exuberance.
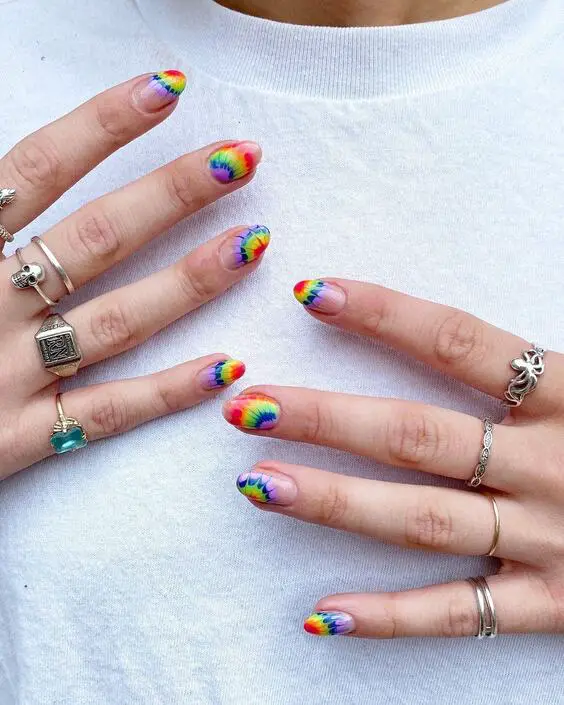
Consumables Needed:
- Neon nail paints in a variety of colors
- A thin brush or toothpick for swirling patterns
- A glossy topcoat for a vibrant finish
Neon colors should be of a formula that blends well without becoming muddy.
DIY Tips: Lay down a white base to make the neon colors pop. Then, while the base is still tacky, add drops of different neons and use the brush to create swirls. Be quick but gentle to avoid over-mixing. Seal with a topcoat for a dazzling, glossy look.
Gradient Gems
This design epitomizes summer nails rainbow pastel tips with a sprinkle of jewel-like embellishments. The gradient shifts from a peachy summer sunset into a cool lavender dusk, crowned by a constellation of sparkling stones.
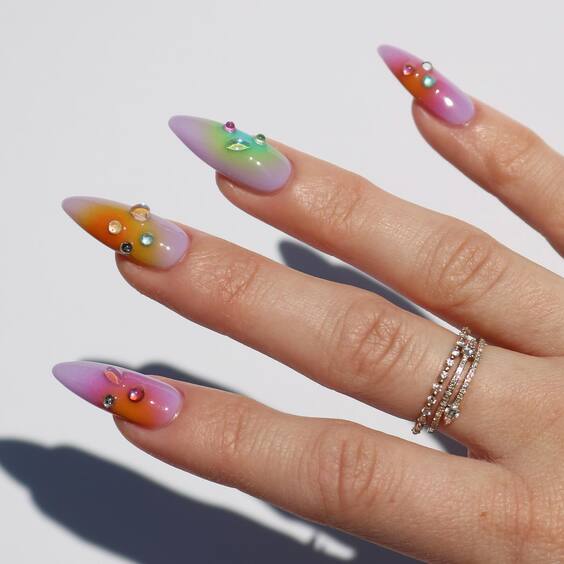
Consumables Needed:
- Pastel polishes for the gradient
- Rhinestones in various sizes
- Nail glue to secure the gems
- A glossy topcoat for added shine and protection
Investing in a precise application tool for the rhinestones will make your job easier.
DIY Tips: Paint your nails with a gradient, using a sponge to blend the pastels. Once dry, strategically place rhinestones near the cuticle or tips with a dot of nail glue. Apply a topcoat not only to seal in the gradient but also to add an extra layer of security for the gems.
Candy Stripe Charm
The summer nails rainbow design featured here is like a candy cane in the summer, with sweet stripes curving over a transparent base. This look is trending and charming, perfect for adding a playful touch to any summer outfit.
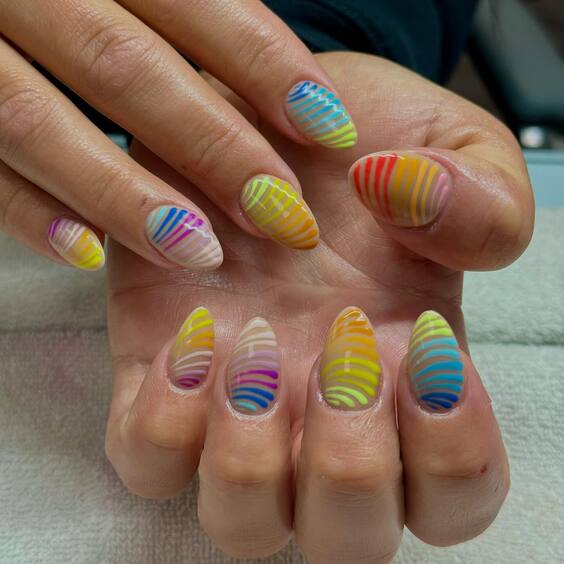
Consumables Needed:
- Striping tape or stencils for precise lines
- A selection of colorful nail paints
- A clear base and topcoat for a sheer background and glossy finish
For crisp lines, the striping tape or stencils are a must.
DIY Tips: Begin with a clear base coat. Use striping tape to outline where your stripes will go. Fill in with your chosen colors and carefully remove the tape while the polish is still wet. Finish with a clear topcoat to enhance the clarity of the design.
Vibrant Ombre Fusion
Imagine the sun’s rays dispersing through a prism, and you have the inspiration for this summer nails rainbow ombre. It’s a full spectrum that goes from an intense pinky-magenta to a vibrant grassy green, each nail a different color melting seamlessly into the next.
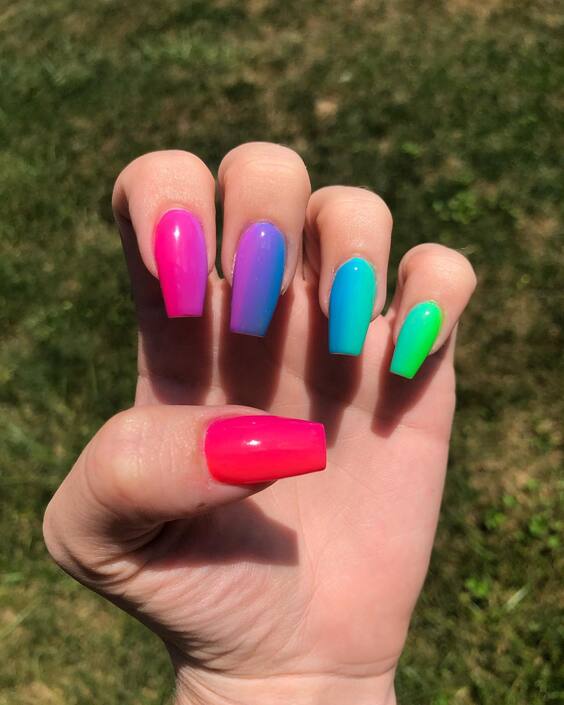
Consumables Needed:
- Bright ombre spectrum nail polishes
- Sponge for blending the gradient
- Liquid latex or tape for clean edges
- Glossy topcoat for a seamless finish
Ombre designs require polishes that blend well, so opt for brands known for their smooth formulation.
DIY Tips: Apply liquid latex around your nails for easy cleanup. Sponge on the colors, overlapping slightly for a perfect gradient. Once dry, peel off the latex and apply a glossy topcoat for a smooth, high-shine finish.
Soft Waves of Color
Soft waves of color make this summer nails rainbow design a subtler choice for those who prefer a touch of elegance with their whimsy. The gentle curves of pastel hues create a serene flow, reminiscent of a watercolor painting in motion.
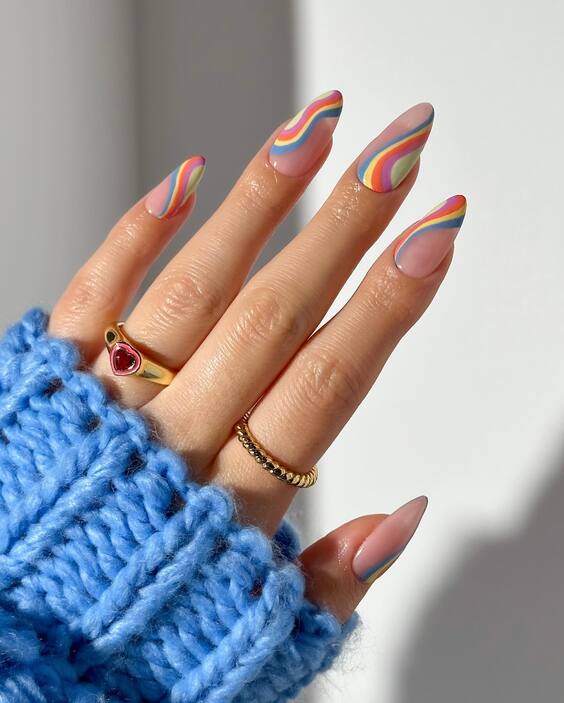
Consumables Needed:
- Pastel polishes for the wave design
- Striping tape to guide the waves
- A fine brush for detail work
- A fast-drying topcoat to preserve the design
When working with soft pastels, ensure your colors are opaque enough to stand out on the nail.
DIY Tips: Lay down a nude base. Use striping tape to mark the wave patterns, then paint each wave with a different pastel shade. A fine brush will help clean up any edges. Seal with a topcoat to protect your watercolor waves.
Abstract Neon Splashes
Abstract art meets neon lights in this bold summer nails rainbow neon design. Each nail is an individual masterpiece, featuring splashes of neon that look like they’ve been flicked on with the artist’s brush in a moment of creative fervor.
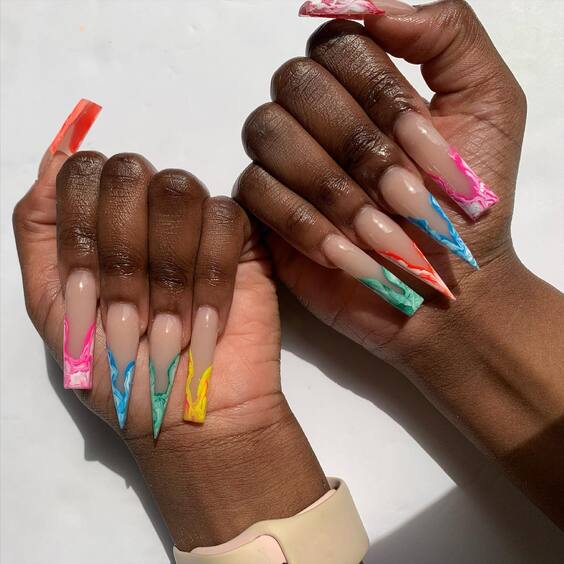
Consumables Needed:
- Neon nail paints in various shades
- A thin brush or toothpick to flick the polish
- A clear base coat to let the colors stand out
- A durable topcoat for a lasting finish
The brighter the neon, the more your nails will stand out, so don’t shy away from vivid hues.
DIY Tips: Start with a clear base. Dip your brush into the neon polish and flick it onto your nails to create abstract patterns. Let your creativity run wild. Once dry, apply a topcoat to seal in the design and add gloss.
Arching Over Clouds
Witness the playful charm of a summer nails rainbow french design, where each nail portrays an arc of color ascending over translucent clouds. It’s a fantastical twist on the classic French tip, turning nails into tiny skies after a summer rain.
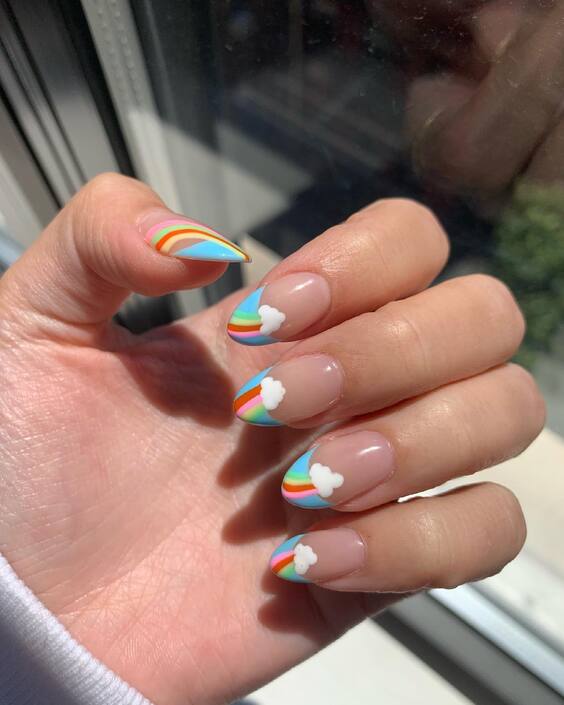
Consumables Needed:
- Translucent pink polish for the base
- Rainbow nail paints for the arcs
- White polish for cloud details
- A detail brush and dotting tool for precision
- A glossy topcoat to capture the shine of the sky
The translucent base should be of high quality to achieve that glassy, cloud-like effect.
DIY Tips: Begin with a translucent pink base. Use the detail brush to paint the rainbow arcs, then add fluffy clouds with white polish and a dotting tool. Finish with a glossy topcoat to give your personal sky its luster.
Eccentric Pop Art
For those who dare to stand out, this summer nails rainbow design screams pop art and personality. Black bases make the colors pop, while whimsical patterns and characters bring each nail to life, embodying the joy and quirkiness of summer fun.
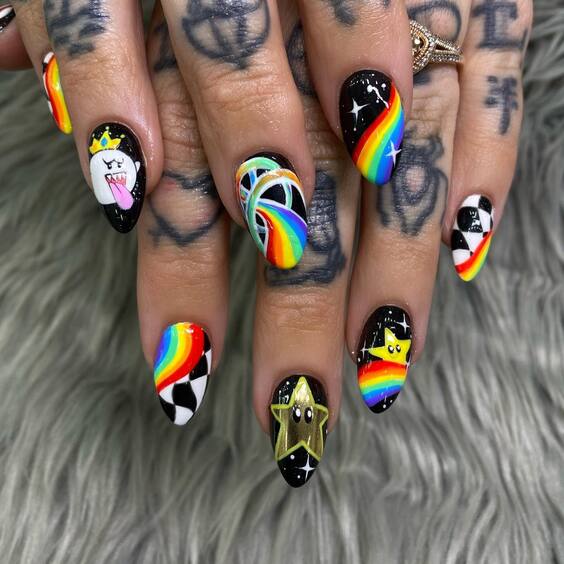
Consumables Needed:
- Black nail polish for the base
- Bright, opaque colors for the designs
- Thin brushes for intricate details
- A strong topcoat to protect the art
Using polishes that offer good opacity over black is crucial for this vibrant look.
DIY Tips: Paint a solid black base. With thin brushes, bring your mini artworks to life, whether it’s with bold stripes, rainbow swirls, or playful characters. Each nail is your canvas. Finish with a robust topcoat to shield your mini masterpieces.
Neon Spectrum Stilettos
The fierce stiletto shape combined with a summer nails rainbow neon gradient embodies the wild and free spirit of summer. Each nail transitions through the neon spectrum, creating a bold statement that’s impossible to ignore.
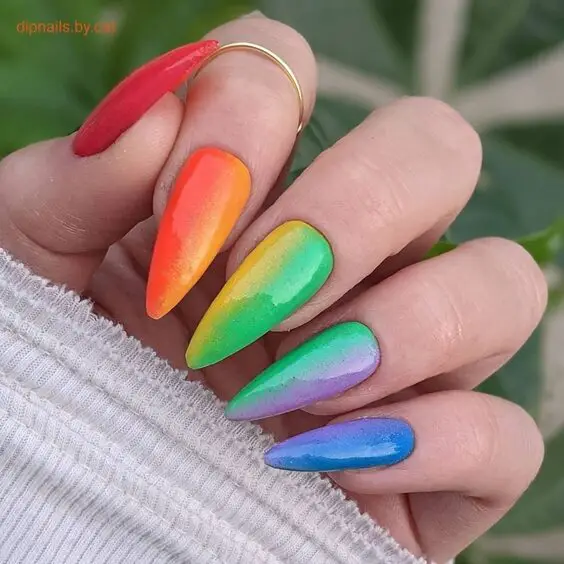
Consumables Needed:
- Neon polishes for the gradient
- A sponge for blending
- Latex barriers or tape for clean edges
- A glossy topcoat for a striking finish
Choose neons that are highly pigmented for a truly electric look.
DIY Tips: Apply a latex barrier for easier cleanup. Use a sponge to dab and blend neon polishes across the nail, creating a seamless gradient. Remove barriers and apply a glossy topcoat for a striking, reflective finish that will stand out under the summer sun.
Dreamy Pastel Brushstrokes
The nails featured here are like a soft whisper of color, as if touched by the pastel sunrise itself. This summer nails rainbow pastel design is a symphony of gentle hues brushed lightly across each nail, creating a dreamlike effect perfect for those serene summer days.
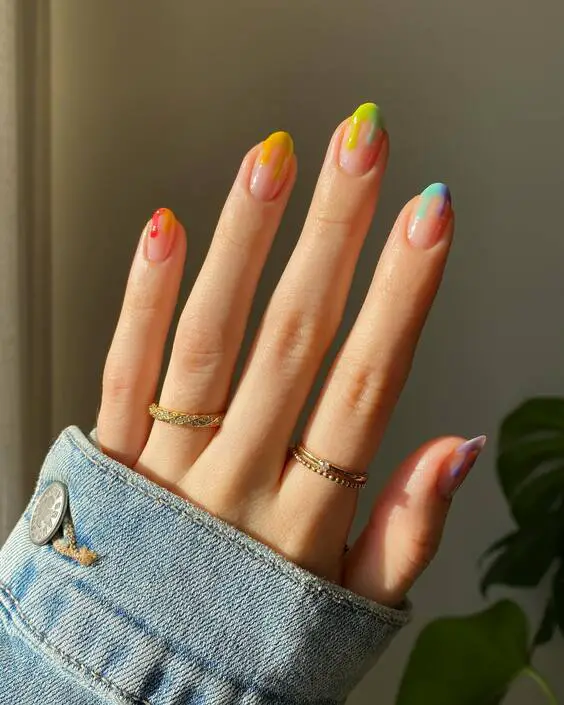
Consumables Needed:
- A palette of pastel polishes for the soft brushstrokes
- A fine-tipped brush for delicate application
- A high-quality base coat to protect the nail
- A glossy topcoat to capture the essence of the pastel colors
For brushstroke designs, the lighter the touch, the more ethereal the look.
DIY Tips: Start with a solid base coat to protect your nails. Dip the fine-tipped brush into the pastel polishes and sweep across the nails with a light hand for that feathered, brushstroke effect. Finish with a glossy topcoat for a seamless and polished look.
Marble Swirls of Summer
Marble swirls pair with neon bursts in this summer nails rainbow design, creating a lively dance of color that’s as playful as it is artistic. The swirling patterns are reminiscent of summer’s ever-changing skies, a beautiful backdrop for any summer adventure.
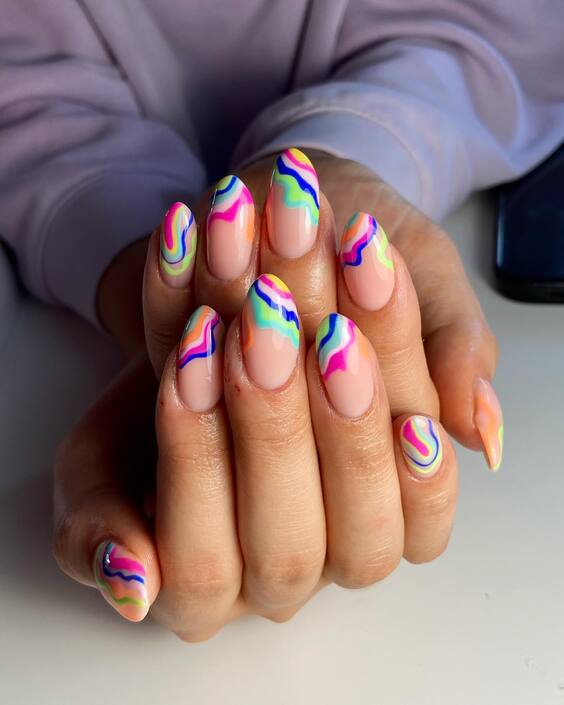
Consumables Needed:
- A variety of neon polishes for the marble effect
- A small bowl of water for the marble technique
- Toothpicks or fine brushes to create swirls
- A base and topcoat for a lasting manicure
Marbling requires polishes that can spread easily in water for that distinct pattern.
DIY Tips: Apply a base coat to your nails. Drop polishes into a bowl of water, creating concentric circles, then use a toothpick to draw marble patterns. Dip your nails into the design, clean up the edges, and seal with a topcoat for a brilliant, summer-ready look.
Frequently Asked Questions
Q: Can I achieve these summer nails rainbow designs without professional tools? A: Absolutely! While professional tools can make the process easier, you can get creative with household items like bobby pins for dots and tape for straight lines.
Q: How can I ensure my neon polish stays vibrant all summer? A: The key to keeping neon vibrant is a good base coat, adequate layers of color, and a UV-protected topcoat to prevent fading from the sun.

