20 Stunning White Toenail Designs: From Elegant Florals to Bold Neons
Are you looking for fresh ways to style your toe nails this season? Whether you prefer a minimalistic look or love a bit of sparkle, white toe nails offer a versatile canvas for all kinds of designs. From classic French tips to adventurous designs adorned with rhinestones, this article explores a variety of white toe nail styles to inspire your next pedicure. Get ready to discover how these timeless designs can be both a statement of elegance and a reflection of your personal style.
Classic Elegance
The first design features a pristine white gel finish that exudes a clean and sophisticated vibe. The subtle addition of glitter on the big toe adds a touch of glamour without overpowering the simplicity of the design. This style is perfect for those who appreciate elegance with a hint of festivity.
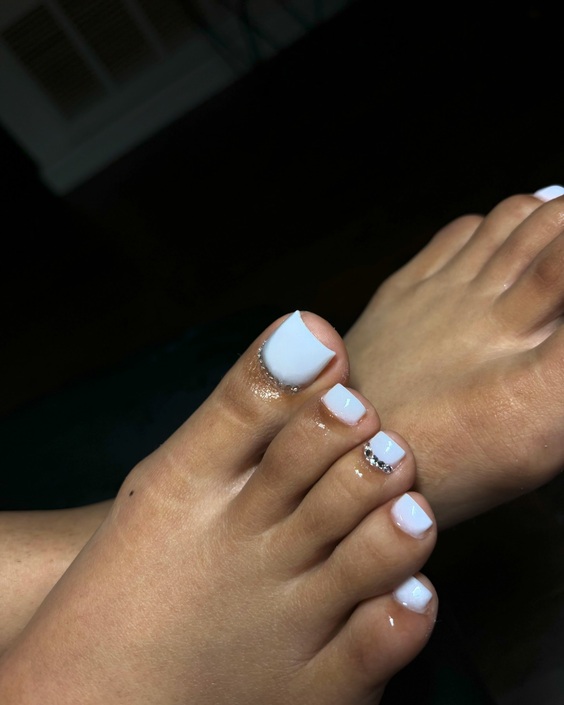
Consumables:
- White Gel Polish: OPI Alpine Snow
- Glitter Polish: Essie Set in Stones
- Top Coat: Seche Vite Dry Fast Top Coat
DIY Instructions: Start by applying a base coat to protect your nails. Follow with two coats of OPI Alpine Snow for a solid white base. For the big toe, apply a thin layer of Essie Set in Stones over the white polish. Finish with a top coat for a glossy and durable finish.
Modern Sparkle
This look takes the white toe nail to the next level by incorporating rhinestones along the cuticle line of the big toe, creating a luxurious and eye-catching effect. The acrylic base offers a durable backdrop for the embellishments, making it a great option for special occasions.
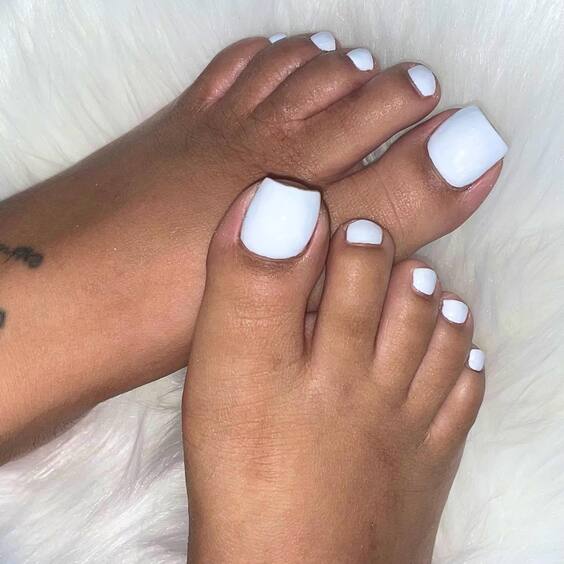
Consumables:
- White Acrylic Powder: Mia Secret White
- Rhinestones: Swarovski Clear Flatback
- Acrylic Liquid: Mia Secret Monomer
- Top Coat: Seche Vite Dry Fast Top Coat
DIY Instructions: Prepare your nails with a primer and apply a base layer of acrylic mixture. Shape the nails as desired and cure. Apply white acrylic powder and form the nail. While the acrylic is still tacky, carefully place the rhinestones along the cuticle line of the big toe using a dotting tool or tweezers. Finish with a top coat to seal in the design.
Beach-Ready French Tips
The timeless French tip is reinvented here with a sharper contrast and a slightly thicker tip than the traditional style. This design is not only chic but also perfect for both casual beach days and formal events, making it a versatile choice for any occasion.
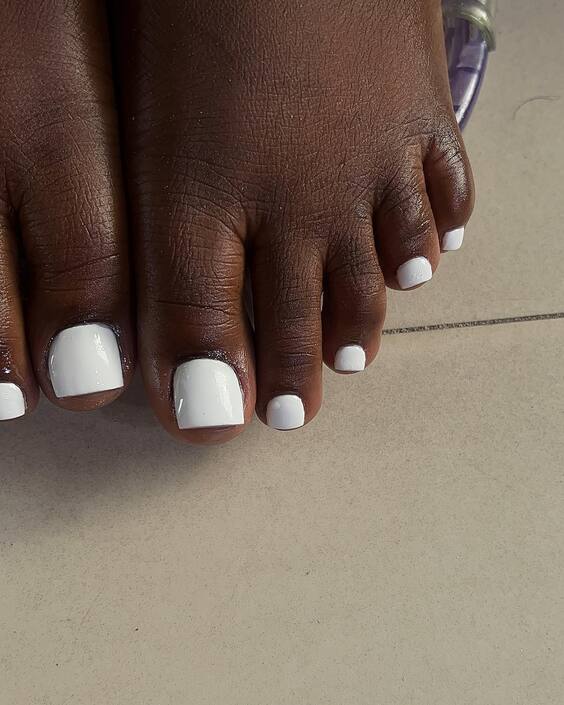
Consumables:
- White Gel Polish: CND Shellac Studio White
- Top Coat: CND Shellac Top Coat
DIY Instructions: Apply a base coat to protect your nails. Use CND Shellac Studio White to paint the tips of your nails, creating a clean line with a nail art brush or stencil. Cure under a UV lamp and seal with CND Shellac Top Coat for a durable finish.
Minimalist Chic with a Gem Accent
This design showcases a minimalistic approach with a clean, white gel polish accented by a single gem on each big toe. The placement of the gems adds a luxurious touch without detracting from the overall simplicity, making it an excellent choice for those seeking understated elegance.
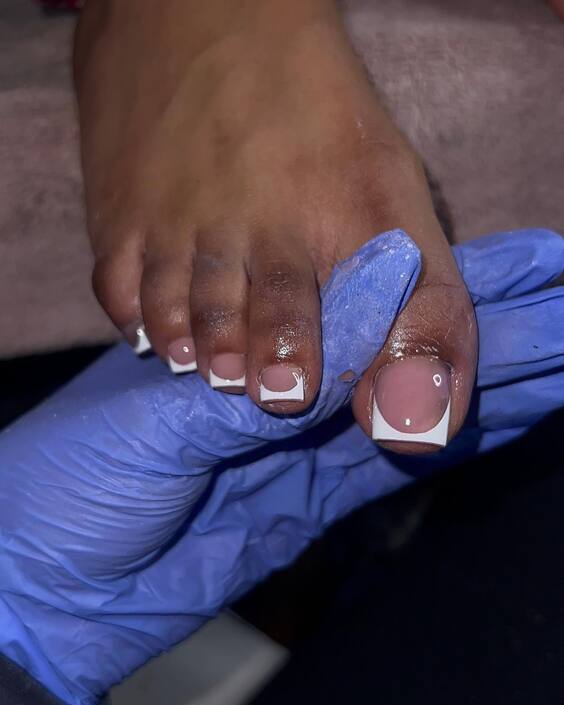
Consumables:
- White Gel Polish: Sally Hansen Miracle Gel, White
- Gemstones: Tiny Crystal Clear Gemstones
- Top Coat: Sally Hansen Miracle Gel Top Coat
DIY Instructions: Begin with a thorough cleaning and a base coat application. Apply two coats of Sally Hansen Miracle Gel in White, allowing each coat to dry thoroughly. Affix a small crystal gemstone on the big toe using a dab of nail glue. Seal the design with Sally Hansen Miracle Gel Top Coat for a lasting finish.
Artistic Flair with Marble and Gold
This artistic design combines white gel polish with swirls of gold to create a stunning marble effect. Each nail is a canvas displaying unique gold lines that mimic the natural veining of marble. This technique is perfect for those looking to add a touch of artistic elegance to their look.
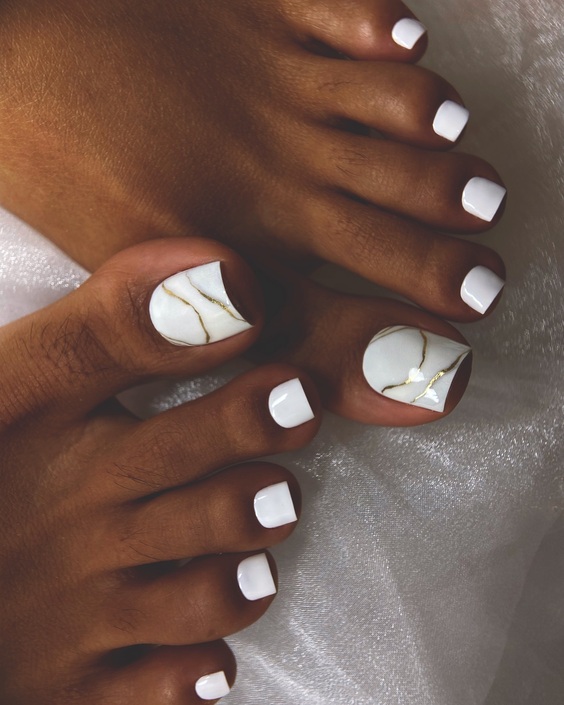
Consumables:
- White Gel Polish: Essie Gel Couture in Pre-Show Jitters
- Gold Polish: OPI Gold Leaf
- Detailing Brush: Fine-tip nail art brush
- Top Coat: Essie Gel Setter Top Coat
DIY Instructions: Apply a base coat and two layers of Essie Gel Couture in Pre-Show Jitters. Use a fine-tip brush to delicately draw gold lines with OPI Gold Leaf. Allow each line to slightly blend with the white base for a natural marble effect. Finish with Essie Gel Setter Top Coat to enhance the design’s durability and shine.
Golden Charm
This look features a straightforward white gel polish enhanced by a delicate gold chain wrapped around the big toe. It’s a perfect blend of simplicity and modern style, ideal for those who prefer their chic with a hint of unique accessory.
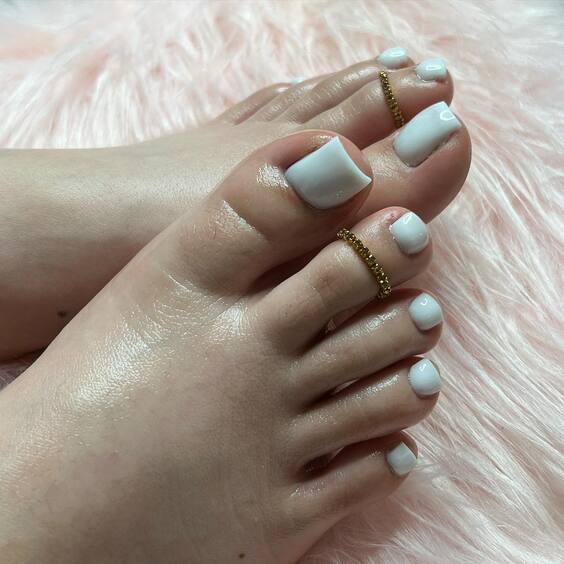
Consumables:
- White Gel Polish: Gelish Soak-Off Gel Polish, Arctic Freeze
- Gold Chain: Fine Gold Toe Chain
- Adhesive: Nail-friendly adhesive
- Top Coat: Gelish Top It Off Sealer Gel
DIY Instructions: Start by applying Gelish Soak-Off Gel Polish in Arctic Freeze for a crisp white finish. Carefully place a thin gold chain around the big toe, securing it with a small amount of nail-friendly adhesive. Seal the entire design with Gelish Top It Off Sealer Gel to ensure the chain stays in place and the polish remains glossy.
Dainty Details
This toe nail design features a classic white gel polish base with a playful twist: small, colorful gemstones on the big toes. The gems are placed in a flower pattern, offering a whimsical and charming touch to the otherwise simple look. It’s an ideal choice for spring and summer seasons, or for anyone looking to add a pop of color to their white toe nails.
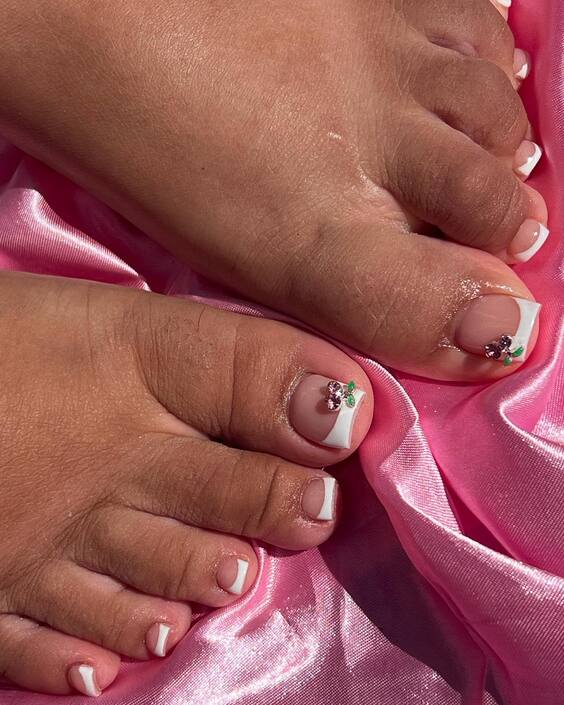
Consumables:
- White Gel Polish: Essie Gel Couture in Blanc
- Colorful Gemstones: Assorted Mini Gemstones
- Top Coat: Essie Gel Setter Top Coat
DIY Instructions: Apply Essie Gel Couture in Blanc over a base coat, ensuring full coverage. Once dry, use a tiny dot of nail glue to place each gemstone in a floral pattern on the big toe. Finish with a layer of Essie Gel Setter Top Coat to secure the gems and add a glossy shine.
Sophisticated Summer
This look pairs minimalist white gel toenails with stylish studded sandals, creating a sophisticated summer-ready appearance. The pure white gel polish provides a stark, clean contrast to the taupe sandals, which are adorned with gold studs. This combination is perfect for those who love to coordinate their nail art with their footwear for a complete and polished ensemble.
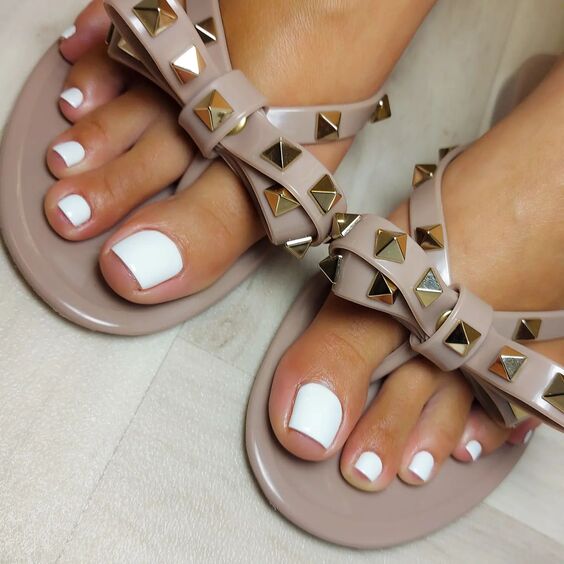
Consumables:
- White Gel Polish: OPI Alpine Snow
- Top Coat: OPI Glossy Top Coat
DIY Instructions: Start with a base coat to protect your nails. Apply two coats of OPI Alpine Snow for a flawless white finish. Allow each coat to dry thoroughly before applying OPI Glossy Top Coat for lasting shine and protection. Pair with your favorite studded sandals to complete the look.
Classic French Elegance
This design brings a touch of timeless elegance with a traditional French tip applied on natural toenails. The tips are painted with a crisp white polish that enhances the natural beauty of the nails, making this style suitable for all occasions, from casual outings to formal gatherings.
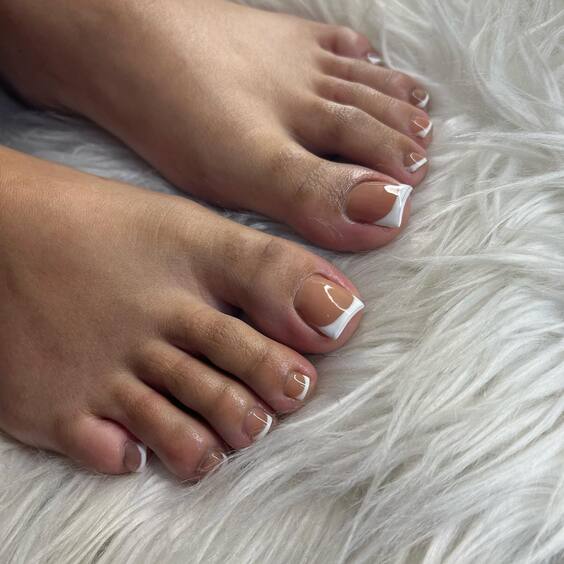
Consumables:
- White Nail Polish: China Glaze White on White
- Base Coat: Sally Hansen Double Duty Base and Top Coat
- Top Coat: Sally Hansen Insta-Dri Anti-Chip Top Coat
DIY Instructions: Begin by applying Sally Hansen Double Duty Base Coat to clean, filed toenails. Once dry, use a thin brush to apply China Glaze White on White on the tips of your toenails to create the classic French tip look. Finish with Sally Hansen Insta-Dri Anti-Chip Top Coat for a quick-drying, long-lasting finish.
Serene Simplicity
This design captures the essence of serenity with its flawless white gel polish. The impeccably applied polish on each toe provides a smooth, clean look, epitomizing minimalist beauty. It’s the perfect choice for those who value a polished yet understated aesthetic.
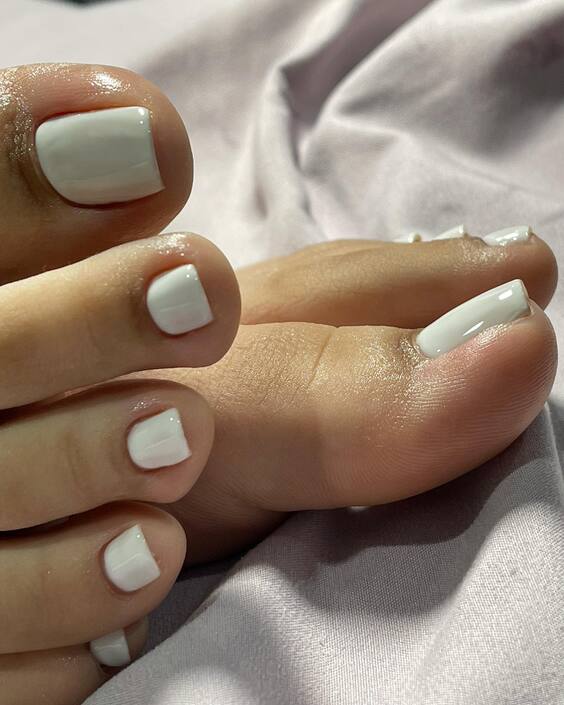
Consumables:
- White Gel Polish: CND Shellac in Cream Puff
- Base Coat: CND Shellac Base Coat
- Top Coat: CND Shellac Top Coat
DIY Instructions: Begin with a base coat to protect your nails. Apply two coats of CND Shellac in Cream Puff, ensuring each layer is cured under a UV lamp for optimal durability. Finish with a top coat for a glossy, long-lasting effect.
Bold Contrast
This striking design features a bold contrast of black and white polish, with artistic abstract patterns on the big toes. The dynamic swirls and curves create a visually captivating effect, making it a standout choice for those who love to make a statement with their nail art.
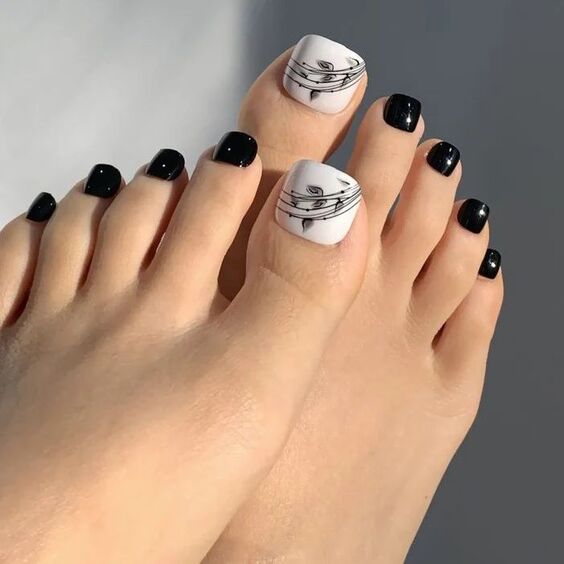
Consumables:
- Black Gel Polish: OPI Black Onyx
- White Gel Polish: OPI Alpine Snow
- Detailing Brushes: Fine-tip nail art brushes
- Top Coat: OPI Glossy Top Coat
DIY Instructions: Paint all toes with OPI Alpine Snow as the base. On the big toes, use OPI Black Onyx with a fine-tip brush to create abstract designs. Allow each layer to cure properly under a UV lamp before applying a glossy top coat for a stunning finish.
Playful Pink Accents
These white gel toenails are beautifully enhanced with playful pink butterfly decals, adding a whimsical and feminine touch. The addition of small rhinestones and delicate pink detailing breathes life into the simple white base, perfect for spring and summer looks.
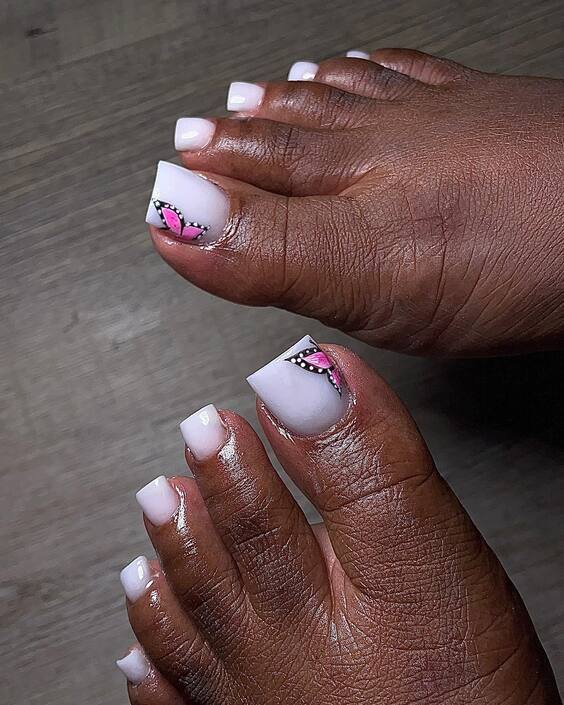
Consumables:
- White Gel Polish: Essie Gel Couture in Pre-Show Jitters
- Pink Decals: Butterfly nail stickers
- Rhinestones: Small pink rhinestones
- Top Coat: Essie Gel Setter Top Coat
DIY Instructions: Apply Essie Gel Couture in Pre-Show Jitters as the base color. Once cured, place pink butterfly decals on the nails, ideally on the big toes. Embellish with small pink rhinestones for additional sparkle. Seal everything with Essie Gel Setter Top Coat for durability and shine.
Cherry Blossom Charms
This charming design brings a touch of nature’s beauty to your toenails with delicate cherry blossom accents on a crisp white base. Each toe features a small cluster of pink and green blossoms, adding a playful and feminine appeal that’s perfect for spring and summer outings.
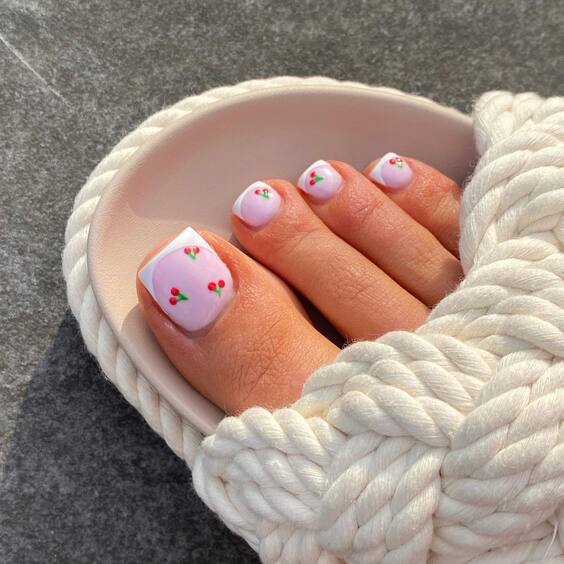
Consumables:
- White Gel Polish: Essie Gel Couture in Pre-Show Jitters
- Cherry Blossom Decals: Floral nail stickers
- Top Coat: Essie Gel Setter Top Coat
DIY Instructions: Start by applying two coats of Essie Gel Couture in Pre-Show Jitters for a smooth, white base. Once cured, apply the cherry blossom decals to each nail, focusing on creating a natural, scattered pattern. Seal the design with Essie Gel Setter Top Coat for longevity and shine.
Elegant Embellishments
Enhance your pedicure with this luxurious design featuring white gel polish and sophisticated crystal embellishments. Each big toe is adorned with a carefully placed crystal, adding a hint of glamour and elegance that elevates the simple white backdrop.
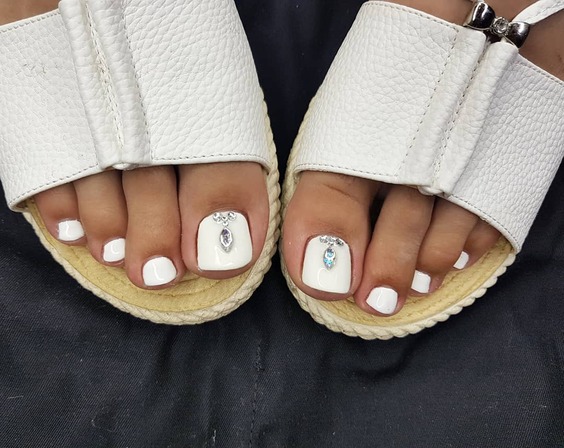
Consumables:
- White Gel Polish: Gelish Soak-Off Gel Polish in Arctic Freeze
- Crystals: Swarovski clear crystals
- Adhesive: Nail-friendly adhesive
- Top Coat: Gelish Top It Off Sealer Gel
DIY Instructions: Apply Gelish Soak-Off Gel Polish in Arctic Freeze for a pristine white finish. Carefully place a Swarovski crystal on the center of each big toe using a dab of nail-friendly adhesive. Finish with Gelish Top It Off Sealer Gel to ensure the crystals are secure and the polish remains glossy.
Nature-Inspired Artistry
This nature-inspired design features a stunning blue dragonfly painted over a translucent white gel base. The detailed artwork on the big toes makes this style a true piece of wearable art, ideal for those who appreciate uniqueness and creativity in their nail designs.
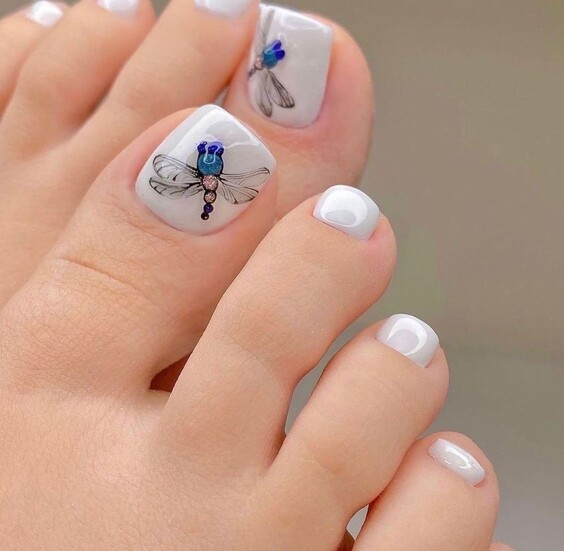
Consumables:
- White Gel Polish: CND Shellac in Clearly Pink (translucent)
- Blue Nail Paint: Custom-mixed blue nail polish
- Detailing Brushes: Fine-tip nail art brushes
- Top Coat: CND Shellac Top Coat
DIY Instructions: Begin by applying CND Shellac in Clearly Pink for a soft, translucent white base. Use fine-tip brushes to paint the blue dragonfly design on the big toes, mixing shades of blue to achieve depth and realism. Cure each layer under a UV lamp and seal with CND Shellac Top Coat for a durable, glossy finish.
Spring Blossoms
Celebrating the beauty of spring, this design features white gel polish adorned with bright daisy appliqués on each toe. The vivid yellow centers of the daisies pop against the clean white base, creating a cheerful and eye-catching look perfect for sunny days.
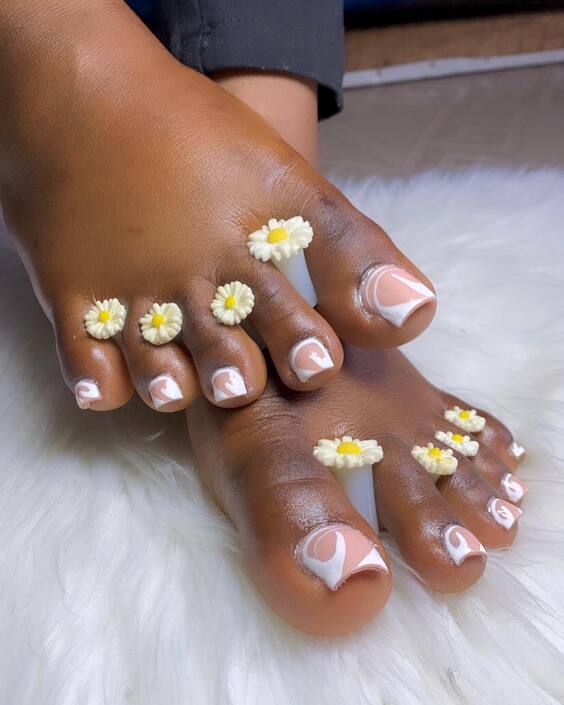
Consumables:
- White Gel Polish: OPI Alpine Snow
- Daisy Appliqués: Yellow-centered white daisy nail decals
- Top Coat: OPI Glossy Top Coat
DIY Instructions: Apply two coats of OPI Alpine Snow for a pure white base. Once dry, place the daisy decals on each nail, positioning the yellow centers creatively. Finish with a glossy top coat to protect the decals and enhance the vibrancy of the colors.
Geometric Glamour
This modern design blends stark black and white polishes with silver glitter and geometric patterns to create a sophisticated, glamorous look. Perfect for evening events, the varied textures and reflective surfaces catch the light beautifully.
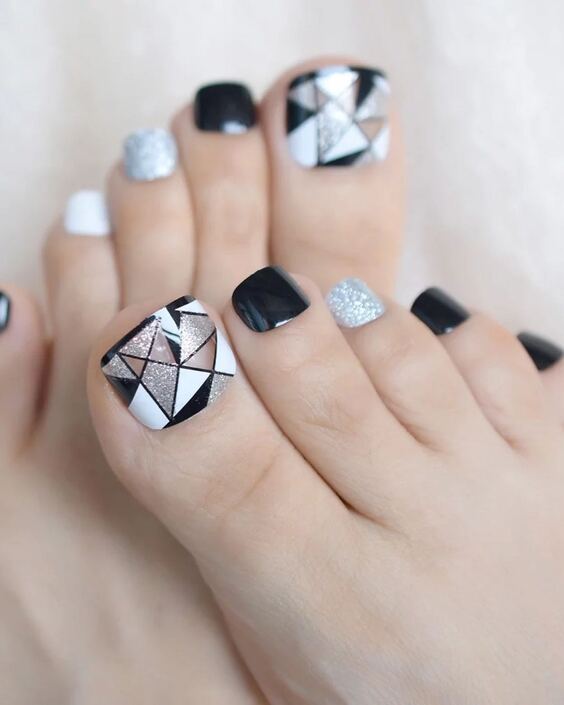
Consumables:
- Black Gel Polish: Essie Licorice
- White Gel Polish: Essie Blanc
- Silver Glitter Polish: Sally Hansen Diamond Strength
- Detailing Tape: Thin silver striping tape
- Top Coat: Sally Hansen Mega Shine Top Coat
DIY Instructions: Start with a base coat of Essie Blanc on selected nails and Essie Licorice on others. Use silver striping tape to create geometric designs. Apply Sally Hansen Diamond Strength on nails designated for glitter. Finish with Sally Hansen Mega Shine Top Coat for a seamless, high-gloss surface.
Delicate Butterflies
This enchanting design features soft pastel backgrounds with detailed butterfly artwork on the big toes. The subtle shades of blue and lavender enhance the delicate lines of the butterfly, making it a poetic and artistic choice for those who prefer a gentle, refined look.
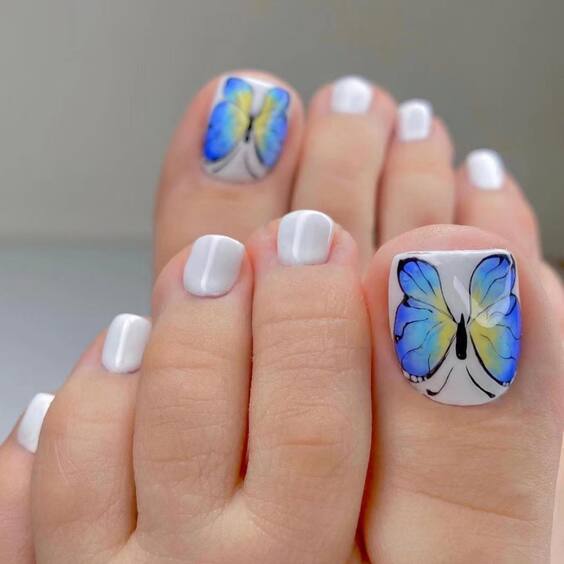
Consumables:
- Pastel Gel Polishes: Lavender and Light Blue
- Black Detailing Polish: For butterfly outlines
- Detailing Brushes: Fine-tip nail art brushes
- Top Coat: CND Shellac Top Coat
DIY Instructions: Apply a base of light blue or lavender gel polish depending on the toe. Use a fine-tip brush and black detailing polish to carefully draw the butterfly outlines. Add subtle shading with the same pastels to give depth to the wings. Cure between steps and seal with CND Shellac Top Coat for durability.
Romantic Flair
This romantic design features a soft pink and white color scheme with elegant floral embellishments and shimmering accents on the big toes. The subtle swirls and floral designs provide a feminine touch, perfect for a wedding or any special occasion that calls for a refined and graceful appearance.
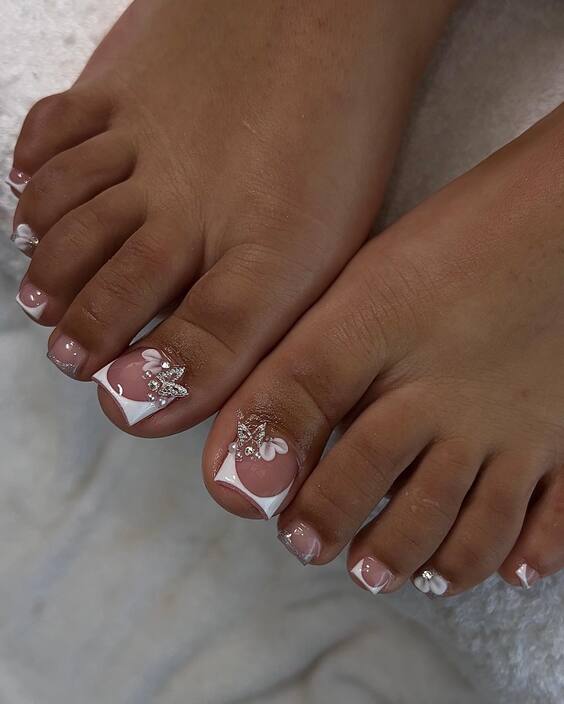
Consumables:
- Pink Gel Polish: Gelish Light Elegant
- White Gel Polish: Gelish Arctic Freeze
- Floral Decals: 3D white floral stickers
- Rhinestones: Small crystal rhinestones
- Top Coat: Gelish Top It Off Sealer Gel
DIY Instructions: Apply a base of Gelish Arctic Freeze, followed by accents of Gelish Light Elegant in swirl patterns. Add 3D floral stickers and rhinestones on the big toes for decoration. Ensure each layer is cured under UV light. Finish with a layer of Gelish Top It Off Sealer Gel for a glossy, protective coating.
Neon Chic
Make a vibrant statement with these neon yellow and green gradient toenails, designed to stand out with any summer outfit, especially stunning when paired with sleek, black strappy heels. The bold colors transition smoothly, offering a fresh and energetic look ideal for vacation vibes or a fun weekend out.

Consumables:
- Neon Yellow Gel Polish: OPI Neon Collection
- Neon Green Gel Polish: OPI Neon Collection
- Sponge: For gradient effect
- Top Coat: OPI Glossy Top Coat
DIY Instructions: Start with a base coat of neon yellow. While still tacky, use a sponge to apply neon green at the tips, blending slightly into the yellow to create a gradient effect. Repeat if necessary to enhance the color transition. Finish with a glossy top coat to seal and add shine.
Conclusion
Whether you’re dressing up for a special occasion or simply want to add a little flair to your everyday style, these white toenail designs offer endless possibilities to showcase your personal taste. From the understated elegance of simple white gel to the playful charm of neon gradients, each design brings its own unique vibe. Remember, the key to a successful toenail design lies not only in the aesthetic appeal but also in the quality of the application. Invest time in perfecting your technique or consult a professional manicurist to bring these beautiful designs to life. With the right care and creativity, your toenails can become a fabulous accessory to your look. So why wait? Pick a design from this guide and step out in style, ready to turn heads with your stunning toenail art!

