2024’s Best Easy Summer Nail Designs: DIY & Kids-Friendly Art Ideas
Let’s embark on this creative journey through the art of easy summer nail designs. In the warm, vibrant months, our nails become the canvas for expressions of personality and style. Whether you’re a beginner looking for something simple to start with, or you’re ready to dive into the DIY realm, there’s a design for every level of expertise and occasion.
Lavender Dreams
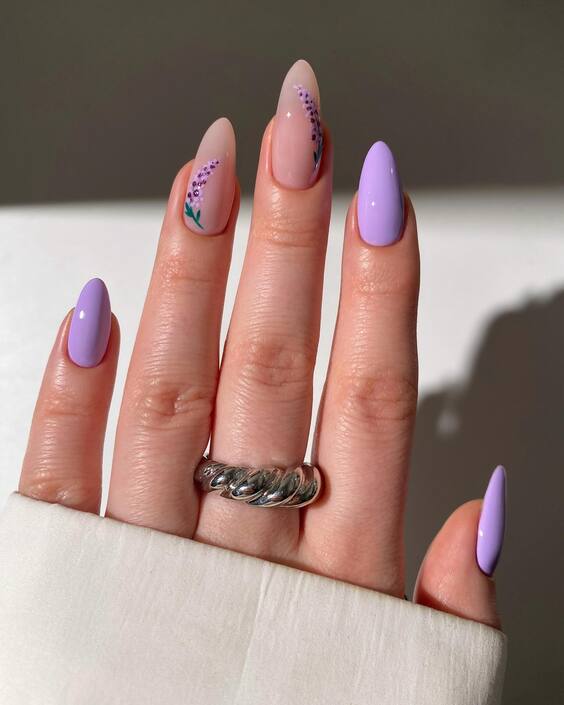
Dive into the essence of summer with a lavender-inspired nail design that whispers elegance with every gesture. These almond-shaped nails boast a pastel purple on the tips that fade into a natural pink base, creating a refreshing, two-tone look. It’s an easy summer nail design that beginners can recreate with a sponge for a soft gradient effect.
- Materials Needed:
- Pastel purple polish (e.g., Essie’s “Lilacism”)
- Natural pink polish (e.g., OPI’s “Bubble Bath”)
- Makeup sponge for gradient
- Clear top coat for a glossy finish
To achieve this look, start with a base coat of natural pink. Once dry, apply a dab of pastel purple onto the sponge and gently press onto the tips of your nails, blending downwards to create a seamless transition. Seal it with a top coat for a glossy finish that’ll catch the summer sunlight just right.
Flamboyant Flames
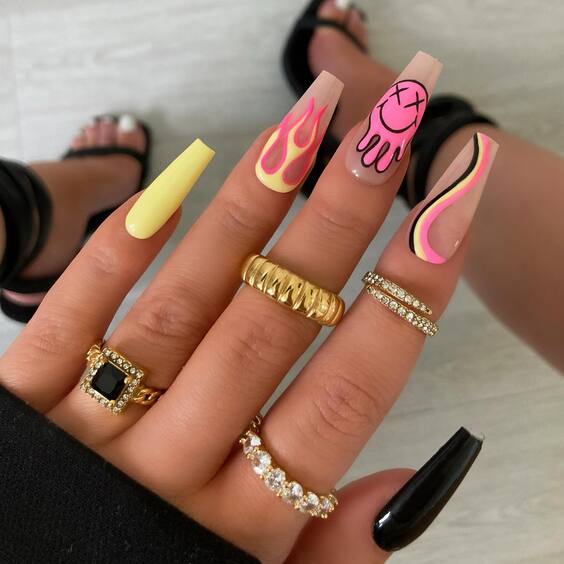
Ignite your summer with these audaciously bold nails that are sure to turn heads. Featuring a black base with a striking contrast of yellow and pink flames, this design captures the dynamic energy of summer bonfires and vibrant sunsets. It’s a perfect DIY project for those who love a bit of drama on their fingertips.
- Materials Needed:
- Black polish (e.g., Sally Hansen’s “Black Out”)
- Yellow polish (e.g., China Glaze’s “Sunshine Pop”)
- Pink polish (e.g., Revlon’s “Pink Punk”)
- Fine brush for detail work
- Matte top coat for a modern finish
The trick is to lay down your black base, let it dry completely, and then carefully draw your flames with a fine brush, starting with yellow and adding pink highlights. Finish with a matte top coat for an edgy look that’s all the rave in 2024.
Summer Rosette
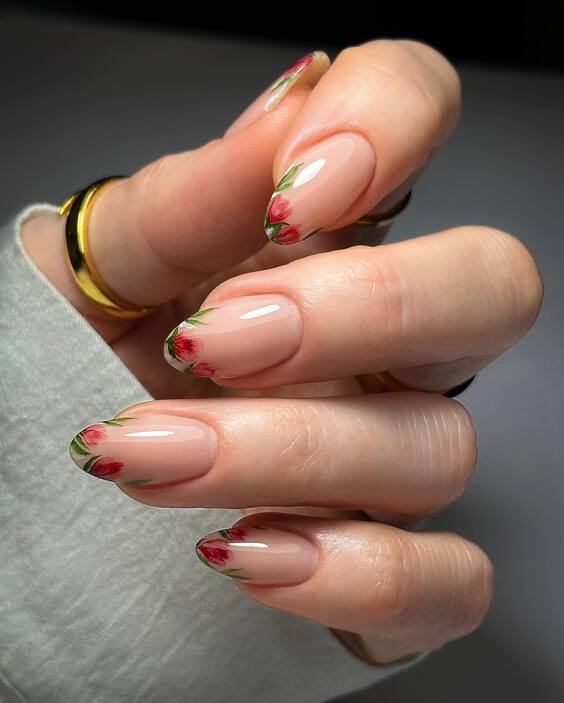
Summer is in full bloom on your nails with this delicate rosette design. Perfect for short nails, this design features a bouquet of tiny roses intricately painted over a clear gel base, suggesting a garden of flowers at your very fingertips. It’s a simple yet pretty sparkle that adds a touch of femininity to any look.
- Materials Needed:
- Clear gel polish (e.g., Gelish “Top It Off”)
- Pink and green acrylic paint for roses
- Thin brush for painting
- Small rhinestones (optional)
Starting with a clear gel base, use a thin brush to paint small strokes forming the petals. Accentuate with green leaves and, if you’re feeling fancy, add a tiny rhinestone to the center of each bloom for that extra sparkle. It’s a simple gel design that brings out the artist in you.
Citrus Twist
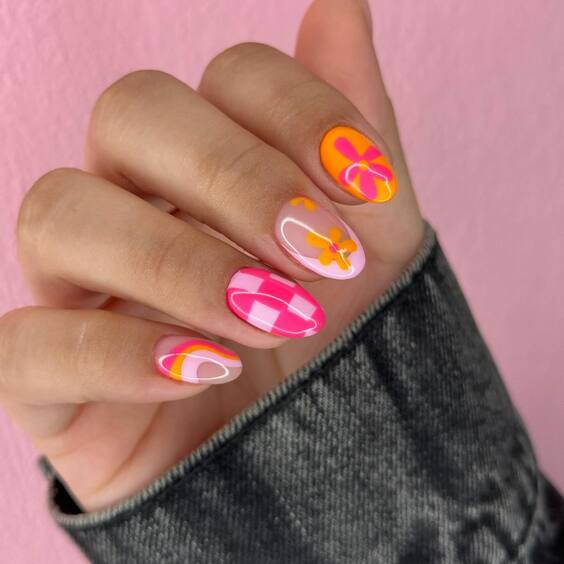
Nothing spells summer like the zesty allure of citrus hues dancing on your fingertips. Here we have a playful mix of geometric shapes and neon-bright colors, making it an ideal choice for an easy summer nail design, especially for short nails. The pops of orange and pink on a white base are just the zest you need to add a twist to your look.
- Materials Needed:
- Neon orange polish (e.g., ORLY’s “Melt Your Popsicle”)
- Hot pink polish (e.g., China Glaze’s “Bottoms Up”)
- White polish as base (e.g., Essie’s “Blanc”)
- Striping tape for clean lines
- Quick-dry top coat for a lasting finish
For the DIY artist, start with a white base, then use striping tape to outline where your colors will go. Paint in the vibrant hues, peel away the tape, and behold the sharp, playful lines. A quick-dry top coat will keep everything in place while you’re out and about.
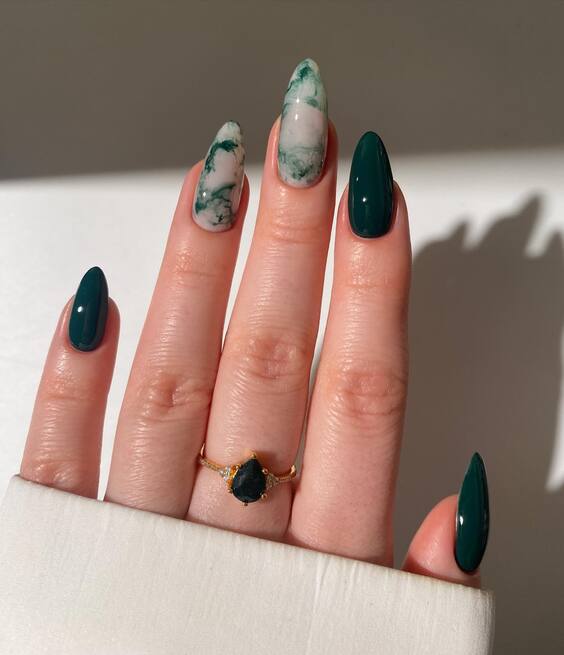
Emerald Elegance
Summer isn’t just for your hands; let’s talk toes. Here, a stunning duo of deep emerald and marbled green gives a luxurious look, perfect for sandal weather. This easy summer nail design showcases how a simple color combo can create a sophisticated effect, and it’s doable for a pedicure at home.
- Materials Needed:
- Deep emerald polish (e.g., OPI’s “Jade is the New Black”)
- Marbling medium or light green polish (e.g., Sally Hansen’s “Mint Sorbet”)
- Plastic wrap for the marbling technique
- Base and top coat for a smooth and shiny finish
Achieving the marbled look is easier than it seems. Apply your emerald polish, let it dry, then dab a lighter green with crumpled plastic wrap for a marble effect. A high-gloss top coat will add that perfect summertime sheen.
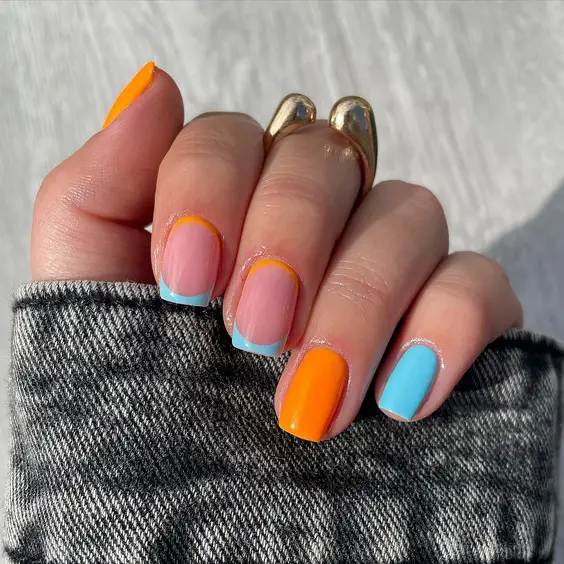
Playful Edges
This contemporary nail art is as fresh as a summer breeze with its bold color blocks and crisp lines. Orange and blue stand out against a soft pink, creating a modern, color-blocked look that’s a breeze to do yourself. It’s a fantastic example of an easy summer nail design DIY for those who love to experiment with bold and bright contrasts.
- Materials Needed:
- Soft pink polish (e.g., Essie’s “Fiji”)
- Vibrant orange polish (e.g., China Glaze’s “Papaya Punch”)
- Bright blue polish (e.g., Essie’s “Butler Please”)
- Thin brush or tape for precise edges
- Clear top coat for a lasting glossy finish
Start with a base of soft pink, then use a thin brush or tape to create your color blocks. Apply your bright hues carefully, allow them to dry, and then seal the deal with a top coat for an eye-catching look that’s sure to garner compliments at every summer outing.
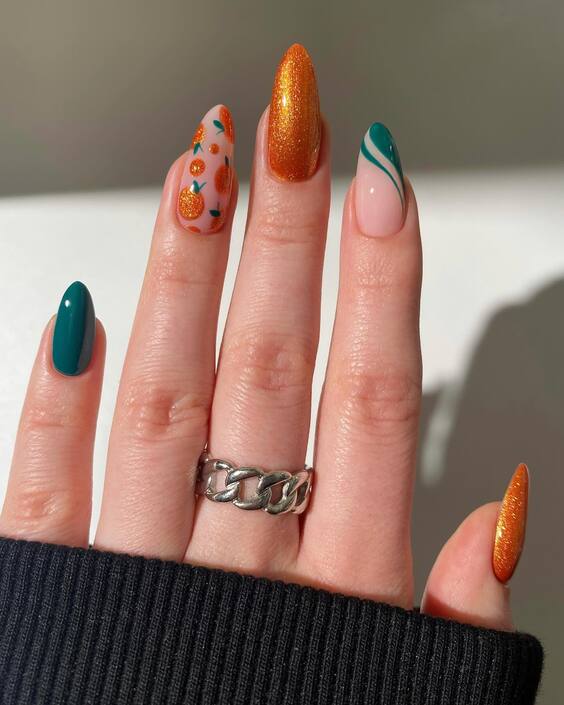
Sunset Sparkle
Sunset Sparkle is like having your own slice of the golden hour right at your fingertips. This design features a glittering orange that’s reminiscent of a summer sunset, paired with a whimsical strawberry accent nail for a pop of playful charm. It’s an embodiment of the season’s warmth and wonder, sparkling with every ray of sunlight.
- Materials Needed:
- Glittering orange polish (e.g., Zoya’s “Thandie”)
- Strawberry decal or stencil
- Teal polish for contrast (e.g., Essie’s “Go Overboard”)
- Fine brush for detail work
- Quick-dry top coat for a durable, shiny finish
To create this look, apply the glittering orange as your base. Then, for the accent nail, paint a strawberry design using a stencil or freehand with a fine brush. Add a teal nail to bring in a contrasting cool tone, perfect for those hot summer days.
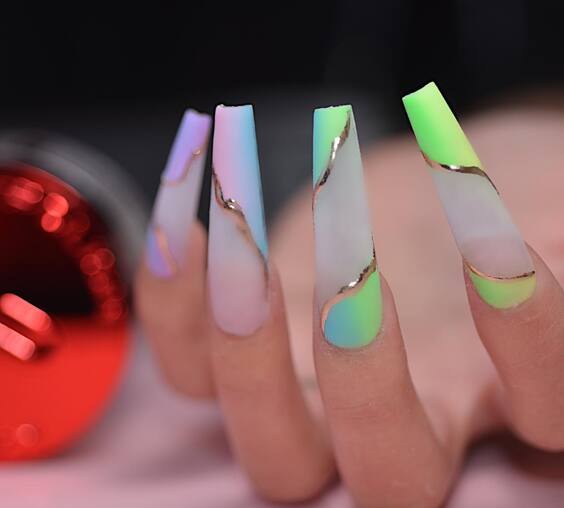
Pastel Panache
The Pastel Panache is a true work of art, showcasing the softness of summer skies in pastel hues, accented with delicate gold foil that catches the light like late afternoon sun on the water. This avant-garde design is perfect for those looking to make a statement with their nails, merging sophistication with a splash of fun.
- Materials Needed:
- Pastel blue and purple polishes (e.g., Sally Hansen’s “Lacey Lilac” and “Breeze Blue”)
- Gold foil or gold leaf for the accents
- Clear gel top coat for a flawless finish
- UV or LED lamp to cure the gel polish
Start with alternating pastel shades for each nail, then carefully place gold foil on top for an eclectic touch. Cure under a lamp after applying a clear gel top coat to seal in the panache.
Neon French Tip
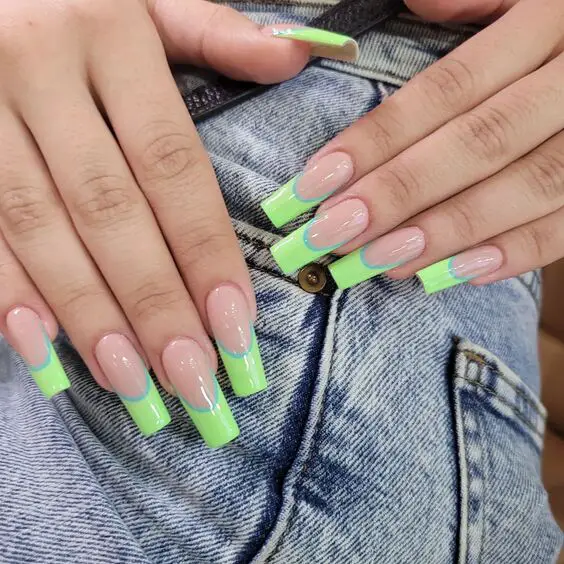
For the young or simply young at heart, the Neon French Tip takes a classic and spins it with vibrant summer fun. It features a fluorescent green tip over a translucent pink base, giving a refreshing twist to the traditional French manicure. It’s an easy summer nail design that’s not just for kids but for anyone who embraces bold colors and simple, clean lines.
- Materials Needed:
- Fluorescent green polish (e.g., ORLY’s “Glowstick”)
- Sheer pink polish (e.g., Essie’s “Mademoiselle”)
- Tip guides or tape for precision
- High-shine top coat for a smooth, protective finish
Apply the sheer pink polish first, and once that’s dry, use the guides to paint on your neon tips with precision. Finish off with a top coat for a glossy sheen that’ll stand out whether you’re poolside or at a picnic.
Icy Blossoms
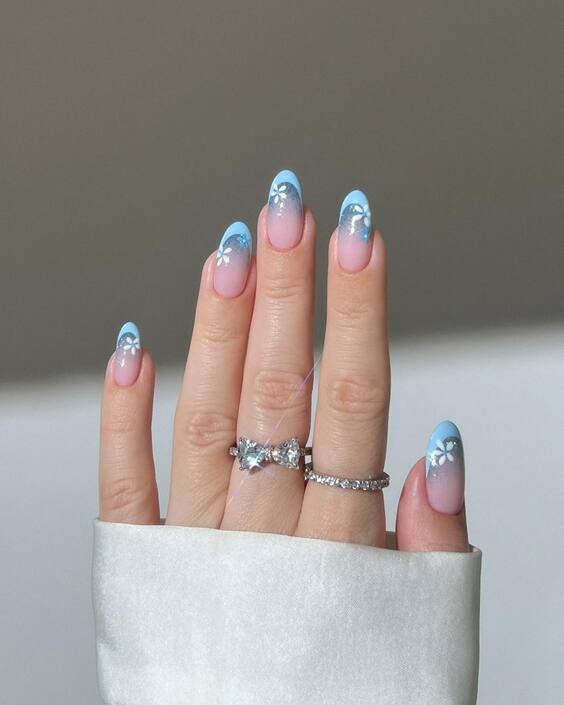
As if kissed by the cool breath of winter, these Icy Blossoms bring a refreshing chill to the summer heat. Sporting a pale blue tip that fades into a transparent base, each nail is adorned with a delicate white flower, evoking the serene beauty of frosty blooms under the summer sky.
- Materials Needed:
- Pale blue polish (e.g., OPI’s “It’s a Boy!”)
- White polish for flower details (e.g., Essie’s “Private Weekend”)
- Top coat for a sheer finish
- Dotting tool or small brush for petal details
Begin with a clear base, gradient the pale blue from the tip, and then meticulously add the white flowers. A final sheer top coat gives that glossy, icy finish, making it a cool retreat for your nails.
Pink Mosaic Garden
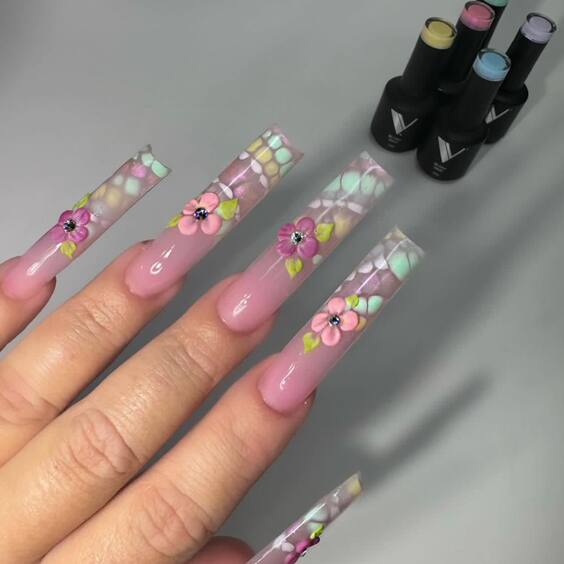
Step into a secret garden with these enchanting nails that feature a pink base as the canvas for a stained-glass inspired design. The soft pastels are interwoven with delicate floral details, making them an exquisite choice for anyone who desires a more intricate and handcrafted look.
- Materials Needed:
- Soft pink polish (e.g., OPI’s “Tickle My France-y”)
- Pastel yellow, green, and purple polishes for mosaic pieces
- Thin brush for detail work
- Glossy top coat for a glass-like finish
To create this mosaic masterpiece, paint your base in soft pink. Then, with a steady hand and a fine brush, piece together your pastel shades, outlining them gently to give the illusion of stained glass. Tiny flowers add a romantic touch to the intricate pattern.
Woodland Whimsy
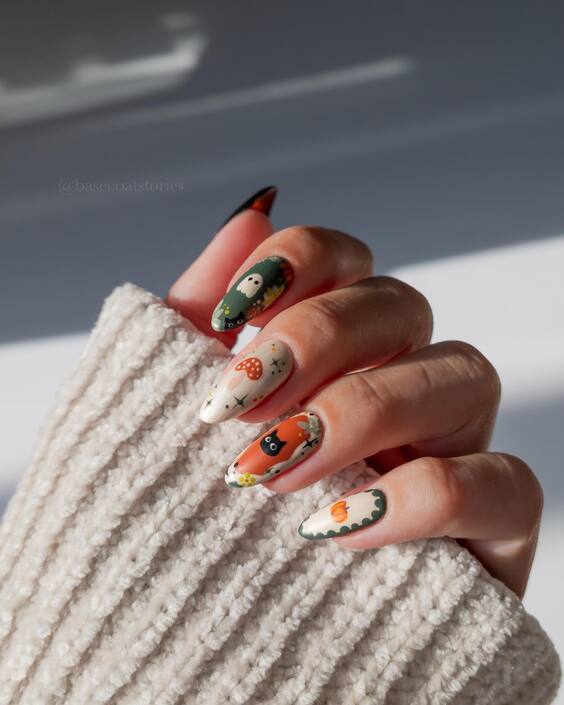
For those enchanted by the magic of a forest, Woodland Whimsy captures the playful essence of summer with its charming array of forest creatures and motifs. The combination of earthy greens, soft oranges, and creamy whites creates a storybook narrative across your nails.
- Materials Needed:
- Creamy white polish (e.g., Essie’s “Tuck It In My Tux”)
- Orange, green, and black polishes for details (e.g., ORLY’s “Surfer Dude”, “Coachella Dweller”, and “Liquid Vinyl”)
- Detailing brush for intricate art
- Matte top coat for a natural finish
With the creamy white as your canvas, use a fine brush to paint the whimsical woodland scenes. A matte top coat ties it all together, giving it a velvety texture that beckons to be touched.
Sunrise Gradient
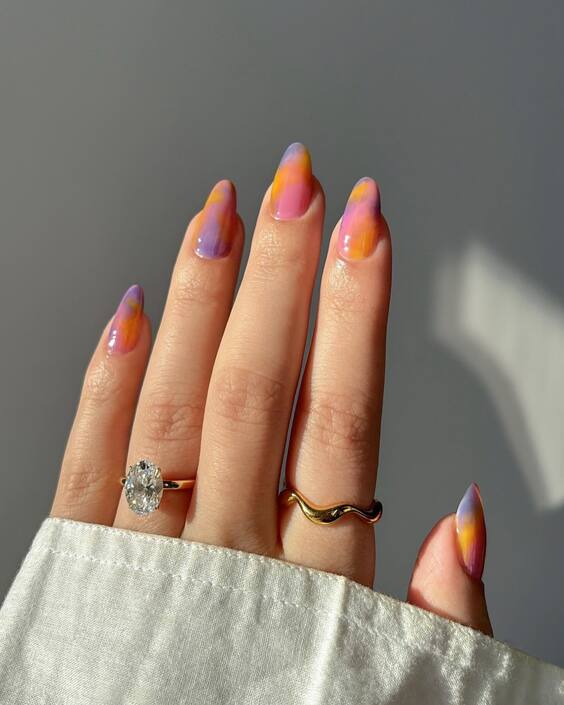
The Sunrise Gradient nails are a symphony of warm summer morning hues, blending seamlessly into each other like the dawn’s early light. They boast a soft transition from purple to a blushing pink and then to a bright, cheerful yellow, capturing the essence of a perfect summer sunrise right at your fingertips.
- Materials Needed:
- Purple, pink, and yellow polishes for the gradient (e.g., OPI’s “Do You Lilac It?”, “Suzi Shops & Island Hops”, and “I Just Can’t Cope-acabana”)
- Makeup sponge for blending the gradient
- Top coat for a smooth finish
Start with a base coat of the lightest color, then apply stripes of each polish side by side on a sponge. Dab onto the nail in a stippling motion, blending the colors into one another. Finish with a top coat to seal the gradient for a long-lasting wear.
Botanical Elegance
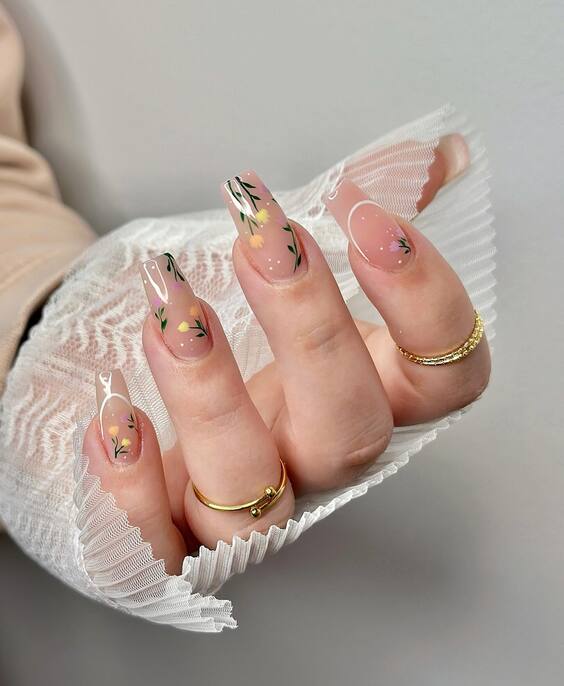
The Botanical Elegance design features transparent nails adorned with delicate black botanical illustrations, giving the appearance of a floating garden. It’s an understated yet sophisticated look that’s perfect for any summer event, from weddings to garden parties.
- Materials Needed:
- Clear polish for the base (e.g., Essie’s “Gel Setter”)
- Black polish for the botanical illustrations (e.g., China Glaze’s “Liquid Leather”)
- Detailing brush for the intricate designs
- Glossy top coat for a protective sheen
Apply a clear base coat and let it dry. With a fine detailing brush, draw your botanical designs, and let creativity bloom on each nail. A glossy top coat adds shine and ensures your miniature garden stays pristine.
Marble Swirls
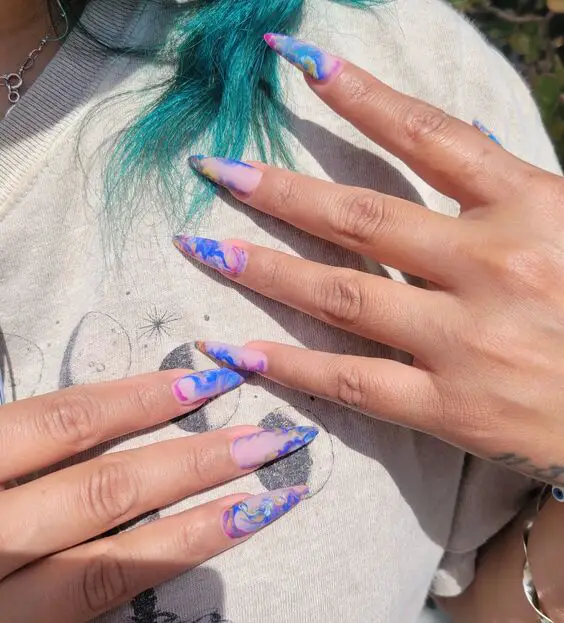
Marble Swirls are an artistic celebration of color and fluidity, reminiscent of marbled paper or the gentle swirl of cream in iced coffee. This design melds purples, blues, and pinks in an abstract pattern that’s unique for each nail, creating a wearable piece of art.
- Materials Needed:
- A selection of purple, blue, and pink polishes for the marbling effect (e.g., Sally Hansen’s “Violet Voltage”, “Pacific Blue”, and “Pink Blink”)
- A small cup of water for the marbling
- Toothpick or needle for swirling the colors
- Top coat for a glossy, smooth finish
Drop polish into the water, allowing each color to spread before adding the next. Use a toothpick to swirl the colors together, then dip your nail into the design. Clean up the edges and apply a top coat to protect your personal swirl of summertime hues.
Olive Ovation
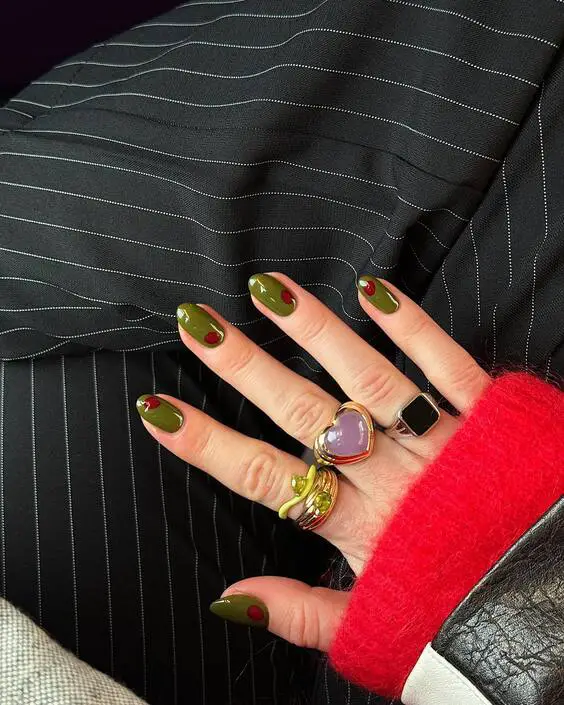
Embrace the earthy tones of summer with Olive Ovation. This design features a sophisticated olive green paired with a minimalist red dot at the base, combining simplicity with a splash of color. It’s a nod to the olives and wines savored on a late summer evening.
- Materials Needed:
- Olive green polish (e.g., OPI’s “Suzi – The First Lady of Nails”)
- Red polish for the dot accent (e.g., Essie’s “Really Red”)
- Dotting tool for precise application
- High-gloss top coat for shine
Apply two coats of the olive polish, followed by a precise dot of red at the base of each nail. A high-gloss top coat not only seals the deal but also adds that sun-reflective sheen to your nails.
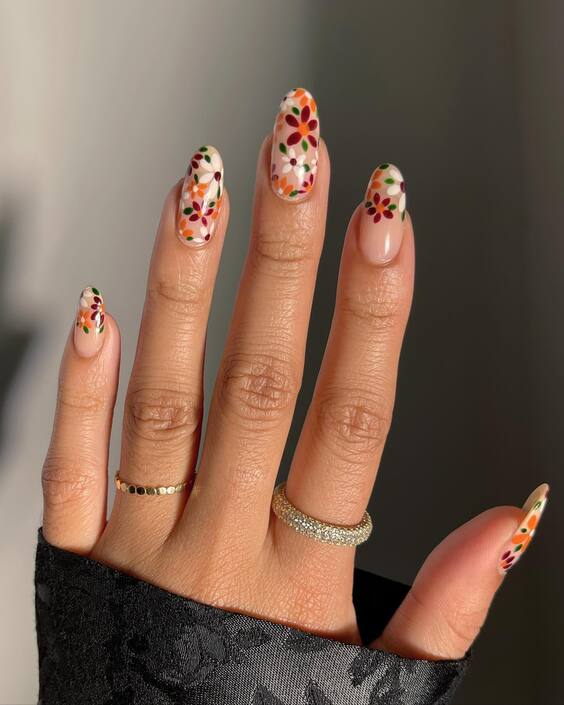
Floral Fiesta
Floral Fiesta is a celebration on your nails, with a translucent base sprinkled with a cascade of colorful flower petals. This design is a cheerful homage to the blooms that grace our gardens and paths during the sunny season.
- Materials Needed:
- Nude polish for the base (e.g., Sally Hansen’s “Almost Almond”)
- A variety of polish colors for the petals (e.g., ORLY’s vibrant summer collection)
- Thin brush for petal details
- Glossy top coat for a smooth, petal-like finish
Begin with a base coat of nude polish. Using a thin brush, paint petal shapes in various colors, overlapping some for depth. Seal with a glossy top coat to capture the freshness of a summer garden.
Neon Brushstrokes
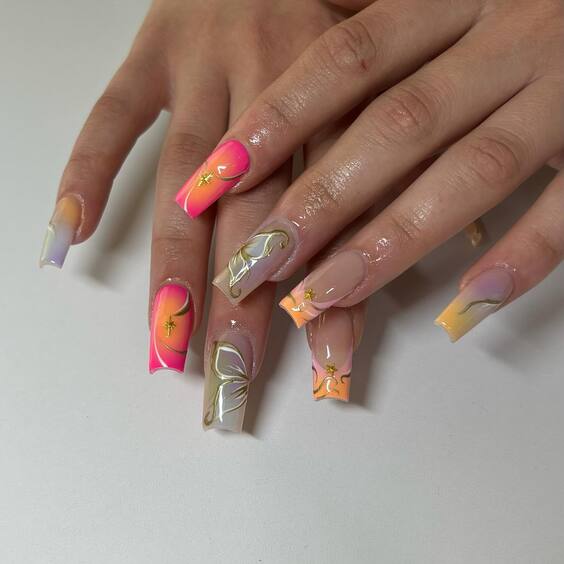
Last but certainly not least, Neon Brushstrokes is a design that’s all about boldness and spontaneity. It features vibrant neon strokes over a clear base, accented with delicate gold detailing, encapsulating the uninhibited spirit of summer festivals and neon-lit nights.
- Materials Needed:
- Clear polish for the base (e.g., Essie’s “Gel Setter”)
- Neon polishes in pink, orange, and yellow (e.g., China Glaze’s Neon collection)
- Gold polish for accents (e.g., Essie’s “Good As Gold”)
- Thin brush for fine lines and details
With a clear base as your canvas, unleash your creativity with bold, neon strokes in various directions. Add thin gold lines for a touch of glamour. A final coat of clear polish will add gloss and protect your artwork.
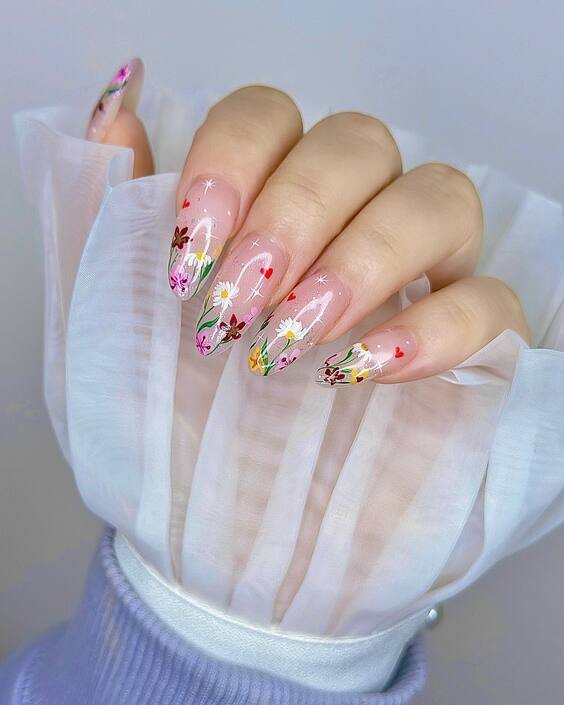
Sheer Florals
The Sheer Florals design is a gentle whisper of nature, with its soft, transparent base and delicate floral accents. It’s like carrying a bouquet of wildflowers on your fingertips, each one placed with care to create a serene, picturesque effect.
- Materials Needed:
- Clear polish for the base (e.g., Seche Vite Clear Base Coat)
- Assorted polish colors for flowers (e.g., pastel tones from OPI’s spring collection)
- Fine detail brush for painting flowers
- Top coat for a durable, glossy finish
Begin with a clear base, painting a variety of small flowers across the nails. Use fine strokes to give life to petals and leaves, creating a meadow of miniature blooms. Seal your art with a top coat to ensure longevity.
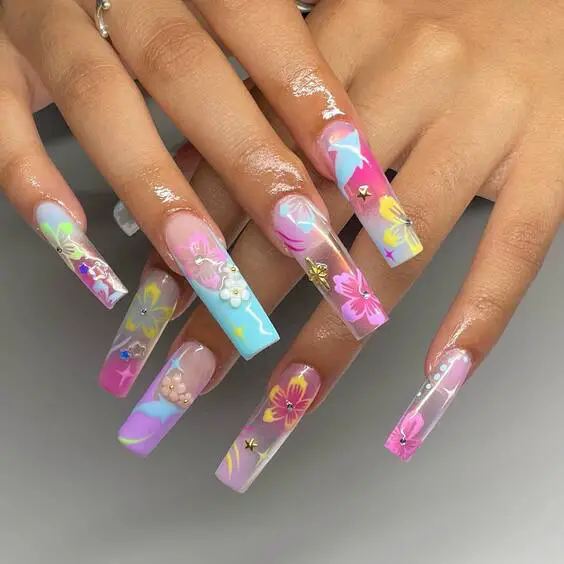
Pastel Paradise
Enter the realm of Pastel Paradise, a realm where soft hues meet to create a dreamy landscape. These nails feature a fusion of pastel pink, blue, and purple, adorned with floral and starburst patterns, crafting a fantastical narrative that’s vibrant and enchanting.
- Materials Needed:
- Pastel pink, blue, and purple polishes (e.g., Essie’s “Romper Room,” “Bikini So Teeny,” “Play Date”)
- White polish for details (e.g., Sally Hansen’s “White On”)
- Fine detail brush for intricate designs
- Glossy top coat to encapsulate the design
With a clear base, blend your pastel shades on each nail, creating a seamless transition of color. Use a fine brush to add delicate flowers and starbursts, invoking a celestial feel. Finish with a glossy top coat to enhance and protect your design.
At the end of the article, consider adding an FAQ section with questions like “What are the best color combos for summer nails?” or “Do you have any art tutorials for simple summer designs?” Answer these questions concisely to provide additional value to the reader.

