21 Stunning Summer Toe Nail Designs: Cute Patterns & Playful Colors
Are you ready to dive into a world of color and creativity right at your toes? This summer, let your feet express more than just comfort as we explore an array of cute toe nail designs that combine artistry with a touch of whimsy. From playful patterns to elegant accents, each design in this showcase is more than just a style statement; it’s a reflection of personality and mood. Whether you’re preparing for a beach vacation, a summer wedding, or simply want to brighten your day-to-day, these toe nail designs offer something unique for every occasion. Get ready to be inspired as we bring you some of the most eye-catching and adorable toe nail art that will surely make your flip-flops and sandals stand out!
Cute Toe Nail Designs for Summer
The first design features a lively and playful array of neon colors perfect for summer. The toe nails are adorned with a gradient of hot pink and electric orange, which seamlessly blend into each other, topped with striking white zebra stripes for a dynamic contrast. This design not only captures the essence of summer but also adds a touch of wild flair to any look.
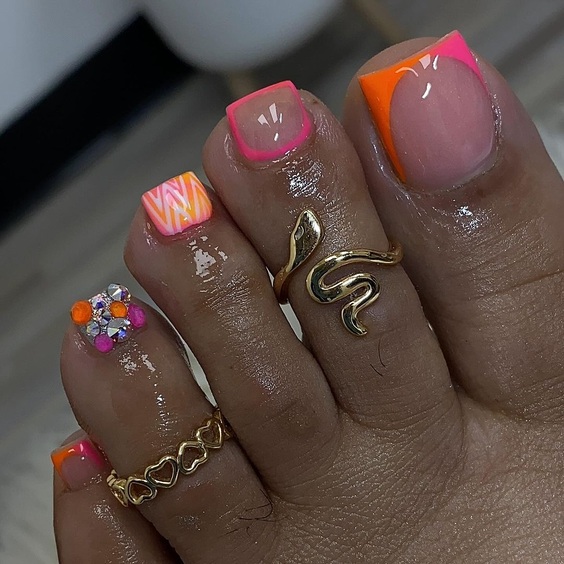
- Consumables Needed:
- Neon pink nail polish
- Electric orange nail polish
- White nail art striping polish
- Clear top coat for gloss and protection
Recommendation: For best results, use high-quality polishes like OPI Neon Collection for vibrant color payoff and a top coat like Seche Vite for a long-lasting finish.
DIY Steps:
- Apply a base coat to protect your nails and ensure a smooth application.
- Paint the base of the nails with neon pink and blend into electric orange toward the tips.
- Once dry, use a thin brush to add white zebra stripes.
- Seal with a clear top coat to enhance the colors and ensure durability.
Elegant Floral Accent
This design embodies elegance with its soft pastel pink base and delicate white floral accents. Each toe features a neatly painted pink square at the base, filled with a minimalist white flower design surrounded by small green leaves, giving it a fresh, clean aesthetic ideal for any summer gathering.
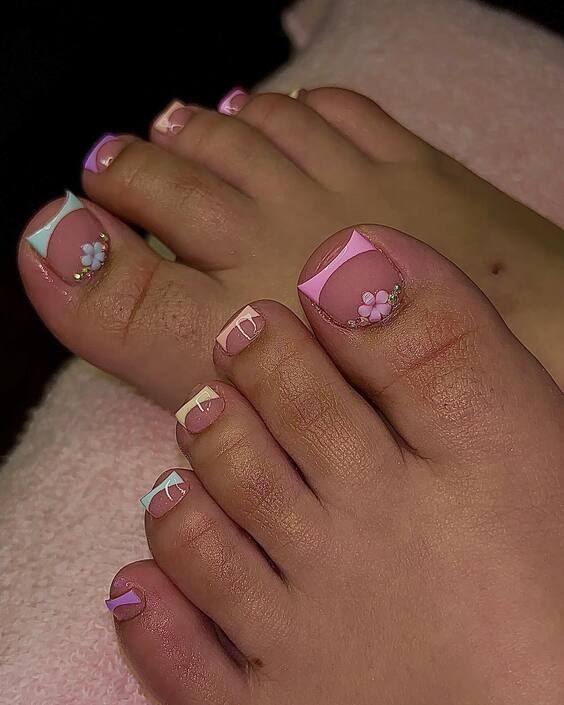
- Consumables Needed:
- Pastel pink nail polish
- White nail art pen
- Green nail art pen
- Top coat for a smooth finish
Recommendation: Try Sally Hansen Nail Art Pens for precise detailing and a smooth Essie top coat for a flawless finish.
DIY Steps:
- Start with a clear base coat to protect the nails.
- Apply two coats of pastel pink polish.
- Use a white nail art pen to draw the flower and a green pen to add leaves.
- Finish with a glossy top coat to enhance the overall look and longevity.
Chic Black and Pink Design
A chic design combining classic black with a touch of pink and intricate line work. The base of each nail is painted black, transitioning into a pink tip through a sleek diagonal line, enhanced by delicate white and pink web-like designs that add an artistic touch.
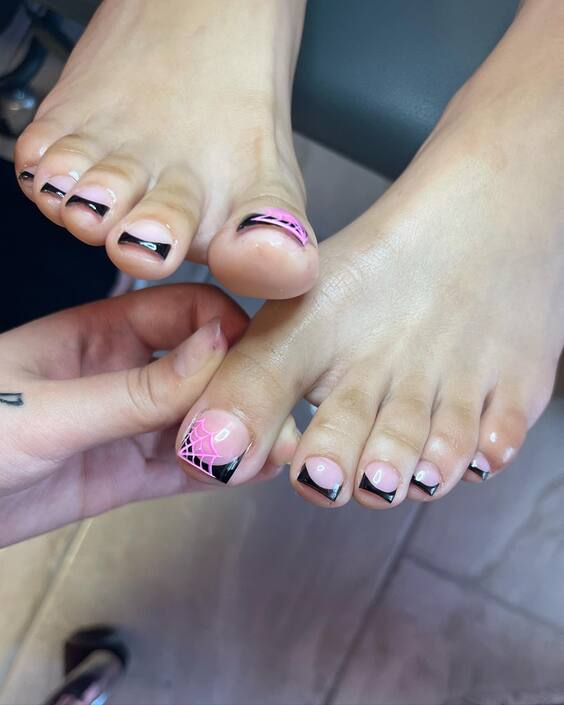
- Consumables Needed:
- Black nail polish
- Pink nail polish
- White nail art pen
- Clear glossy top coat
Recommendation: Use Chanel Le Vernis for the black and pink base and a fine-tipped nail art brush for precision.
DIY Steps:
- Apply a clear base coat.
- Paint the base in black and the tips in pink with a clean diagonal separation.
- Draw intricate white and pink patterns using a nail art pen.
- Finish with a clear top coat for durability and shine.
Elegant Floral Accent
This toe nail design elegantly combines simplicity with a touch of floral sophistication. A soft white base on each toe provides a clean, fresh look, while the pink floral accents on the big toes are highlighted with delicate black and white dots, adding a refined and charming touch perfect for any summer gathering.
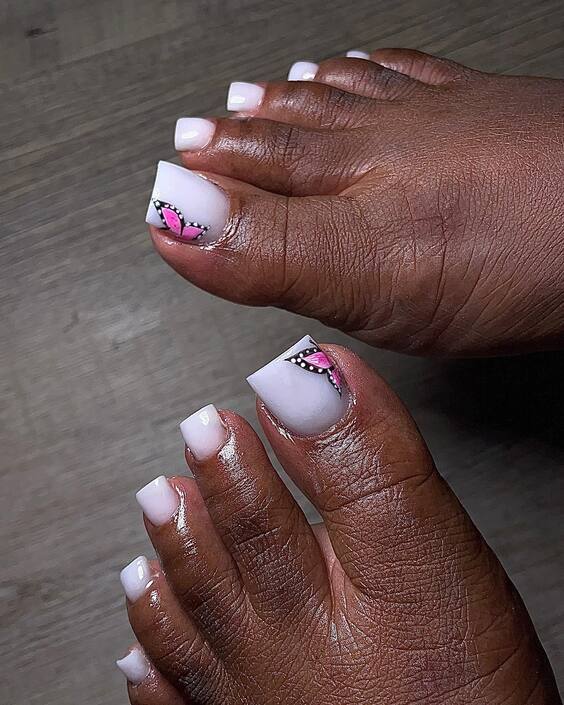
- Consumables Needed:
- Soft white nail polish
- Pink nail polish for floral designs
- Black and white nail art pens
- Clear top coat for a glossy finish
Recommendation: Opt for Sally Hansen’s nail art pens for precise dotting and floral patterns.
DIY Steps:
- Apply two coats of soft white nail polish as the base.
- Use a fine brush to paint pink flowers on the big toes.
- Add details with black and white nail art pens.
- Seal the design with a clear top coat for durability and shine.
Butterfly Beauty
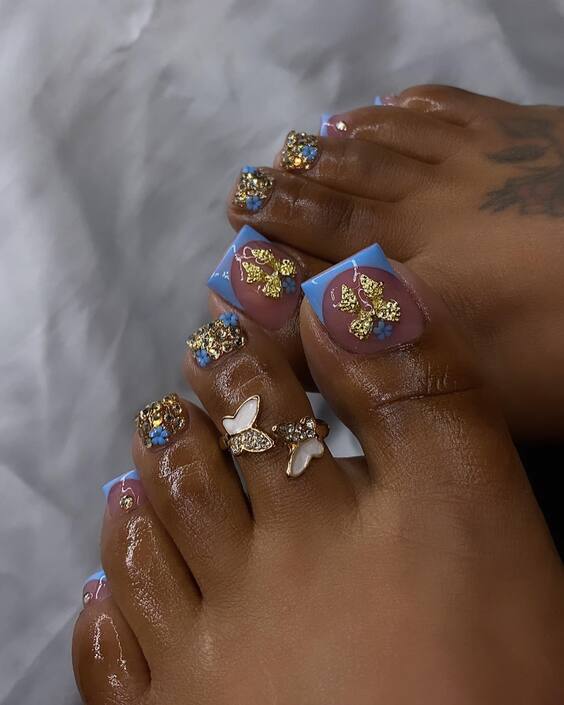
Capture the essence of summer with these beautifully crafted butterfly toe nail designs. The soft lavender base serves as a perfect canvas for intricate golden butterfly stickers and sparkling blue gemstones, creating a whimsical and dreamy look that’s ideal for beach days or casual summer evenings.
- Consumables Needed:
- Lavender nail polish
- Golden butterfly nail stickers
- Blue gemstones
- Nail glue
- Clear top coat
Recommendation: Use high-quality adhesive from Duo to ensure gemstones stay in place.
DIY Steps:
- Paint your nails with a lavender polish as the base.
- Apply golden butterfly stickers on alternating toes.
- Embellish with blue gemstones using a dot of nail glue.
- Finish with a clear top coat to protect the design.
Geometric Pastel Play
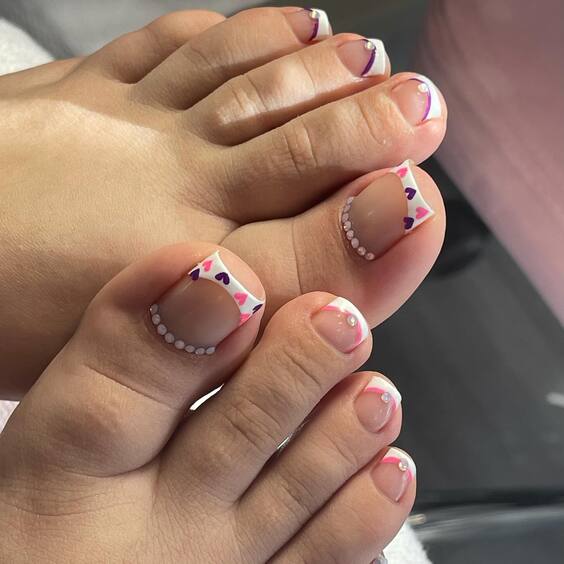
This design features a playful geometric pattern with pastel shades, making it a perfect choice for those who love a minimalist yet colorful style. The base of pale pink is enhanced with triangular accents in shades of purple and white, adorned with a delicate line of pearls along the big toe, adding an element of elegance to the playful design.
- Consumables Needed:
- Pale pink nail polish
- Purple and white nail polish for accents
- Small pearls
- Nail adhesive
- Clear top coat
Recommendation: Use Essie’s pastel collection for the perfect shade of pale pink and purple.
DIY Steps:
-
- Apply pale pink as the base color on all toes.
- Paint triangular patterns on the big toes using purple and white polish.
- Attach a line of small pearls at the base of the big toes with nail glue.
- Cover with a clear top coat to ensure longevity and gloss.
Gold Fleck Chic
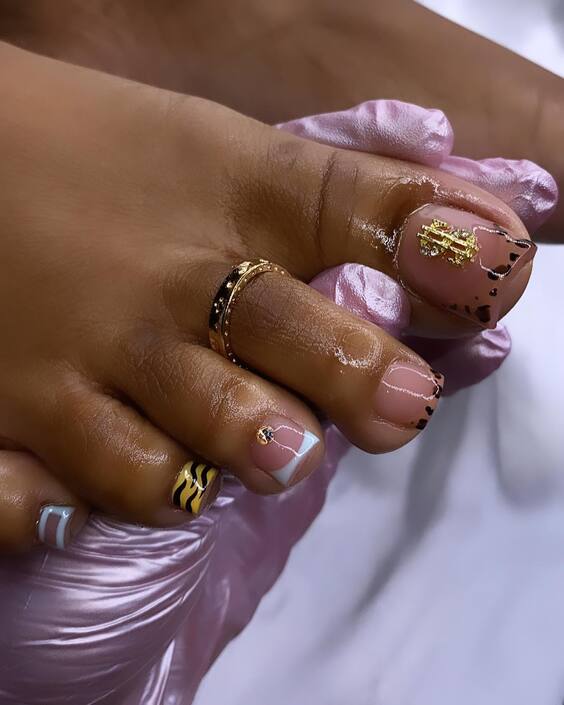
This toe nail design exudes sophistication with its muted nude base punctuated by artistic gold flakes and a striking black accent. The minimalist approach, combined with a bold, graphic line and delicate golden embellishments, creates an understated yet glamorous style that’s suitable for both everyday elegance and special occasions.
- Consumables Needed:
- Nude nail polish
- Black nail art pen or striping tape
- Gold leaf flakes
- Clear top coat for a seamless finish
Recommendation: For precision in gold flake placement, use tweezers and seal with a strong top coat like Seche Vite.
DIY Steps:
- Apply a base coat of nude polish.
- Add a single black line across each toe using a nail art pen or striping tape.
- Carefully place gold leaf flakes on the big toe.
- Finish with a clear top coat to ensure durability and enhance shine.
Summer Sky Blues
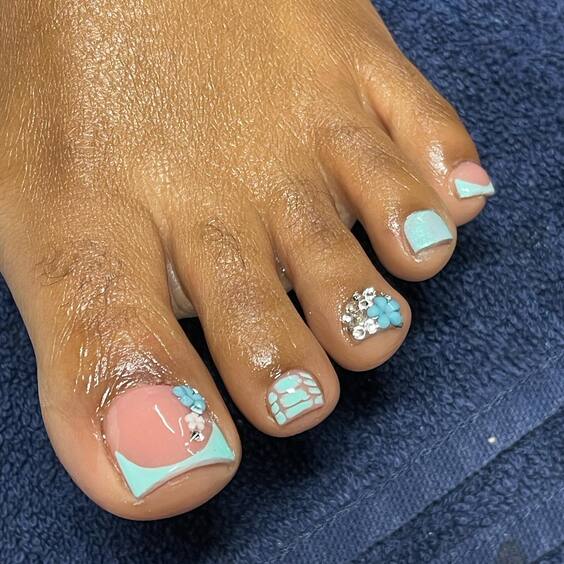
Capture the essence of a summer’s day with this refreshing toe nail design featuring sky blue and soft peach hues. The design is adorned with intricate flower patterns and sky-blue gemstones, perfectly encapsulating a cheerful summer vibe. This look is great for a beach day or a casual sunny outing.
- Consumables Needed:
- Sky blue nail polish
- Peach nail polish
- White nail polish for flower detailing
- Sky-blue gemstones
- Nail adhesive
- Clear top coat
Recommendation: Utilize fine brushes for the floral details and a dotting tool for precise gemstone placement.
DIY Steps:
- Paint all toes with a base of peach polish.
- Add sky blue tips with a clean horizontal line.
- Draw small white flowers on the big toes.
- Adorn the center of each flower with a sky-blue gemstone.
- Seal with a clear top coat to maintain the design’s freshness and brightness.
Classic French Twist
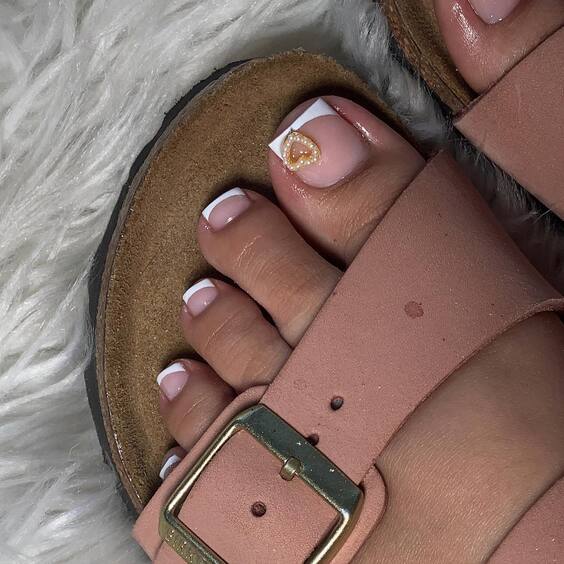
This design modernizes the classic French pedicure by incorporating a soft pink base with traditional white tips, enhanced by a sparkling peach-toned gem at the heart of each big toe. It’s a timeless style with just enough sparkle to stand out, making it perfect for both formal events and casual outings.
- Consumables Needed:
- Soft pink nail polish
- White nail polish for tips
- Peach-toned gems
- Nail adhesive
- Clear top coat
Recommendation: Use a French tip guide sticker for perfect white tips and a gem adhesive for lasting hold.
DIY Steps:
- Apply soft pink polish as the base.
- Paint the tips white with the help of French tip guides.
- Place a peach-toned gem on the big toe using a small drop of nail adhesive.
- Complete the look with a clear top coat for added shine and protection.
Pretty in Pink and Gold
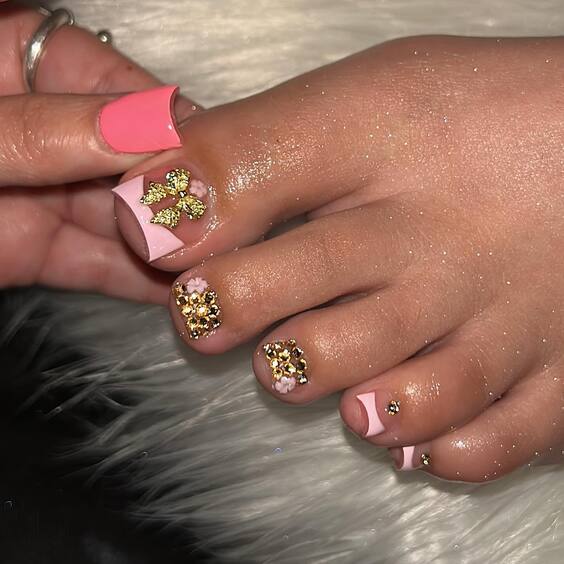
This design marries the sweetness of pink with the luxury of gold, creating an opulent look ideal for special occasions or a pampering day. The pink base is richly adorned with gold glitter and elegant floral accents, giving it a refined yet festive vibe.
- Consumables Needed:
- Pastel pink nail polish
- Gold glitter
- Floral nail stickers
- Clear top coat for durability and shine
Recommendation: For an even application of glitter, use a sponge to dab it onto the wet polish.
DIY Steps:
- Paint all toes with a pastel pink polish.
- Apply gold glitter over the big toe while the base is still tacky.
- Place floral stickers strategically for an artistic touch.
- Seal with a clear top coat to enhance longevity and gloss.
Turquoise Marble Elegance
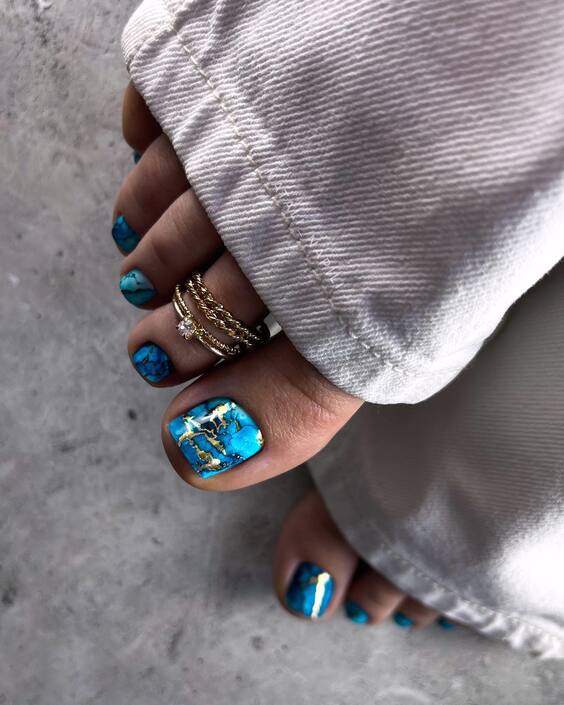
This unique design features a bold turquoise base with marbled gold veins that mimic the natural beauty of turquoise stone. It’s an eye-catching choice that stands out with its vibrant color and intricate detailing, perfect for adding a splash of color to your summer wardrobe.
- Consumables Needed:
- Turquoise nail polish
- Gold nail paint for marbling
- Toothpick or fine brush for detail work
- Clear top coat
Recommendation: Utilize a swirling technique with a toothpick to achieve the marbled effect.
DIY Steps:
- Apply a turquoise base coat.
- Drizzle gold polish over the wet base and use a toothpick to create marbled effects.
- Let it dry completely.
- Apply a clear top coat for a smooth, finished look.
Sophisticated Black and Gold Geometry
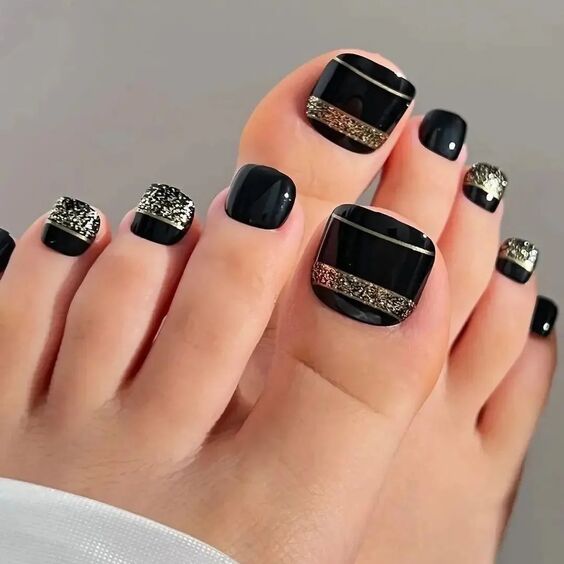
This design exudes sophistication with its geometric patterns and the classic combination of black and gold. The nails are adorned with gold speckles and precise lines that enhance the modern aesthetic, making this design both bold and chic.
- Consumables Needed:
- Black nail polish
- Gold striping tape
- Gold glitter
- Clear top coat
Recommendation: Use striping tape for clean, crisp lines and a detail brush for applying glitter with precision.
DIY Steps:
- Paint all toes black as a sleek base.
- Apply gold striping tape to create geometric patterns.
- Add a touch of gold glitter for a sparkly highlight.
- Seal with a clear top coat to maintain the design’s sharp look and durability.
Cheerful Pastels
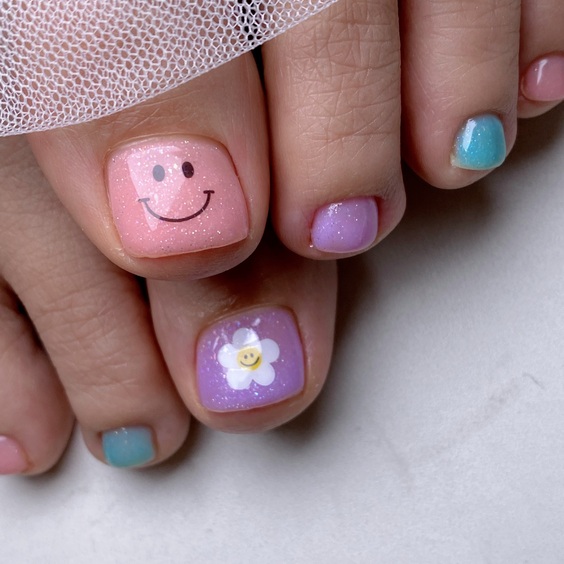
This adorable toe nail design features a mix of pastel pink and lavender shades, sprinkled with sparkles and adorned with cute designs like a smiling face and a playful flower. Perfect for those who enjoy a light-hearted and joyful aesthetic, this style brings a smile with every step.
- Consumables Needed:
- Pastel pink and lavender nail polish
- White nail art pen for details
- Small decals or stickers for designs
- Sparkle top coat
Recommendation: Use a dotting tool for perfect smiley faces and fine brushes for detailed flower designs.
DIY Steps:
- Apply a base of pastel pink on some toes and lavender on others.
- Add a smiley face and flower design using decals or hand-painted with a white nail art pen.
- Finish with a sparkle top coat for a playful shimmer.
Golden Summer
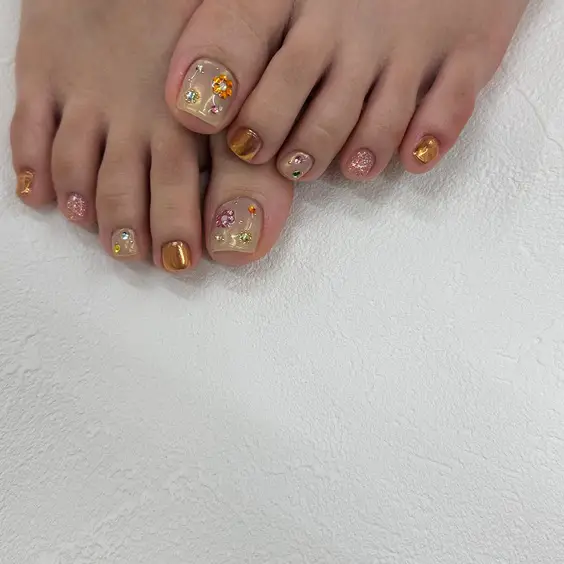
This design radiates warmth with a golden base and a rich variety of embellishments including pink and golden glitters, and floral accents. It’s a rich, textured look that’s perfect for anyone looking to add a bit of luxury to their summer wardrobe.
- Consumables Needed:
- Golden nail polish
- Pink and gold glitter
- Floral decals
- Clear top coat for protection
Recommendation: Apply the glitter and decals while the base coat is still tacky to ensure they adhere well.
DIY Steps:
- Coat all toes with a golden polish.
- Sprinkle pink and gold glitter on selected toes.
- Apply floral decals for an added decorative touch.
- Seal everything with a clear top coat to keep the design intact through summer activities.
Blue Sky Mosaic
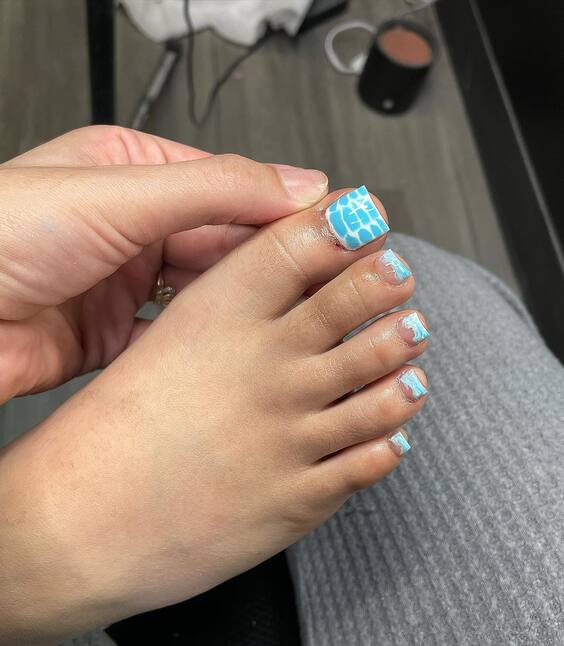
Inspired by clear blue skies, this toe nail design features a sky blue base with white clouds and a detailed mosaic pattern. This artistic and calming design is perfect for those who appreciate a unique and thematic approach to nail art, reflecting the serene beauty of a summer sky.
- Consumables Needed:
- Sky blue nail polish
- White nail polish for cloud patterns
- Mosaic decals or a fine brush for detail work
- Clear top coat
Recommendation: For the cloud effect, use a sponge to dab on white polish softly.
DIY Steps:
- Paint a base of sky blue polish.
- Create cloud patterns using a sponge dipped in white polish.
- Apply mosaic decals or hand-paint details for a complex finish.
- Apply a clear top coat to protect and enhance the design.
Heartful Pink
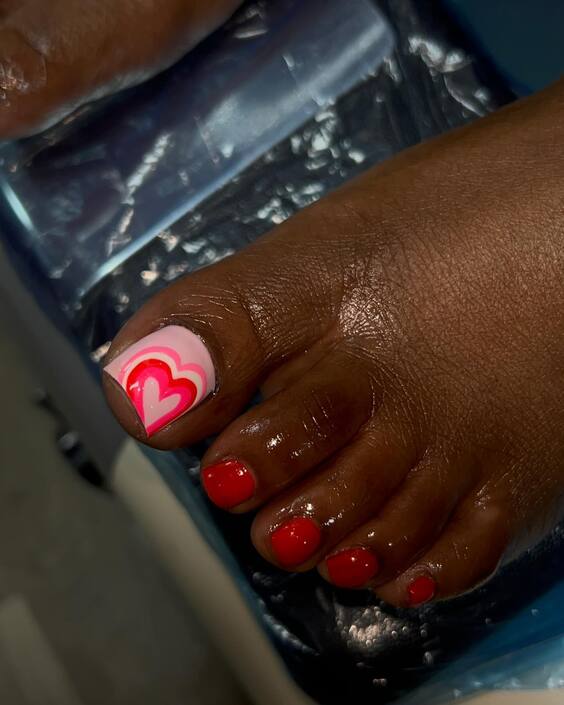
This delightful toe nail design features a radiant pink base, decorated with a bold heart motif that captures a playful yet romantic essence. It’s perfect for those looking to express love and joy through their style, making it an excellent choice for special occasions or everyday cheer.
- Consumables Needed:
- Bright pink nail polish
- White nail polish for the heart design
- Detailing brush or a fine-tip nail art pen
- Clear top coat for a glossy finish
Recommendation: Use a stencil or freehand the heart with a steady hand for precision.
DIY Steps:
- Apply two coats of bright pink nail polish as the base.
- Paint a large white heart on the big toe using a detailing brush.
- Let it dry completely before applying a clear top coat to protect and enhance the design.
Funky Owl Art
This eye-catching design is perfect for those who adore bold, artistic expressions. It features intricately painted owls on a backdrop of multi-colored polka dots, showcasing a brilliant mix of colors and a playful theme that’s bound to turn heads.
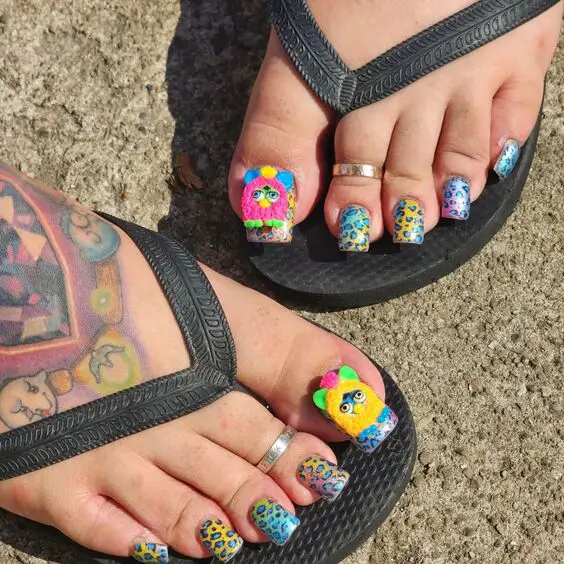
- Consumables Needed:
- Various shades of colorful nail polish for the base and dots
- Black nail polish for owl detailing
- A set of fine brushes for detailed art work
- Clear top coat to seal the design
Recommendation: Practice the owl design on paper before attempting it on nails to ensure accuracy.
DIY Steps:
- Apply a neutral base coat.
- Add multi-colored polka dots randomly across the toes.
- Carefully paint owl designs on the largest toenails.
- Finish with a clear top coat for longevity and shine.
Sunny Pineapple Yellow
This playful design is all about bringing tropical vibes to your toes. It features a bright yellow base with adorable pineapple patterns and a smiling face, ideal for summer days or a vacation mood. It’s cheerful and sure to evoke smiles wherever you go.
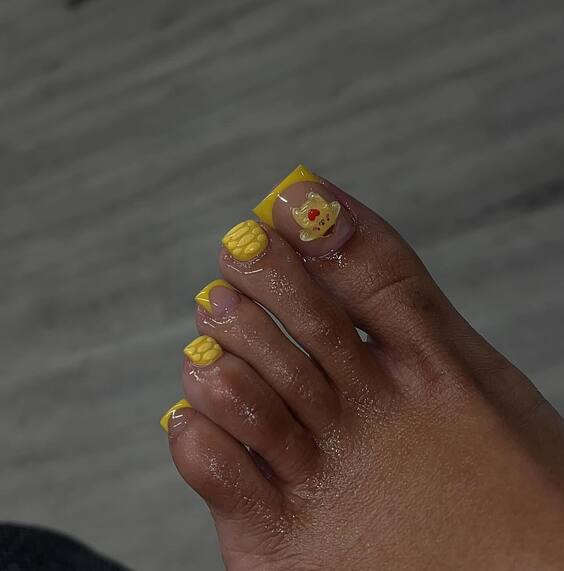
- Consumables Needed:
- Bright yellow nail polish
- Green nail polish for pineapple leaves
- Black and red nail polish for detailing the face
- Clear top coat for durability
Recommendation: Use a thin brush for the pineapple leaves and facial features to maintain detail.
DIY Steps:
- Paint all toes with a bright yellow base.
- On the big toes, add pineapple designs using green and black polish.
- Add a smiling face on one toe to enhance the fun theme.
- Seal the design with a clear top coat to ensure it lasts through your adventures.
Vibrant Neon Leopard
This toe nail design explodes with vibrant personality, featuring a bold magenta base with neon green and black leopard spots. It’s perfect for those looking to make a statement with their summer style, blending wild patterns with eye-catching colors.
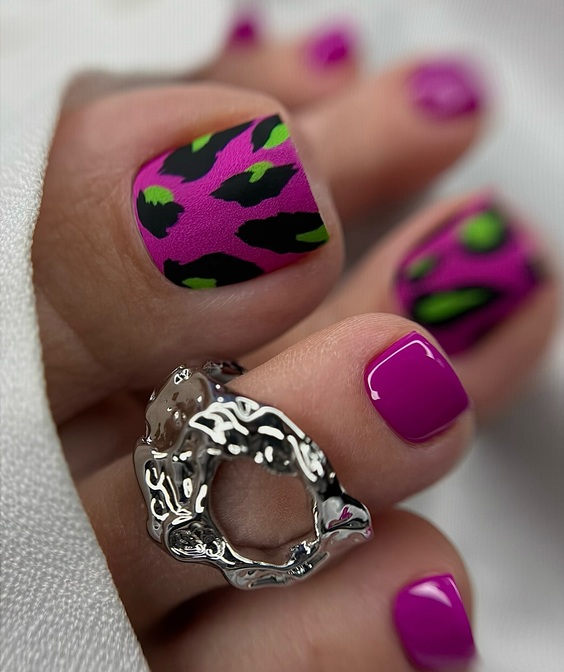
- Consumables Needed:
- Magenta nail polish
- Neon green nail polish
- Black nail polish for leopard spots
- Small detailing brush
- Clear top coat for protection
Recommendation: Use a small dotting tool or the tip of a brush for precise spot creation.
DIY Steps:
- Apply two coats of magenta nail polish as the base.
- Dot on neon green spots randomly.
- Outline the green spots with black to create the leopard pattern.
- Finish with a clear top coat to enhance durability and shine.
Cool Blue Leopard
This toe nail design brings a cool twist to the classic leopard print, using a serene blue base with white and deeper blue accents. It’s a fantastic choice for those who prefer their animal prints with a unique, cooler color palette, suitable for both casual and more upscale summer events.
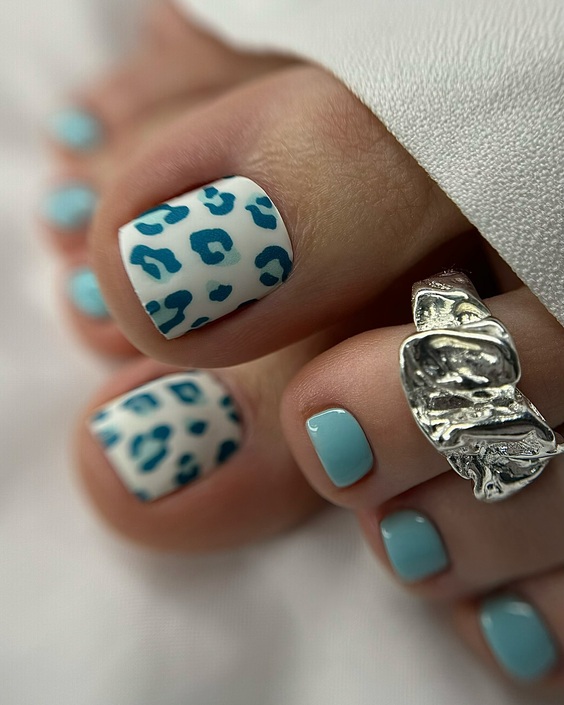
- Consumables Needed:
- Light blue nail polish
- White and dark blue nail polish for accents
- Detailing brush or dotting tool
- Clear top coat
Recommendation: For a smoother pattern, layer the white dots under the dark blue for added depth.
DIY Steps:
- Paint all toes with a light blue polish as the base.
- Add white spots, then edge these in dark blue to form the leopard spots.
- Seal with a clear top coat to ensure the design stays pristine.
Neutral Tones with Charm
This design elegantly combines muted tones with playful nail art, featuring a mix of taupe and white polishes accented by geometric patterns and a cute polar bear decal on the big toe. It’s ideal for those who prefer their toe nail art subtle yet charming, perfect for blending with a variety of outfits.
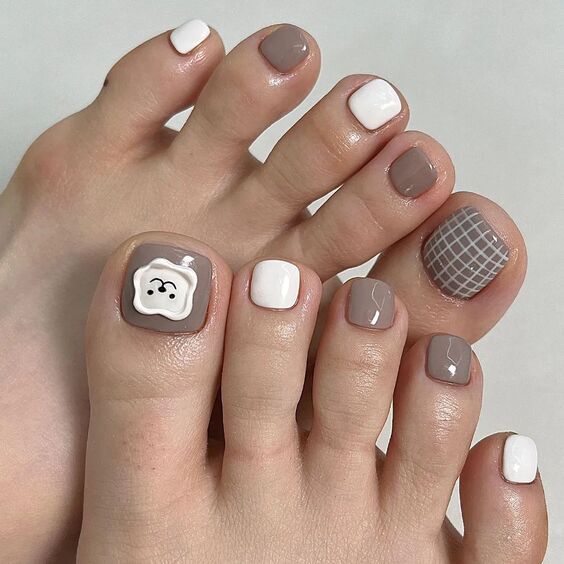
- Consumables Needed:
- Taupe and white nail polish
- Polar bear decal
- Striping tape for geometric designs
- Clear top coat
Recommendation: Place decals carefully with tweezers for precision and avoid bubbles by pressing firmly.
DIY Steps:
- Apply taupe polish on some toes and white on others.
- Use striping tape to create geometric patterns on selected toes.
- Apply the polar bear decal on the big toe.
- Finish with a clear top coat for a sleek, long-lasting effect.
Conclusion
As we wrap up our vibrant journey through diverse and delightful toe nail designs, it’s clear that the possibilities are endless when it comes to adorning your toes. From the wild energy of neon leopard prints to the understated elegance of neutral tones with charming decals, each design offers a unique way to express your personal style this summer. Remember, the best accessory is one that you wear with confidence, and what better way to feel fabulous than with perfectly polished toes? So, grab your favorite nail polishes and start experimenting, or visit your local nail salon to bring these captivating designs to life. Let your toes do the talking this season and step into the spotlight with style!

