21 Summer August Nail Designs: Neon, Botanical & Pastel Manicure Ideas
Are you ready to dazzle this August with the hottest nail designs? Whether you’re lounging by the pool, attending a summer wedding, or just want to add a splash of color to your everyday look, our curated selection of nail designs will ensure your nails are nothing short of spectacular. What makes August’s palette stand out in the realm of summer nails? Let’s find out as we explore vibrant colors, intricate patterns, and easy-to-follow designs that you can recreate at home.
Floral Pastel Perfection
The first look features a delicate pastel base adorned with subtle floral accents. The soft lavender and baby blue hues, combined with white and muted green floral designs, give a fresh, ethereal feel ideal for summer. This design not only captures the essence of August blooms but also pairs beautifully with light summer fabrics.
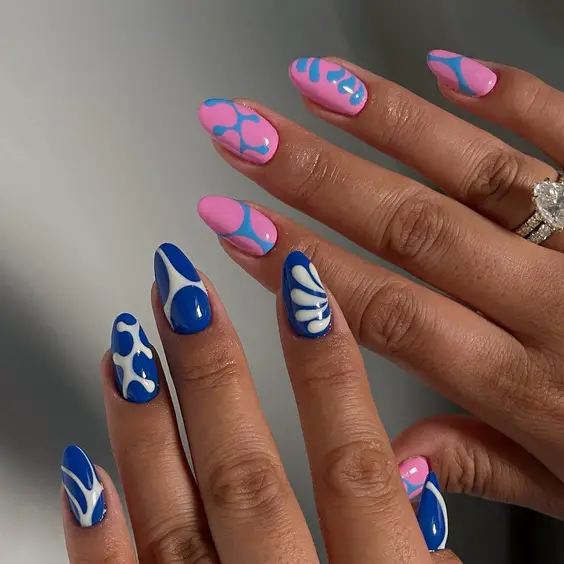
Consumables Needed
- Base coat: Essie “Grow Stronger”
- Pastel lavender polish: OPI “Do You Lilac It?”
- Baby blue polish: CND “Creekside”
- White polish for detailing: Sally Hansen “White On”
- Muted green polish: Zoya “Tilda”
- Top coat: Seche Vite Dry Fast
DIY Instructions
Start with a clean, prepped nail and apply a base coat. Once dry, paint two coats of the pastel lavender. Using a thin brush, create small floral patterns with the baby blue and white polishes. Add leaves with the muted green. Seal your artwork with a fast-drying top coat for a glossy finish and enhanced durability.
Tropical Blue Waves
Dive into the deep blue with this ocean-inspired design. Bold, wavy patterns of aqua and navy mimic the mesmerizing movements of sea waves. This design is perfect for those who love a dramatic, eye-catching look that screams summer adventure.
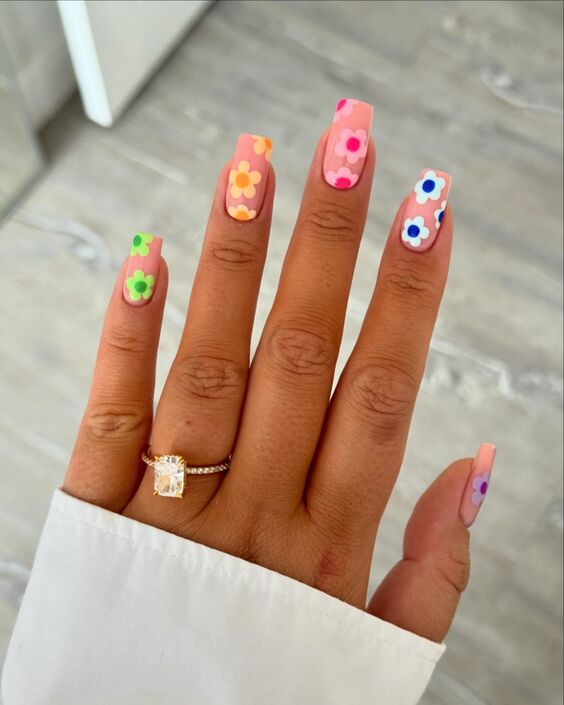
Consumables Needed
- Base coat: Butter London Nail Foundation
- Aqua polish: China Glaze “Too Yacht to Handle”
- Navy polish: Essie “After School Boy Blazer”
- Detailing tool or small brush
- Top coat: Seche Vite Dry Fast
DIY Instructions
Apply a base coat to protect your nails. Paint the entire nail with aqua. Once dry, use a small brush to draw wavy patterns with the navy polish. The waves don’t need to be perfect—embrace the irregularities to mimic the ocean’s natural flow. Finish with a top coat for a long-lasting shine.
Elegant Sunset Gradient
Nothing says summer like a stunning sunset gradient. This design blends fiery shades of red, orange, and yellow, mimicking an August sunset. The seamless transition between colors creates a warm, inviting look that’s both sophisticated and playful.
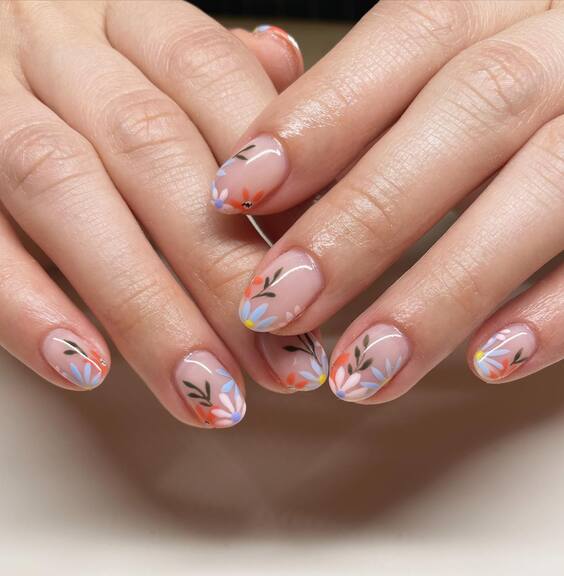
Consumables Needed
- Base coat: OPI Natural Nail Base Coat
- Red polish: Sally Hansen “Red My Lips”
- Orange polish: Essie “Tart Deco”
- Yellow polish: Orly “Melt Your Popsicle”
- Sponge for gradient effect
- Top coat: Seche Vite Dry Fast
DIY Instructions
Begin with a base coat. Apply a light layer of red polish as the base color. Take a sponge and dab on layers of orange and yellow, blending where the colors meet to create a gradient effect. Continue layering until you achieve the desired intensity. Apply a top coat to smooth out the texture and add a glossy finish.
Lavish Floral Accents
This nail design showcases a beautiful blend of elegance and whimsy, perfect for any summer event. The base is a transparent pale pink that enhances the natural beauty of the nail, topped with delicate blue flowers and golden accents that add a touch of luxury. The detailed artistry in the floral patterns, combined with the strategic placement of golden embellishments, creates a sophisticated yet playful look.
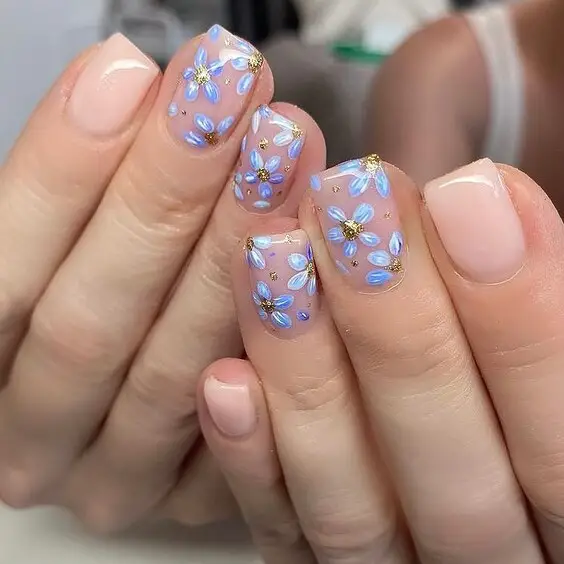
Consumables Needed
- Base coat: Deborah Lippmann Gel Lab Pro
- Pale pink polish: Essie “Ballet Slippers”
- Blue acrylic paint for flowers
- Golden studs and microbeads
- Detailing brush
- Top coat: Deborah Lippmann Gel Lab Pro
DIY Instructions
Prepare your nails with a base coat and apply two coats of Essie “Ballet Slippers.” Once dry, use a fine detailing brush to paint the blue flowers. Place golden studs at the center of each flower and scatter microbeads to enhance the floral theme. Seal your design with a top coat to ensure longevity and gloss.
Sunset Bloom
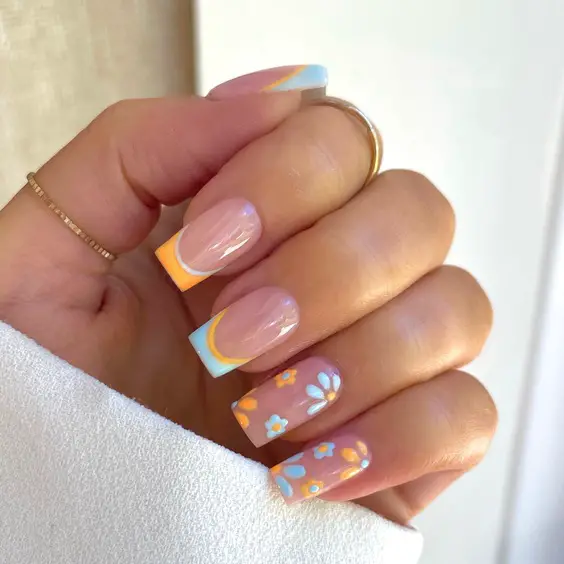
Inspired by the warm hues of a sunset, this nail design combines a matte orange and sky blue gradient with floral accents for a vibrant summer look. The use of matte finish juxtaposed with glossy flower details offers a stunning textural contrast that is both eye-catching and stylish.
Consumables Needed
- Base coat: OPI Natural Nail Base Coat
- Orange matte polish: Zoya “Sawyer”
- Sky blue matte polish: China Glaze “Sunday Funday”
- White polish for flowers
- Detailing brush
- Matte top coat
- Glossy top coat for floral highlights
DIY Instructions
Apply a base coat followed by a coat of matte orange polish. While still tacky, blend in the sky blue polish using a sponge to create a gradient effect. Once dry, paint small white flowers with a glossy finish over the matte background to create a pop effect. Finish with a matte top coat, leaving the flowers glossy for a multi-texture look.
Pastel Ombre Elegance
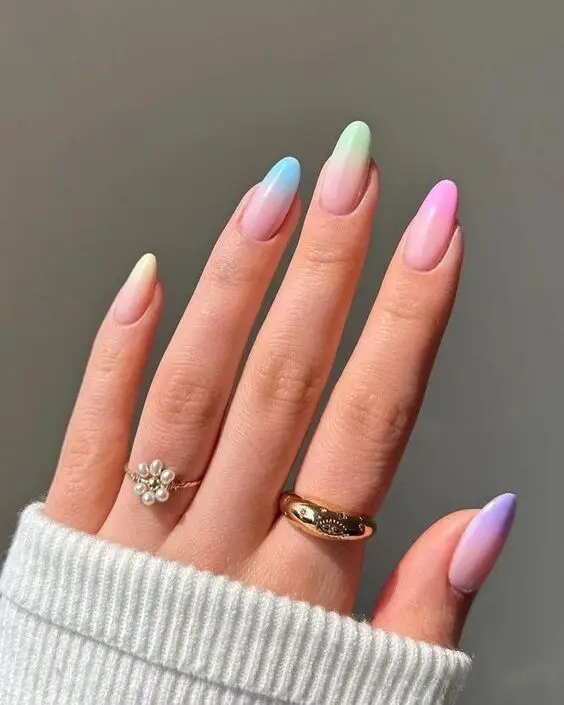
This nail design epitomizes the soft, dreamy essence of August with its pastel ombre effect. Using a palette of mint green, sky blue, lavender, and soft pink, each nail transitions smoothly from one color to the next, evoking the serene colors of a late summer sky.
Consumables Needed
- Base coat: Sally Hansen Miracle Gel
- Pastel polishes: Lavender (Essie “Lilacism”), Mint Green (CND “Mint Convertible”), Sky Blue (Essie “Bikini So Teeny”), Soft Pink (OPI “Pink Friday”)
- Sponge for ombre application
- Top coat: Sally Hansen Miracle Gel Top Coat
DIY Instructions
After applying a base coat, paint each nail with a different pastel shade as the base color. Then, use a sponge to dab and blend adjacent colors on each nail to create the ombre effect. Carefully build the gradient until you achieve a seamless transition between hues. Finish with a glossy top coat for a smooth and shiny appearance.
Subtle Pink Flora
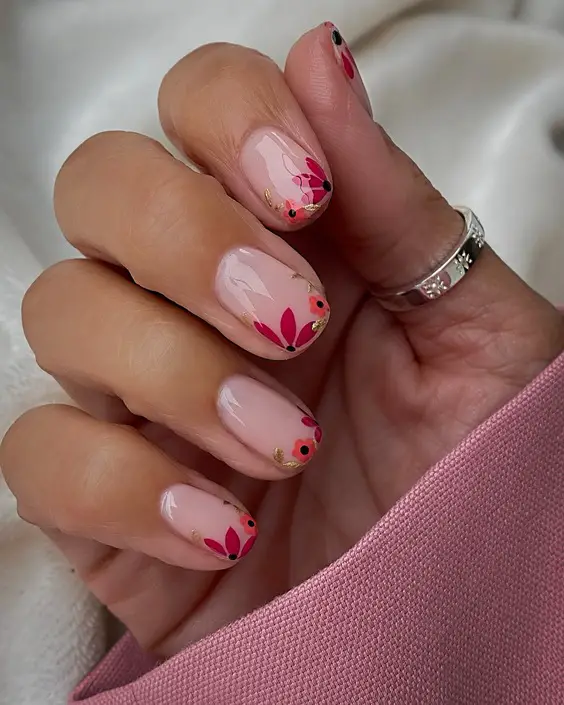
This design is a perfect blend of subtlety and elegance, ideal for a minimalist who still wants a touch of flair. The sheer pink base provides a natural look, enhanced with small, abstract floral designs in vibrant red and green. Tiny gold beads are strategically placed to add a sparkle that catches the light beautifully, making this design both simple and sophisticated.
Consumables Needed
- Base coat: CND Stickey Base Coat
- Sheer pink polish: Dior Nail Glow
- Red and green acrylic paint
- Gold microbeads
- Detailing brush
- Top coat: Sally Hansen Insta-Dri
DIY Instructions
Apply a base coat to protect your nails. Use two coats of Dior Nail Glow for a healthy, pink sheen. With a detailing brush, add small red flowers and green dots to mimic leaves. Place a gold bead at the center of each flower before the paint dries. Finish with a quick-drying top coat to seal in your design and add durability.
Modern French Twist
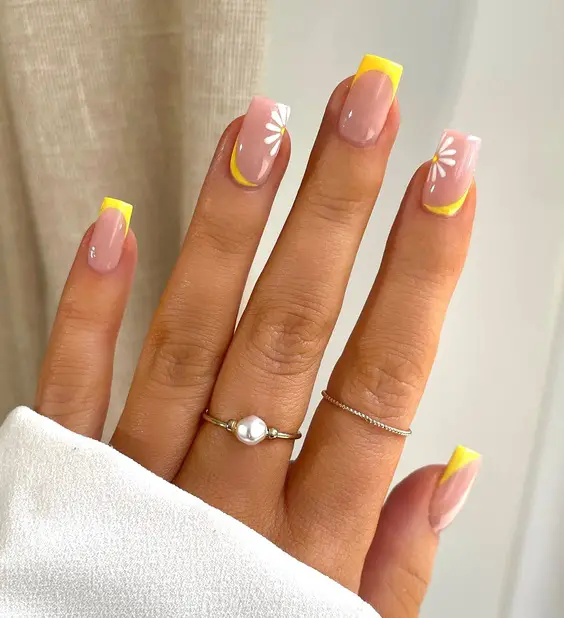
Revamping the classic French manicure, this design incorporates a modern twist with sharp geometric shapes and a pop of sunny yellow. The matte lavender base pairs wonderfully with the crisp white and yellow tips, offering a fresh, contemporary look that’s both striking and playful.
Consumables Needed
- Base coat: ORLY Bonder Rubberized Basecoat
- Matte lavender polish: Essie “Go Ginza”
- White and yellow polish: OPI “Alpine Snow” and “Exotic Birds Do Not Tweet”
- Matte top coat
- Tape or nail guides for precise lines
DIY Instructions
Start with the ORLY Bonder as a base. Apply two coats of “Go Ginza” and let it dry completely. Use tape to achieve sharp lines, then apply “Alpine Snow” and “Exotic Birds Do Not Tweet” for the tips. Remove the tape while the polish is still slightly wet to ensure clean lines. Finish with a matte top coat for a modern, sophisticated look.
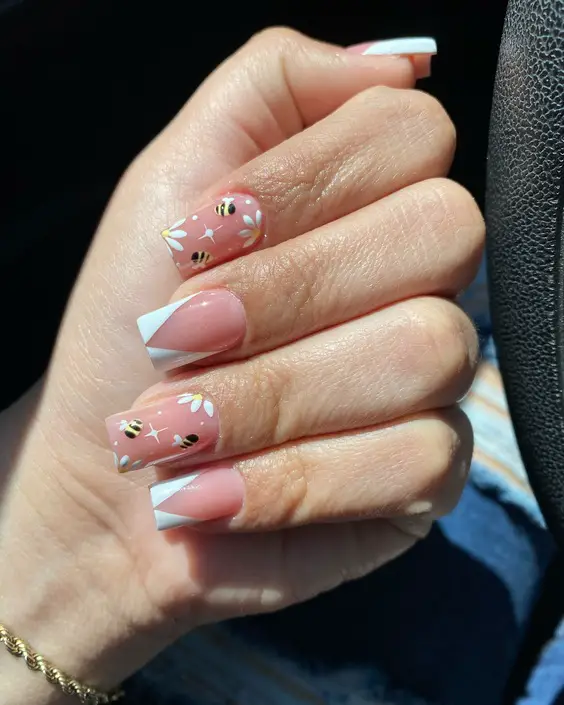
Cherry Blossom Tips
This nail design captures the delicate beauty of cherry blossoms using a French tip as a canvas. The soft pink gradient on the nails provides a perfect backdrop for the white cherry blossom accents, detailed with tiny black dots for depth. This look is romantic and whimsically artistic, great for any summer outing or special occasion.
Consumables Needed
- Base coat: Essie “Grow Stronger”
- Soft pink polish: OPI “Bubble Bath”
- White polish for detailing: Sally Hansen “White On”
- Black acrylic paint
- Detailing brush
- Top coat: Seche Vite Dry Fast
DIY Instructions
Apply a strengthening base coat followed by a soft pink polish as the base color. Create a French tip with a more intense shade of the same color. Use a detailing brush to draw cherry blossoms on the tips, adding black dots to the center of each blossom. Seal your design with a fast-drying top coat for a smooth, durable finish.
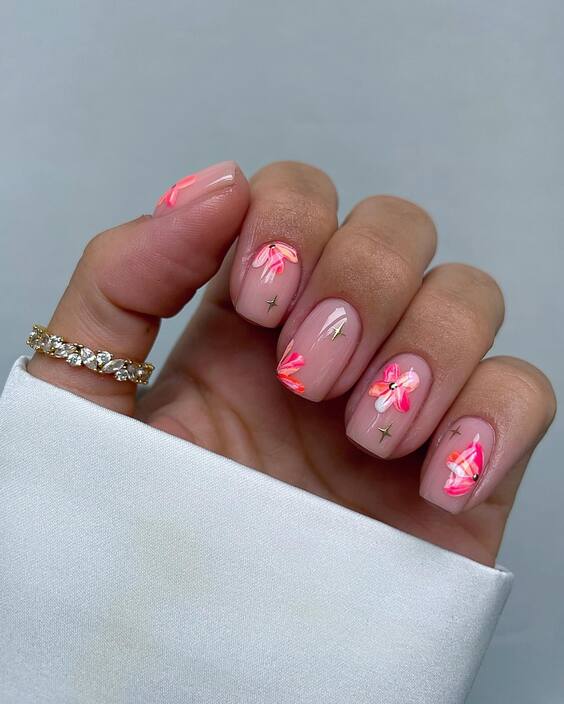
Daisy Delights
This charming design breathes life into the classic idea of floral nails, featuring daisies on a pastel lavender background. The careful placement of yellow centers and white petals introduces a playful yet refined style, perfect for a summer day out or a casual brunch.
Consumables Needed
- Base coat: ORLY Bonder Rubberized Basecoat
- Pastel lavender polish: Essie “Lilacism”
- White and yellow acrylic paint for daisies
- Detailing brush
- Top coat: Seche Vite Dry Fast
DIY Instructions
Start by applying a base coat for protection. Paint your nails with two coats of Essie “Lilacism” as a smooth base. Using a detailing brush, paint white petals around small yellow dots to create daisy designs. Seal your floral art with a top coat for a glossy, enduring finish.
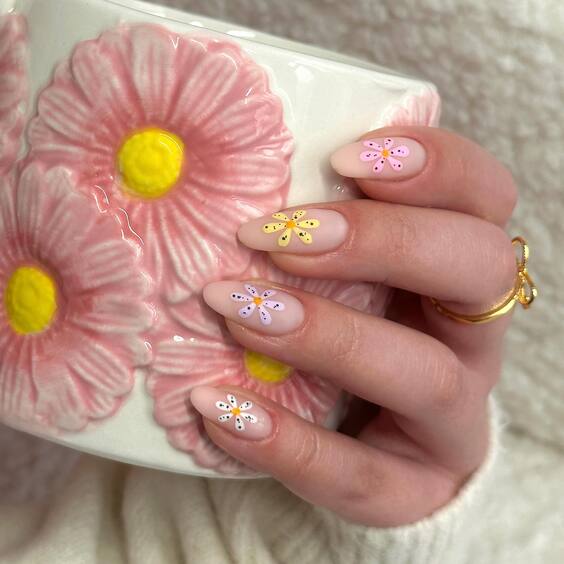
Soft Floral French
Updating the French manicure with a floral twist, this design uses a sheer base with vibrant yellow tips that seamlessly blend into delicate white floral patterns. This inventive approach not only modernizes a timeless style but also adds a touch of warmth, ideal for the vibrant energy of August.
Consumables Needed
- Base coat: CND Stickey Base Coat
- Sheer polish: Essie “Ballet Slippers”
- Yellow and white polish: OPI “Exotic Birds Do Not Tweet” and “Alpine Snow”
- Detailing brush
- Top coat: OPI Top Coat
DIY Instructions
Apply the base coat followed by a layer of Essie “Ballet Slippers” for a natural look. Paint the tips with OPI “Exotic Birds Do Not Tweet.” While the yellow is still tacky, use a detailing brush to draw small white flowers, blending into the yellow for a gradient effect. Finish with a top coat to ensure longevity and shine.
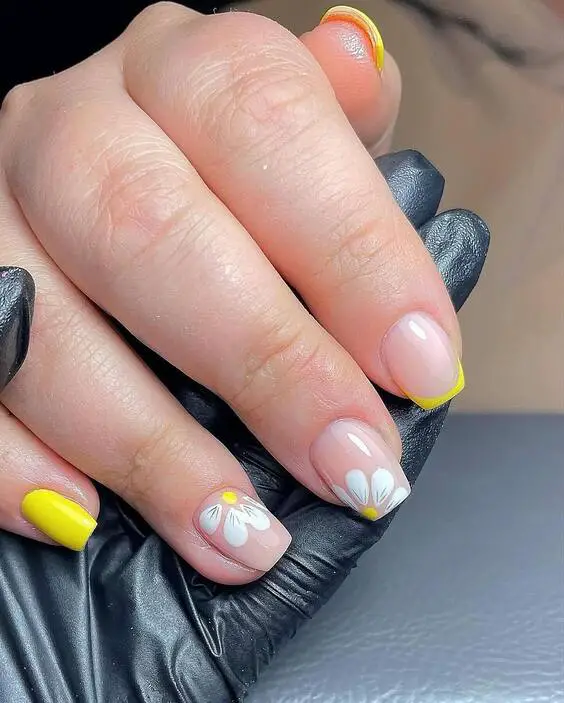
Elegant Daisy French
This sophisticated design reimagines the French manicure with a playful yet elegant twist, featuring white daisies with yellow centers on a pink gradient base. The crisp white tips add a traditional touch, while the floral accents offer a fresh, summery vibe.
Consumables Needed
- Base coat: Essie “Grow Stronger”
- Pink polish for gradient: OPI “Pink Flamenco”
- White and yellow polish for detailing: Sally Hansen “White On” and Essie “Sunshine State of Mind”
- Sponge for gradient
- Detailing brush
- Top coat: Sally Hansen Miracle Gel Top Coat
DIY Instructions
Apply a base coat to protect your nails. Use a sponge to create a soft pink gradient with OPI “Pink Flamenco.” Carefully paint white daisies with yellow centers over the gradient, focusing the designs near the tips. Apply a crisp white tip over the gradient and floral design. Finish with a glossy top coat for a smooth, protective seal.
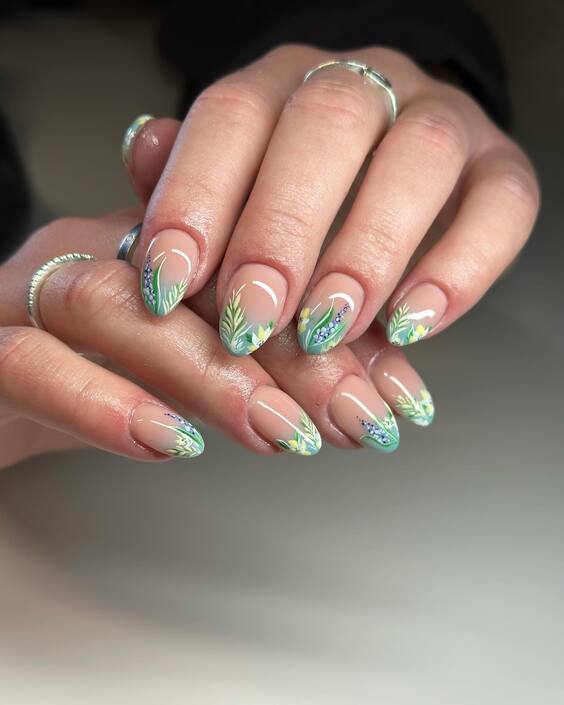
Serene Green Whispers
Embodying the tranquil essence of nature, this design features delicate green leaves and subtle lavender accents against a clear background. The precise application and fine detailing echo the peaceful, serene vibes perfect for a reflective summer day.
Consumables Needed
- Base coat: CND Stickey Base Coat
- Clear polish: OPI “Natural Nail Base Coat”
- Green and lavender acrylic paint
- Fine detailing brush
- Top coat: Seche Vite Dry Fast
DIY Instructions
Begin with a protective base coat, followed by a layer of clear polish for a clean canvas. Use a fine brush to draw intricate green leaves and add lavender accents for a touch of color contrast. Each stroke should be thin and precise to mimic natural foliage. Seal with a top coat for a lasting glossy finish.
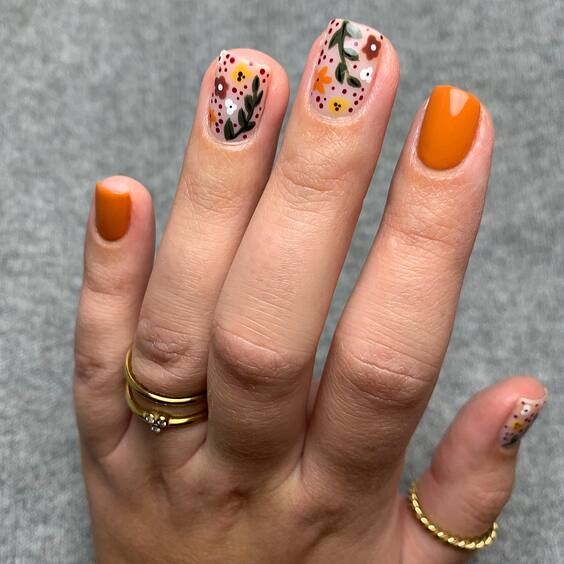
Autumnal Splatter
This vibrant nail design takes inspiration from the energetic colors of fall but fits perfectly into a late summer aesthetic. It features a bright orange base with a playful splatter of black and white dots and abstract foliage patterns, which provide a dynamic, artistic look.
Consumables Needed
- Base coat: Essie “Here to Stay”
- Bright orange polish: Sally Hansen “Sun Kissed”
- Black and white polish: Essie “Licorice” and “Blanc”
- Small dotting tools
- Top coat: OPI Top Coat
DIY Instructions
Apply a base coat to protect your nails. Paint two coats of “Sun Kissed” for a vivid orange background. Dip a dotting tool into black and white polishes to create random splatters across each nail. Add abstract leaf designs in the mix for a textured look. Finish with a clear top coat for durability and shine.
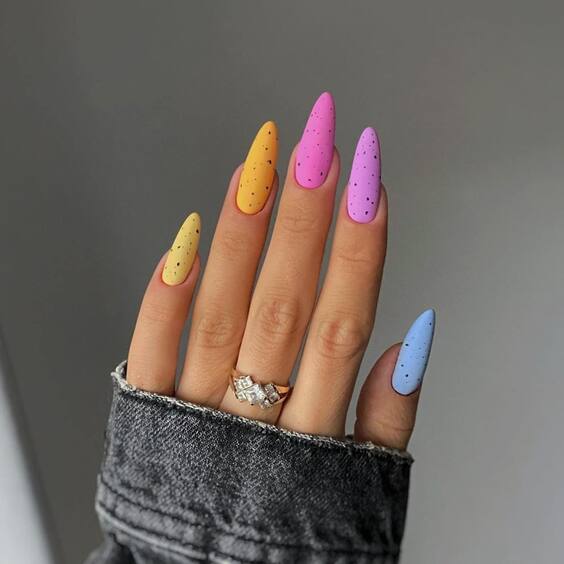
Playful Pastel Polka
Celebrate the joyous mood of summer with this playful design featuring a spectrum of pastel hues sprinkled with black polka dots. Each nail showcases a different color, creating a fun, vibrant effect that’s both eye-catching and stylish.
Consumables Needed
- Base coat: ORLY Bonder Rubberized Basecoat
- Pastel polishes: Essie “Mint Candy Apple,” “Lilacism,” “Peach Side Babe,” and “Bikini So Teeny”
- Black polish for dots: Essie “Licorice”
- Dotting tool
- Top coat: Seche Vite Dry Fast
DIY Instructions
Start with a base coat to ensure your nails are well protected. Apply two coats of each pastel polish on different nails for a multicolored effect. Using a dotting tool, apply small black dots over the dried pastel backgrounds for a whimsical polka-dot pattern. Seal with a top coat to enhance the colors and ensure a lasting finish.
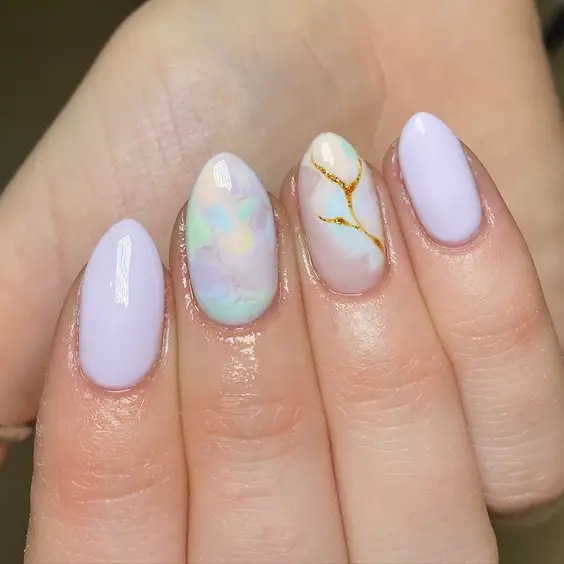
Marble Elegance
This design is a masterpiece of nail art, featuring a stunning marbled effect with swirls of white, teal, and lavender on a nude base. Enhanced by delicate gold veining, it exudes sophistication and elegance, ideal for a formal event or a luxurious evening out.
Consumables Needed
- Base coat: ORLY Bonder Rubberized Basecoat
- Nude polish: Essie “Topless & Barefoot”
- White, teal, and lavender acrylic paint for marbling
- Gold striping tape
- Detailing brush
- Top coat: Seche Vite Dry Fast
DIY Instructions
Apply a base coat and a nude color as the foundation. Drop small blobs of white, teal, and lavender paint on the nail and use a fine brush to swirl the colors together, creating a marbled effect. Add thin lines of gold striping tape to accentuate the marble with elegant veins. Finish with a top coat to protect and enhance the intricate design.
Summer Sky Blossoms
Bright and cheerful, this design captures the essence of a clear summer sky with a vibrant blue base and scattered white daisies. The yellow centers of the flowers add a pop of color, making this style perfect for daytime outings or casual summer gatherings.
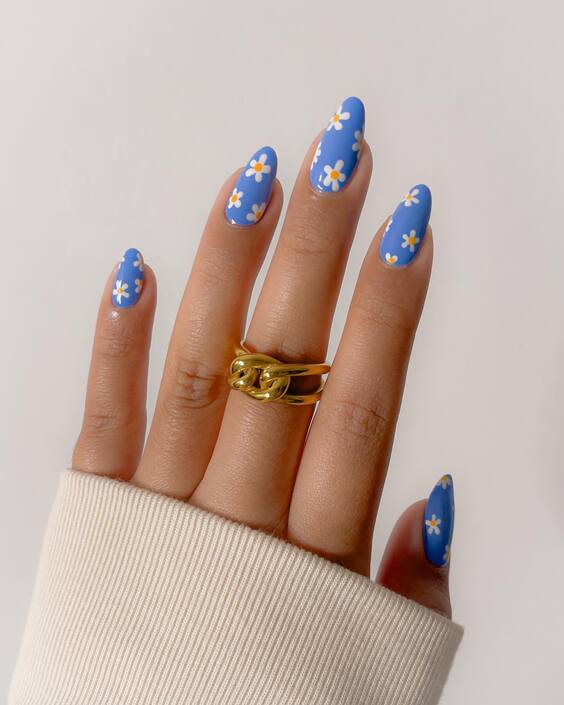
Consumables Needed
- Base coat: CND Stickey Base Coat
- Blue polish: OPI “Can’t Find My Czechbook”
- White and yellow acrylic paint for daisies
- Detailing brush
- Top coat: OPI Top Coat
DIY Instructions
Begin with a base coat to protect your nails. Apply two coats of vibrant blue polish as the background. Use a detailing brush to paint small white daisies with yellow centers over the blue. Allow each layer to dry completely before adding the next to prevent smudging. Seal with a top coat for a glossy finish and extended wear.
Floral Artistry
This design is a true floral fantasy, featuring an array of detailed flowers in shades of pink, purple, and green on a white base. The intricate detailing and vibrant colors make it an eye-catching choice for any occasion that calls for a touch of nature’s beauty.
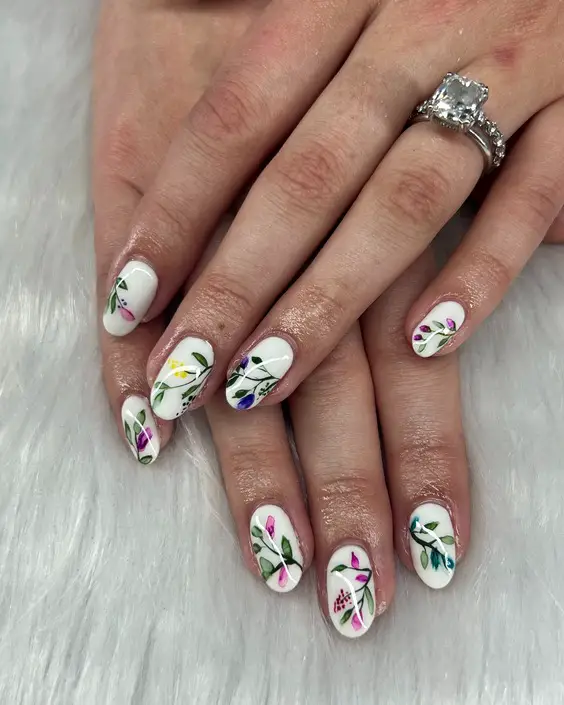
Consumables Needed
- Base coat: Essie “Grow Stronger”
- White polish: Essie “Blanc”
- Pink, purple, and green acrylic paint for floral details
- Detailing brush
- Top coat: Sally Hansen Miracle Gel Top Coat
DIY Instructions
Start with a strengthening base coat and apply a white polish as the base. Once dry, use a fine detailing brush to paint an assortment of flowers in pink and purple, adding green leaves for contrast. Each element should be finely detailed to capture the delicate nature of the flowers. Finish with a glossy top coat to protect your artwork and add a high-shine effect.
Neon Elegance
This modern take on the classic French manicure infuses vibrant neon pink to create an eye-catching curve against a transparent base. The design’s simplicity paired with a striking color choice makes it a standout option for both casual wear and special occasions.
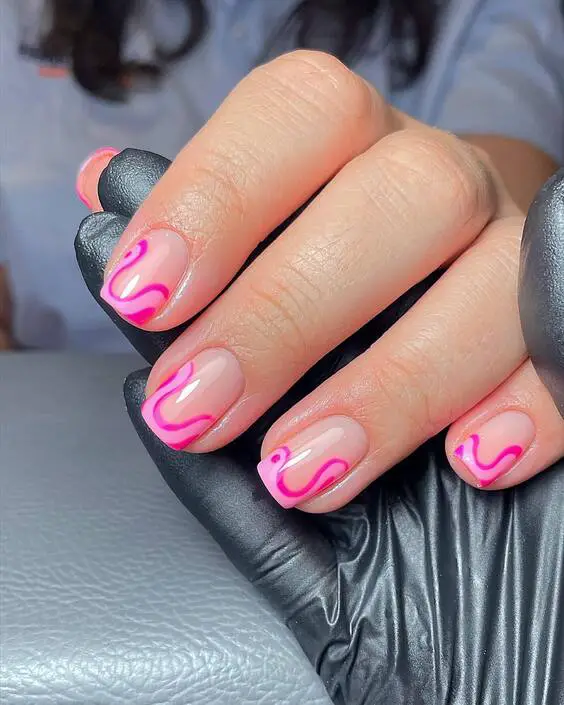
Consumables Needed
- Base coat: ORLY Bonder Rubberized Basecoat
- Transparent polish: OPI “Natural Nail Base Coat”
- Neon pink polish: Essie “Fluorescent Fuchsia”
- Detailing brush
- Top coat: Seche Vite Dry Fast
DIY Instructions
Apply the base coat to protect your nails. Use a transparent polish as the base layer. With a fine detailing brush, paint a neon pink curve at the tip of each nail, following its natural shape. Seal with a top coat for a glossy, long-lasting finish.
Botanical Minimalism
Embrace the beauty of minimalism with this elegant design featuring subtle botanical illustrations on a matte nude base. This manicure is perfect for those who prefer a more understated look but still enjoy a touch of artistic flair.
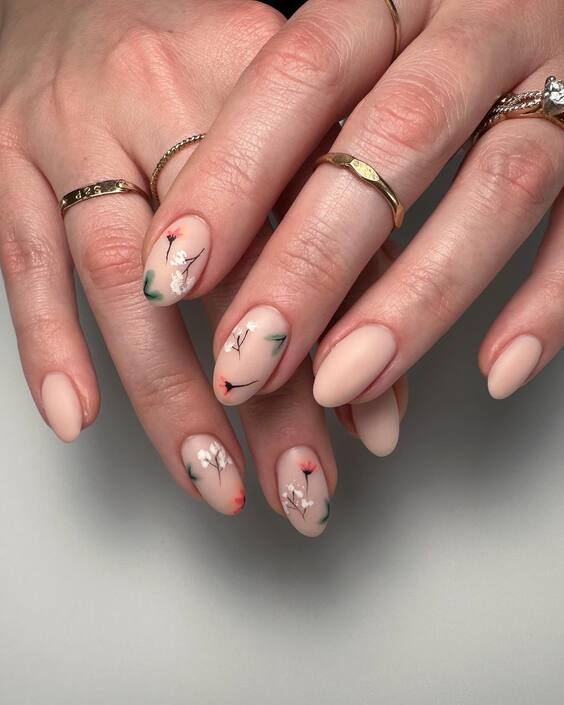
Consumables Needed
- Base coat: CND Stickey Base Coat
- Nude matte polish: Essie “Matte About You”
- Green and red acrylic paint
- Detailing brush
- Matte top coat
DIY Instructions
Start with a base coat to ensure nail protection. Apply two coats of matte nude polish as the base. Once dry, use a detailing brush to paint small, delicate botanical patterns using green and red paints. Focus on simplicity and elegance in your designs. Finish with a matte top coat to enhance the understated beauty of the artwork.
Playful Pastel
This lively design features a variety of patterns and colors, making each nail distinct yet harmoniously combined. From geometric lines to soft florals, the playful use of pastel shades makes this manicure ideal for spring and summer, or simply for brightening up everyday looks.
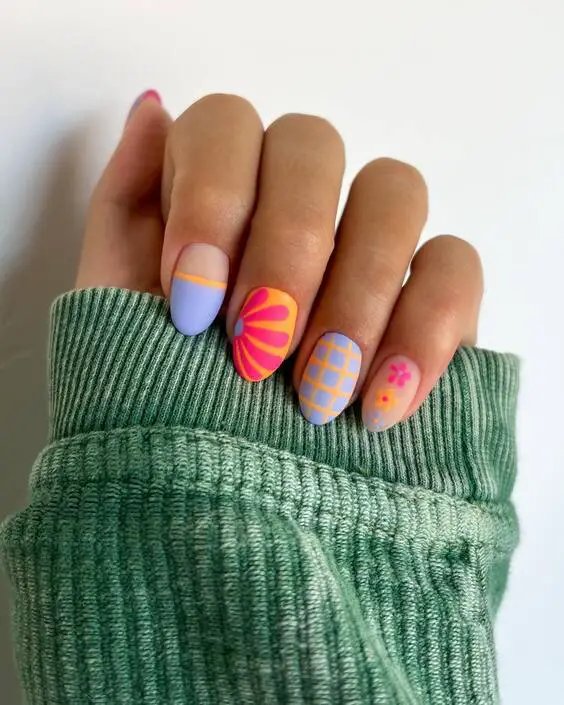
Consumables Needed
- Base coat: Sally Hansen Miracle Gel
- Pastel polishes: Essie “Mint Candy Apple,” “Peach Side Babe,” “Lilacism”
- Detailing tools for patterns and dots
- Top coat: Sally Hansen Miracle Gel Top Coat
DIY Instructions
Apply a base coat to protect your nails. Choose different pastel shades for each nail, applying two coats for full coverage. Use detailing tools to create a variety of designs, such as stripes, dots, and abstract shapes. Play with the placement and combination of patterns to keep each nail unique. Seal with a top coat for a durable, glossy finish.
As we conclude our showcase of summer august nail designs, we’ve explored an array of styles from neon accents to intricate botanical details, demonstrating the vast possibilities in nail art. Each design offers a way to express your individuality and style, ensuring your nails are always a highlight of your summer ensemble. Experiment with these designs or draw inspiration to create your own unique patterns!

