23 Summer Rainbow Nail Designs 2024: Bold & Cute Manicure Ideas
Are you ready to dive into the world of vibrant and eye-catching summer rainbow nail designs? As summer approaches, the trend of colorful manicures takes center stage, bringing a splash of color to every outfit. But what makes a rainbow design perfect for summer 2024? In this article, we’ll explore stunning summer nails 2024 rainbow inspirations and provide practical tips on how you can recreate these cute summer rainbow nails at home. Whether you’re a novice or a seasoned nail artist, get ready for some colorful creativity!
Vibrant Swirls of Color
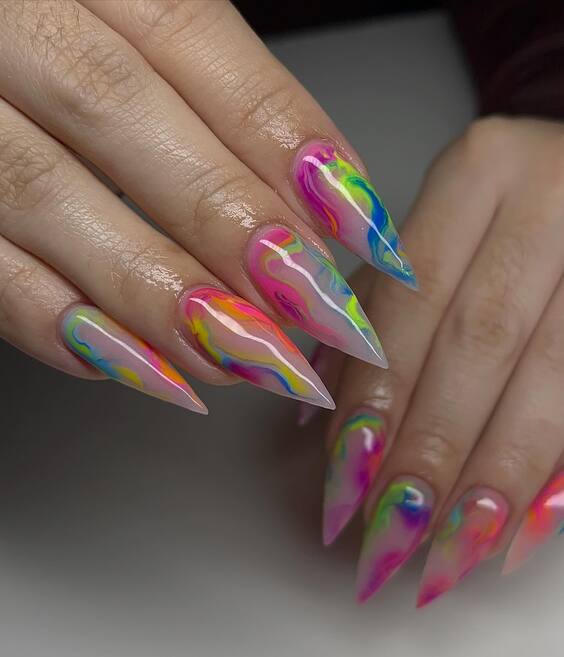
The first design features a dynamic swirl of neon colors, creating an almost hypnotic effect that catches the eye. This nail art uses a brilliant combination of hot pink, electric blue, and lime green, swirling together on a white base which makes the colors pop even more. It’s a bold choice for those who love to stand out. The sharp, stiletto shape adds an edgy touch to the playful colors.
Consumables List
- Base Coat: Opt for a high-adhesion base like OPI Natural Nail Base Coat.
- White Polish: Sally Hansen Hard as Nails Xtreme Wear in “White On”.
- Neon Polishes: A set from the Orly Feel the Vibe collection, particularly the hot pink, electric blue, and lime green.
- Top Coat: Seche Vite Dry Fast Top Coat for a glossy finish.
DIY Instructions
Start with a clean, buffed nail and apply a base coat. Once dry, apply two coats of white polish as the base color. For the swirls, use a fine nail art brush to paint thin lines of each neon color in a random, swirling pattern. Don’t worry about perfection; the beauty is in the blend. Seal your design with a fast-drying top coat for longevity and gloss.
Striped Rainbow Brilliance
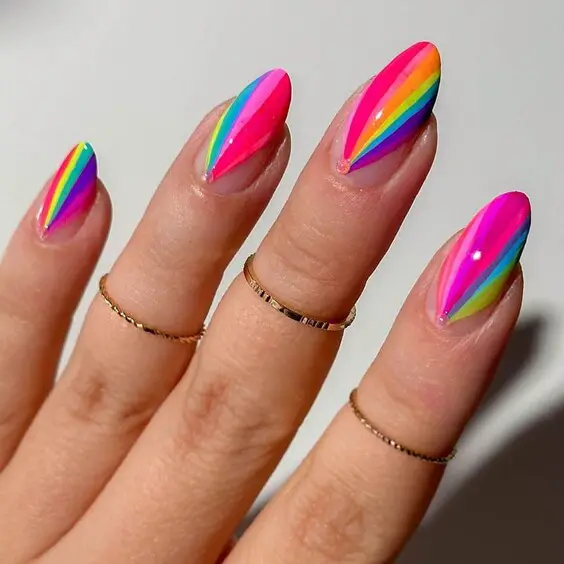
This design cleverly uses the brightness of rainbow stripes against a glossy, opaque background to emphasize each color’s vibrancy. Perfectly aligned stripes in shades of the rainbow stretch across each nail, creating a seamless transition from one hue to the next. This look is not only visually stunning but also symbolizes the beauty of diversity.
Consumables List
- Base Coat: Essie Here to Stay Base Coat.
- Black Polish: China Glaze Liquid Leather.
- Rainbow Polishes: Revlon Colorstay Gel Envy in multiple shades.
- Striping Tape: Thin adhesive tape for precise lines.
- Top Coat: Sally Hansen Miracle Gel Top Coat.
DIY Instructions
Apply a base coat to protect your nails and follow with a solid black base layer. Once dry, apply striping tape in even intervals. Then, paint each section with a different color, carefully removing the tape while the polish is still wet. Finish with a gel top coat for a smudge-free, high-gloss finish.
Playful Artistic Flair
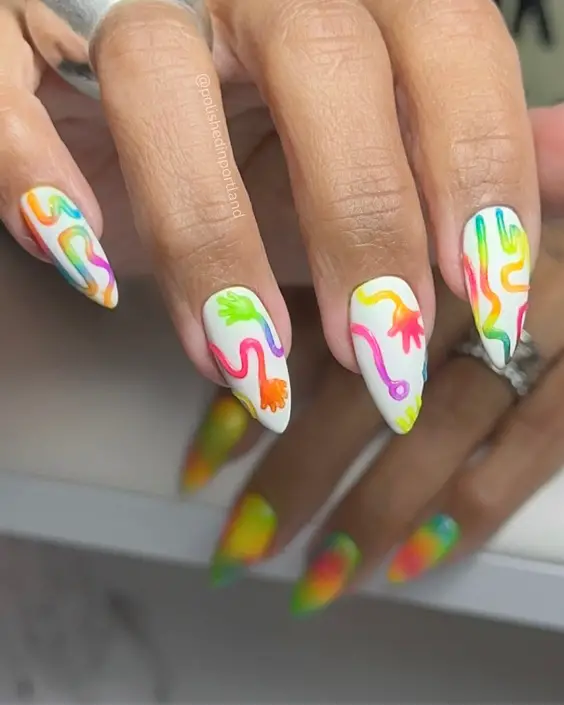
Featuring a whimsical approach to summer nails, this design incorporates abstract shapes and multiple colors on a soft white background. The playful arrangement of colors and shapes gives it a free-spirited, artistic vibe that’s perfect for summer festivals or casual outings.
Consumables List
- Base Coat: CND Stickey Base Coat.
- White Polish: Essie Blanc.
- Colorful Polishes: A mix from the NYX Professional Makeup Pastels collection.
- Detailing Brush: For intricate designs.
- Top Coat: OPI Top Coat for a lasting finish.
DIY Instructions
Prepare your nails with a base coat and two layers of white polish. Using a detailing brush, randomly apply different pastel colors in abstract, fluid shapes. Let each color slightly overlap for a blended effect. Once dry, apply a top coat to protect and enhance the colors.
Enchanted Sky: Dreamy Clouds and Rainbows
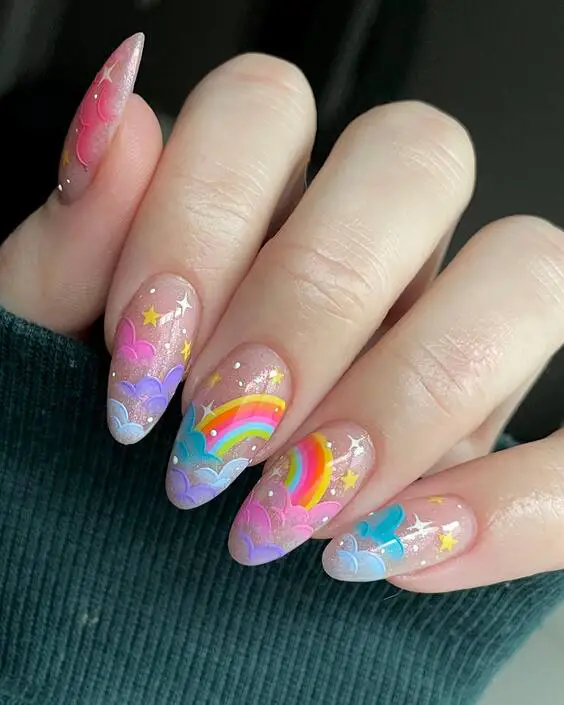
This design paints a fairy-tale scene across each nail, showcasing a soft, cloudy base with delicate rainbows and sparkling stars. Each element is meticulously painted to convey a sense of whimsy and magic, ideal for dreamers and romantics alike. The use of pastel shades against the translucent glitter background enhances the ethereal quality of the nail art.
Consumables List
- Base Coat: ORLY Bonder Rubberized Basecoat.
- Glitter Polish: Deborah Lippmann Glitter Polish in “Fairy Dust”.
- Pastel Polishes: Ciaté London Mini Pastel Pot.
- Detailing Brushes: For intricate designs and small stars.
- Top Coat: INM Out the Door Top Coat for a durable finish.
DIY Instructions
Begin with a clear base coat, followed by a coat of glitter polish for a starry effect. Using pastel polishes and a fine brush, paint clouds at the base of each nail, gradually blending lighter tones for depth. Add small rainbows and stars to complete the design. Finish with a quick-drying top coat to seal in your artwork.
Minimalist Chic: Sleek Lines and Bold Color
This nail design epitomizes modern simplicity with its clean, sharp lines and bold use of color blocking. The vibrant colors are arranged in a geometric pattern that feels both contemporary and stylish. This look is perfect for the fashion-forward individual who appreciates a minimalist aesthetic but still wants a pop of color.
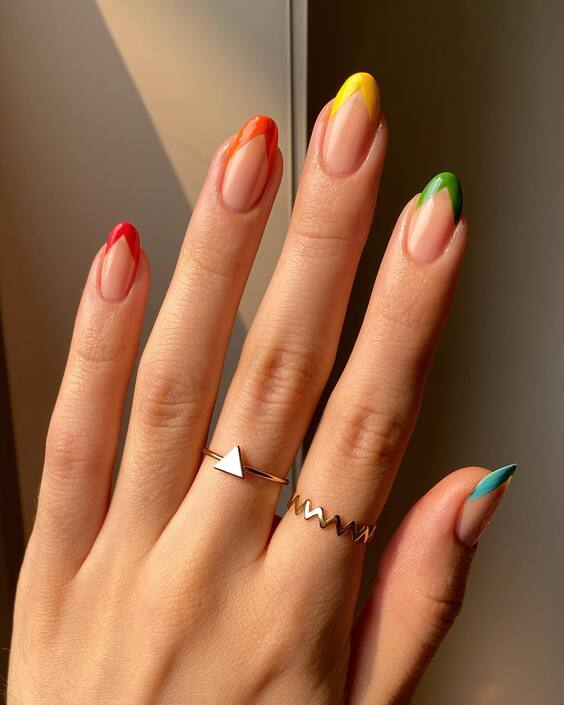
Consumables List
- Base Coat: Essie All in One Base.
- Polishes: OPI Color Paints Collection, particularly the primary colors.
- Striping Tape: For precise and sharp lines.
- Top Coat: Chanel Le Gel Coat for a long-lasting, glossy finish.
DIY Instructions
Apply your base coat to clean, dry nails. Place striping tape to outline your design, then fill in each section with a different color. Carefully remove the tape while the polish is still wet to ensure crisp lines. Once dry, apply a top coat to enhance the colors and add shine.
Playful Pastel Waves
Echoing the soft undulations of summer waves, this nail design features flowing curves of vibrant pastels. The playful wave pattern is both eye-catching and fitting for a lighthearted summer vibe. Each wave is perfectly placed to create a sense of movement across the nails, making it a fun choice for beach days or casual summer outings.
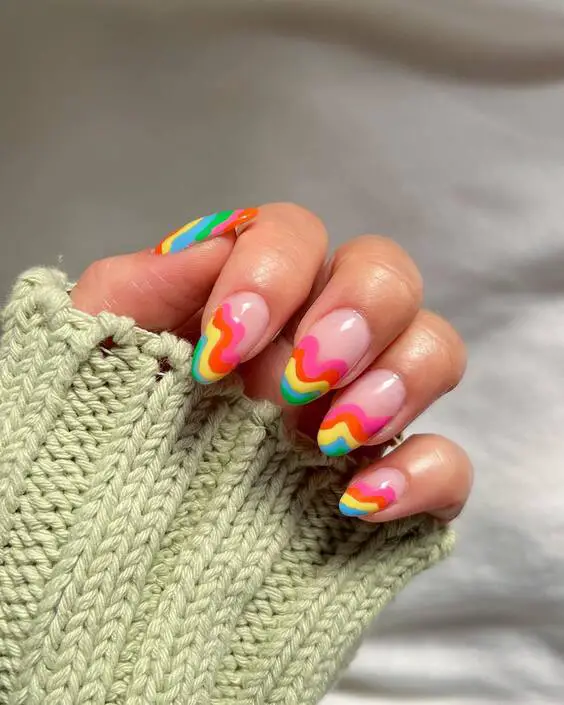
Consumables List
- Base Coat: Sally Hansen Double Duty Base & Top Coat.
- Pastel Polishes: Zoya Pastel Collection.
- Detailing Brush: For smooth, curved lines.
- Top Coat: Butter LONDON Hardwear Shine UV Topcoat.
DIY Instructions
Start with a base coat to protect your nails. Apply a light pink base color as your canvas. Using a detailing brush, layer different pastel colors in wave-like patterns across each nail. Allow each color to slightly overlap for a seamless look. Finish with a high-gloss top coat to bring out the vibrancy of the colors.
Sunset Glow: Radiant Summer Gradient
This design captures the essence of a summer sunset, blending vibrant hues of pink, orange, and yellow into a seamless gradient. Each nail tells a story of the sky transitioning from day to night, enhanced by subtle gold flake accents that mimic the sun’s glittering rays. It’s an ideal look for those warm, balmy evenings.
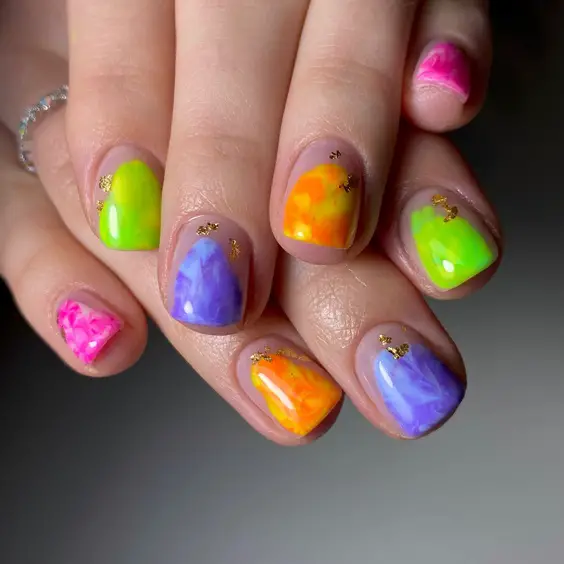
Consumables List
- Base Coat: OPI Natural Nail Base Coat.
- Gradient Polishes: Colors from the Essie Summer Collection — particularly the shades in pink, orange, and yellow.
- Gold Leaf Flakes: For a touch of sparkle.
- Sponge: For dabbing and blending the gradient effect.
- Top Coat: Revlon Extra Life No Chip Top Coat.
DIY Instructions
Start with a base coat to protect your nails. Apply a light pink polish as your base color. Using a sponge, dab on the orange polish, blending upwards from the nail base, and finish with yellow at the tip to create a smooth gradient. Add small pieces of gold leaf flakes while the polish is still tacky. Seal with a top coat for a glossy finish and extra durability.
Celestial Dreams: Stars and Clouds
This celestial-inspired design brings the beauty of the night sky to your fingertips. Featuring a translucent base with soft white clouds and vibrant, colorful stars, the look is both enchanting and playful. It’s perfect for those who prefer their summer nails to have a touch of fantasy and wonder.
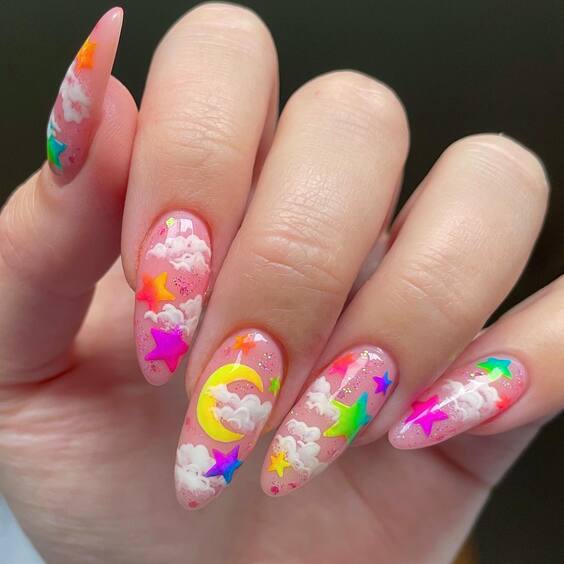
Consumables List
- Base Coat: Deborah Lippmann Gel Lab Pro Base Coat.
- Translucent Polish: Jelly polish for a glass-like finish.
- White Polish: For the clouds.
- Colored Polishes: Various bright shades for the stars.
- Detailing Brush: For precise cloud and star shapes.
- Top Coat: CND Vinylux Long Wear Top Coat.
DIY Instructions
After applying your base coat, use a translucent jelly polish for the base. With a detailing brush, paint fluffy clouds randomly using white polish. Then, using different colored polishes, add small stars around the clouds. Finish with a durable top coat to ensure your celestial nails shine like the night sky.
Gradient Magic: Soft Summer Rainbow
These nails feature a soft, ombre rainbow transition, blending one color into the next across each finger. The effect is subtle yet striking, offering a modern twist on traditional rainbow nails. This design is perfect for those who love a splash of color but prefer a more understated look.
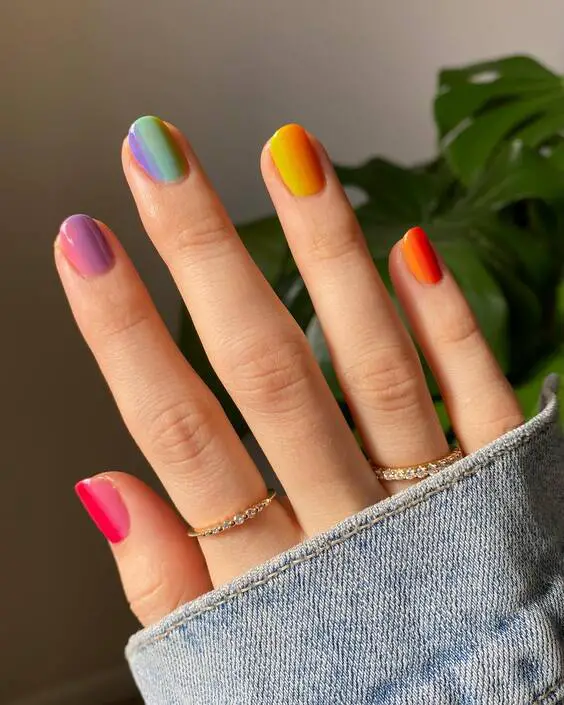
Consumables List
- Base Coat: Zoya Anchor Base Coat.
- Rainbow Polishes: A selection of pastel shades from the Orly Color Blast collection.
- Sponge: For a smooth ombre effect.
- Top Coat: Essie Gel Setter Top Coat.
DIY Instructions
Apply a base coat to protect your nails. Paint each nail a different pastel shade, corresponding to the colors of a rainbow. Using a sponge, gently dab at the boundary where two colors meet to create a soft transition. Finish with a top coat for a sleek and shiny appearance.
Whimsical Cloudscapes: A Touch of Magic
This delightful design blends soft clouds and vibrant bursts of color to mimic the magical sky just after a rainstorm. The nails feature a semi-translucent base, allowing the colors to appear as if they’re truly part of the sky. Sprinkles of glitter give an extra sparkle, reminiscent of sunlight peeking through clouds.
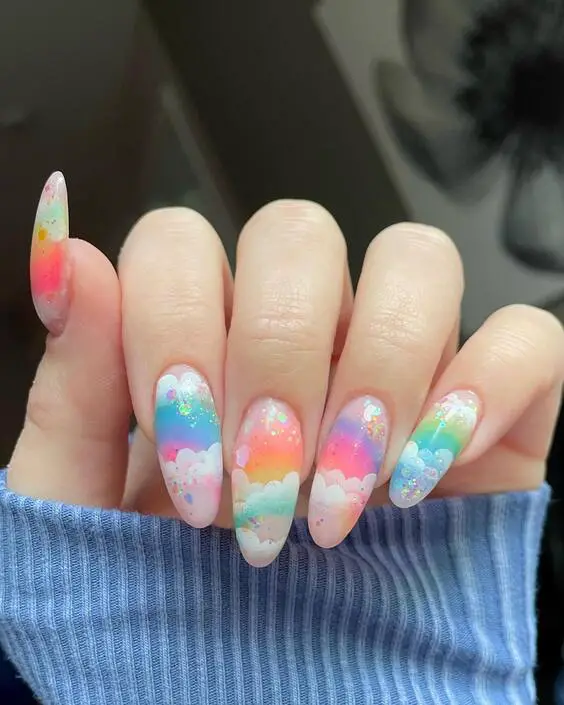
Consumables List
- Base Coat: Base Coat by Orly.
- Translucent Milky White Polish: for the base.
- Colorful Polishes: For the rainbows and color bursts.
- Glitter: Fine holographic glitter for added sparkle.
- Top Coat: High-gloss top coat to seal and protect.
DIY Instructions
Begin with a smooth base coat. Apply a milky white polish for a cloudy base. Use a sponge to dab on pastel colors, creating the illusion of a rainbow peeking through clouds. Add glitter for a shimmering effect. Finish with a glossy top coat to enhance the magical feel.
Psychedelic Art: Bold and Expressive
This nail art takes a daring approach with its psychedelic patterns and vibrant colors. Each nail is a canvas displaying unique designs, including abstract swirls, waves, and iconic ’70s motifs. This is for those who love to make a statement with their style, offering a nostalgic yet fresh vibe.
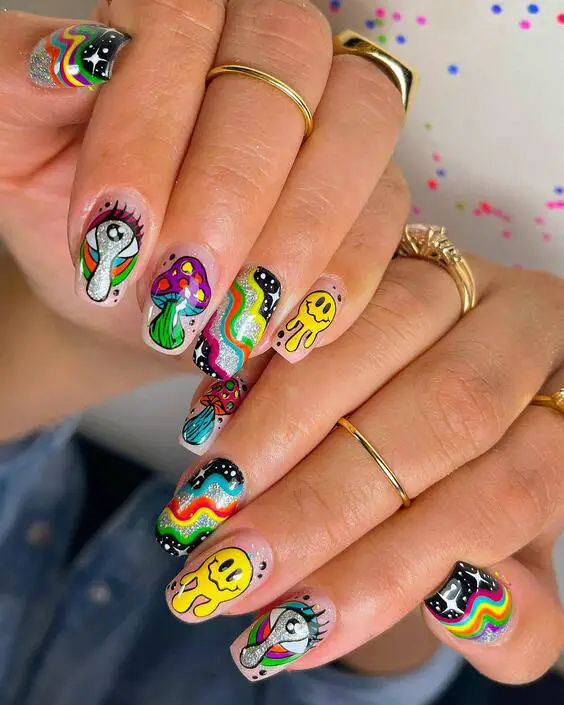
Consumables List
- Base Coat: Sally Hansen Double Duty.
- Vibrant Polishes: Array of neon colors for a bold look.
- Detailing Brushes: For intricate designs.
- Black Polish: For outlines and added contrast.
- Top Coat: Essie Gel Setter for a flawless finish.
DIY Instructions
Apply a base coat to protect the nails. Paint each nail with a white base to make the colors pop. Using detailing brushes, create various psychedelic designs in vivid colors. Outline with black to define and enhance the shapes. Seal everything with a glossy top coat for a vibrant finish.
Minimalist with a Pop: Sleek and Modern
This minimalist design offers a modern twist on classic French tips, incorporating thin, vibrant lines against a sheer pink background. The subtle addition of color provides a contemporary look while maintaining elegance and simplicity—perfect for those seeking a chic yet understated style.
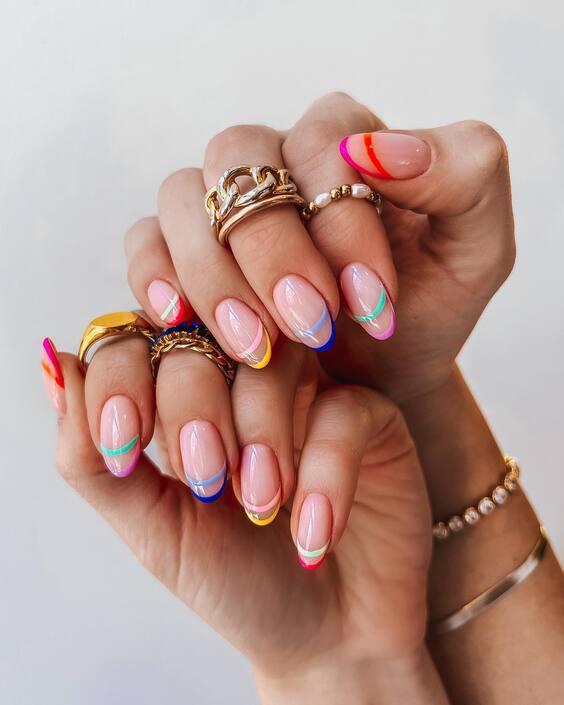
Consumables List
- Base Coat: Zoya Anchor Base Coat.
- Sheer Pink Polish: For a natural, clean look.
- Colored Polishes: Thin, bright lines using neon colors.
- Striping Tape: For precise and clean lines.
- Top Coat: OPI Top Coat for a long-lasting sheen.
DIY Instructions
Start with a base coat for nail protection. Apply two coats of sheer pink polish for a clean, natural look. Use striping tape to create thin lines at the tips in your chosen colors. Carefully apply the colored polish, remove the tape, and then seal with a top coat for a sleek, finished look.
Pastel Perfection: Soft Hues and Sharp Lines
This stunning nail design features a beautiful interplay of pastel colors with a sharp, ombre transition. Each nail displays a unique combination of blue, pink, and yellow, blending seamlessly into each other. The effect is both calming and stylish, perfect for those who appreciate a softer yet vibrant look.
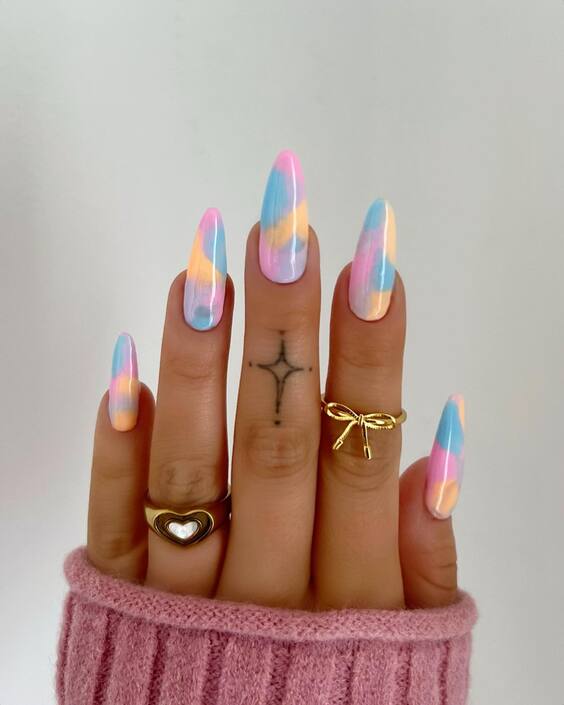
Consumables List
- Base Coat: ORLY Bonder Rubberized Basecoat.
- Pastel Polishes: Light blue, pink, and yellow shades from Essie’s pastel collection.
- Sponge: To blend the ombre effect smoothly.
- Top Coat: Seche Vite Dry Fast Top Coat for a glossy finish.
DIY Instructions
Begin by applying a base coat to protect your nails. Use a sponge to apply and blend the pastel colors, creating a smooth transition from one shade to the next. Work quickly to blend while the polish is still wet. Finish with a fast-drying top coat to enhance the smoothness and shine.
Rainbow and Clouds: A Dreamy Sky
This whimsical design captures the essence of a dreamy sky with soft clouds and vibrant rainbows. The base of each nail is adorned with white clouds using a sponging technique, over which rainbow curves are meticulously painted, creating a joyful and uplifting look.
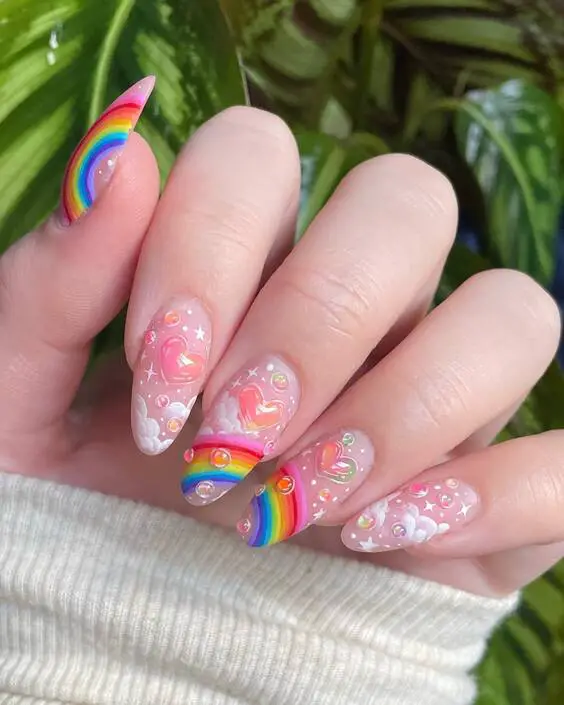
Consumables List
- Base Coat: CND Stickey Base Coat.
- White Polish: For the clouds.
- Rainbow Polishes: Colors of the rainbow for the detailed designs.
- Detailing Brush: For painting precise rainbows and stars.
- Top Coat: OPI Top Coat for a durable and glossy finish.
DIY Instructions
Apply a base coat for nail protection. Sponge on some white polish to create fluffy clouds. With a detailing brush, paint small rainbows peeping through the clouds. Add tiny stars or glitter for a magical touch. Finish with a top coat to seal and protect your dreamy design.
Modern Waves: Dynamic and Bold
This nail design embraces boldness with its dynamic wavy patterns in a mix of vibrant neon colors. The waves are painted with high precision, creating a visually stunning effect that is both modern and striking—ideal for making a fashion statement.
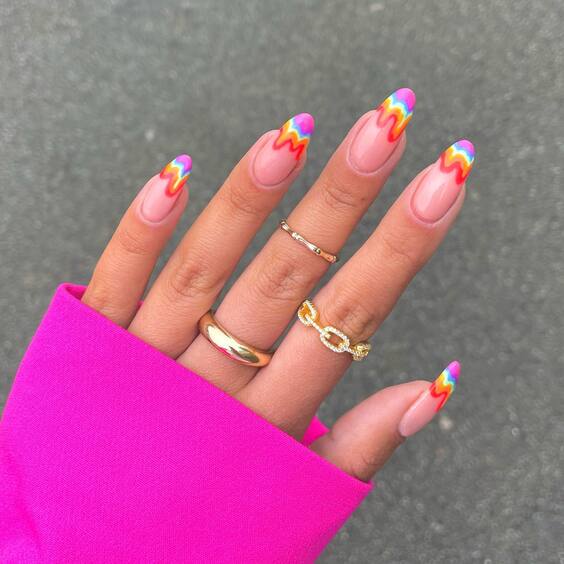
Consumables List
- Base Coat: Essie Here to Stay Base Coat.
- Neon Polishes: A selection of neon polishes for the waves.
- Detailing Brush: For crisp and clean lines.
- Top Coat: Chanel Le Gel Coat for a long-lasting, glossy finish.
DIY Instructions
Start with a base coat to protect your nails. Apply a neutral base color. Using a detailing brush, paint wavy lines with your chosen neon colors, allowing each color to slightly overlap the previous for a seamless effect. Finish with a high-gloss top coat for extra shine and durability.
Candy Stripes: Sweet and Playful
This delightful design brings to mind the sweet allure of candy canes with its soft pastel stripes. Each nail features a unique combination of colors, creating a playful and charming effect. The matte finish provides a modern touch to the classic striped pattern, making it both sweet and sophisticated.
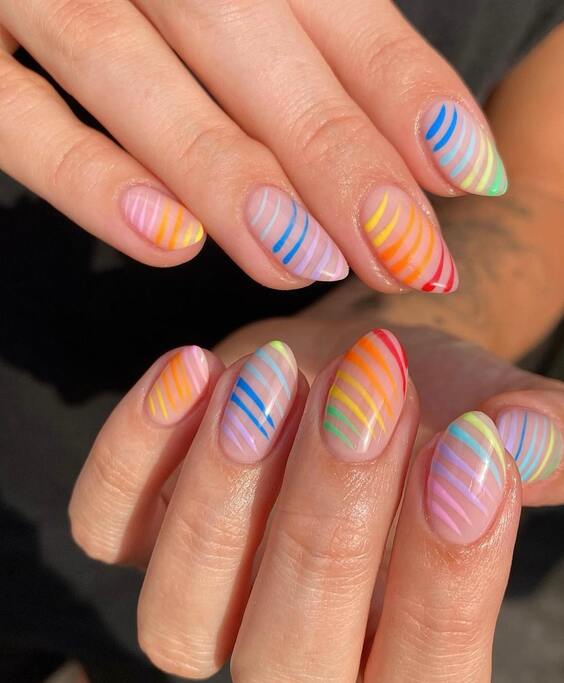
Consumables List
- Base Coat: ORLY Bonder Rubberized Basecoat.
- Pastel Polishes: Various shades for stripes.
- Matte Top Coat: Essie Matte About You to achieve the soft finish.
- Striping Tape: For clean and even lines.
DIY Instructions
Start by applying a base coat to protect your nails. Use striping tape to section off areas for different colors. Paint each section with a different pastel shade. Carefully remove the tape before the polish dries to ensure sharp lines. Finish with a matte top coat for a modern look.
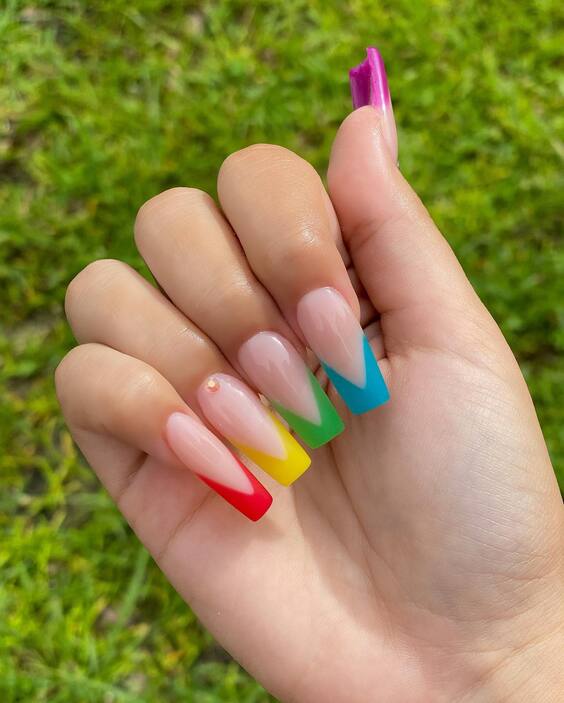
Geometric Rainbow: Sharp and Bold
This geometric design features sharp lines and bold rainbow colors that transition across each nail, creating a visually striking pattern. The use of clear polish segments enhances the vividness of the colors, giving the design a unique, transparent look.
Consumables List
- Base Coat: CND Stickey Base Coat.
- Rainbow Polishes: Bright shades for the geometric patterns.
- Top Coat: Seche Vite Dry Fast Top Coat for clarity and durability.
- Tape: For creating precise geometric shapes.
DIY Instructions
Apply a base coat to protect your nails. Arrange tape to outline the geometric shapes. Fill in each section with a different color, ensuring that the colors are vivid and opaque. Carefully remove the tape while the polish is still slightly wet. Finish with a glossy top coat to enhance the colors and add durability.
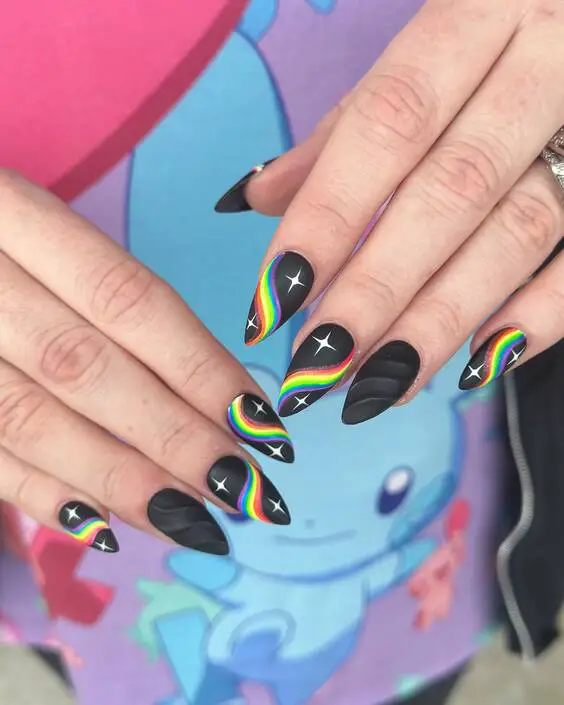
Rainbow Edge: Dark Elegance
Combining the edginess of black with the vibrant colors of the rainbow, this design is both striking and sophisticated. The rainbow colors pop against the black background, while the sharp, clean lines add a modern and elegant touch.
Consumables List
- Base Coat: Essie Here to Stay Base Coat.
- Black Polish: For the base.
- Rainbow Polishes: Neon shades for the colorful accents.
- Detailing Brush: For precise lines.
- Top Coat: OPI Top Coat for a long-lasting glossy finish.
DIY Instructions
Start with a base coat to protect your nails. Apply a black polish as the base. Using a detailing brush, paint thin, rainbow-colored lines along the edge of each nail. Ensure that each line is clean and sharp for a striking look. Finish with a glossy top coat to enhance the contrast and protect the design.
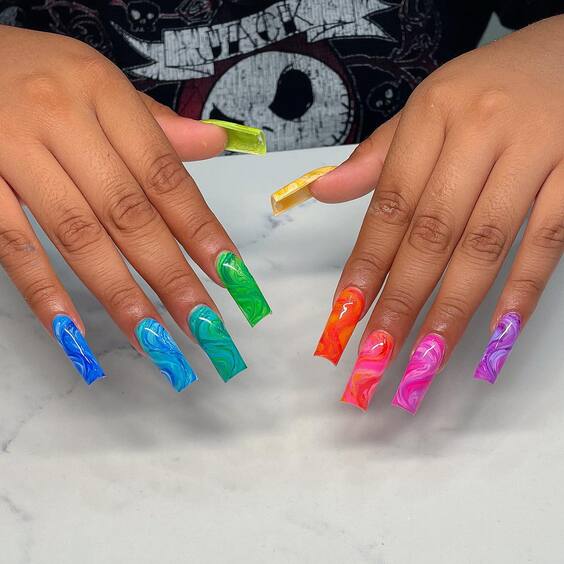
Luminous Waves: Bold and Beautiful
This striking nail design features a dazzling array of luminous colors flowing in wavy patterns across each nail. The colors transition smoothly, creating a bold and beautiful look reminiscent of the ocean’s waves under a bright sun. This design is perfect for those who love to stand out with vibrant and eye-catching nail art.
Consumables List
- Base Coat: Essie Strong Start Base Coat.
- Vibrant Polishes: High-intensity colors for the waves.
- Top Coat: Sally Hansen Miracle Gel Top Coat for a glossy finish.
- Detailing Brush: To precisely paint the wave patterns.
DIY Instructions
Begin by applying a base coat to protect your nails. Select several vibrant colors and use a detailing brush to paint wavy patterns that mimic the flow of waves. Blend the colors where they meet to create a smooth transition. Finish with a glossy top coat to enhance the vivid colors and ensure long-lasting wear.
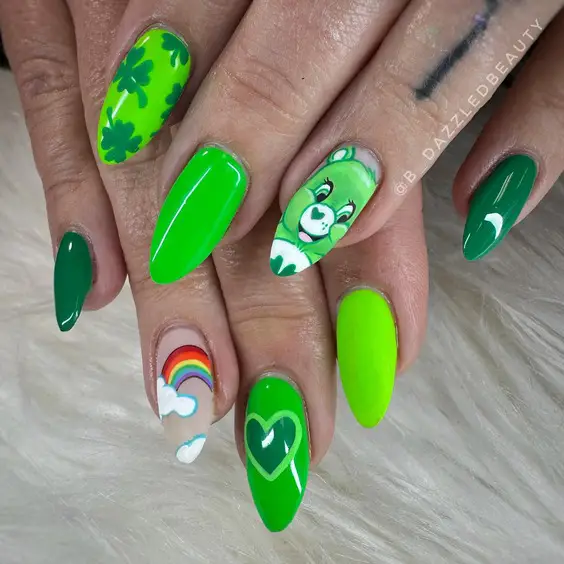
Lucky Charms: Playful and Thematic
This playful design is themed around luck and charm, incorporating elements like clovers, rainbows, and cheerful characters. The vivid green base serves as a perfect backdrop for the thematic artwork, making each nail a small canvas of storytelling. This nail art is ideal for thematic events or as a cheerful expression of personality.
Consumables List
- Base Coat: CND Stickey Base Coat.
- Green Polishes: Various shades for a dynamic look.
- White Polish: For the clouds and characters.
- Detailing Brushes: For intricate designs.
- Top Coat: OPI Top Coat for durability and shine.
DIY Instructions
Apply a base coat to protect your nails. Use a vibrant green polish as the base color. With white polish and a detailing brush, add clouds, rainbows, and lucky charms to each nail. Utilize additional colors to fill in details like clovers and characters. Seal with a top coat to protect your artwork.
Vibrant Rainbows: Colorful and Festive
This design celebrates color and creativity with vibrant rainbows painted over a clear or nude base, interspersed with glitter and colorful sequins. The rainbows are painted with crisp, clean lines, creating a joyful and festive look perfect for any celebratory occasion or just to brighten everyday life.
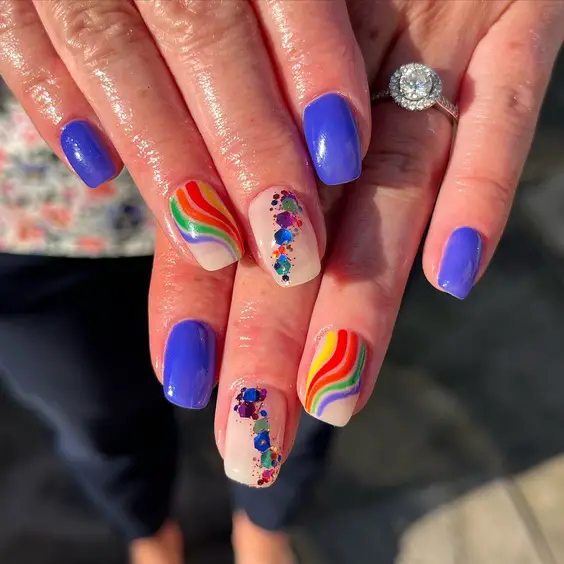
Consumables List
- Base Coat: ORLY Bonder Rubberized Basecoat.
- Rainbow Polishes: Bright colors for the rainbows.
- Glitter and Sequins: For added sparkle.
- Detailing Brush: For precise lines.
- Top Coat: Seche Vite Dry Fast Top Coat for a smooth, glossy finish.
DIY Instructions
Start with a base coat to protect your nails. Apply a clear or nude polish as the base. Paint vibrant rainbows on each nail using a detailing brush. Add glitter and sequins while the paint is still wet to enhance the festive look. Finish with a top coat to ensure durability and shine.
Electric Swirls: Vibrant and Captivating
This dynamic nail art design features electric swirls of vivid neon colors, making each nail a standout piece. The combination of orange, pink, green, blue, and purple creates a mesmerizing effect, reminiscent of a neon light display. Perfect for those who love bold and dramatic styles, this design is sure to turn heads.
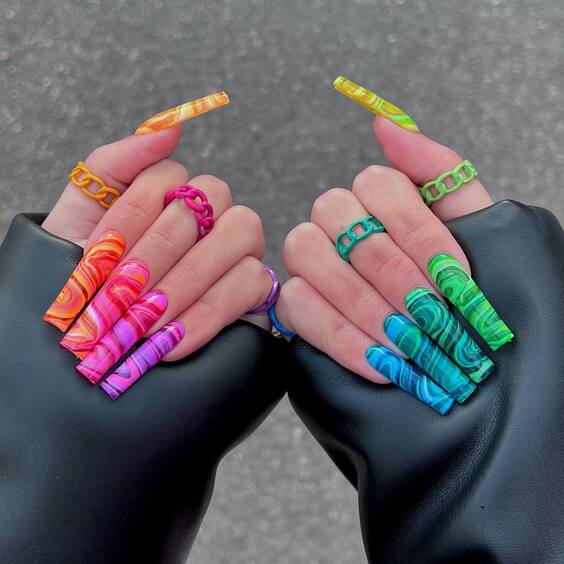
Consumables List
- Base Coat: OPI Natural Nail Base Coat.
- Neon Polishes: Bright neon colors for a vibrant look.
- Top Coat: Essie Good To Go Top Coat for a glossy finish and prolonged wear.
- Detailing Brush: For creating precise swirl patterns.
DIY Instructions
Start with a base coat to protect your nails. Apply a black or deep blue base color to make the neon colors pop. Use a detailing brush to paint electric swirls in various neon colors on each nail. Allow each color to slightly blend into the next for a fluid look. Finish with a glossy top coat to enhance the neon effect.
Pastel Glow: Soft and Radiant
This nail design embraces the soft and subtle beauty of pastel shades, creating a glowing effect on each nail. The smooth gradient transition between yellow, pink, green, and blue gives a serene and calming vibe, ideal for those who prefer a more understated but equally colorful nail art style.
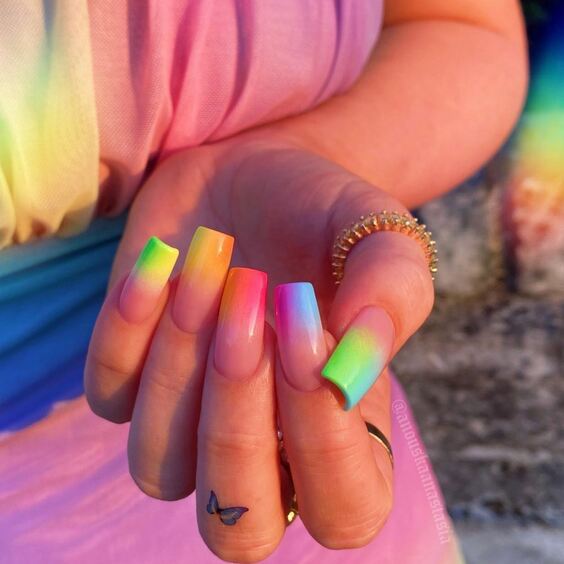
Consumables List
- Base Coat: Sally Hansen Double Duty Base and Top Coat.
- Pastel Polishes: Soft pastel shades for the gradient.
- Sponge: For blending the colors smoothly.
- Top Coat: Revlon Quick Dry Top Coat for a seamless finish.
DIY Instructions
Apply a base coat to prepare your nails. Use a sponge to dab on a gradient of pastel colors, blending them together softly. Start with yellow at the base, followed by pink, green, and blue towards the tip. Ensure each color transitions smoothly into the next. Finish with a quick-dry top coat to maintain the soft glow and protect your design.
These stunning summer rainbow nail designs are sure to inspire and captivate. Whether you prefer a magical, whimsical look, a bold statement, or minimalist elegance, there’s a style here to express your unique personality and complement your summer wardrobe. Enjoy crafting these vibrant creations and flaunt your colorful nails this season!

