21 End of Summer Nail Colors 2024: Discover Season’s Top Manicure Trends

Are you ready to wave goodbye to summer with style? As the sun sets on another vibrant season, our nail colors often shift to echo the changing environment. But what shades should grace our fingertips as we transition from the bright bursts of summer to the more subdued tones of fall? This article will guide you through the latest end of summer nail colors that are making waves in 2024. Whether you’re a fan of subtle elegance or bold statements, I’ve got the perfect palette to make your nails pop!
Almond-Shaped Elegance
The serene beauty of these almond-shaped nails captures the essence of summer’s twilight. Each nail tells a story, with hues ranging from a deep sea green to a soft, dreamy peach, and a glittering gold that seems to catch the last rays of summer sun. The design intricately balances boldness with subtlety, making it a perfect reflection of the end of summer nail colors.
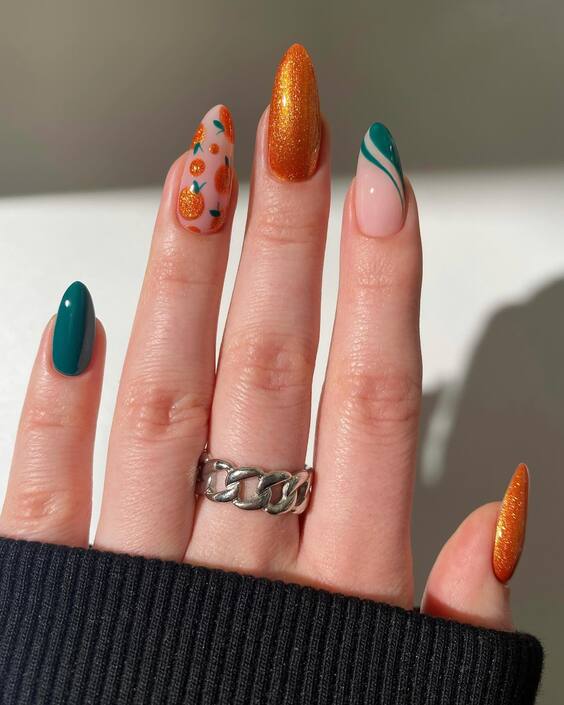
Photo credit by: @nailsbypaular
Materials Needed:
- Base Coat: Start with a clean base, preferably using OPI’s Natural Base Coat.
- Colors:
- Teal Green: DND’s Teal Stencil
- Peach: OPI’s Peachy Keen
- Gold Glitter: Gelish’s Good Gossip
- Top Coat: Seal it with a high-quality glossy top coat, such as Gel OPI’s Top Coat.
DIY Manicure Steps:
Begin by applying the base coat and let it dry completely. For the teal and peach nails, apply two coats of each color, letting them dry between applications. For the glittering nail, dab the brush to create a dense sparkle effect. Finish with a top coat to lock in the color and shine. This manicure is not only stylish but also a creative way to mark the transition from vibrant summer days to the cooler, golden tones of fall.
Subtle French Revival
This modern take on the classic French manicure incorporates soft pink bases with bold green tips, marrying simplicity with a pop of color. The subtle twist perfectly aligns with the end of summer nail colors, offering a fresh yet understated look that’s ideal for any end-of-season gathering.
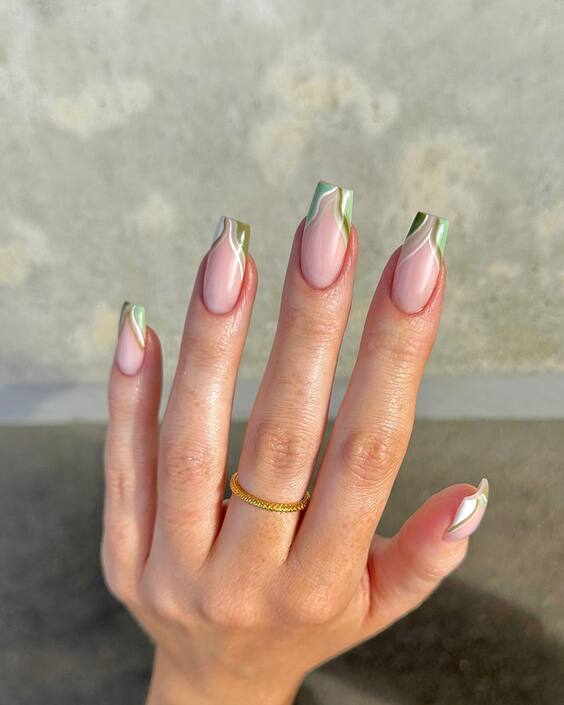
Photo credit by: @sansungnails
Materials Needed:
- Base Coat: A clear base to protect your natural nails.
- Colors:
- Soft Pink: Essie’s Ballet Slippers
- Green Tips: CND’s Lush Tropics
- Top Coat: A durable top coat for a lasting finish, like DND’s Gel Top Coat.
DIY Manicure Steps:
After the base coat, apply two coats of the soft pink polish. Once dry, carefully paint the tips with the vibrant green color to add that unexpected flair. Finish with a top coat to ensure your French manicure stands out with a professional touch.
Vibrant Summer Closeout
These nails are a celebration of summer’s final days, featuring a fiery orange that commands attention alongside a playful patterned accent nail. It’s a bold choice that embodies the spirit of end of summer nail colors.
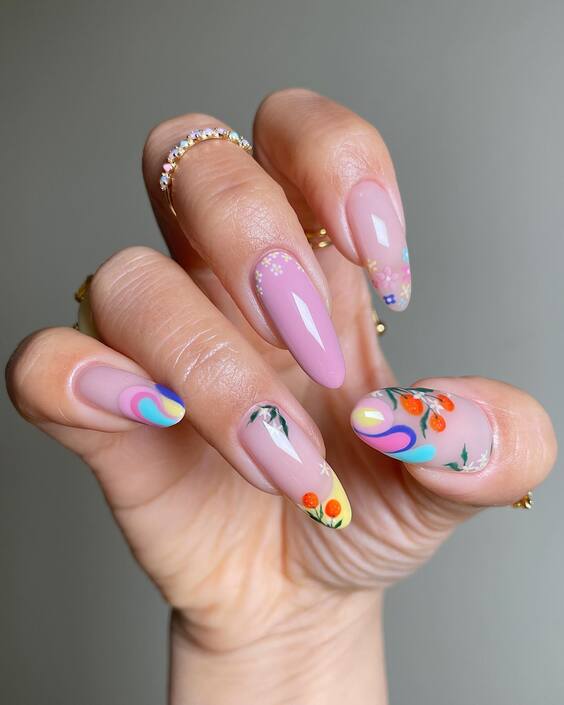
Photo credit by: @nailsbycaroline_
Materials Needed:
- Base Coat: Always start with a smooth base.
- Colors:
- Fiery Orange: DND’s Sun-Kissed Fire
- Pattern Accent: Use white and black acrylic paint for the details.
- Top Coat: A glossy top coat to enhance the vibrancy, like Gel OPI’s Top Coat.
DIY Manicure Steps:
Apply your base coat, followed by two coats of the fiery orange. For the accent nail, use a thin brush to create your designs with white and black acrylic paint. Seal all nails with a top coat for a glossy, eye-catching finish that’s perfect for any end-of-summer celebration.
Neon Waves
These extra-long, stiletto-shaped nails are a true celebration of bold summer vibes, featuring an explosion of neon colors with a psychedelic swirl design that seems to dance on the fingertips. A vivid blend of hot pink, lime green, and electric blue makes this design an ideal showcase of popular end of summer nail colors.
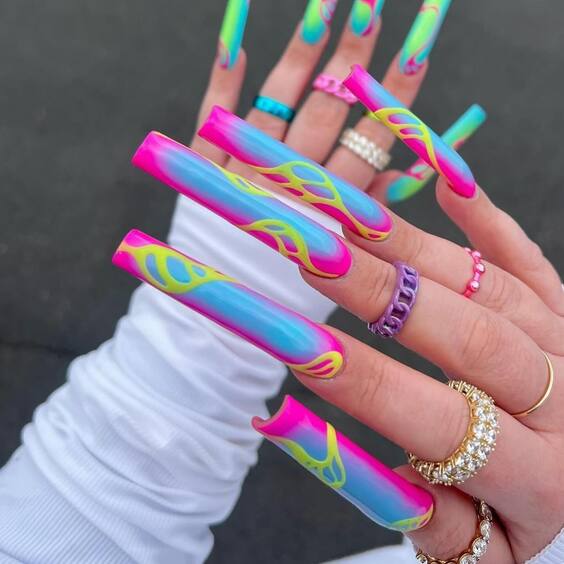
Photo credit by: @thenailprogramme
Materials Needed:
- Base Coat: Start with a clear, strong base to support the long stilettos.
- Colors:
- Hot Pink: DND’s Hot Pop Pink
- Lime Green: Gelish’s Lime All The Time
- Electric Blue: OPI’s No Room for the Blues
- Top Coat: A strong top coat, like Gel 2024’s high gloss finisher.
DIY Manicure Steps:
Prepare your nails with a base coat. Use sponges for the color transitions, dabbing each color gently to blend into the next. Employ a fine brush to draw the intricate swirls with precision. Seal with a top coat for a durable, glossy finish that’s sure to catch every eye.
Marbled Elegance
The elegance of these almond-shaped nails with a marble effect in shades of deep green and white echo the calm and serene transition from summer to autumn. This design utilizes gel nail colors end of summer for a smooth, flawless finish that mimics natural marble.
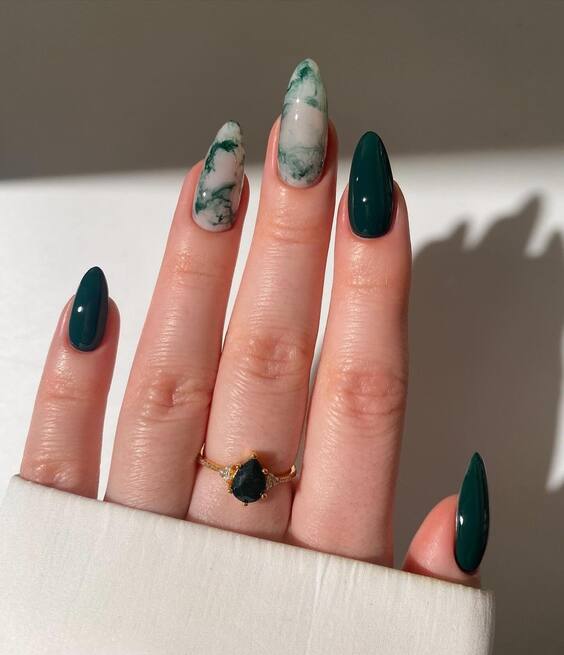
Photo credit by: @thenaildaily
Materials Needed:
- Base Coat: Essential for protecting the nail.
- Colors:
- Deep Green: OPI’s Jade is the New Black
- White Marble: Use white gel from Gel OPI and a dot of black for marbling.
- Top Coat: A matte finish top coat from DND for a realistic stone texture.
DIY Manicure Steps:
Apply your base coat. For the marble effect, drop spots of white and green gel on the nail and swirl gently with a toothpick. Use a very small amount of black to enhance the marble lines. Finish with a matte top coat for an elegant, soft stone look.
Cloudy Skies
Reflecting the beautiful yet melancholic skies of late summer, these stiletto nails feature a dreamy cloud-like design with soft blues and whites. The design is a poetic nod to the end of summer nail polish colors, perfect for those who appreciate a more subtle yet artistic expression.
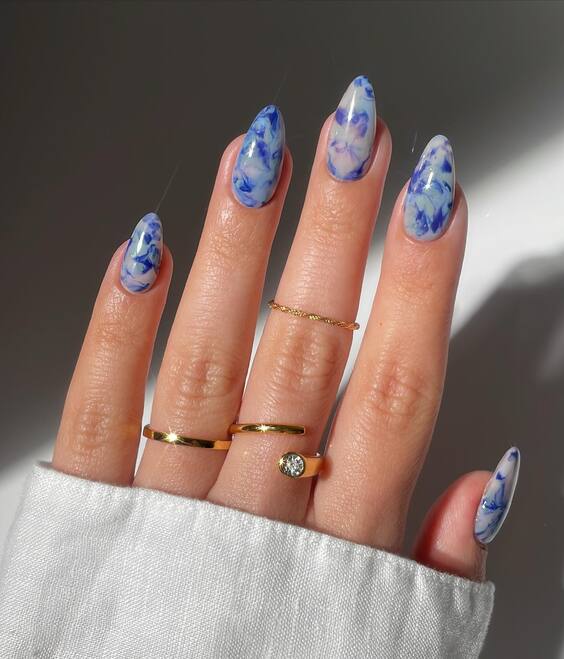
Photo credit by: @simlynail
Materials Needed:
- Base Coat: A must to prevent staining.
- Colors:
- Sky Blue: Essie’s Bikini So Teeny
- Cloud White: OPI’s Alpine Snow
- Top Coat: Use a gel top coat from Gel 2024 for a smooth, cloud-like finish.
DIY Manicure Steps:
Start with a base coat to ensure a clean canvas. Apply the sky blue as the base layer. Sponge on the white polish to create soft, cloud-like patterns. Finish with a gel top coat to ensure the design remains as ephemeral as a summer cloud.
Aquatic Glow
These long, almond-shaped nails gleam with a subtle green shimmer reminiscent of a calm sea under the moonlight. The minimalistic yet mesmerizing approach perfectly embodies the toe nail colors end of summer, providing a sophisticated option for those who prefer a touch of mystery.
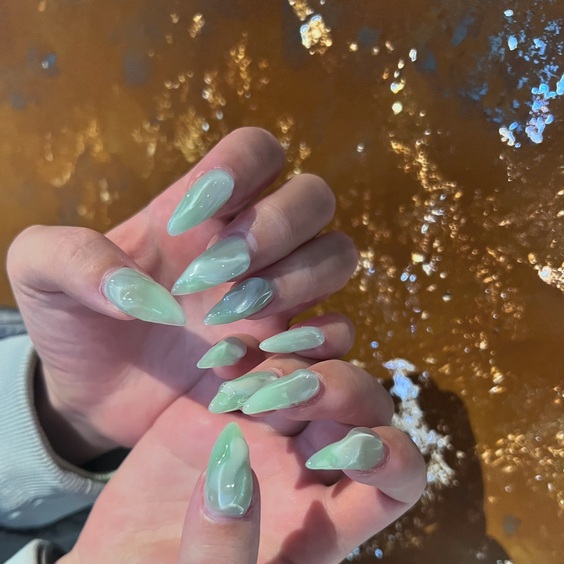
Photo credit by: @lilypinks.nail
Materials Needed:
- Base Coat: A strong foundation with OPI’s Natural Base Coat.
- Colors:
- Sea Green Shimmer: Essie’s Sea of Shadows
- Top Coat: A high-gloss finish with DND’s Gel Top Coat.
DIY Manicure Steps:
Start with a base coat to protect your nails. Apply two coats of the sea green shimmer, allowing each coat to dry thoroughly. Finish with a high-gloss top coat for a smooth, glass-like finish that captures the essence of the tranquil sea.
Floral Whimsy
Capture the lingering spirit of summer with these stiletto nails adorned with delicate floral patterns. The soft pink base accented with red and purple flowers offers a fresh breath of nature’s best, ideal for the gel nail colors end of summer.
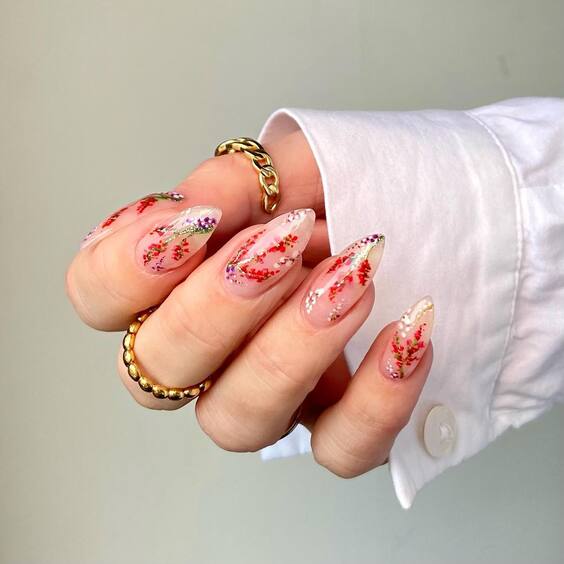
Photo credit by: @nailperfectionbynatalie
Materials Needed:
- Base Coat: Essential for long-lasting wear.
- Colors:
- Soft Pink: Gelish’s Pink Smoothie
- Floral Accents: Acrylic colors in red and purple
- Top Coat: Ensure longevity with OPI’s Gel Top Coat.
DIY Manicure Steps:
Apply a base coat, followed by two coats of soft pink. Use a fine brush to hand-paint the floral designs in red and purple. Once dry, apply a gel top coat to enhance the details and durability of your floral artwork.
Tropical Radiance
Embrace the vibrant essence of summer with these brightly colored, square-shaped nails featuring bold transitions and floral embellishments. The dynamic range of colors from deep blue to sunny yellow represents the popular end of summer nail colors, perfect for a bold transition into the cooler months.
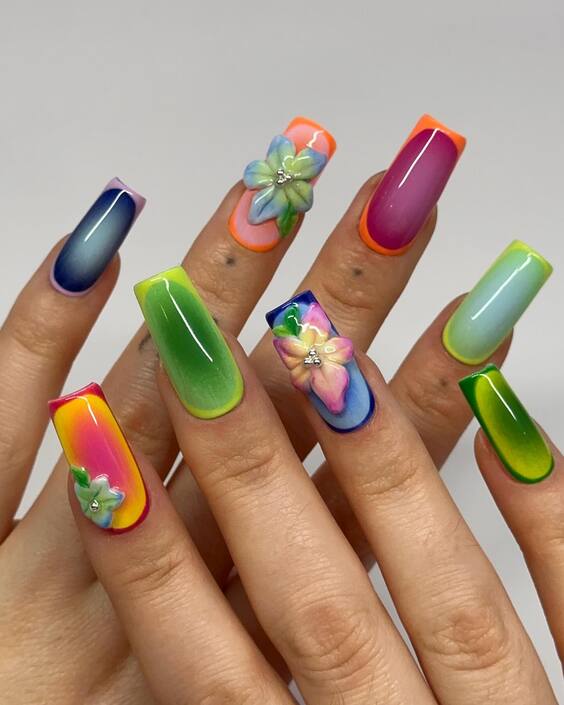
Photo credit by: @suki_nailz
Materials Needed:
- Base Coat: Start with a protective layer.
- Colors:
- Multiple Shades: DND’s collection including blue, green, yellow, and pink
- Embellishments: Small floral decals or gems
- Top Coat: A layer of DND’s Glossy Top Coat for a radiant finish.
DIY Manicure Steps:
After applying the base coat, use a sponge to blend the different colors on each nail, creating a smooth gradient effect. Place floral decals or small gems while the polish is still tacky. Seal everything with a glossy top coat to ensure your vibrant nails stand out at any end-of-summer festivity.
Sparkling Sunset
These nails artistically combine soft pastel shades with sparkling details, creating a look that mimics a summer sunset sprinkled with stardust. Each nail features a unique design, blending pastel pink, sky blue, and translucent glitter, making it a quintessential representation of cute end of summer nail colors.
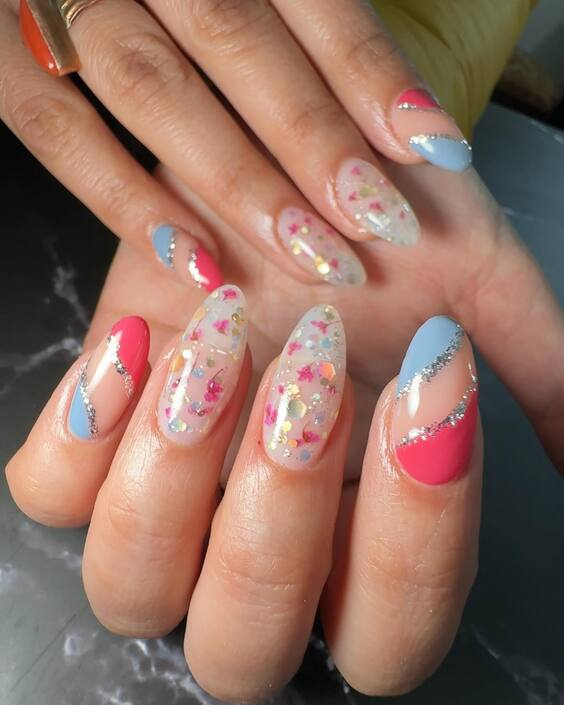
Photo credit by: @the_sugar_nails_kurukshetra
Materials Needed:
- Base Coat: Use a strong base to prevent chipping.
- Colors:
- Pastel Pink: Essie’s Mod Square
- Sky Blue: OPI’s Can’t Find My Czechbook
- Glitter: Sally Hansen’s Set in Stones
- Top Coat: A glossy top coat for a radiant finish, such as Gel 2024.
DIY Manicure Steps:
Apply the base coat for a smooth canvas. Paint each nail with the base colors of pastel pink and sky blue. Before the second coat dries, sprinkle or place glitter strategically for a sparkling effect. Seal with a top coat for a dazzling finish perfect for any summer evening event.
Summer Swirls
This design captures the playful spirit of summer with swirls of neon pink and green against a soft pink background, creating a fun and flirty look. These nails are a fabulous choice for those who love gel nail colors end of summer, offering a burst of brightness before the muted tones of autumn.
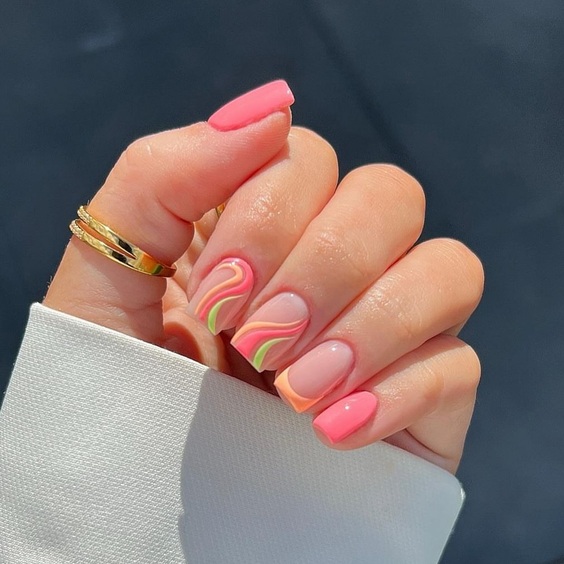
Photo credit by: @brillbirduk
Materials Needed:
- Base Coat: To protect the nail and enhance color adhesion.
- Colors:
- Neon Pink: Gelish’s Brights Have More Fun
- Neon Green: DND’s Electric Lime
- Soft Pink: OPI’s Pink Friday
- Top Coat: A durable top coat from DND for lasting shine.
DIY Manicure Steps:
Start with a base coat. Apply a soft pink base on all nails. Once dry, use a thin brush to swirl neon pink and green in alternating patterns for a dynamic effect. Finish with a strong top coat to maintain the vibrancy of the colors.
Rainbow Reflections
These short, rounded nails present a smooth gradient that transitions through multiple hues, reflecting the spectrum of a summer rainbow. This manicure is a stunning display of popular end of summer nail colors, capturing the essence of summer’s playful and colorful spirit.
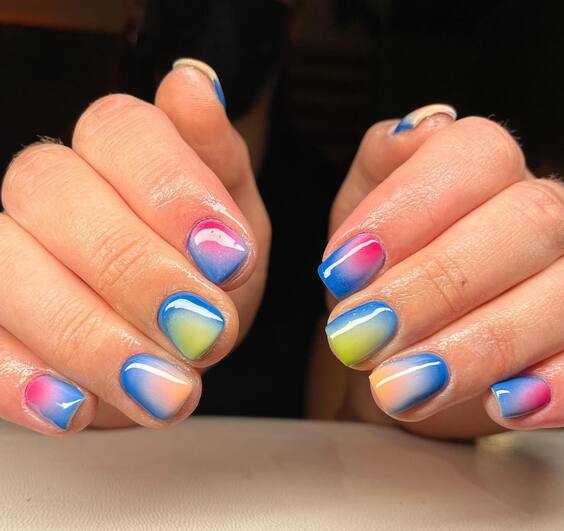
Photo credit by: @hihi_mx
Materials Needed:
- Base Coat: Essential for smooth color application.
- Colors:
- A variety of rainbow colors: Use DND’s rainbow collection for the gradient.
- Top Coat: A glossy finish with OPI’s Gel Top Coat to enhance the depth of the colors.
DIY Manicure Steps:
Apply the base coat and once dry, start with the lightest color at the cuticle and blend outward to the darkest at the tip using a sponge for the gradient effect. Carefully blend the colors to ensure a seamless transition. Apply the top coat for a glossy and enduring finish.
Pastel Petals
These beautifully crafted nails blend soft pastels with vibrant yellow, showcasing intricate floral designs that capture the gentle transition of summer into autumn. Each nail is a canvas featuring soft pinks and bright yellow backdrops with white and pink flowers, epitomizing the cute end of summer nail colors.
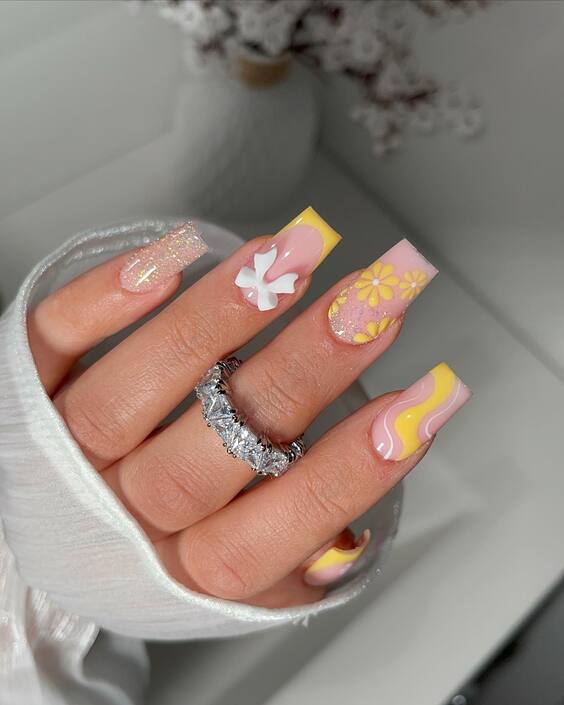
Photo credit by: @elennailedit
Materials Needed:
- Base Coat: A protective layer to start.
- Colors:
- Soft Pink: Essie’s Ballet Slippers
- Bright Yellow: OPI’s Need Sunglasses?
- White and Pink for flowers: Use acrylic paints for detailed art.
- Top Coat: A glossy finish with Gel 2024 to seal the delicate artwork.
DIY Manicure Steps:
After applying the base coat, alternate the soft pink and bright yellow as base colors on different nails. Paint intricate floral designs using white and pink acrylic paints. Finish with a glossy top coat to protect and enhance the artwork, giving it a professional and vibrant look.
Lavender Whispers
These almond-shaped nails are adorned with delicate lavender floral designs, set against a soft pink background. The green leaf accents add a touch of nature, making these nails a graceful nod to the end of summer nail polish colors. This design is perfect for those who prefer a subtle yet sophisticated look.
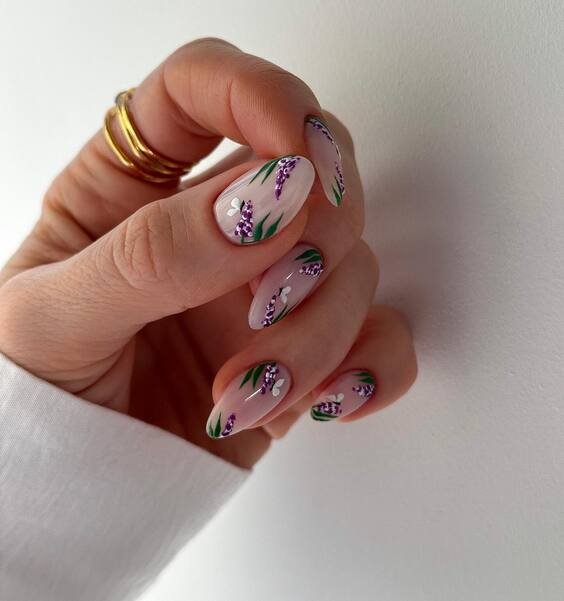
Photo credit by: @bugnails
Materials Needed:
- Base Coat: Essential for long wear.
- Colors:
- Soft Pink Base: Gelish’s Pink Smoothie
- Lavender and Green for details: Use thin brushes and acrylic paints.
- Top Coat: A matte finish from OPI to give an elegant touch.
DIY Manicure Steps:
Begin with a base coat. Apply a soft pink base on each nail. With a fine brush, paint the lavender flowers and add green leaves for a natural effect. Opt for a matte top coat to enhance the soft, pastel theme and to keep the design understated yet beautiful.
Dewy Morning
Reflecting a fresh summer morning, these short, rounded nails feature a dewy finish with a shimmering seafoam green base, dotted with clear dew-like droplets. This look uses gel nail colors end of summer to achieve a refreshing and unique nail art that stands out subtly.
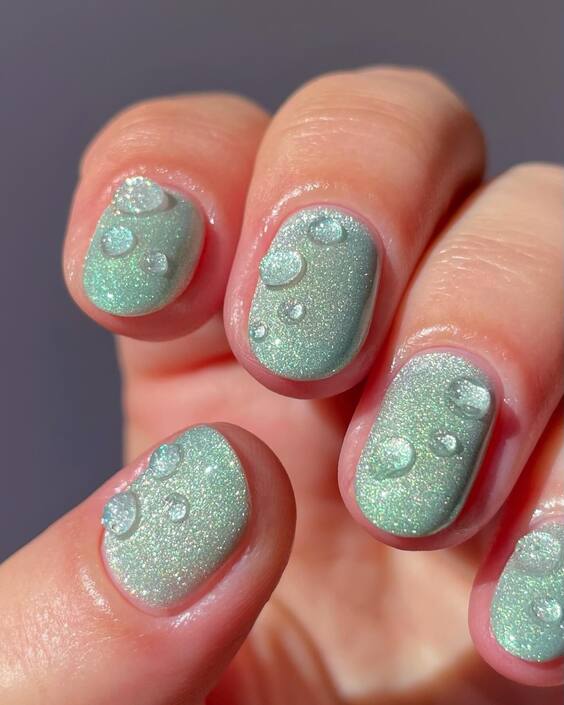
Photo credit by: @bugnails
Materials Needed:
- Base Coat: Start with a clear base.
- Colors:
- Seafoam Green: DND’s Seafoam Delight
- Clear Gel for dew drops: A thick builder gel for the droplet effect.
- Top Coat: A high gloss top coat to enhance the wet look of the dew drops.
DIY Manicure Steps:
Apply a base coat followed by two coats of seafoam green. Use a dotting tool to apply small amounts of clear builder gel to mimic dew drops on the nails. Cure under a UV lamp if using gel. Finish with a glossy top coat to emphasize the dewy effect.
Floral Serenity
These nails blend a deep navy blue with neutral tones, interspersed with delicate white and blue floral designs. Perfect for those who prefer a touch of nature with a sophisticated backdrop, this design embodies the transitional end of summer nail colors with its serene and graceful appearance.
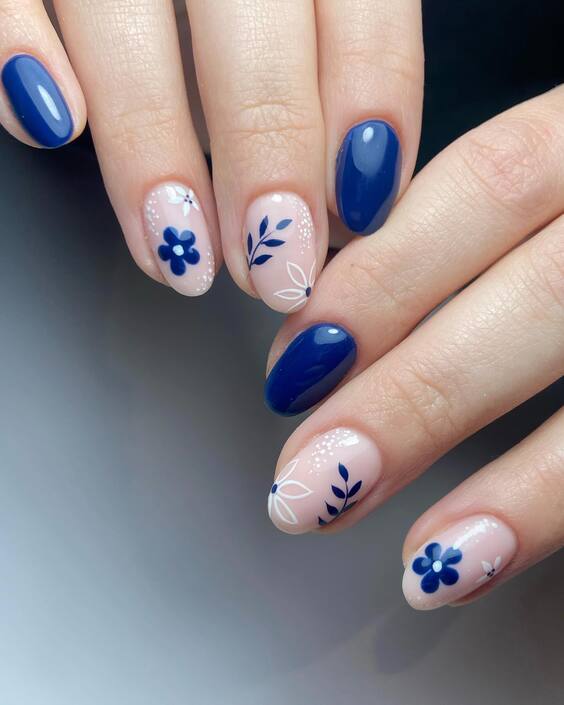
Photo credit by: @_by_shelley
Materials Needed:
- Base Coat: An essential foundation for lasting color.
- Colors:
- Navy Blue: OPI’s Russian Navy
- Neutral Beige: Essie’s Sand Tropez
- White and Blue for floral details: Acrylic paints for precision.
- Top Coat: A glossy finish from Gel 2024 for durability and shine.
DIY Manicure Steps:
Apply the base coat to protect your natural nails. Alternate the navy blue and neutral beige as base colors. Use a fine brush to add small floral accents in white and blue. Seal the design with a glossy top coat to enhance the depth and longevity of the colors.
Pastel Play
These nails offer a playful yet delicate look with their pastel pink base and white artistic accents. Embellished with glitter for a subtle sparkle, this manicure is a fantastic choice for those seeking a gel nail colors end of summer design that’s both fun and chic.
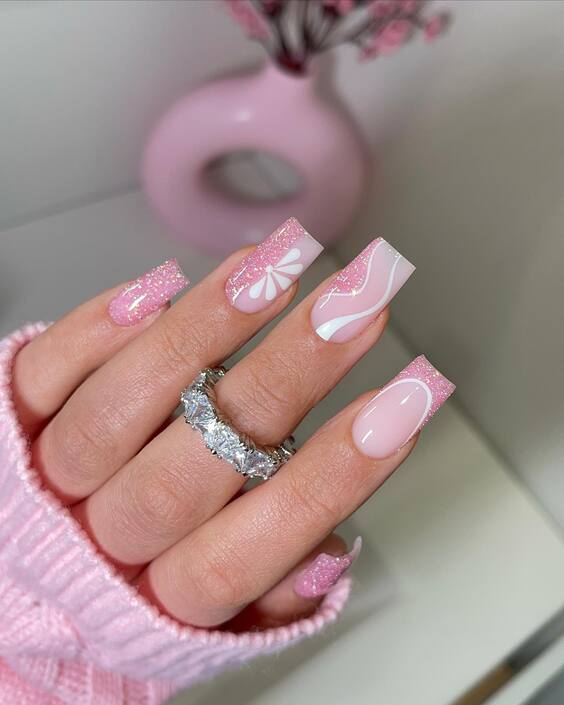
Photo credit by: @elennailedit
Materials Needed:
- Base Coat: To ensure the manicure’s longevity.
- Colors:
- Pastel Pink: DND’s Bubble Bath
- White for accents: Use acrylic paint for sharp lines.
- Glitter: A sprinkle of fine pink glitter for a subtle shimmer.
- Top Coat: A high gloss top coat for a smooth and shiny finish.
DIY Manicure Steps:
Begin with a base coat. Apply the pastel pink as the base color. With a thin brush, create white decorative patterns and add a touch of glitter while the paint is still wet. Finish with a high gloss top coat for a lasting and eye-catching look.
Geometric Spectrum
Showcasing a mix of bold geometric patterns and vibrant colors, these nails are perfect for making a statement at the end of summer. The design combines sharp contrasts with playful patterns, embodying popular end of summer nail colors in a modern and artistic way.
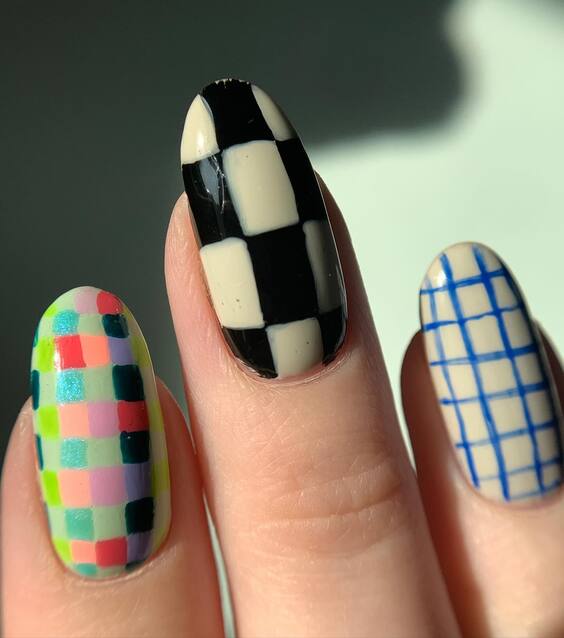
Photo credit by: @audrey_swatches
Materials Needed:
- Base Coat: To protect and smooth the nail surface.
- Colors:
- Various bold shades: Black, white, and primary colors for a vivid effect.
- Top Coat: A durable top coat from OPI to maintain the manicure’s bold look.
DIY Manicure Steps:
Start with a base coat to prepare the nails. Paint each nail a different color or pattern, using tape or stencils to achieve sharp lines and clean geometric shapes. Apply a top coat to seal the design and ensure it stands out with a glossy, professional finish.
Fresh Spring Edges
These unique nails combine a fresh pastel pink base with striking green edging and delicate white floral accents. The addition of shimmering silver glitter on select edges gives a modern twist to traditional spring themes, making it a perfect end of summer nail color choice for those who appreciate a hint of sparkle.
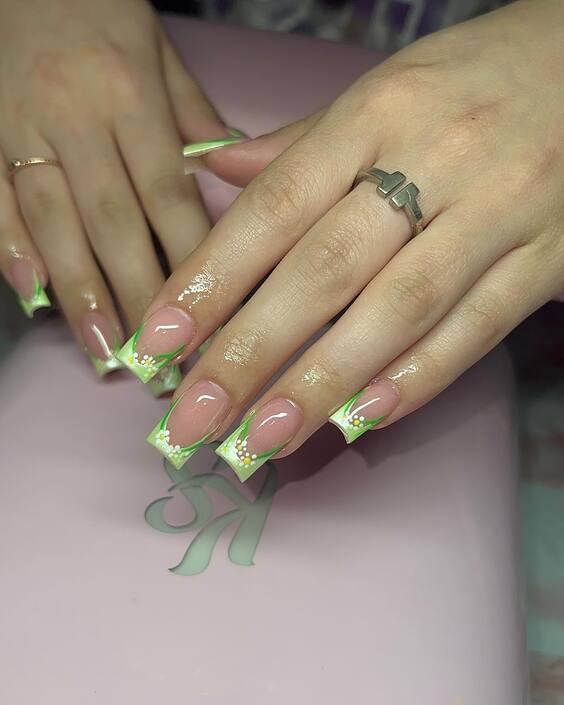
Photo credit by: @nailsxolily
Materials Needed:
- Base Coat: A strong foundation to enhance the nail color.
- Colors:
- Pastel Pink: Essie’s Muchi, Muchi
- Green for edging: CND’s Lush Tropics
- White for floral details: Acrylic paint for precision.
- Silver Glitter: Use a fine glitter polish for subtle shimmer.
- Top Coat: A high gloss finish with Gel 2024 for a sparkling effect.
DIY Manicure Steps:
Start with a base coat to protect your nails. Apply the pastel pink as the base color. Carefully paint the green edges and add white floral designs. While the edges are still tacky, apply a light dusting of silver glitter. Seal everything with a glossy top coat for durability and extra shine.
Autumn Dew
These nails feature a sophisticated deep burgundy fading into a transparent tip, adorned with small dew-like droplets that add a unique texture and visual interest. The overall effect is reminiscent of early morning dew on autumn leaves, making it a fitting representation of toe nail colors end of summer.
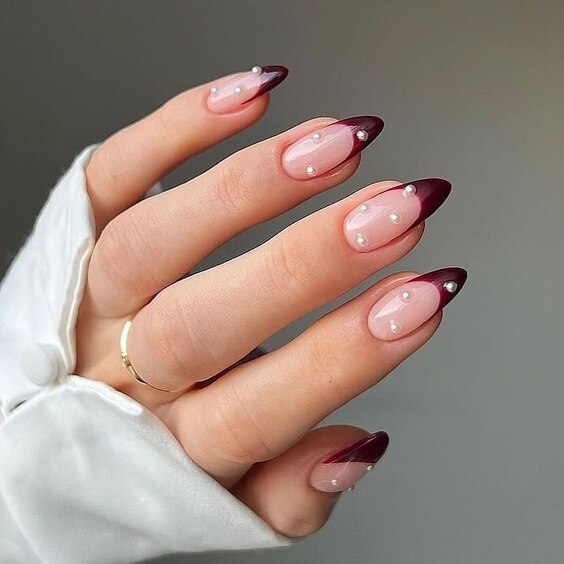
Photo credit by: @nails.beauty999
Materials Needed:
- Base Coat: An essential base for durability.
- Colors:
- Deep Burgundy: OPI’s Malaga Wine
- Clear Gel for droplets: A thick builder gel to create the dew effect.
- Top Coat: A matte finish from DND to enhance the dew-like appearance.
DIY Manicure Steps:
Apply the base coat for long-lasting wear. Paint a gradient of deep burgundy fading into clear at the tips. Use a dotting tool to apply small amounts of clear builder gel to mimic dew drops. Opt for a matte top coat to give an authentic dewy look.
Floral Fall Fantasy
Capturing the essence of autumn’s richness, these nails are adorned with intricate floral patterns over a deep burgundy base, interspersed with golden accents. This design is perfect for those who love gel nail colors end of summer, combining traditional fall colors with the vibrant, lively spirit of summer.
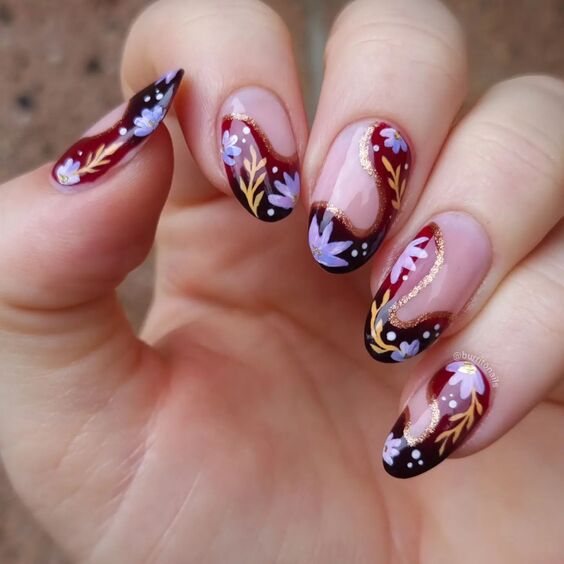
Photo credit by: @burritonails
Materials Needed:
- Base Coat: To protect the natural nail.
- Colors:
- Deep Burgundy: DND’s Burgundy Wine
- White, Blue, and Gold for details: Use acrylic paints for detailed art.
- Top Coat: A glossy finish from Gel OPI to preserve the intricate designs.
DIY Manicure Steps:
Begin with a base coat to ensure a smooth application. Apply the burgundy as the base color. Painstakingly add the floral and leaf details using white and blue acrylic paints, and highlight with gold accents. Finish with a glossy top coat to seal the design and bring out the depth of the colors.

