22 Stunning Summer Nail Designs for Dark Skin: Colorful and Elegant Ideas

As summer heats up, are you ready to flaunt your nails with the season’s hottest trends on dark skin? Let’s dive into some stunning summer nail designs that not only pop on darker tones but also make a statement with every wave of your hand!
Orange and Blue Swirl Delight
This nail design is a vibrant masterpiece combining swirling patterns with a glossy finish that stands out brilliantly against dark skin. The playful interplay of orange and blue hues creates a visual pop that’s both bright and refreshing for summer. Each nail presents a unique swirl pattern, giving a personalized touch to the manicure.
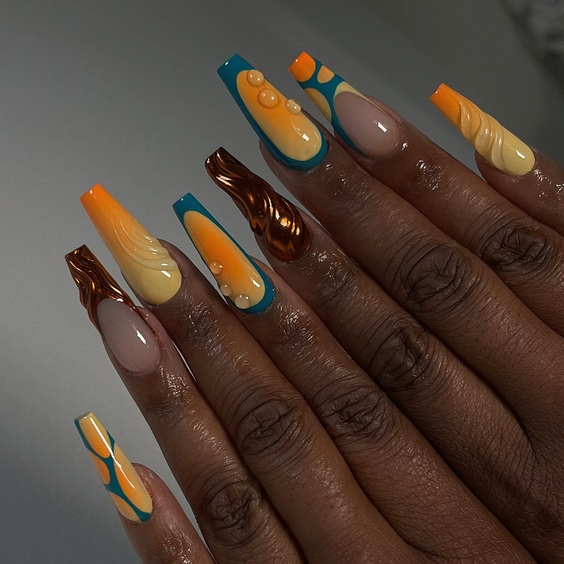
Photo credit by: @traciethetech
Materials Needed
- Base coat: Opt for a hydrating base to protect your nails.
- Orange polish: Choose a vibrant, high-pigment shade for full coverage.
- Blue polish: A glossy, sky-blue works wonders here.
- Top coat: A high-shine top coat to seal in the design and enhance durability.
- Detailing brush: For those intricate swirls and precise lines.
DIY Manicure Steps
- Start with a clean, filed nail and apply a base coat.
- Once dry, paint the nails with a light layer of orange polish.
- Using a detailing brush, draw delicate swirls with blue polish.
- Allow each layer to dry completely before applying the next to avoid smudging.
- Finish with a top coat for a glossy look and extended wear.
Chic Geometric Elegance
This design showcases the beauty of geometric precision on short gel nails. The mix of matte black, glossy yellow, and hints of blue creates a sophisticated look perfect for both casual and formal summer events. The design is particularly flattering on dark skin, enhancing the nails’ natural shape and length.
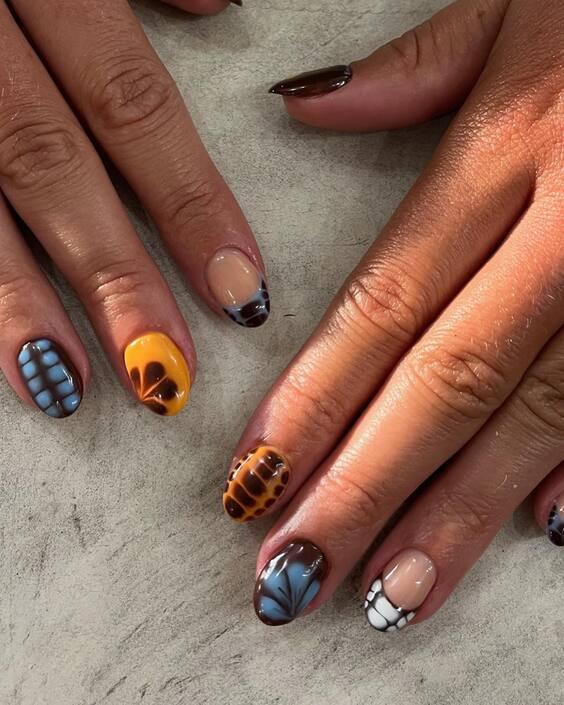
Photo credit by: @houseoforangebali
Materials Needed
- Matte black polish: A smooth, fast-drying formula.
- Glossy yellow polish: For a striking contrast.
- Blue polish: Adds a touch of cool sophistication.
- Striping tape: For flawless geometric patterns.
- Matte top coat: To seal in the design and prevent chips.
DIY Manicure Steps
- Apply a base coat to protect your nails and prevent staining.
- Use matte black as the base color on all nails.
- Once dry, apply striping tape to create geometric patterns.
- Fill in the patterns with yellow and blue polishes.
- Carefully remove the tape before the polish dries completely.
- Finish with a matte top coat for a chic, modern look.
Summer Citrus Pop
These nails are a true celebration of summer, featuring bright, bold citrus-inspired colors that look delectable against dark skin. The design incorporates playful patterns and a glossy finish that mimics the fresh, juicy appeal of summer fruits.
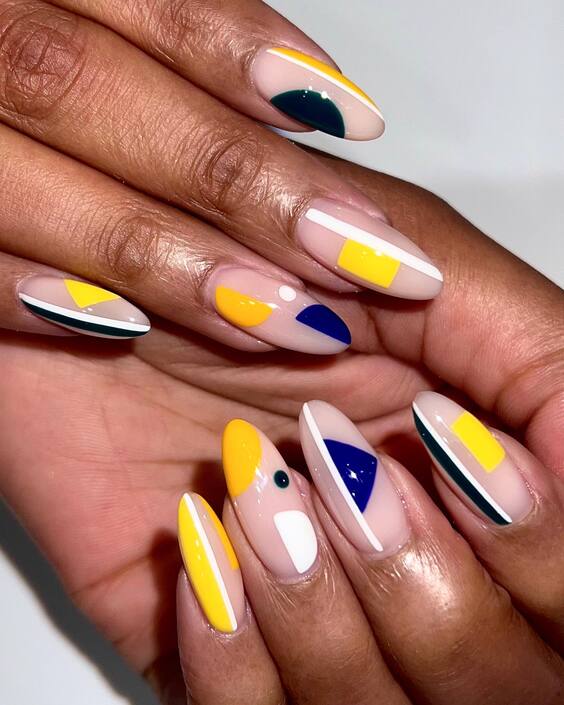
Photo credit by: @skyynailsintl
Materials Needed
- White polish: For a crisp base that makes colors pop.
- Lemon yellow polish: Bright and sunny.
- Orange polish: Vibrant and cheerful.
- Green polish: For a hint of leafy freshness.
- Dotting tool: To create perfect citrus segments.
- High-gloss top coat: To enhance the juiciness of the look.
DIY Manicure Steps
- Prep your nails with a base coat and apply two coats of white polish.
- Use a dotting tool to add segments of yellow, orange, and green.
- Experiment with different sizes and shapes to mimic fruit slices.
- Allow each color to dry before layering to maintain clarity and brightness.
- Seal everything with a high-gloss top coat for a juicy finish.
Playful Pink Explosion
This dazzling nail design screams summer fun with its electric pink base and intricate artistic accents on each nail. The artwork on the acrylic nails makes a stunning contrast against dark skin, featuring vivid, abstract patterns in blue, black, and white. This style exemplifies how bright summer nails for dark skin can be both bold and chic.
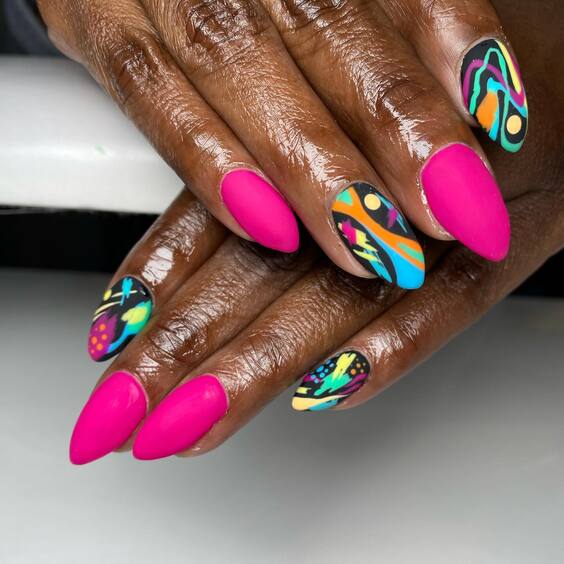
Photo credit by: @nailsthatspeakstudio
Materials Needed
- Pink acrylic polish: Bright and bold for a standout base.
- Black and white paint: For detailed designs.
- Fine art brushes: Essential for precision in intricate patterns.
- Sealing top coat: To protect the artwork and enhance the shine.
DIY Manicure Steps
- Prepare your nails with a primer and apply pink acrylic as the base.
- Use fine brushes to paint abstract designs on each nail.
- Play with the balance of black and white to enhance the pink.
- Allow each design to dry thoroughly before applying a top coat for a glossy finish.
Floral and Pastel Fusion
The floral and pastel theme of this design is perfect for a delicate yet eye-catching summer look. The nails feature soft pastel hues with stunning blue and yellow floral accents, making it an ideal choice for summer nails on dark skin tones. The intricate detail in the floral patterns adds a touch of nature-inspired beauty.
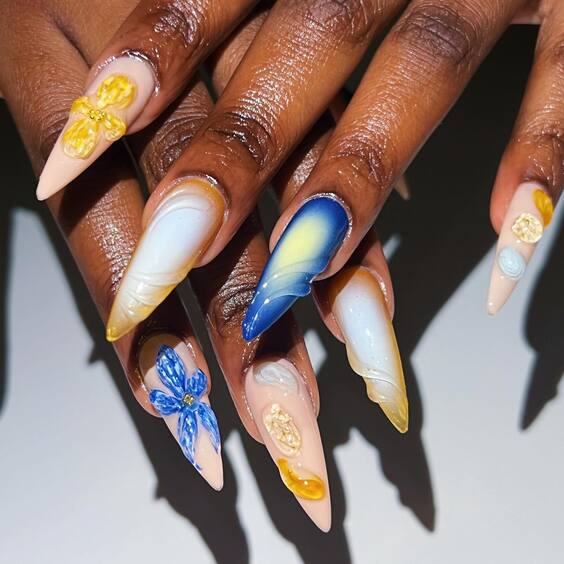
Photo credit by: @beautybyrachellb
Materials Needed
- Pastel polishes: Soft peach, mint green, and baby blue.
- Yellow and blue acrylic paint: For the floral designs.
- Detailing brushes: For precise flower detailing.
- Glossy top coat: To ensure the nails shine and last longer.
DIY Manicure Steps
- Apply a soft peach polish as the base.
- Paint delicate flowers with blue and yellow acrylic using a fine brush.
- Add a few subtle dots and strokes to emulate natural beauty.
- Finish with a glossy top coat to enhance the pastel colors and protect your design.
Tropical Sunset Vibes
This nail design takes inspiration from tropical sunsets with warm shades of orange and red, complemented by white floral patterns. It’s a fantastic example of summer nails toes dark skin, where the vibrant colors play off beautifully against the darker skin tone, giving an instant feel of walking on a sunlit beach.
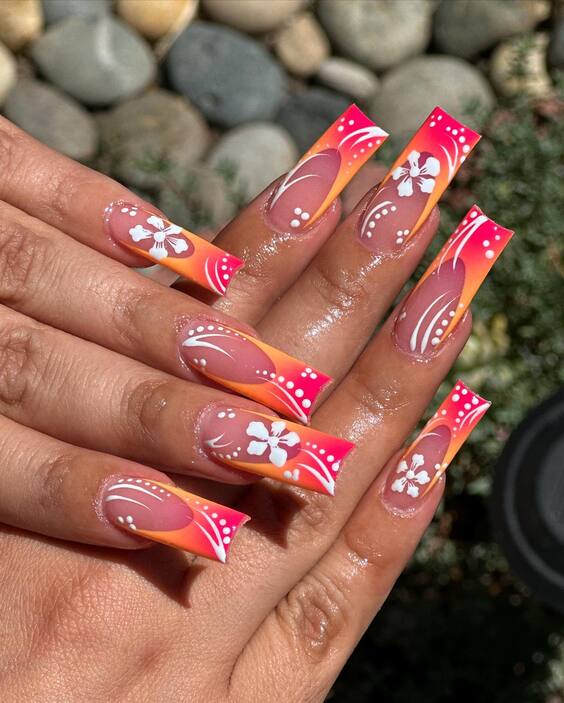
Photo credit by: @serenasnails_
Materials Needed
- Orange and red gradient polish: For the sunset effect.
- White paint: For the floral details.
- Sponge: For a smooth gradient transition.
- Protective top coat: To maintain the design’s vibrancy.
DIY Manicure Steps
- Start with a base coat to protect your nails.
- Apply a gradient of orange and red using a sponge for the sunset background.
- Use a thin brush to add white floral designs.
- Seal the design with a top coat for a lasting finish and a beach-ready look.
Pastel Tips on Tranquil Teal
This manicure elevates the classic French tip by introducing a serene teal and soft pink pastel palette. The crisp, geometric design at the tips against a natural nail base offers a refreshing twist on traditional French tips, making it an excellent choice for those who appreciate simple yet striking nail art.
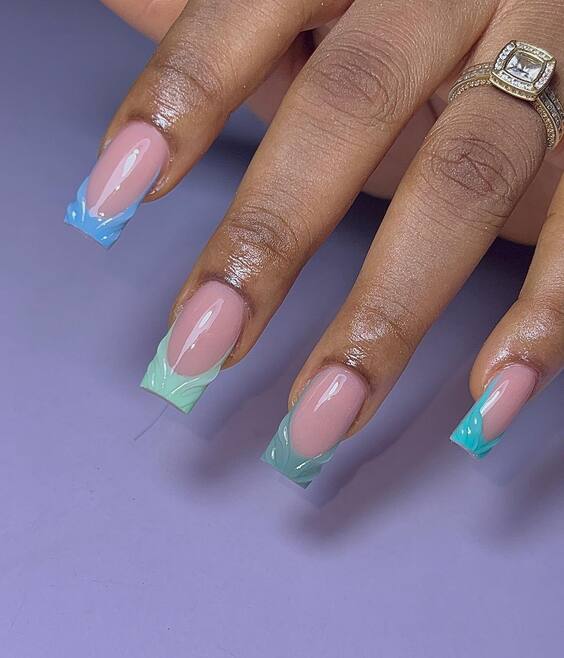
Photo credit by: @aras.planet
Materials Needed
- Teal and pink polish: Pastel shades for a soft, modern look.
- Protective base coat: To keep natural nails healthy.
- Striping tape: For perfecting those crisp lines.
- Glossy top coat: To ensure a lasting shine and prevent chips.
DIY Manicure Steps
- Begin with a protective base coat to preserve nail health.
- Apply striping tape at the tips to guide the pastel application.
- Paint the tips with alternating teal and pink, then carefully remove the tape.
- Finish with a glossy top coat for a polished and durable manicure.
Floral Artistry on Nude Nails
These nails blend the natural beauty of nude polish with vibrant, hand-painted flowers, showcasing a stunning level of detail. Each nail is a miniature canvas, with delicate floral artwork enhancing the simple elegance. This design is a testament to how subtle elements can transform a manicure into a work of art on dark skin.
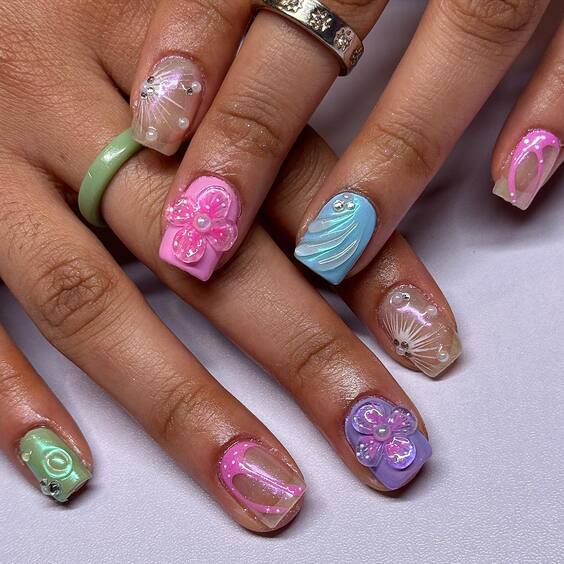
Photo credit by: @alithenailtech
Materials Needed
- Nude polish: A smooth, natural shade that complements dark skin tones.
- Acrylic paints: Various colors for the floral designs.
- Fine brushes: For detailed painting.
- High-gloss top coat: To protect the artwork and add a radiant shine.
DIY Manicure Steps
- Apply a nude base coat and let it dry completely.
- Use fine brushes and acrylic paints to create the floral designs on each nail.
- Allow the paint to dry without smudging.
- Seal with a high-gloss top coat to enhance the depth and detail of the artwork.
Abstract Modern Art
This nail design is a bold statement piece, featuring abstract art with a rich mix of colors and patterns. Perfect for those who love to stand out, the design includes elements of gold, pink, and blue, making it a perfect fit for bright summer nails for dark skin.
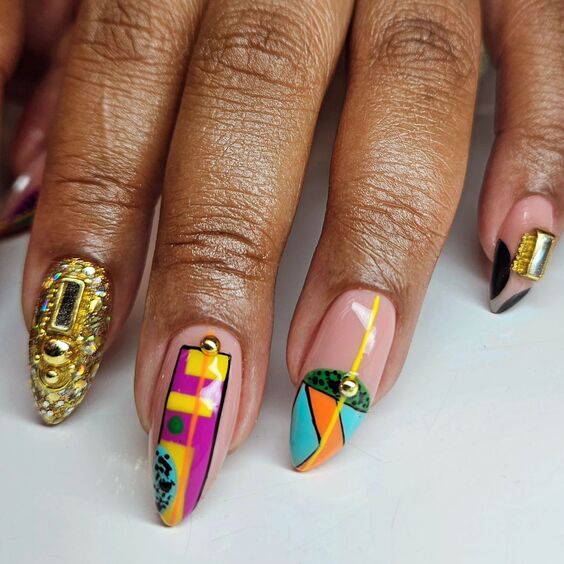
Photo credit by: @_naturallyashleyg
Materials Needed
- Variety of polish colors: Gold, pink, blue, and more for the abstract designs.
- Detailing tools: Brushes and dotting tools for intricate patterns.
- Gold embellishments: Small studs or decals for added texture and luxury.
- Top coat: A must-have for sealing in the design and ensuring longevity.
DIY Manicure Steps
- Start with a base coat to protect your natural nails.
- Sketch your abstract designs using a thin brush or dotting tool with various colors.
- Add gold embellishments while the paint is still tacky to ensure they adhere well.
- Apply a top coat to protect your designs and add a glossy finish.
Swirling Rainbow Fun
This playful design is all about bringing joy with its swirling patterns of vibrant colors on each nail. Perfect for the summer, this look uses a palette of neon colors that stand out beautifully on dark skin, providing a cheerful and youthful vibe that’s hard to miss.
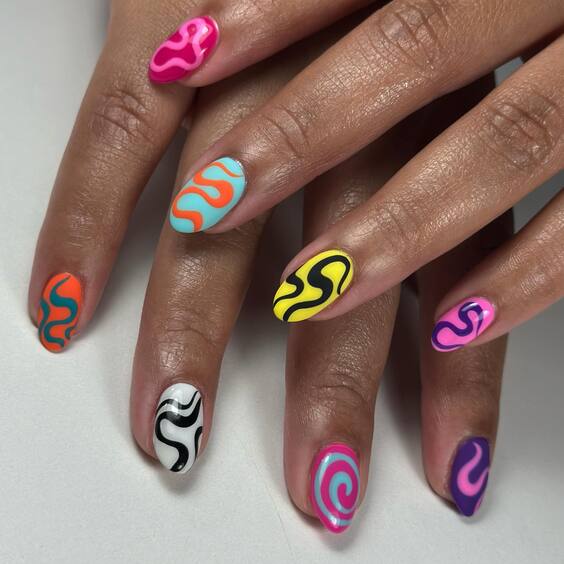
Photo credit by: @siczmo
Materials Needed
- Neon polishes: A range of bright colors for the base and details.
- Detailing brush: For precise swirls and curves.
- Base coat: To protect the natural nail.
- Glossy top coat: For a lasting, shiny finish.
DIY Manicure Steps
- Start with a base coat to protect your nails.
- Apply a different neon color to each nail as the base.
- Use a detailing brush to create swirling patterns over the base colors.
- Seal with a glossy top coat for durability and shine.
Classic Pink French Tips
These classic French tips with a twist of pink are the epitome of chic. The subtle pink tips provide a modern update to the traditional French manicure, making it a perfect choice for both everyday wear and special summer occasions. The look is sophisticated and understated, highlighting the beauty of short nails on dark skin.
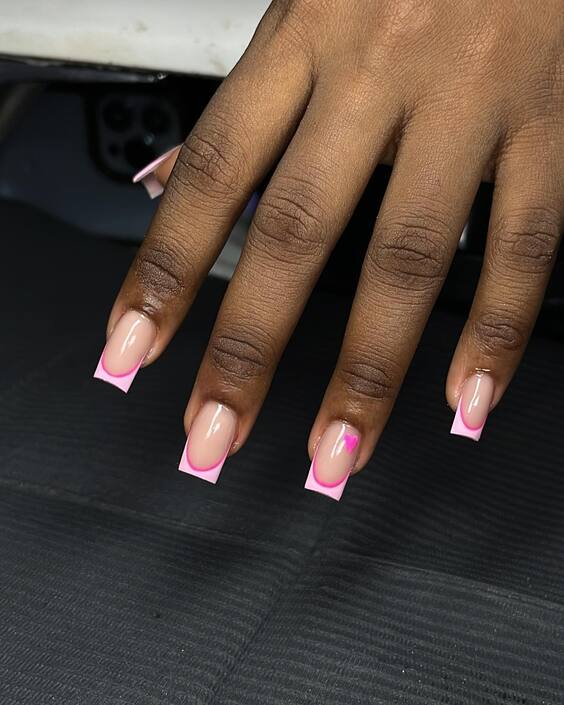
Photo credit by: @naildbylola
Materials Needed
- Light pink polish: For the tips.
- Nude polish: As the base to enhance the natural look.
- Tip guides or tape: For precision in achieving the perfect tip.
- Top coat: To ensure a smooth finish and long-lasting wear.
DIY Manicure Steps
- Apply a nude base coat and let it dry.
- Place tip guides on each nail and apply pink polish to the tips.
- Remove the guides and let the tips dry completely.
- Apply a top coat for a seamless finish and extra shine.
Elegant Nude Artistry
This design features an elegant nude base with white artistry, creating a sophisticated, minimalist look. It’s perfect for those who prefer a subtle yet stylish manicure. The delicate white patterns add a touch of elegance without overpowering the natural beauty of the nails, making it ideal for summer nails on dark skin.
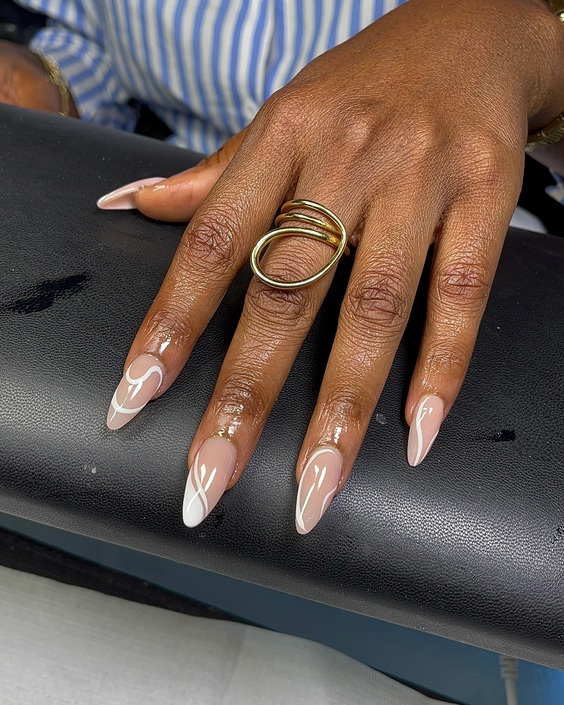
Photo credit by: @nails.bygale
Materials Needed
- Nude polish: For a clean, subtle base.
- White polish: For the artistic details.
- Fine brush: For delicate line work.
- Top coat: To protect the design and add a glossy finish.
DIY Manicure Steps
- Apply a nude polish as the base.
- Use a fine brush to create white artistic patterns on each nail.
- Allow the design to dry completely to avoid smudges.
- Finish with a top coat for a refined look.
Eclectic Summer Splash
This design is a playful explosion of color and pattern, embodying the essence of summer fun. Each nail features a unique design ranging from neon swirls to polka dots, creating a dynamic and vibrant look that is sure to catch the eye. This manicure is perfect for those who love to express their creativity through their nails.
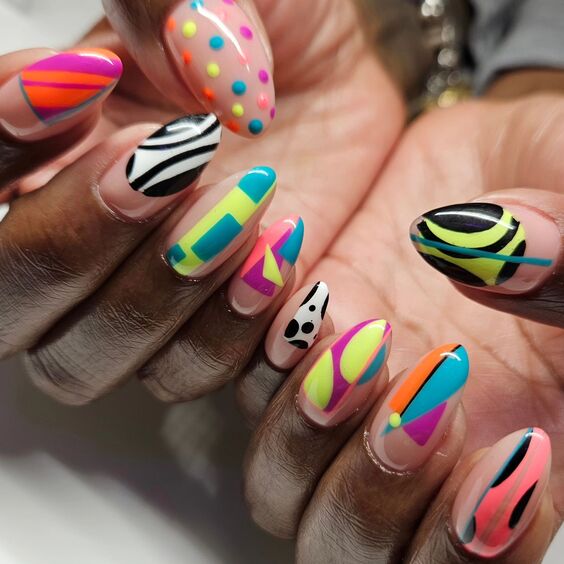
Photo credit by: @_naturallyashleyg
Materials Needed
- Multiple polish colors: For the base and designs.
- Dotting tools and brushes: For creating dots and detailed patterns.
- Base coat and top coat: To protect the nails and seal the designs.
DIY Manicure Steps
- Prep the nails with a base coat.
- Apply different base colors on each nail.
- Use dotting tools and brushes to add designs and patterns.
- Finish with a top coat for gloss and protection.
Modern Neon Edges
This manicure modernizes the French tip by incorporating vibrant neon outlines on a transparent base. The sleek, minimalistic lines are perfect for a contemporary summer look, providing a pop of color while maintaining a sense of simplicity and elegance.
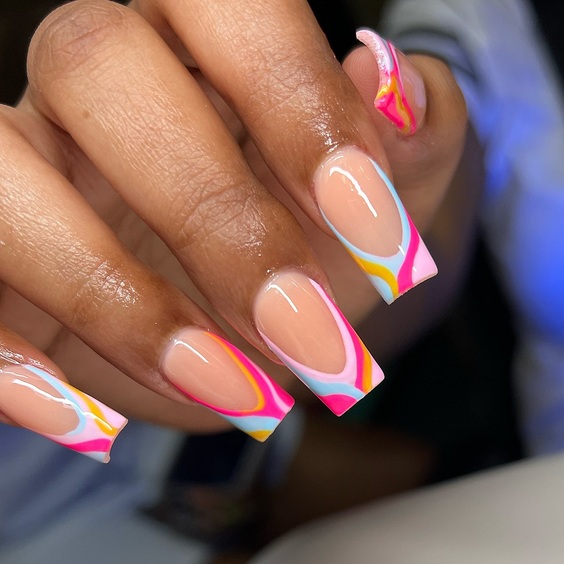
Photo credit by: @kimmycutenails
Materials Needed
- Neon polishes: For the tips.
- Clear polish: As the base.
- Fine brush: For precise lining.
- Top coat: To enhance durability and shine.
DIY Manicure Steps
- Apply a clear base coat.
- Paint the tips with neon polish using a fine brush for precision.
- Allow the polish to dry completely.
- Seal with a top coat for a long-lasting finish.
Elegant Blue and Gold
This design combines deep blue with luxurious gold accents, creating an elegant and sophisticated look. The gold embellishments add a touch of glamour, making this manicure ideal for special occasions or a night out during the summer.
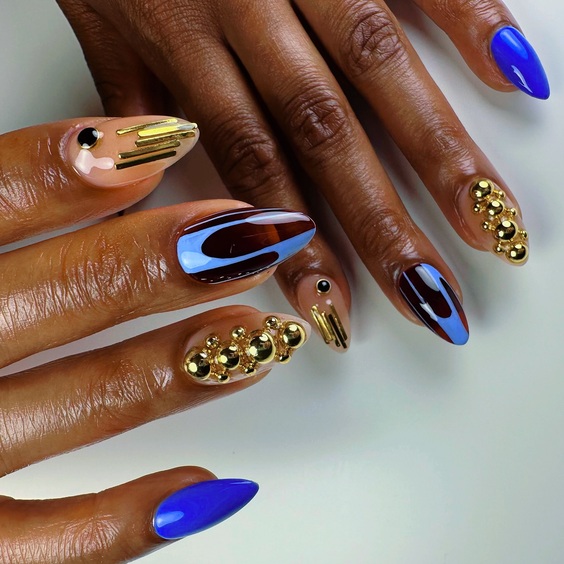
Photo credit by: @shespolished
Materials Needed
- Deep blue polish: For a rich, vibrant base.
- Gold embellishments: To add luxury and texture.
- Adhesive for embellishments: To ensure they stay in place.
- Top coat: For added shine and protection.
DIY Manicure Steps
- Apply the blue polish as the base.
- Once dry, carefully place gold embellishments on the nails.
- Use adhesive to secure the embellishments.
- Finish with a top coat to protect the design and add a glossy sheen.
Playful Summer Patterns
This vibrant set showcases a festival of colors and patterns, ideal for the bold at heart. Each nail is uniquely designed with different shapes and motifs, ranging from hearts to abstract waves, making each finger a statement piece. It’s a playful choice that captures the essence of summer’s lively spirit.
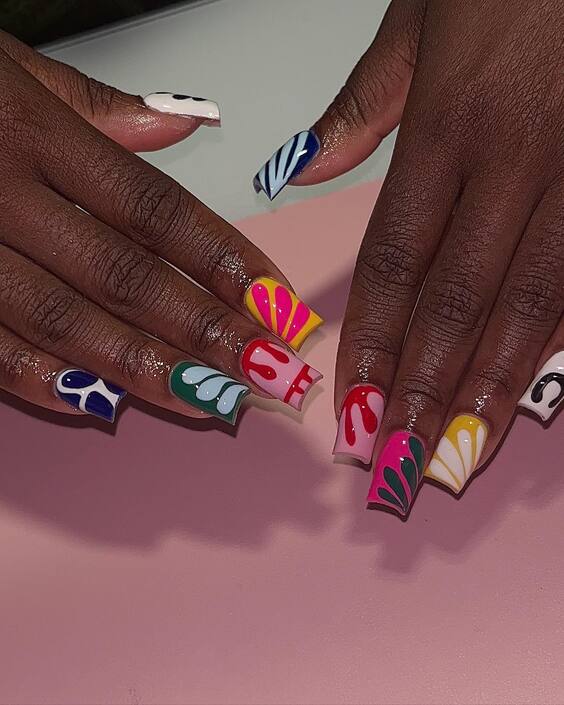
Photo credit by: @tatinailedit
Materials Needed
- Various polish colors: For the diverse patterns.
- Detailing brushes: For precision in small artwork.
- Base and top coats: To protect the nail and enhance the durability of the design.
DIY Manicure Steps
- Begin with a base coat to protect your nails.
- Paint each nail with a different base color.
- Use detailing brushes to add various patterns and designs.
- Finish with a top coat to seal the design and add shine.
Subtle Pink Gradient
These nails feature a subtle gradient of pink, transitioning beautifully from a deeper shade at the tips to a lighter hue near the cuticle. The design is elegant and understated, perfect for those who prefer a more minimalist approach to summer nail art.
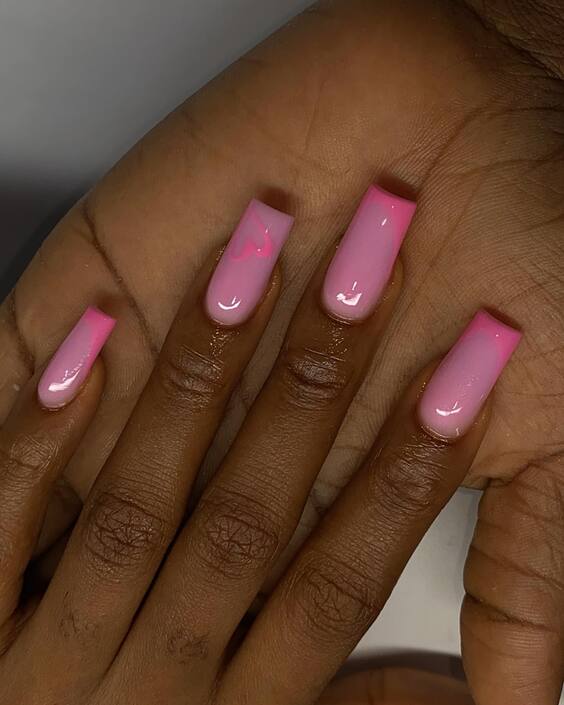
Photo credit by: @nailsbyaugust
Materials Needed
- Pink polishes: Two shades for the gradient effect.
- Sponge: For blending the gradient smoothly.
- Top coat: To ensure a glossy finish and prolong the design.
DIY Manicure Steps
- Apply a lighter pink polish as the base.
- Once dry, use a sponge to apply a darker pink at the tips, blending towards the middle.
- Carefully blend to achieve a smooth gradient.
- Finish with a top coat for a seamless and shiny appearance.
Elegant Nude with Gold Trim
This design takes elegance to the next level with its simple nude base and striking gold trim at the tips. It’s an excellent choice for those who love a chic and polished look with just a hint of flair. The gold trim adds a luxurious touch suitable for any summer occasion, from weddings to evening parties.
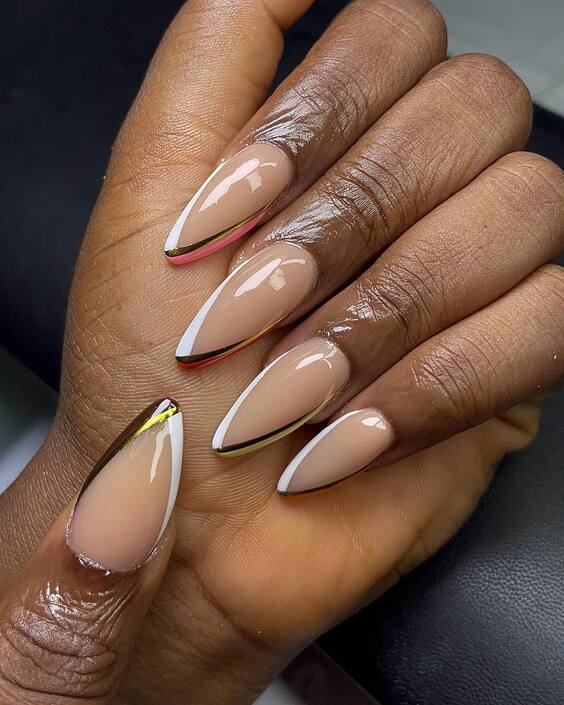
Photo credit by: @nails.bygale
Materials Needed
- Nude polish: For a clean, polished base.
- Gold striping tape: For the perfect crisp line.
- Top coat: To protect the design and add gloss.
DIY Manicure Steps
- Paint your nails with a nude polish and let it dry completely.
- Apply gold striping tape at the tips to create a sharp, elegant line.
- Seal everything with a top coat to ensure longevity and shine.
Global Influences Design
This set features nails inspired by diverse cultural patterns and symbols, reflecting global artistry. The detailed designs include traditional motifs and vibrant color palettes, making each nail a unique representation of cultural appreciation. This is perfect for those who love storytelling through their style.
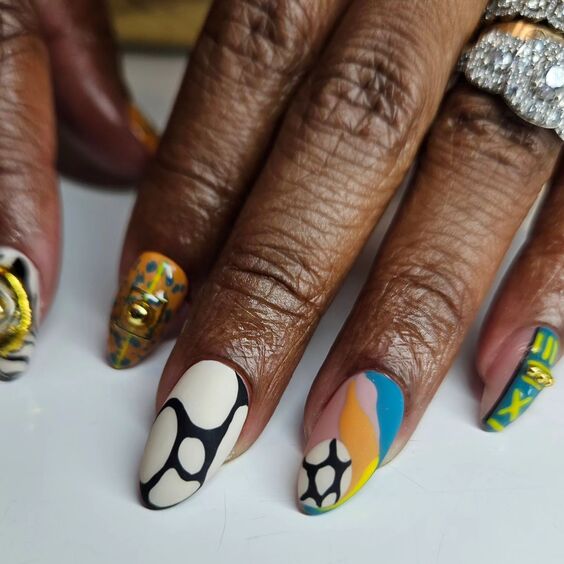
Photo credit by: @_naturallyashleyg
Materials Needed
- Multi-colored polishes: To achieve the vivid and varied designs.
- Detailing brushes: For intricate patterns.
- Top coat: To ensure the designs are sealed and last longer.
DIY Manicure Steps
- Start with a clean base coat to protect your nails.
- Apply a neutral base color.
- Use detailing brushes to paint various cultural patterns in bright colors.
- Finish with a top coat to protect and enhance the artwork.
Elegant Emerald and Gold
This nail design pairs a deep emerald green with luxurious gold leaf accents, offering a regal and sophisticated look. The combination of rich green and shimmering gold is ideal for evening events or special occasions during the summer months.
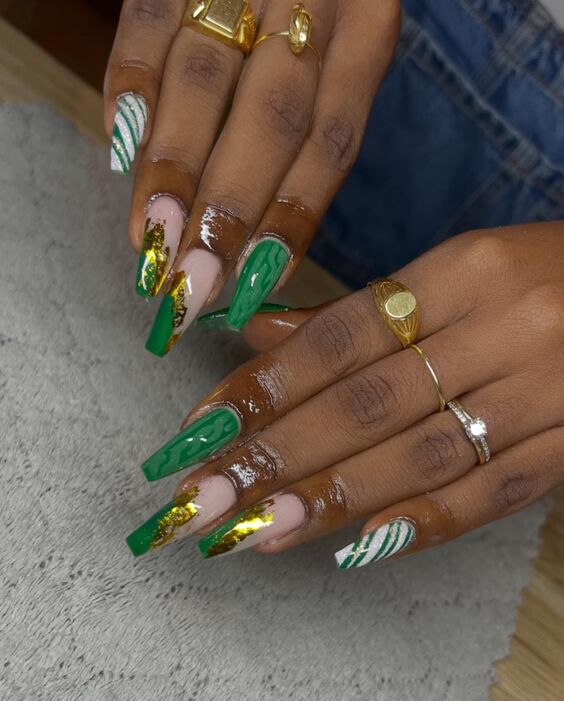
Photo credit by: @fahbuleuse
Materials Needed
- Emerald green polish: For a rich base color.
- Gold leaf flakes: For adding a touch of opulence.
- Adhesive for gold leaf: To ensure it adheres well.
- Top coat: To seal everything in and provide a glossy finish.
DIY Manicure Steps
- Paint your nails with the emerald green polish.
- Apply a small amount of adhesive and carefully place gold leaf flakes on the nails.
- Seal the design with a top coat for durability and shine.
Soft Pink Elegance
This manicure showcases a soft pink base with subtle glitter accents, creating a look of understated elegance. The simplicity of the design makes it versatile for both day-to-day wear and more formal summer gatherings, highlighting the beauty of simplicity.
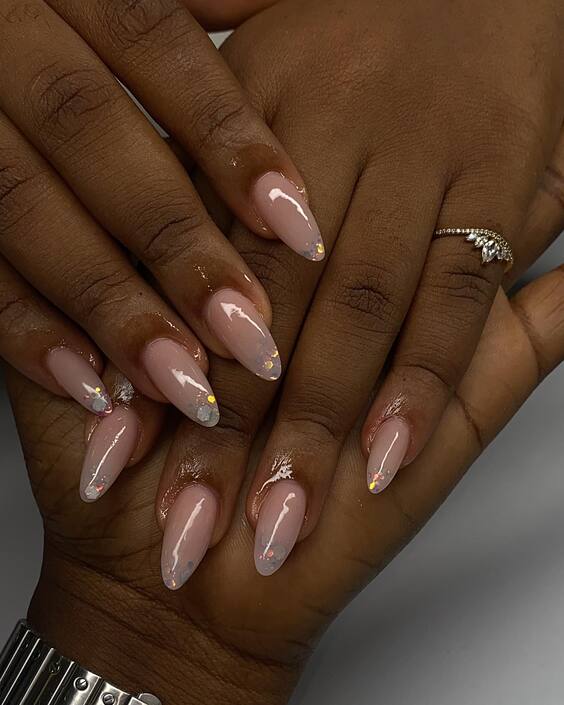
Photo credit by: @nailsbyaugust
Materials Needed
- Soft pink polish: For a delicate base.
- Glitter accents: To add a touch of sparkle.
- Top coat: For a smooth, protective finish.
DIY Manicure Steps
- Apply a soft pink polish as the base.
- Sprinkle glitter accents on the tips or as desired.
- Finish with a top coat to ensure longevity and enhance the sparkle.
Gradient Ombre Elegance
This manicure features a stunning ombre gradient that transitions from a deep pink at the tips to a subtle nude at the cuticle, creating a smooth, flowing color change. The design combines simplicity with a touch of elegance, making it perfect for both casual outings and more formal events.
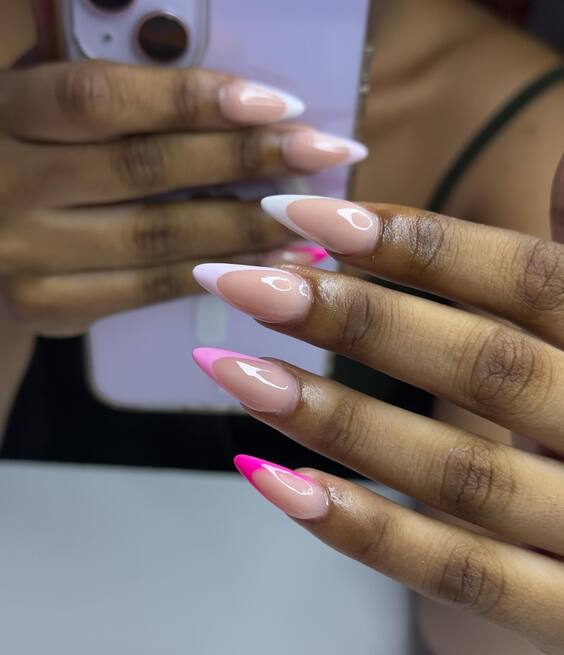
Photo credit by: @obsession.beauty.lounge
Materials Needed
- Pink and nude polishes: For the gradient effect.
- Sponge: To blend the colors smoothly.
- Top coat: To ensure a glossy finish and protect the ombre.
DIY Manicure Steps
- Apply the nude polish as a base and let it dry completely.
- Place pink polish on a sponge and dab gently starting at the tip, blending towards the middle.
- Repeat the sponging process until the desired gradient effect is achieved.
- Apply a top coat to smooth out the transition and add shine.

