Are you ready to dazzle this July with the hottest nail trends of 2024? Whether you’re planning to celebrate the 4th of July with a bang or just enjoy the summer vibes, the perfect manicure can set the mood. From vibrant colors to intricate designs, this article will guide you through a variety of stunning nail ideas perfect for the month of July. Curious about how to achieve these looks at home? Keep reading as we break down each style with professional insights, DIY tips, and all the essentials you’ll need.
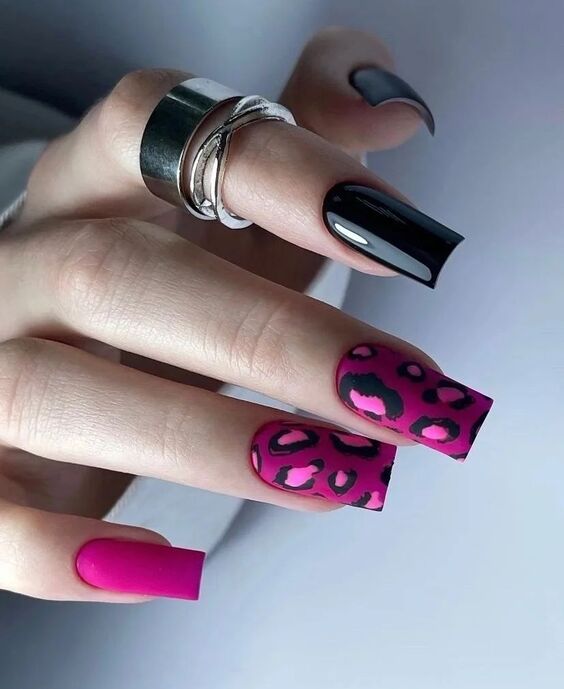
Bold and Exotic Animal Print
The animal print in this nail design is not just bold; it’s a statement. Utilizing a vivid magenta paired with a deep black, these nails scream confidence and fun, perfect for summer parties or nights out during July Nails 2024. The glossy finish adds an extra layer of sophistication, making each detail pop even more.
Consumables List:
- Base Coat: Essie Here to Stay
- Magenta Polish: OPI Two-timing the Zones
- Black Polish: Sally Hansen Black Out
- Top Coat: Seche Vite Dry Fast
- Detailing Brush
DIY Instructions: Start by applying a base coat to protect your nails. Once dry, apply two coats of the magenta polish as the base color. Use the detailing brush dipped in black polish to draw the animal patterns. Let it dry, then seal everything with a high-gloss top coat for durability and shine.
Sleek Monochrome Magic
This monochrome look with alternating matte and glossy black is both sophisticated and chic, ideal for anyone looking to make a subtle yet powerful style statement this 4th of July 2024. It’s a versatile design that complements any outfit, whether it’s casual or formal.
Consumables List:
- Base Coat: OPI Natural Base
- Black Matte Polish: Zoya Matte Velvet
- Black Glossy Polish: Revlon Blackest Black
- Top Coat: Matte Finish by Revlon
DIY Instructions: Apply the base coat and let it dry. Paint alternate nails with matte and glossy black polish. Allow each nail to set completely before applying the respective top coat—matte finish on glossy nails and glossy finish on matte nails for a striking contrast.
Elegant Floral Accents
These nails feature a beautiful contrast between a soft matte red and glossy floral accents, making it a perfect choice for any summer event or a patriotic celebration on the Fourth of July 2024. The floral pattern adds a touch of elegance and femininity.
Consumables List:
- Base Coat: CND Stickey Base
- Red Matte Polish: Essie Matte About You
- White and Pink Acrylic Paint for flowers
- Detailing Brushes
- Top Coat: Glossy Accents by Rimmel
DIY Instructions: After the base coat, apply two coats of the red matte polish. Use acrylic paints with a fine brush to create floral designs. Once dry, strategically apply a glossy top coat over the flowers only to enhance their appearance.
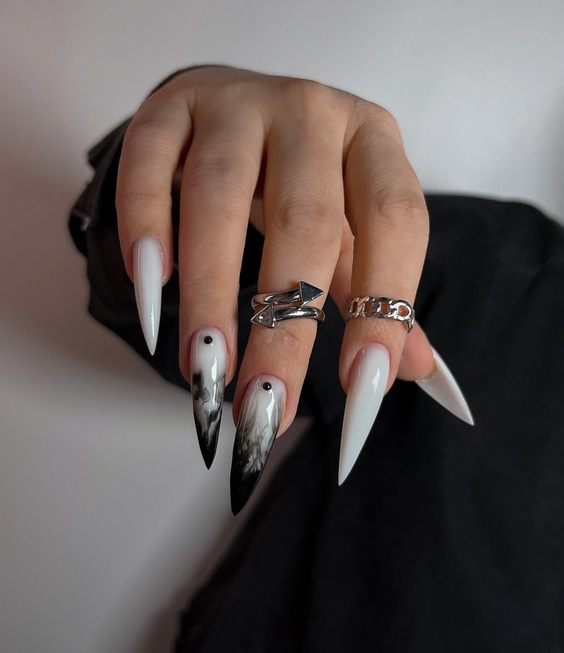
Mystical Raven Artistry
The artwork showcased on these nails is nothing short of mystical, featuring a detailed raven design that looks as though it’s about to take flight right off the nails. The gradient transition from a milky white to a deep grey creates a foggy backdrop, perfect for the raven’s mystique. The clever use of negative space not only enhances the bird’s features but also adds an elegant simplicity to the overall design.
Consumables List:
- Base coat (e.g., OPI Natural Nail Base Coat)
- Milky white gel polish
- Grey gel polish
- Fine detail brush
- Matte top coat (e.g., Essie Matte About You)
DIY Instructions: Start by applying a base coat to protect your nails and ensure a smooth application. Paint a gradient with milky white at the base transitioning to grey at the tips. Once dry, use a fine detail brush to paint the raven. Allow each layer to dry thoroughly before applying the next to avoid smudging. Finish with a matte top coat for an ethereal, muted effect.
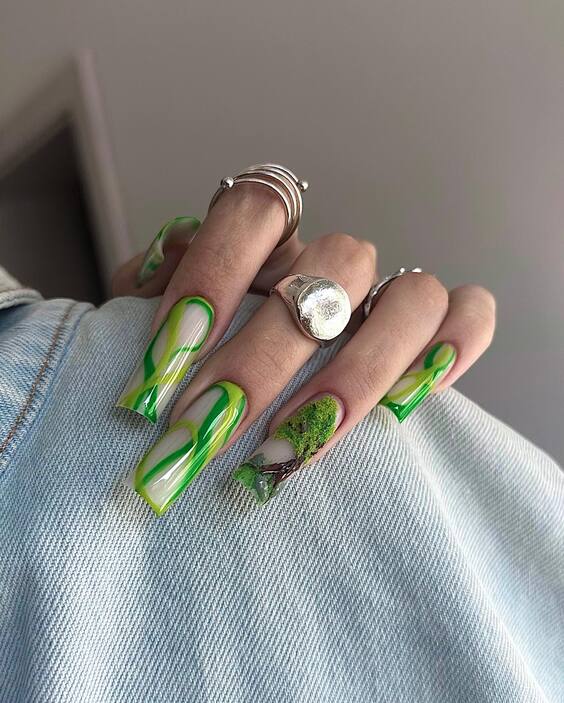
Vivid Green Swirls
These nails are a vibrant testament to the joys of summer, featuring electric green swirls that mimic the lively energy of July. The design uses a mix of glossy and matte finishes to create depth and interest, making the swirls pop against the matte background. The added touch of grassy textures introduces an element of nature-inspired beauty.
Consumables List:
- Base coat
- Electric green polish (glossy and matte)
- White matte polish
- Detailing brush
- Matte and glossy top coats
DIY Instructions: Apply a base coat for longevity. Use matte white as the background. With a detailing brush, draw swirls using glossy electric green polish. For a touch of realism, add small patches of grass texture on random nails using a mix of green tones. Seal with a glossy top coat on the swirls and a matte coat over the white background to enhance the contrast.
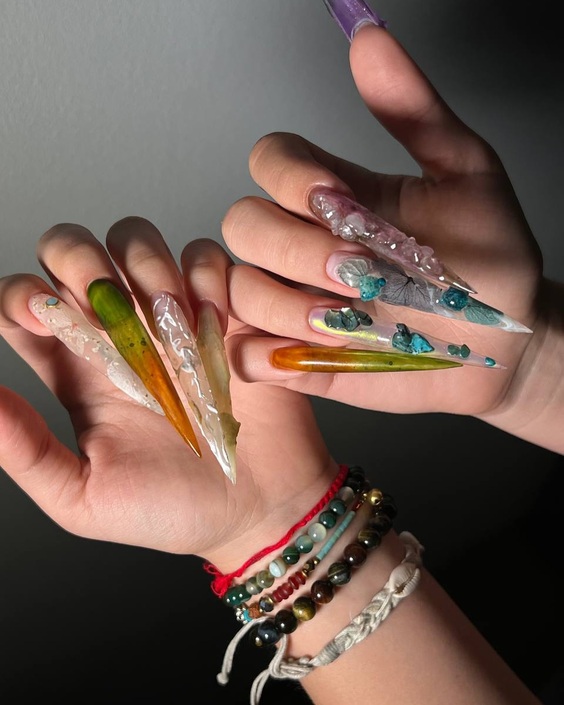
Crystal Clear Charm
This nail design is a striking combination of clarity and color, featuring long, clear acrylic nails infused with vibrant dyes and suspended beads. The strategic placement of tiny turquoise stones adds a pop of color, providing a playful yet sophisticated look.
Consumables List:
- Clear acrylic nails
- Nail glue
- Turquoise beads and small crystals
- Yellow and green dye
- Nail resin
DIY Instructions: Begin with clear acrylic nails as the base. Before setting, mix in small amounts of yellow and green dye into the acrylic. Strategically place turquoise beads and crystals into the wet acrylic to achieve the suspended effect. Once dry, use nail resin to ensure the stones are securely in place. This design requires patience and a steady hand for precision.
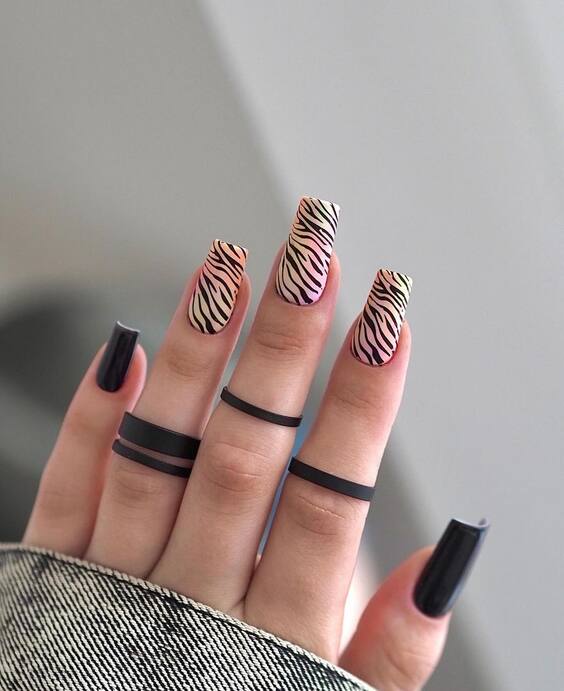
Safari Elegance
The zebra-inspired pattern on these nails brings a wild and sophisticated aesthetic that’s perfect for summer adventures or a stylish July 4th celebration. The black and white contrast is bold, yet the pink accents add a fresh and youthful twist, making it both eye-catching and elegant.
Consumables List:
- Base coat
- White polish
- Black striping polish
- Pink neon polish
- Fine detail brush
- Glossy top coat
DIY Instructions: Begin with a base coat to protect your nails. Apply a white polish as the base color. Once dry, use a fine detail brush and black striping polish to create zebra stripes. Add a touch of pink neon polish in areas to highlight the design. Finish with a glossy top coat to enhance the colors and ensure durability.
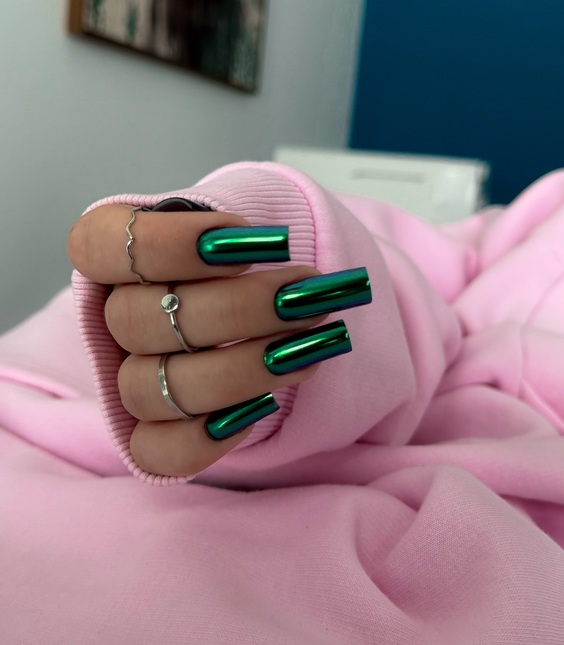
Vivid Chrome Green
These nails dazzle with a metallic chrome finish that reflects the vibrant hues of summer. The intense green mirrors the lushness of July’s nature, perfect for adding a pop of color to any summer outfit or a festive 4th of July gathering.
Consumables List:
- Base coat
- Chrome green polish
- High-gloss top coat
- UV or LED lamp (if using gel)
DIY Instructions: Start with a smooth base coat to create an even surface. Apply the chrome green polish; for best results, consider a gel polish that requires curing under a UV or LED lamp for a flawless finish. Seal with a high-gloss top coat to amplify the reflective quality and ensure long-lasting wear.
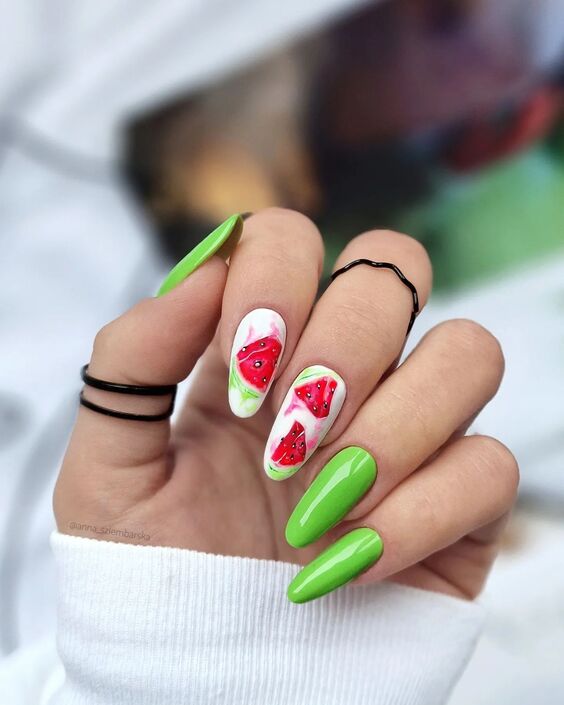
Summer Watermelon Delight
Nothing says summer like the fresh, juicy appeal of watermelon. These nails capture the essence of summer with vibrant green and juicy red, decorated with tiny black seeds to mimic watermelon. This fun and playful design is perfect for any summer day or festive July 4th celebration.
Consumables List:
- Base coat
- Lime green polish
- White polish
- Red polish
- Black polish for seeds
- Detailing brush
- Glossy top coat
DIY Instructions: Apply a base coat to start. Paint the tips lime green and the base red, resembling a watermelon. Use white polish to create a slight separation between the green and red for a more realistic look. Add small black dots for seeds using a detailing brush. Finish with a glossy top coat to protect your design and add a fresh, shiny look.
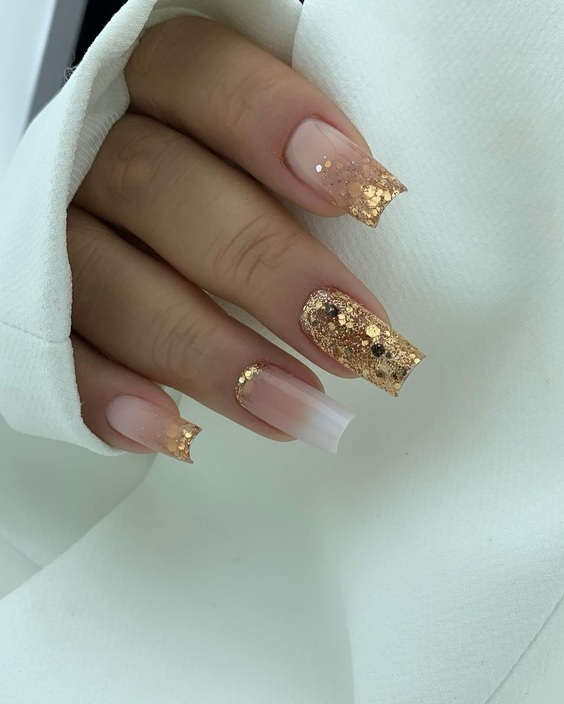
Golden Glamour
This nail design exudes elegance and luxury, perfect for a festive July event. The use of gold glitter on a nude ombre base creates a subtle yet striking appearance. The placement of the glitter towards the tip emphasizes the nail’s length and adds an exquisite touch of glam.
Consumables List:
- Base coat
- Nude polish
- Gold glitter polish
- Sponge (for ombre effect)
- Glossy top coat
DIY Instructions: Start with a base coat to protect your nails. Apply a nude polish as the base. Once semi-dry, dab gold glitter polish on the tips using a sponge to create a gradient ombre effect. Ensure even coverage and blend well for a seamless transition. Finish with a glossy top coat for a lasting shine and protection.
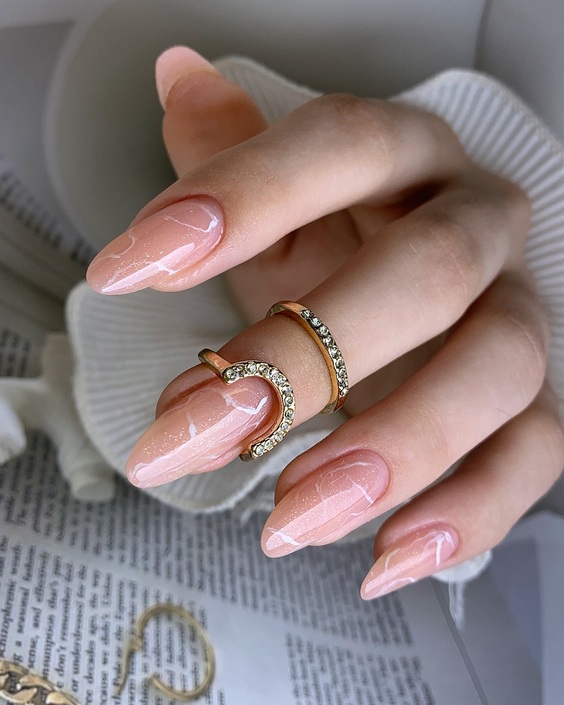
Subtle Elegance
These nails are a testament to the beauty of simplicity. The soft pink base with gentle white marbling effect offers a clean and understated look that is both modern and timeless, ideal for a serene July day or an elegant evening event.
Consumables List:
- Base coat
- Soft pink polish
- White polish
- Detailing brush
- Glossy top coat
DIY Instructions: Apply a base coat. Paint your nails with a soft pink polish. Using a detailing brush, lightly drag white polish over the wet pink base to create a marbling effect. Work quickly to blend while the polish is still wet. Finish with a glossy top coat to enhance the design’s depth and ensure durability.
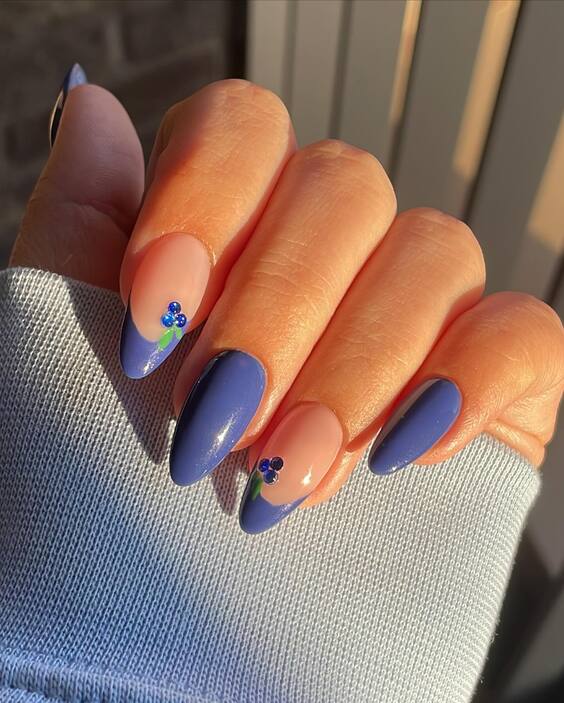
Serene Blue Blossoms
Capturing the essence of July’s blue skies, these nails feature a serene blue base with delicate floral accents over a French tip design. The tiny blue flowers add a charming detail that is perfect for welcoming the summer warmth.
Consumables List:
- Base coat
- Sky blue polish
- White polish for tips
- Blue paint for flowers
- Fine detail brush
- Glossy top coat
DIY Instructions: Begin with a base coat to ensure your manicure’s longevity. Apply a sky blue polish as the base. Once dry, paint the tips with white polish to create a classic French tip look. Use a fine detail brush to add small blue flowers on the white tips. Seal the design with a glossy top coat for a smooth finish and extra shine.
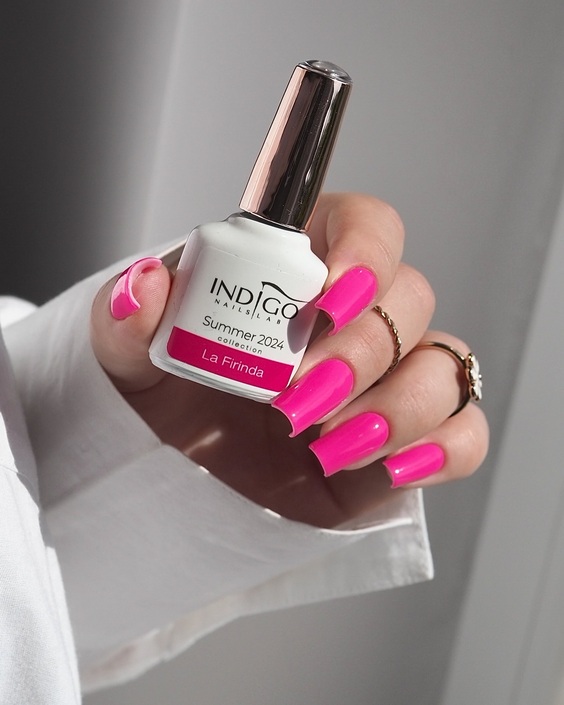
Vibrant Pink Passion
This nail design captures the essence of summer with its vibrant hot pink color. The bold hue is perfect for making a statement during July’s festive events. Its glossy finish and seamless application show expert craftsmanship, ideal for a lively summer look.
Consumables List:
- Base coat
- Vibrant hot pink polish (Indigo’s “La Firinda”)
- Glossy top coat
DIY Instructions: Begin with a base coat to protect the natural nail. Apply two coats of Indigo’s “La Firinda” to achieve a deep, vibrant pink. Ensure each coat is fully dry before applying the next to prevent smudging. Finish with a glossy top coat to enhance the color’s vibrancy and ensure long-lasting wear.
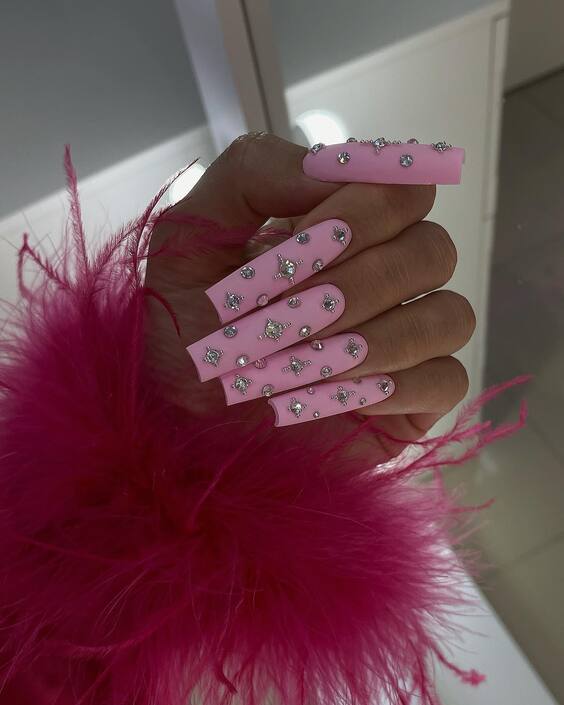
Pink Sparkle and Glam
These nails are a masterpiece of glamour, combining a soft pink base with elaborate rhinestone embellishments. The sparkle and meticulous placement of each stone make this design a showstopper, perfect for special July celebrations or as a statement piece at any summer soirée.
Consumables List:
- Base coat
- Soft pink polish
- Rhinestones in various sizes
- Nail glue
- Glossy top coat
DIY Instructions: Start with a base coat to ensure a smooth canvas. Apply a soft pink polish as the base color. Once dry, carefully place rhinestones on the nails using nail glue—arrange them creatively for maximum impact. Finish with a glossy top coat to secure the stones and add a spectacular shine.
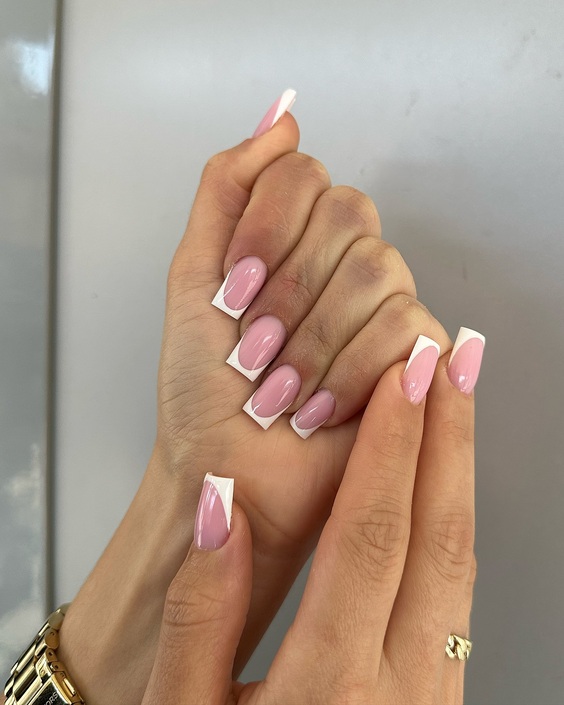
Elegant French Twist
This modern take on the classic French manicure features a soft pink base with white tips, distinguished by a sharp geometric twist that adds an element of contemporary elegance. This design is understated yet chic, perfect for a sophisticated July gathering.
Consumables List:
- Base coat
- Soft pink polish
- White polish
- Tape or nail stencils for precise lines
- Glossy top coat
DIY Instructions: Apply a base coat to protect your nails. Paint the entire nail with a soft pink polish. Once dry, use tape or nail stencils to create a precise line for the white tips. Apply the white polish, then carefully remove the tape while the polish is still slightly wet to ensure clean lines. Finish with a glossy top coat for a sleek and polished look.
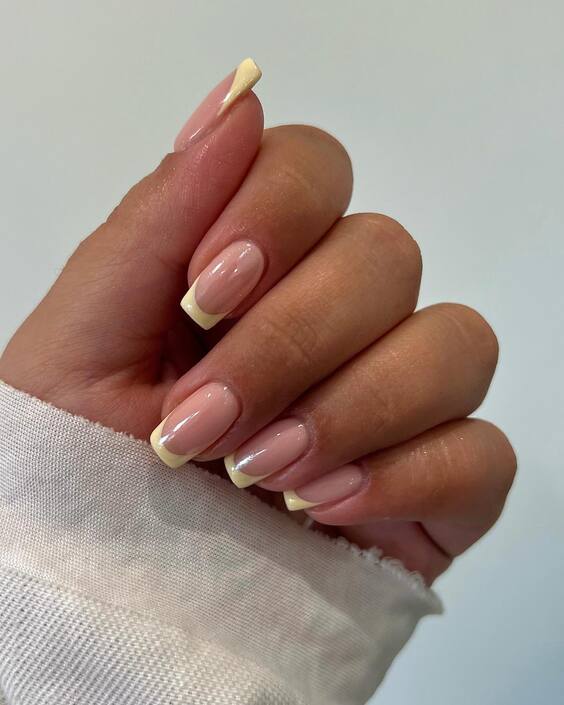
Classic French Charm
This nail design elevates the classic French manicure with a subtle yet beautiful twist. The natural pink base and crisp white tips embody elegance, making it a timeless choice for July events or everyday sophistication.
Consumables List:
- Base coat
- Natural pink polish
- White polish for tips
- Glossy top coat
DIY Instructions: Start by applying a base coat to protect your nails. Use a natural pink polish for the base. Once it dries, carefully apply white polish on the tips. For a flawless finish, use a clean brush dipped in nail polish remover to perfect the smile line. Seal with a glossy top coat for a durable, shiny finish.
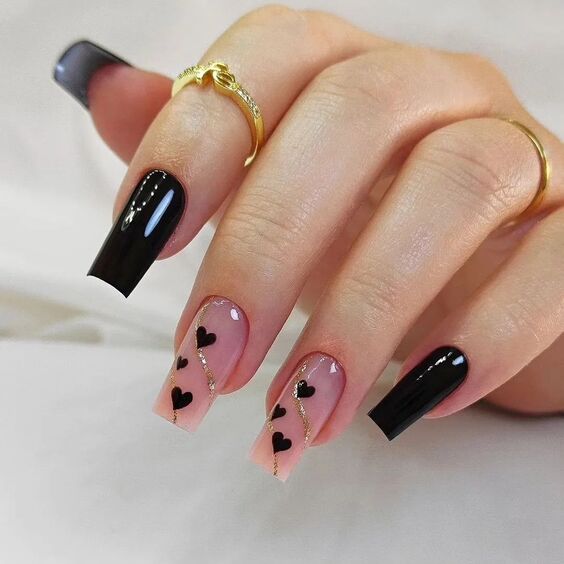
Love in Black and Pink
This playful and romantic design features black and pink polish with adorable heart accents. The contrast between the dark and light hues, coupled with the precise placement of the hearts, makes it a striking choice for those who wish to express their style boldly.
Consumables List:
- Base coat
- Black polish
- Pink polish
- Small heart stickers or a detail brush for freehand hearts
- Glossy top coat
DIY Instructions: Apply a base coat for a smooth foundation. Paint alternate nails with black and pink polish. On the pink nails, apply black hearts using stickers or a detail brush. On the black nails, use pink polish for the hearts. Finish with a glossy top coat to protect your design and add a brilliant shine.
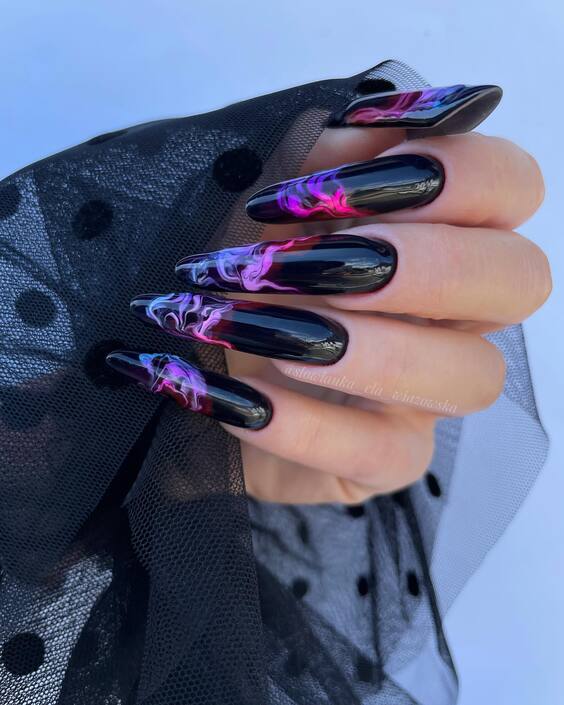
Neon Smoke Art
This design is a true work of art, featuring a black base with a vibrant neon smoke effect that seems to move across the nails. This dramatic look is perfect for standing out at any July celebration, combining bold colors and a dynamic pattern.
Consumables List:
- Base coat
- Black polish
- Neon pink and purple polishes
- Detailing brush
- Thinning liquid or water for the smoke effect
- Matte top coat
DIY Instructions: Start with a base coat to ensure the longevity of your manicure. Apply a black polish as the base. Mix neon polish with a thinning liquid to create a watery consistency. Use a detailing brush to dab and swirl the neon colors over the black base, creating a smoke effect. Allow each color to blend slightly while keeping the details sharp. Finish with a matte top coat to enhance the visual impact of the neon colors against the matte black.
Whimsical Critter Accents
This playful design incorporates adorable animal faces with subtle heart accents on a transparent base, adding a touch of whimsy. Perfect for those who enjoy quirky and youthful styles, this manicure brings a fun element to your everyday July look.
Consumables List:
- Base coat
- Transparent polish
- Various colors for critter faces (white, black, pink, blue)
- Detailing brush
- Small heart stickers
- Glossy top coat
DIY Instructions: Start with a base coat. Apply a layer of transparent polish as the base. Use a detailing brush to paint small critter faces on each nail. Add small heart stickers near the critters for an extra cute touch. Finish with a glossy top coat to seal the design and ensure longevity.
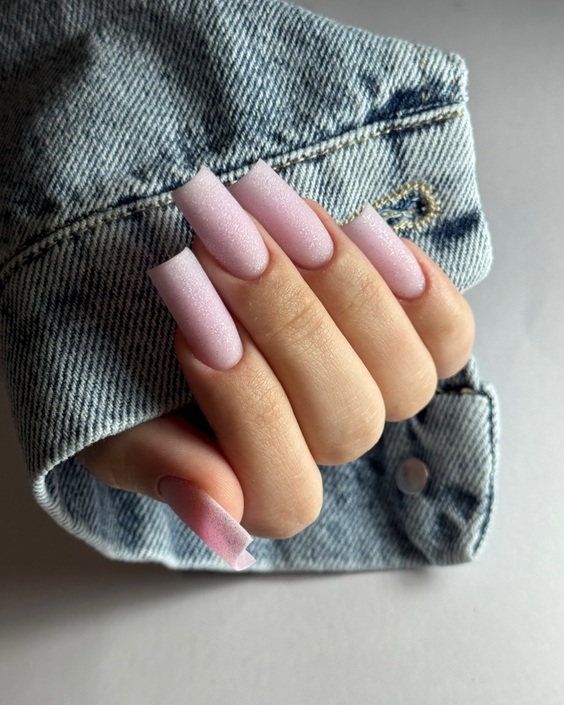
Soft Matte Elegance
This design showcases a soft, matte finish on a subtle pink base, offering an elegant and refined look. The matte texture adds a contemporary twist, making it suitable for both casual and formal occasions throughout July.
Consumables List:
- Base coat
- Soft pink matte polish
- Matte top coat
DIY Instructions: Apply a base coat to protect your nails. Paint your nails with a soft pink matte polish. Allow the first coat to dry, then apply a second coat to achieve a smooth, even color. Finish with a matte top coat to enhance the matte effect and protect the color.
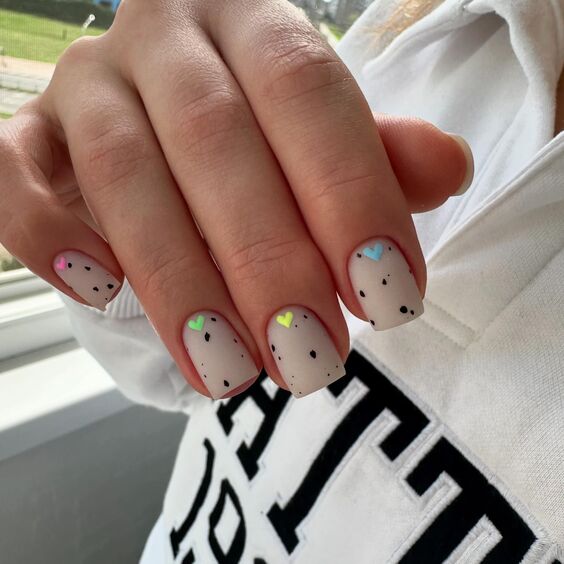
Minimalist Love
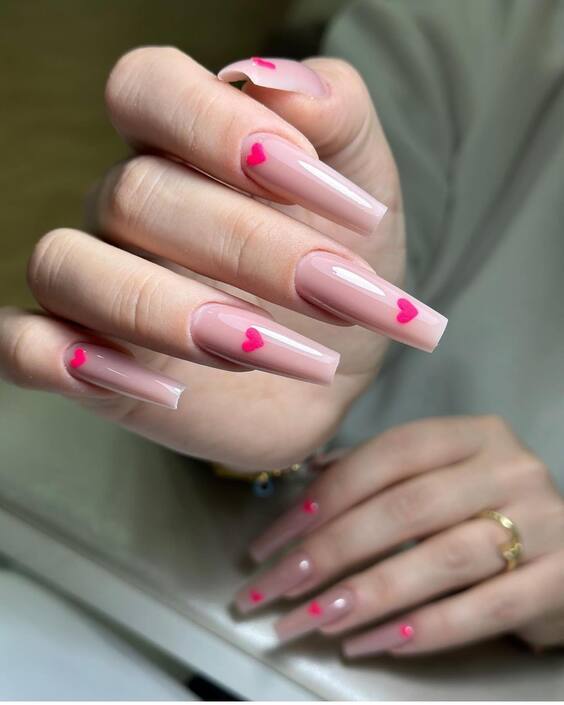
Featuring a clean, nude base with small pink hearts, this nail design is perfect for those who appreciate minimalism with a touch of romance. The placement of hearts offers a subtle yet impactful statement, ideal for a sweet July encounter.
Consumables List:
- Base coat
- Nude polish
- Pink polish for hearts
- Detailing brush
- Glossy top coat
DIY Instructions: Begin with a base coat for a smooth foundation. Apply a nude polish as the base color. Use a detailing brush to paint small pink hearts at the base of each nail, creating a simple yet elegant design. Finish with a glossy top coat to add shine and protect the design.
Vibrant Safari
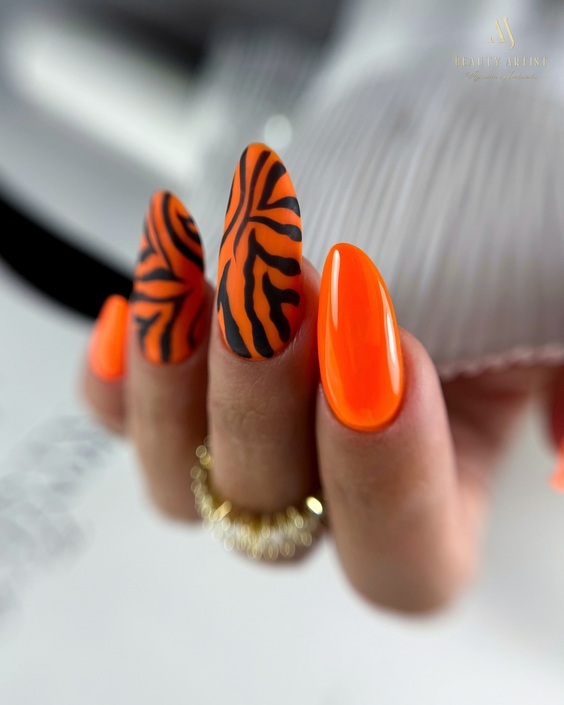
This bold design pairs a striking orange base with black zebra stripes, encapsulating the vibrant energy of a safari adventure. Ideal for those looking to make a statement during July festivities, this look is both bold and adventurous.
Consumables List:
- Base coat
- Vibrant orange polish
- Black polish for stripes
- Striping brush
- Glossy top coat
DIY Instructions: Apply a base coat to protect your nails. Color your nails with a vibrant orange polish. Use a striping brush and black polish to create zebra stripes. Allow the design to dry completely before applying a glossy top coat for a dazzling finish and added durability.
Conclusion
These designs offer a delightful mix of fun, elegance, and boldness, providing perfect options for any style preference this July. Whether you prefer the charm of critter accents, the sophistication of matte finishes, the subtlety of minimalist designs, or the excitement of safari-inspired looks, there’s a manicure here to match your summer vibe.


